こんにちは。カバー株式会社エンジニアのKです。
弊チームでは、UnityプロジェクトのビルドにGitHub Actionsを利用しています。GitHub Actionsは、GitHubにアップロードしたプロジェクトを、設定に応じて自動でテスト・ビルド・デプロイなどのワークフローを実行してくれる機能です。
CIサービスは他にも色々ありますが、GitHub ActionsはGitHubで管理しているプロジェクトに少し設定ファイルを足すだけでCIを回せるので便利です。GitHubの公式サービスなので、プッシュやプルリクとの連動が簡単に行える点も魅力です。また、GitHubが用意したクラウド上のマシンや自前で用意したPCなど、ビルドマシンを柔軟に設定できるのも助かります。
GitHub Actionsについてはネット上に紹介している記事がたくさんあるので、この記事では弊チームの活用事例と設定を中心に紹介します。
セルフホステッドランナー
GitHub Actionsには、自前で用意したPCでランナーを実行することで、そのPC内でワークフローを実行することができる機能があります。これをセルフホステッドランナーと言います。一方で、GitHubが自動でクラウド上のリソースを用意してビルドする機能もあります。こちらはGitHubホステッドランナーと言います。
弊チームでは、セルフホステッドランナーを使っています。できればGitHubホステッドランナーも使ってみたかったのですが、プロジェクトが大きすぎてGitHubホステッドランナーの標準プラン内に収まらないのと、Unity用に用意されているGameCIというプラグインが対応していないユースケースがあったため、結局自前のPCを使うことになりました。
用意したマシンをセルフホステッドランナーとして設定するには、以下の手順に従います。手順に従ってコマンドを打ち込むだけなので非常に簡単です。
Unityプロジェクトにビルドメソッドを追加
プロジェクトに以下のようなビルドメソッドを用意しておきます。置き場所はEditorフォルダの中にします。
using UnityEditor;

public static class BuildApp
{
    [MenuItem("Build/BuildApp")]
    public static void Build()
    {
        //windows64のプラットフォームでアプリをビルドする
        BuildPipeline.BuildPlayer(
            new string[] { "Assets/Scenes/SampleScene.unity" },
            "Builds/App/SampleApp.exe",
            BuildTarget.StandaloneWindows64,
            BuildOptions.None
        );
    }
}
ワークフローの例
ビルドしたいリポジトリの.github/workflowsに以下のymlを配置します。
name: Build App windows

on:
  workflow_dispatch: { }
defaults:
  run:
    shell: bash

jobs:
  buildForWindowsBasedPlatforms:
    name: Build for ${{ matrix.targetPlatform }}
    runs-on: [ self-hosted, Windows ]
    strategy:
      fail-fast: false
      matrix:
        targetPlatform:
          - StandaloneWindows64 # Build a Windows 64-bit standalone.
        buildMethod:
          - BuildApp.Build
        unityPath:
          - '"C:\Program Files\Unity\Hub\Editor\2020.3.33f1\Editor\Unity.exe"' #使用しているUnityのバージョンのパス
    steps:
      - uses: actions/checkout@v4
        with:
          lfs: true
          clean: false
          submodules: recursive

      - name: Run Build
        run: |
          ${{ matrix.unityPath }} -batchmode -quit -projectPath . -buildTarget ${{matrix.targetPlatform}} -executeMethod ${{ matrix.buildMethod }} -logFile -

      - name: Upload App
        uses: actions/upload-artifact@v3
        with:
          name: App_Develop
          path: Builds/App/
          retention-days: 7
配置すると、GitHubのActionsのタブにワークフローが表示されるようになります。
画面左側にある「Build App windows」をクリックすると以下のような画面が表示されます。
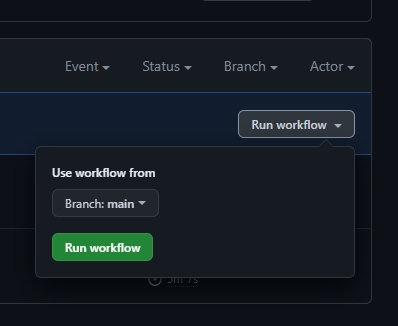
右側にある「Run workflow」をクリックし、緑色の「Run workflow」ボタンをクリックすると、ビルドが開始されます。
ビルド中は、GitHub Actionsの画面上で進捗を確認できます。
ビルドが完了すると、「Summary」画面にビルド成果物のダウンロードリンクが表示されます!
ワークフローの実行タイミング
上記の例では、ワークフローの実行タイミングを以下のように設定しました。
name: Build App windows

on:
  workflow_dispatch: { }
この「workflow_dispatch」は、Actionsの管理画面から手動実行するオプションです。他に、プルリクエストの作成時、特定のブランチへのプッシュ時など、GitHubのアクションに合わせてワークフローを実行することもできます。詳しくはこちら↓
まとめ
GitHub Actionsのセルフホステッドランナーを使えば、余分なPCにUnityとランナーをインストールするだけで、すぐに簡単なCIワークフローを構築することが可能です。お手軽なので、小規模なチームの初めてのCIとしておすすめです。
ありがとうございました。


