初めに
xで流れてきたちょいバズっていた動画を見て
これって簡単に実装出来るのは?
と思い簡単に実装してみました。
と言っても、フルスクラッチでやった訳では無く
先人の知恵をプログラムを一部改変して作りました。
https://twitter.com/po__kaki__to/status/1623323910078074881(リンク切れ)
https://www.tiktok.com/@dyvvycqmxpzh/video/7241705892633152786

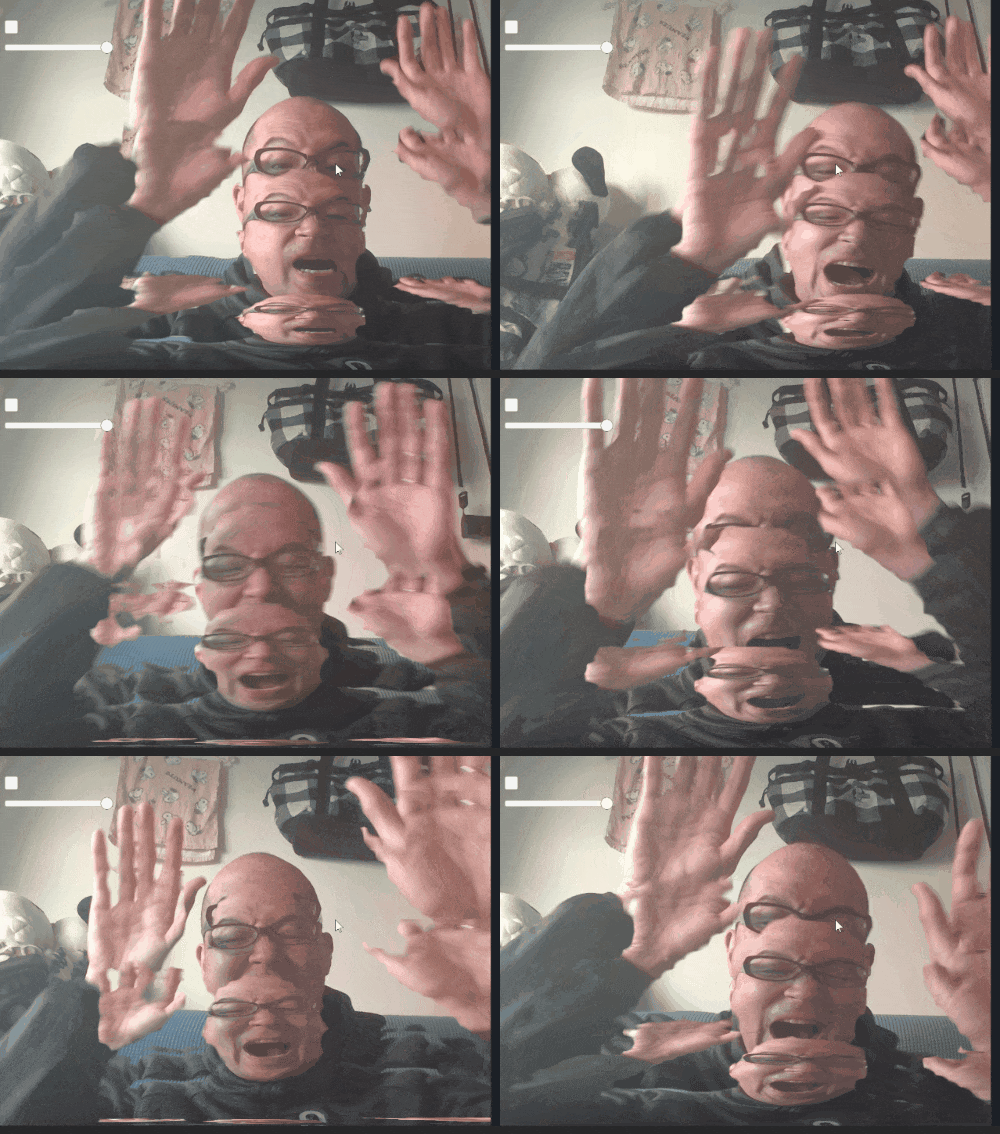
で出来たのは下記になります。
動画を見て参考にしたプログラム
まず、人体だけ抜き取りので
BodyPixSample
が使えるのでは?と思い
_kzr氏のBodyPixSampleサンプルを参考に作りました。
サンプルソースの改変
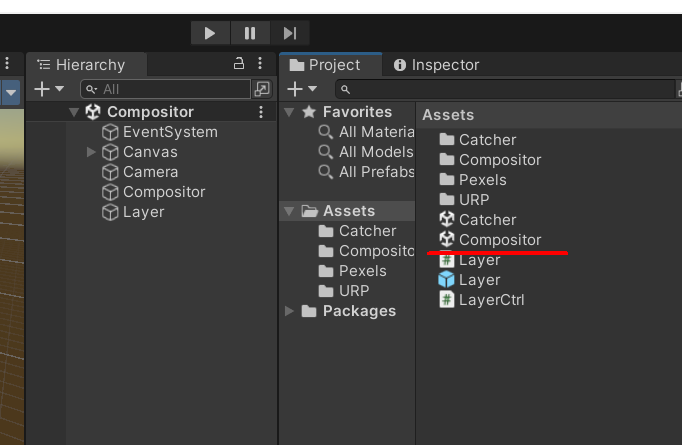
Compositorシーンは、BodyPixを使って、人体だけを取得して
背景画像と合成したり、顔にモザイクを入れるサンプルになります。
新しくシーンを作っても良いのですが、サンプルを少し修正するだけ実現できたのでそのまま使いました。
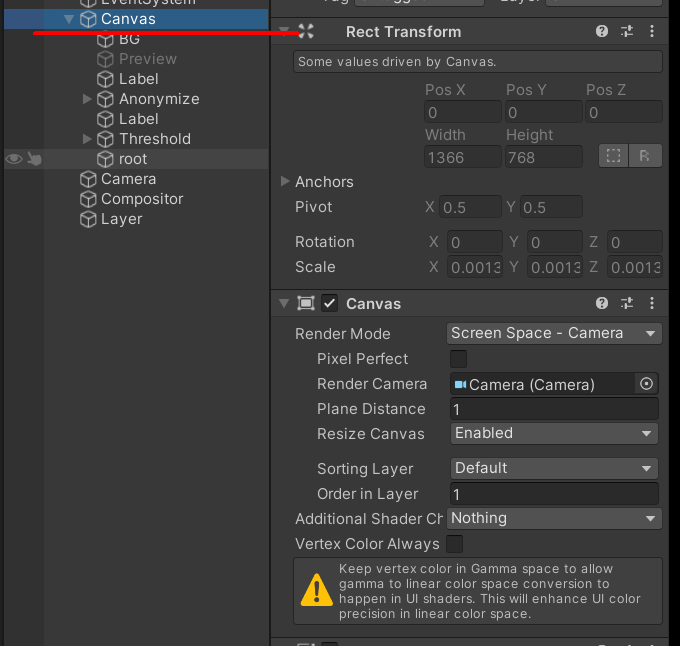
Canvasにカメラの画像を描画したいので「BG」とパタパタ画像をInstantiateする用の親の
「root」を追加しました。
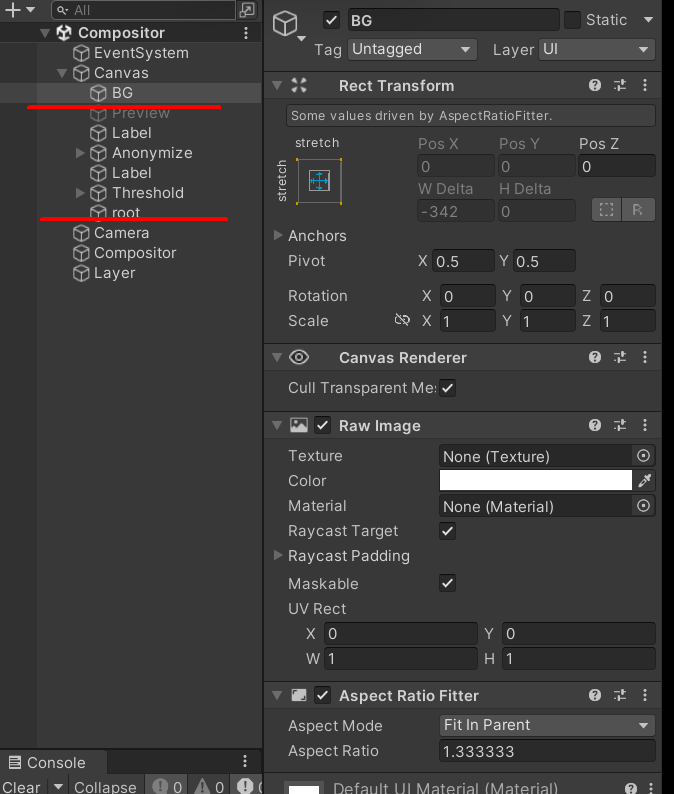
Canvasの設定のRender Modeを変更します。
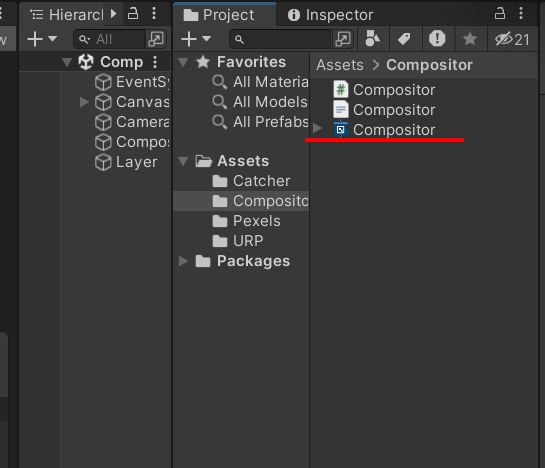
次にShaderGraphファイルの
Compositor.shadergraph
の一部変更します。
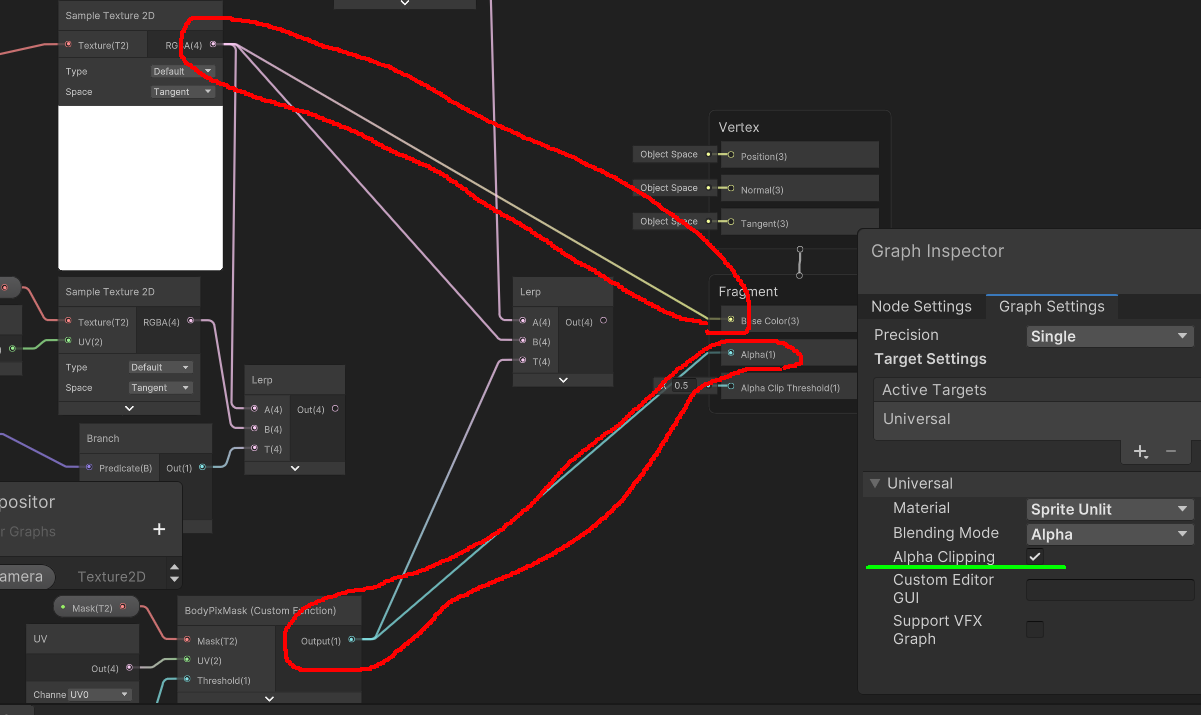
ちょっとわかりずらいと思いますが、カメラ画像とマスク画像と背景画像を
合成していた箇所をがっつり省きます。
赤で囲った部分を修正しています。
上の方はカメラ画像をFragmentのBase Color(3)に
マスク用の画像をFragmentのAlpha(1)に入れます。
設定も変更します。
緑のぶぶんの
graph settingsのAlpha Clipping設定をonにします。
プログラム追加、変更
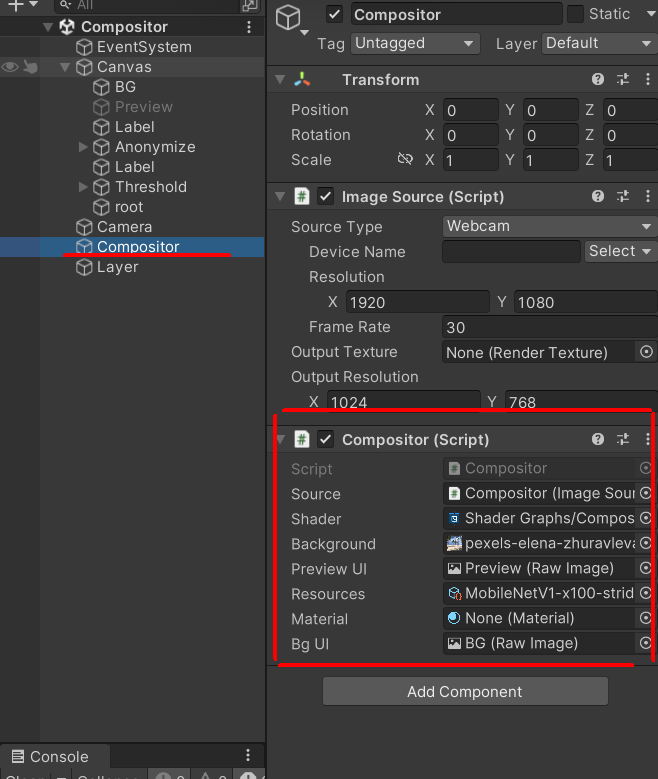
変更した箇所は2ヶ所BGの画像を渡すRawImageと人体だけを切り取ったmaterial
情報が格納されている物をpublicにしました。
    public Material _material;
	[SerializeField] RawImage _bgUI = null;
    void Update()
    {
        ....
        _bgUI.texture = _source.Texture;
	}
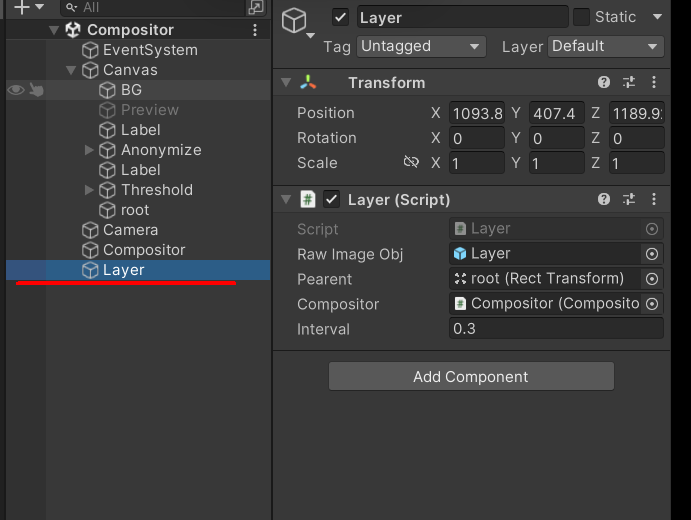
次にLayerスクリプトを追加しました。
処理は特別な事していないので省きますが
Instantiateしたオブジェクトの親の設定をする際に
順序の問題で新しくInstantiateしたものは必ず親の一番上(0)に
追加するようにSetSiblingIndexで0番を指定しています。
using UnityEngine;
using UnityEngine.UI;

public class Layer : MonoBehaviour
{
	[SerializeField]
	private GameObject rawImageObj = null;
	[SerializeField]
	private Transform pearent = null;
	[SerializeField]
	private Compositor compositor = null;

	//タイマー
	private float timer = 0.0f;
	//インターバル
	[SerializeField]
	private float interval = 10.0f;

	// Start is called before the first frame update
	void Start()
    {
		timer = 0;
	}

    // Update is called once per frame
    void Update()
    {
        timer -= Time.deltaTime;
        if(timer < 0)
        {
            timer = interval;
			GameObject obj = Instantiate(rawImageObj, pearent);
			obj.GetComponent<RawImage>().material = compositor._material;
			obj.transform.SetSiblingIndex(0);

		}
	}
}
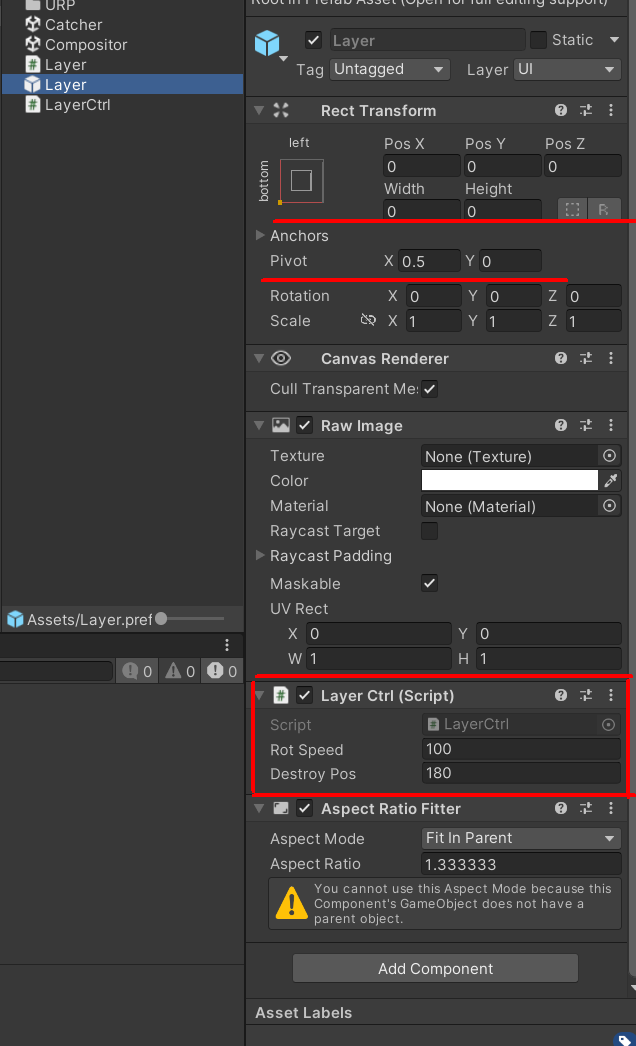
ペラペラ捲れていくRawImageのオブジェクトをプレハブ化しました。
Rect Transfotmの設定を画像の下を起点に回転してペラペラ捲れるようにしたいので
Pivotの設定と(0.5,0)にしました。
この設定でxの値を-(マイナス)方向に増減してあげれば手間に倒れてきます。
スクリプトLayerCtrl.scに関しては、時間で値を増加と画面外に出た際
自分自身を消す処理を消す処理を書きました。
using UnityEngine;

public class LayerCtrl : MonoBehaviour
{
	[SerializeField]
    private float rotSpeed = 100.0f;
	[SerializeField]
    private float destroyPos = 180.0f;

    // Update is called once per frame
    void Update()
    {
        // x軸を回転していく
        this.gameObject.transform.Rotate(-Time.deltaTime* rotSpeed, 0.0f, 0.0f);

        if (this.gameObject.transform.localRotation.eulerAngles.x < destroyPos)
        {
            Destroy(this.gameObject);
        }
    }
}
最後に
xやTikTokなどでてくる面白エフェクトを手元で再現してみると面白いで
定期的にやれて行ければいいなと思いました。
_kzr氏のサンプルはいつも勉強になります。
改めて、感謝します。
プログラムの説明でわからない箇所がありましたらコメントください。
