入門Kubernetes の主に 5 章のメモです。
環境構築〜 YAML を使用してデプロイを行います。
minikube について
ローカル開発環境が必要か、あるいはクラウドリソースに課金したくないならminikubeを使ってシンプルなシングルノードクラスタをインストールできます。minikubeは便利なKubernetesクラスタのシミュレータですが、ローカル開発や学習、テストのためだけに作られています。ノード1台の仮想マシン上でしか動かないので、分散されたKubernetesクラスタのような信頼性はありません。
入門Kubernetes p.30 より
必要なもの
kubectl と docker は minikube に含まれます
コマンド
開始 (minikube start)
$ minikube start
クラスタ上の全てのノードを表示 (kubectl get nodes)
$ kubectl get nodes
NAME       STATUS    ROLES     AGE       VERSION
minikube   Ready     <none>    16d       v1.14.1
特定のノードの詳細を確認 (kubectl describe nodes Node名)
$ kubectl describe nodes minikube

# (略)

# Conditions の Message でそれぞれのノードのリソースが足りているかを確認できる。
Conditions:
  Type             Status  LastHeartbeatTime                 LastTransitionTime                Reason                       Message
  ----             ------  -----------------                 ------------------                ------                       -------
  MemoryPressure   False   Tue, 28 May 2019 09:38:54 +0900   Sat, 11 May 2019 09:39:20 +0900   KubeletHasSufficientMemory   kubelet has sufficient memory available
  DiskPressure     False   Tue, 28 May 2019 09:38:54 +0900   Sat, 11 May 2019 09:39:20 +0900   KubeletHasNoDiskPressure     kubelet has no disk pressure
  PIDPressure      False   Tue, 28 May 2019 09:38:54 +0900   Sat, 11 May 2019 09:39:20 +0900   KubeletHasSufficientPID      kubelet has sufficient PID available
  Ready            True    Tue, 28 May 2019 09:38:54 +0900   Sat, 11 May 2019 09:39:20 +0900   KubeletReady                 kubelet is posting ready status

# (略)

# Non-terminated Pods でノード上の Pod を確認できる。
Non-terminated Pods:         (7 in total)
  Namespace                  Name                                CPU Requests  CPU Limits  Memory Requests  Memory Limits
  ---------                  ----                                ------------  ----------  ---------------  -------------
  default                    hello-node-78cd77d68f-vvtlq         0 (0%)        0 (0%)      0 (0%)           0 (0%)
  kube-system                etcd-minikube                       0 (0%)        0 (0%)      0 (0%)           0 (0%)
  kube-system                kube-addon-manager-minikube         5m (0%)       0 (0%)      50Mi (2%)        0 (0%)
  kube-system                kube-apiserver-minikube             250m (12%)    0 (0%)      0 (0%)           0 (0%)
  kube-system                kube-controller-manager-minikube    200m (10%)    0 (0%)      0 (0%)           0 (0%)
  kube-system                kube-scheduler-minikube             100m (5%)     0 (0%)      0 (0%)           0 (0%)
  kube-system                storage-provisioner                 0 (0%)        0 (0%)      0 (0%)           0 (0%)
Allocated resources:
  (Total limits may be over 100 percent, i.e., overcommitted.)
  CPU Requests  CPU Limits  Memory Requests  Memory Limits
  ------------  ----------  ---------------  -------------
  555m (27%)    0 (0%)      50Mi (2%)        0 (0%)

# (略)
GUI を立ち上げる (kubectl proxy)
localhost:8001 で起動される。
$ kubectl proxy
Starting to serve on 127.0.0.1:8001
アクセスすると API 一覧っぽいのが JSON で返ってきました。
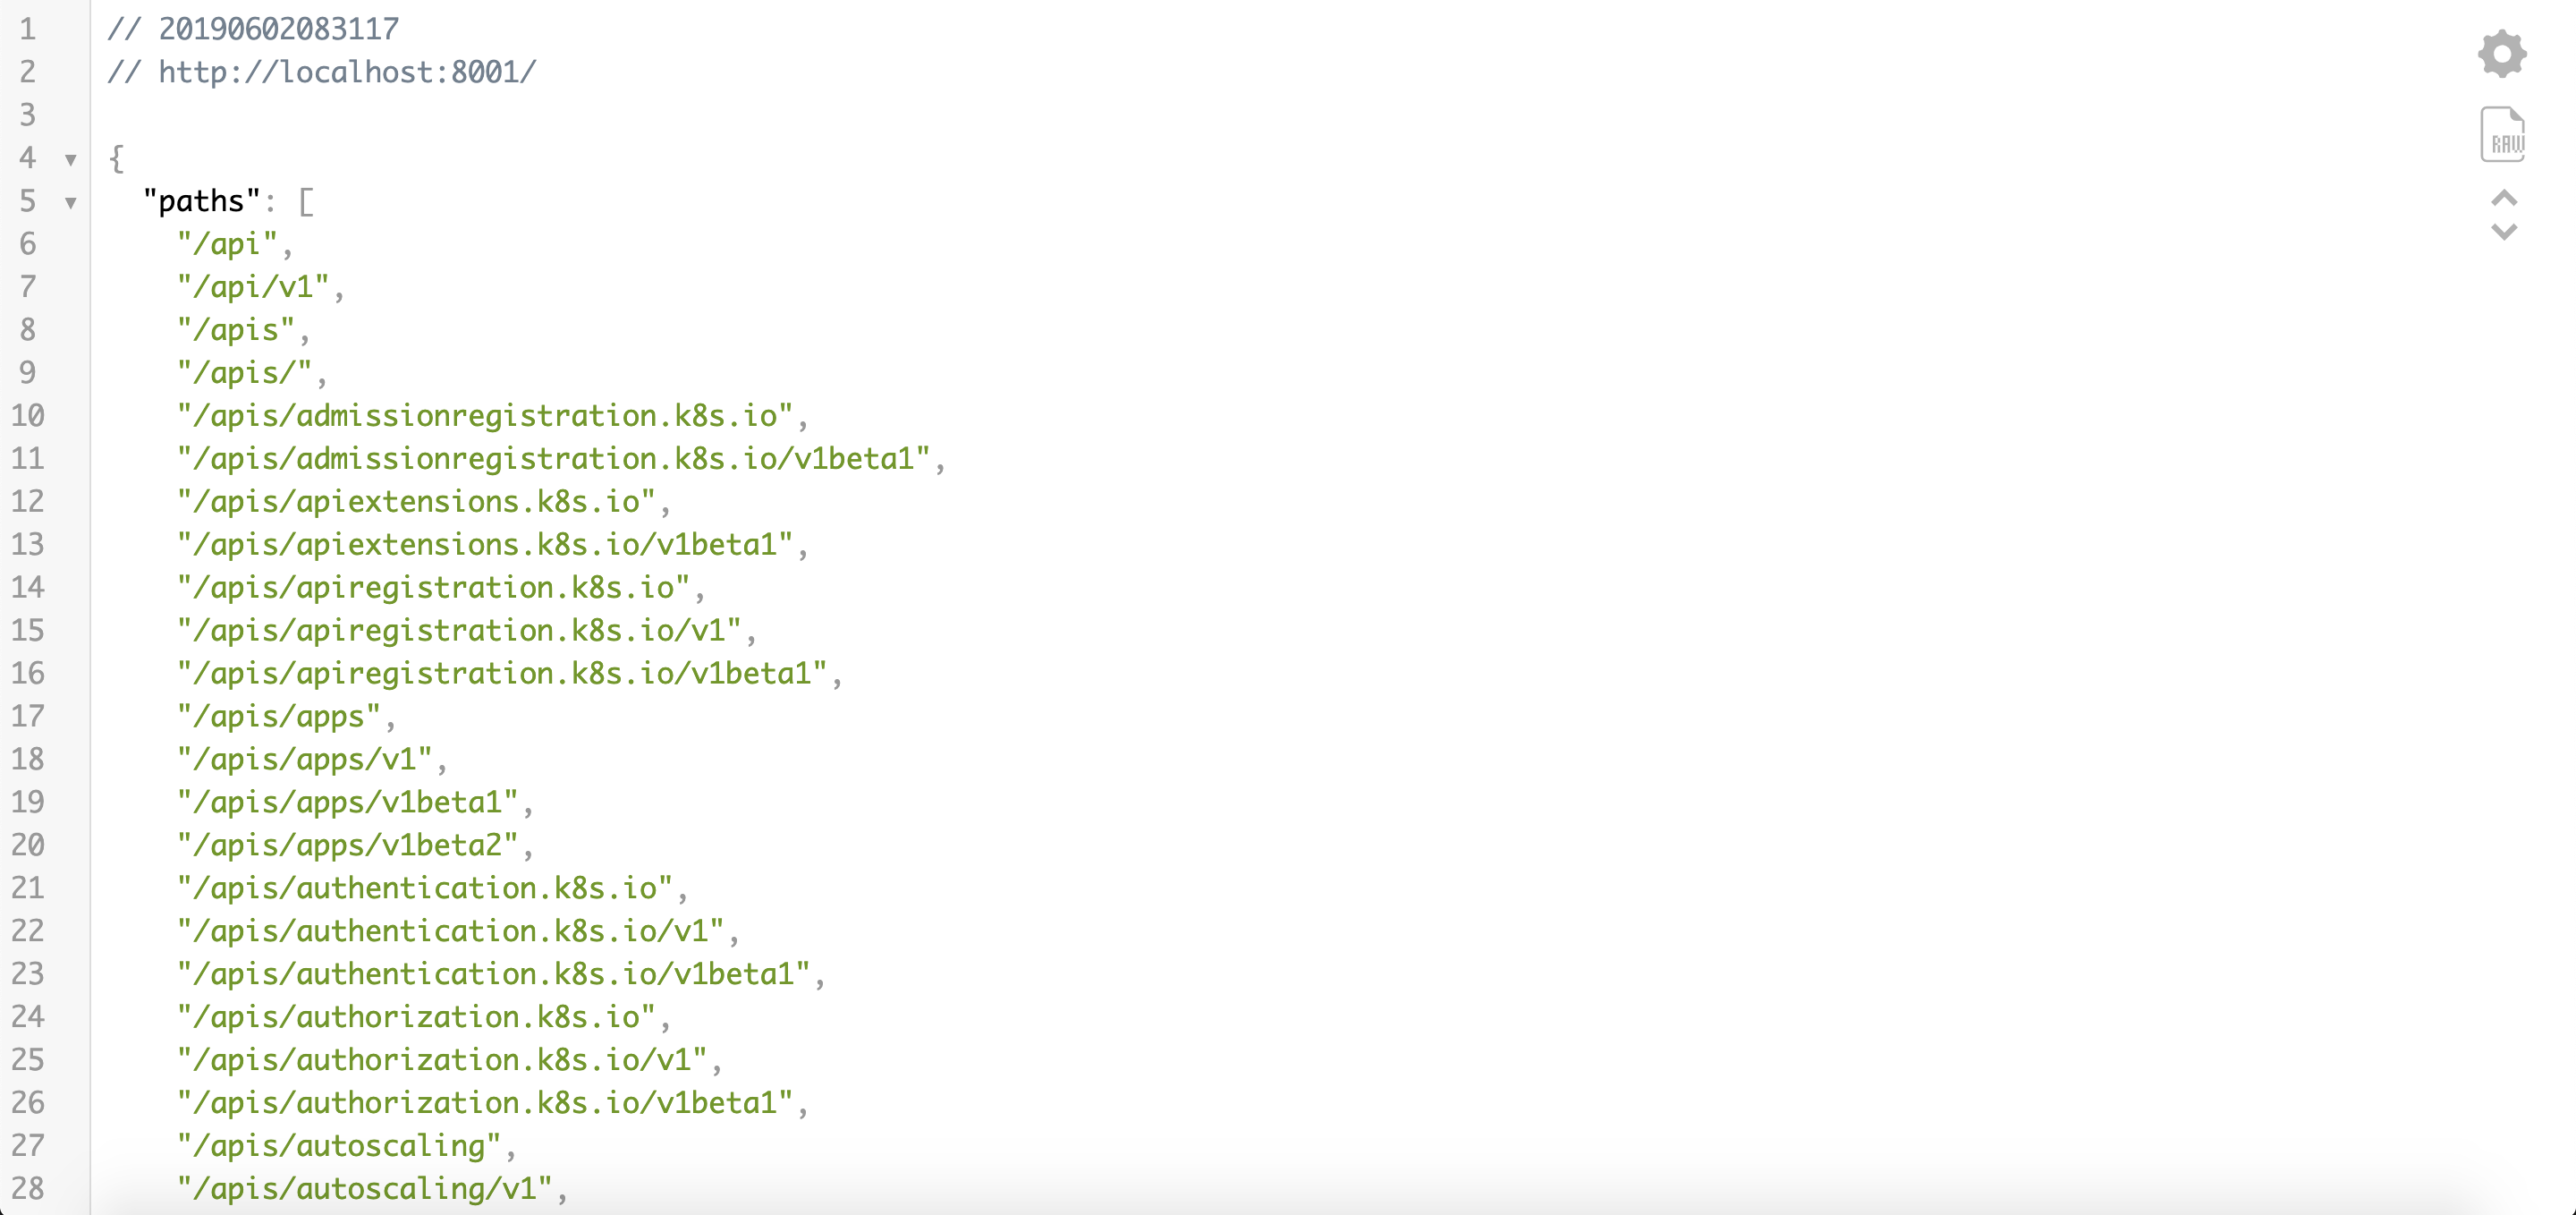
試しに一番上の localhost:8001/api にアクセスすると serverAddress を取得できました。

詳細な情報を表示 (kubectl get pods -o wide)
$ kubectl get pods -o wide
NAME                          READY     STATUS    RESTARTS   AGE       IP           NODE
hello-node-78cd77d68f-vvtlq   1/1       Running   1          17d       172.17.0.2   minikube
JSON または YAML で表示 (kubectl get pods -o json)
$ kubectl get pods -o json
$ kubectl get pods -o yaml
ログ取得 (kubectl logs Pod名)
hello-node-78cd77d68f-vvtlq は Pod 名
$ kubectl logs hello-node-78cd77d68f-vvtlq
コンテナ内でコマンドを実行 (kubectl exec -it Pod名 -- bash)
$ kubectl exec -it hello-node-78cd77d68f-vvtlq -- bash
コンテナからホストへファイルをコピー (kubectl cp Pod名:コピー元 コピー先)
コンテナ内で home/hoge ファイルを作成し、それをホストのカレントディレクトリにコピー
$ kubectl exec -it  hello-node-78cd77d68f-vvtlq -- bash
root@hello-node-78cd77d68f-vvtlq:/home# touch hoge && echo 123 > hoge
root@hello-node-78cd77d68f-vvtlq:/home# exit
$ kubectl cp hello-node-78cd77d68f-vvtlq:home/hoge .
$ cat hoge
123
ホストからコンテナへファイルをコピー (kubectl cp コピー元 Pod名:コピー先)
ホストで fuga を作成しコンテナ内の home/下へコピー
$ touch fuga && echo 456 > fuga
$ kubectl cp fuga hello-node-78cd77d68f-vvtlq:home/
$ kubectl exec -it hello-node-78cd77d68f-vvtlq -- bash
root@hello-node-78cd77d68f-vvtlq:/# cat home/fuga
456
Pod の作成 (kubectl run kuard --image=イメージ名)
kubectl run すると自動で Pod が作成される。
ここでは kuard (Demo app for Kubernetes Up and Running book) を動かしている。
$ kubectl run kuard --image=gcr.io/kuar-demo/kuard-amd64:1
deployment.apps "kuard" created
$ kubectl get pods
NAME                          READY     STATUS    RESTARTS   AGE
kuard-9896fdb64-6nkkr         1/1       Running   0          8s
マニフェストから Pod 作成 (kubectl apply -f ***.yaml)
マニフェストから Pod も作成できる。
まずはマニフェストを作成。
apiVersion: v1
kind: Pod
metadata:
  name: kuard
spec:
  containers:
    - image: gcr.io/kuar-demo/kuard-amd64:1
      name: kuard
      ports:
        - containerPort: 8080
          name: http
          protocol: TCP
kubectl apply -f で Pod を作成。
$ kubectl apply -f kuard-pod.yaml
ちなみに上記は、下記の docker コマンドとほぼ同じことをする。
$ docker run -d --name kuard --publish 8080:8080 gcr.io/kuar-demo/kuard-amd64:1
apply -f で SchemaError が出た場合は
$ rm /usr/local/bin/kubectl
$ brew link --overwrite kubernetes-cli
すると良いかもしれない。
$ kubectl apply -f kuard-pod.yaml
error: SchemaError(io.k8s.api.core.v1.NodeList): invalid object doesn\'t have additional properties
$ rm /usr/local/bin/kubectl
$ brew link --overwrite kubernetes-cli
Linking /usr/local/Cellar/kubernetes-cli/1.14.1... 215 symlinks created
$ kubectl apply -f kuard-pod.yaml
pod/kuard created
参考
Pod の削除 (kubectl delete Pod名 または kubectl delete -f ***.yaml)
$ kubectl delete pods/kuard
pod "kuard" deleted
または
$ kubectl delete -f kuard-pod.yaml
Pod へのアクセス (kubectl port-forward kuard ホストポート番号:Podポート番号)
http:localhost:8080 から Pod の 8080 にアクセスできる。
次のコマンドを実行すると、Kubernetes のマスタを経由し、ローカルマシンと、ワーカーノードの内の 1 台で動いている Pod のインスタンスの間にセキュアなトンネルが作られます。
入門Kubernetes p.54 より
$ kubectl port-forward kuard 8080:8080
Forwarding from 127.0.0.1:8080 -> 8080
Forwarding from [::1]:8080 -> 8080

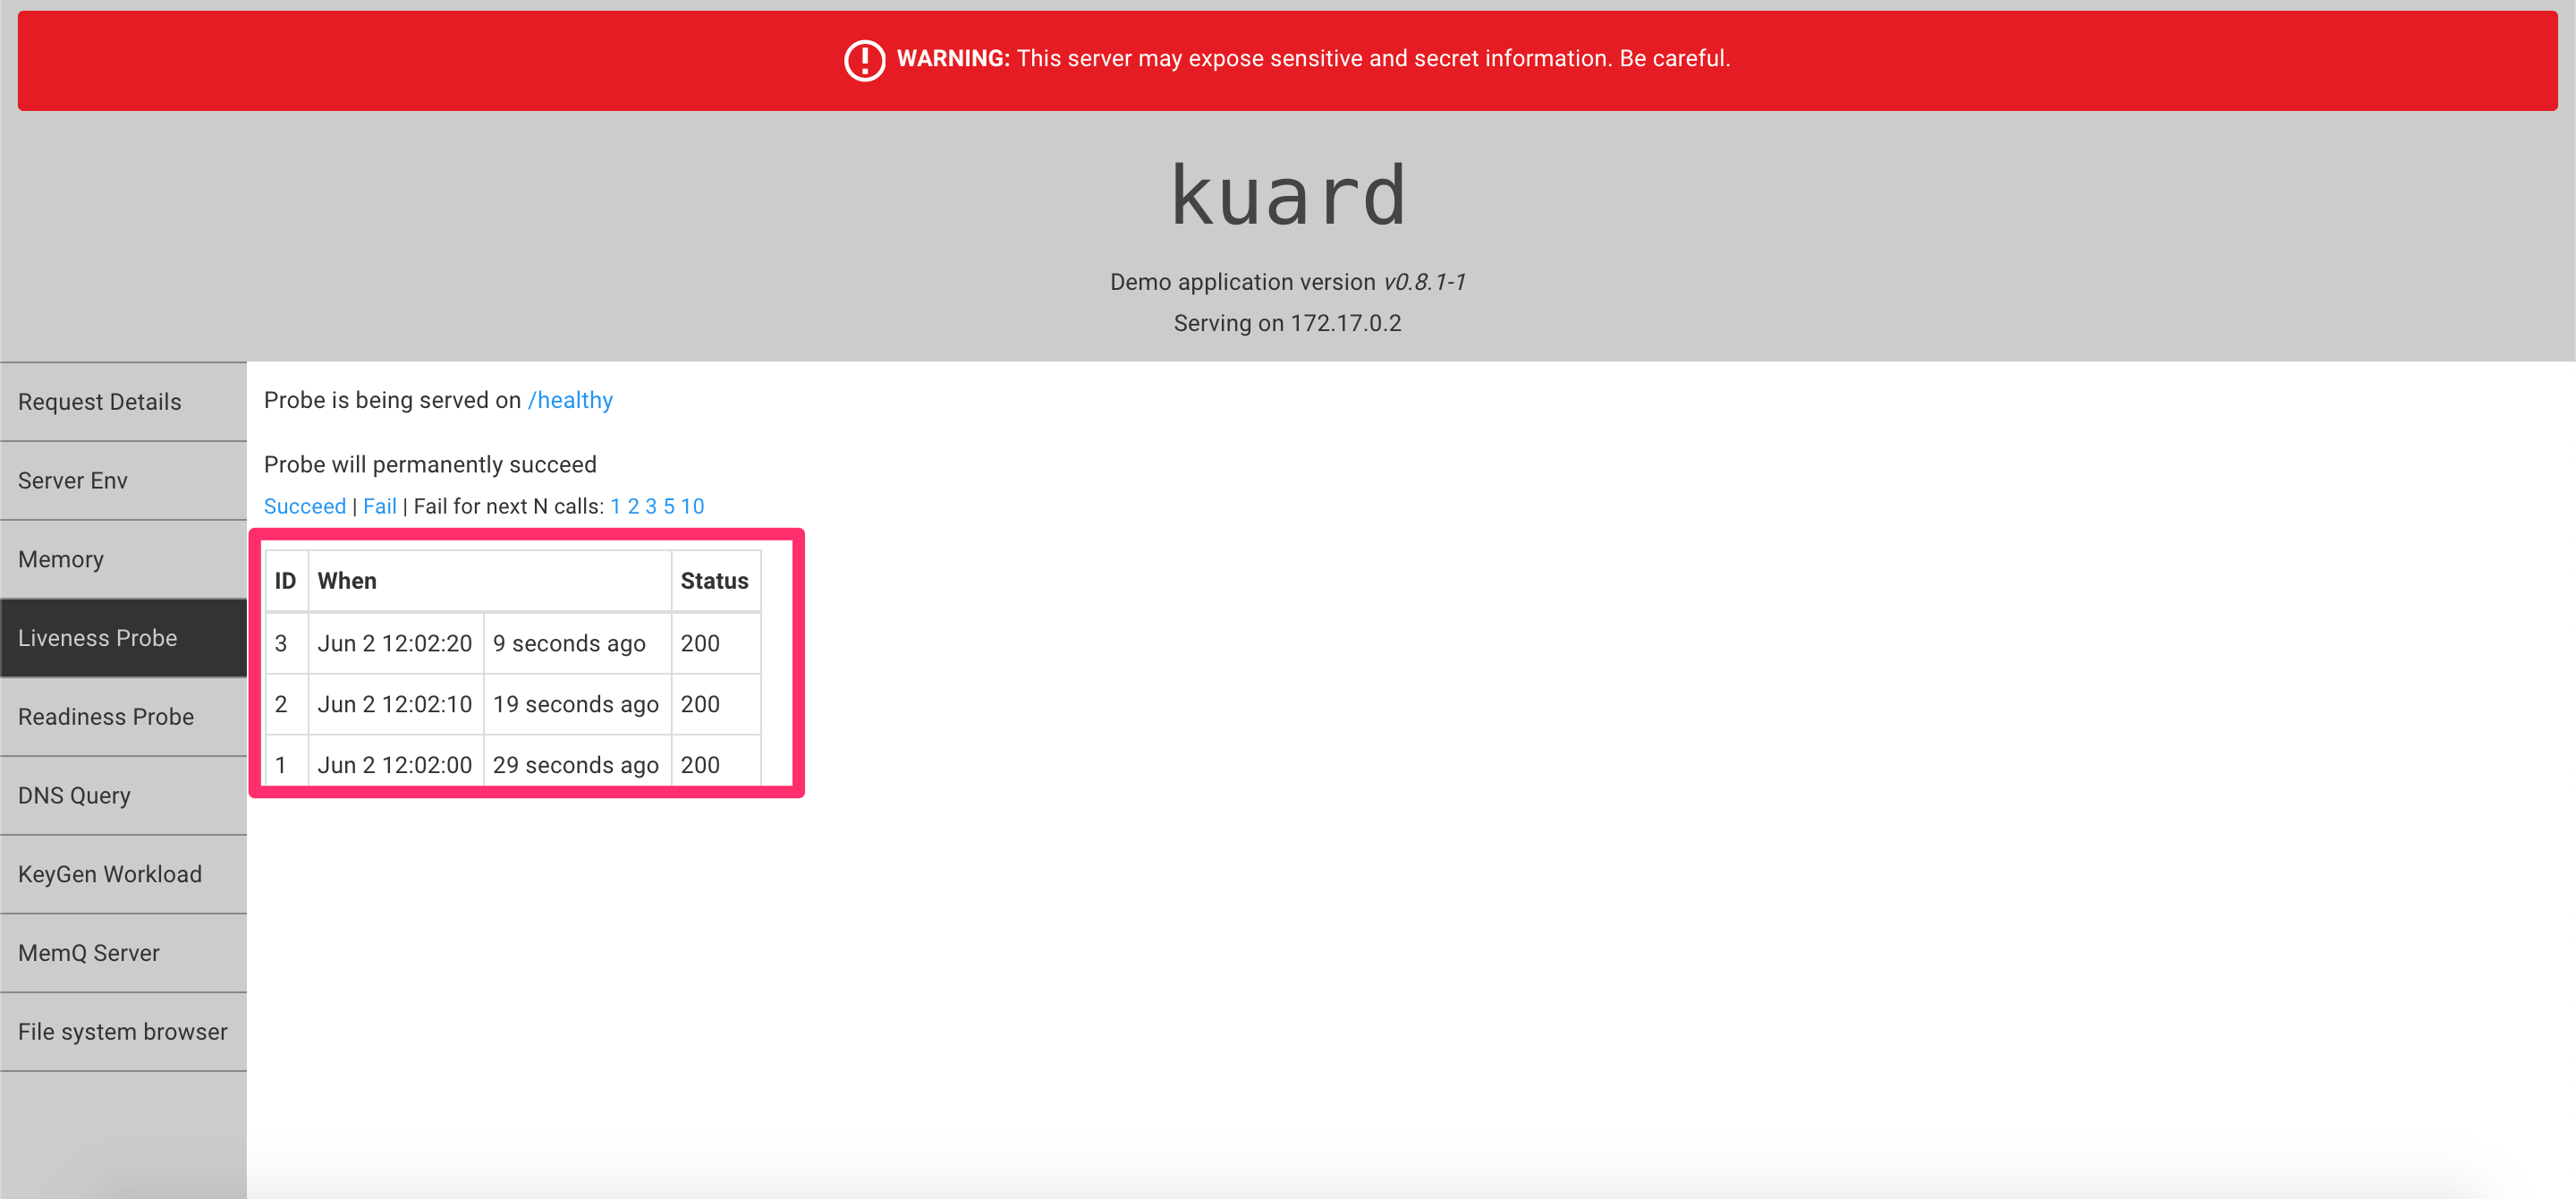
Liveness probe (ヘルスチェク)
 apiVersion: v1
 kind: Pod
 metadata:
   name: kuard
 spec:
   containers:
     - image: gcr.io/kuar-demo/kuard-amd64:1
       name: kuard
+      livenessProbe:
+        httpGet:
+          path: /healthy
+          port: 8080
+        initialDelaySeconds: 5 # Pod 内の全コンテナが作成された 5 秒経過後に開始
+        timeoutSeconds: 1
+        periodSeconds: 10 # 10 秒おきに監視
+        failureThreshold: 3
       ports:
         - containerPort: 8080
           name: http
           protocol: TCP
localhost:8080 にアクセスし、 Liveness probe を見ると 10 秒おきに監視されているのがわかりました。
リソース要求とリソース制限
 apiVersion: v1
 kind: Pod
 metadata:
   name: kuard
 spec:
   containers:
     - image: gcr.io/kuar-demo/kuard-amd64:1
       name: kuard
+      resources: # リソース要求 (最低)
+        requests:
+          cpu: "500m"
+          memory: "128Mi"
+        limits: # リソース制限 (最大)
+          cpu: "1000m"
+          memory: "256Mi"
       livenessProbe:
         httpGet:
           path: /healthy
           port: 8080
         initialDelaySeconds: 5
         timeoutSeconds: 1
         periodSeconds: 10
         failureThreshold: 3
       ports:
         - containerPort: 8080
           name: http
           protocol: TCP
以下のエラーが出た場合は一回 kubectl delete すると良い。
$ kubectl apply -f kuard-pod-reslim.yaml
The Pod "kuard" is invalid: spec: Forbidden: pod updates may not change fields other than `spec.containers[*].image`, `spec.initContainers[*].image`, `spec.activeDeadlineSeconds` or `spec.tolerations` (only additions to existing tolerations)
参考
Volume 使ったデータの永続化
 apiVersion: v1
 kind: Pod
 metadata:
   name: kuard
 spec:
+  volumes:
+    - name: "kuard-data"
+      hostPath:
+        path: "/var/lib/kuard"
   containers:
     - image: gcr.io/kuar-demo/kuard-amd64:1
       name: kuard
+      volumeMounts:
+        - mountPath: "/data"
+          name: "kuard-data"
       resources:
         requests:
           cpu: "500m"
           memory: "128Mi"
         limits:
           cpu: "1000m"
           memory: "256Mi"
       livenessProbe:
         httpGet:
           path: /healthy
           port: 8080
         initialDelaySeconds: 5
         timeoutSeconds: 1
         periodSeconds: 10
         failureThreshold: 3
       ports:
         - containerPort: 8080
           name: http
出典
Kubernetes: Up and Running, by Kelsey Hightower, Brendan Burns, and Joe Beda (O'Reilly), 978-1-491-93567-5. (日本語版「入門 Kubernetes」 Kelsey Hightower, Brendan Burns, Joe Beda 著、オライリー・ジャパン、ISBN 978-4-87311-840-6)