Spark3.0から、Dataframeで扱えるフォーマットとしてbinaryFileが追加されました。その名の通り、バイナリデータをDateframeで扱えるようになりました。構造化データ、準構造化データ加えて、画像やPDFファイルなど非構造化データを扱えるようになり、全ての種類のデータを一元的に管理・処理することが可能になっています。
もちろんSparkの分散処理が基本になっていますので、非構造データの大量のデータ処理などもその恩恵をフルに享受できます。例えば、膨大なPDFファイルから文字列を抜き出して、自然言語処理する例などもDatabricksが公開しています。
ここでは、よく使われるバイナリデータである画像ファイルにフォーカスして、SparkのDataframeでどう扱えるかを見ていきます。
画像ファイルとDataframe
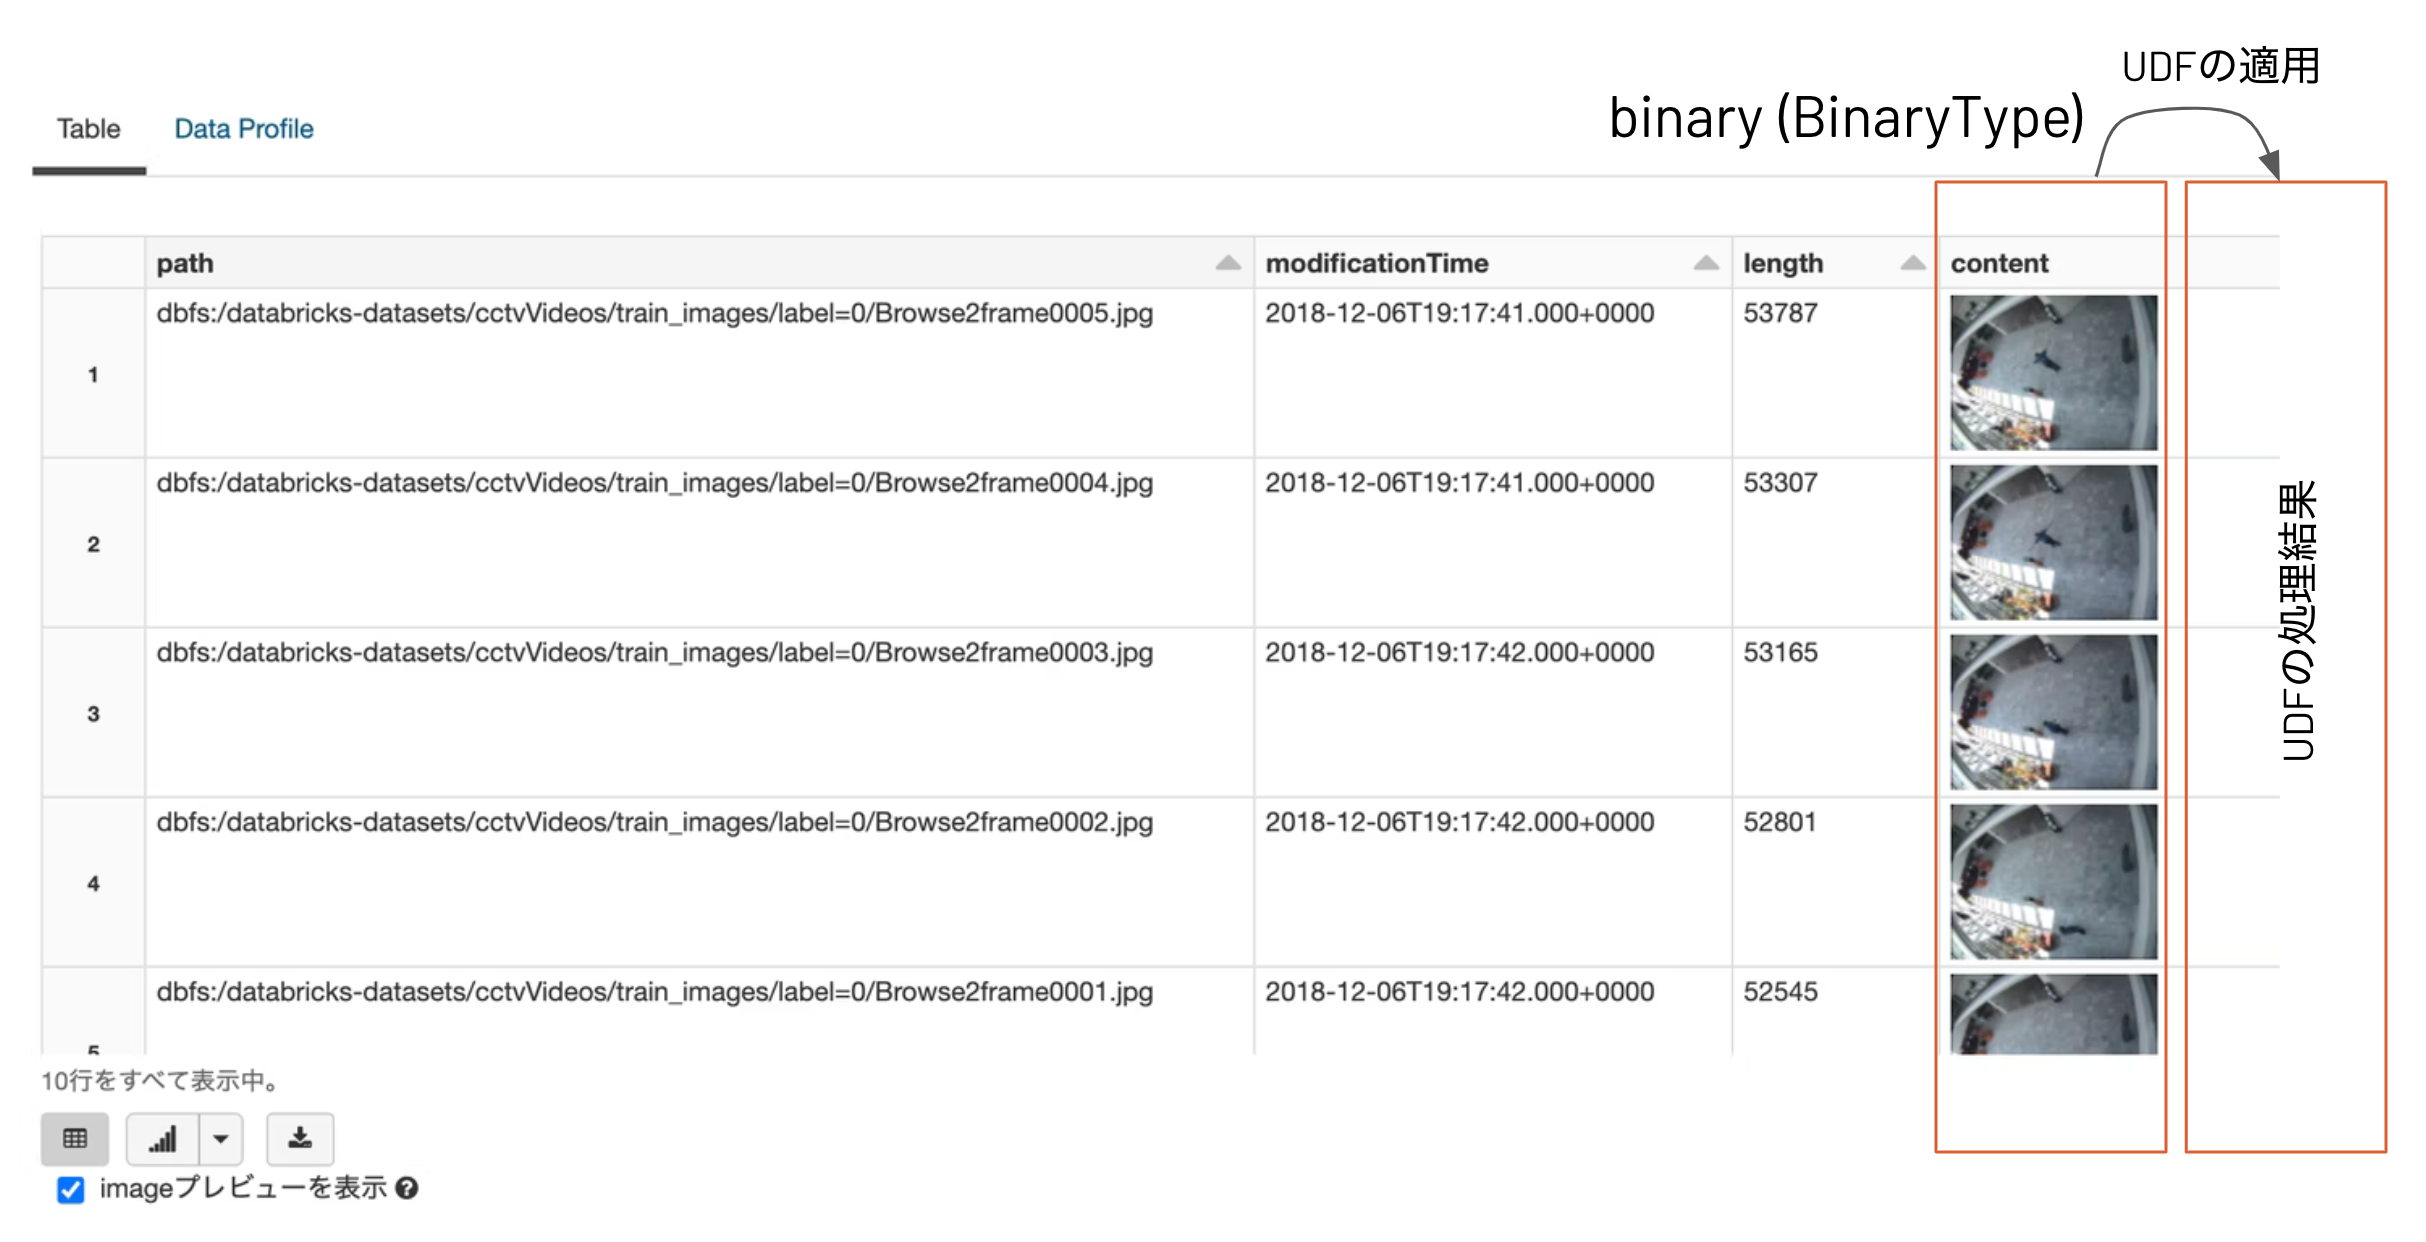
テーブル形式のデータを扱うDataframeにおいて、画像を扱うとはどういうことでしょうか。簡単にいうと、データ型がbinaryのカラムが用意され、そこに画像のバイナリデータ(JPGなどの生データ)が入ります。そして、従来のカラム操作と同じ様に扱えます。例えば、画像ファイルの属性をパースしたければ、Pillow(PIL)などの画像処理ライブラリを使った処理をUDFで実装し、その処理を一括で画像データのカラムに適用し(Spark!)、新しく属性カラムを追加する、といった使い方が可能になります。
他の応用例としては、機械学習の推論で使うケースがあります。UDFにする画像処理として機械学習モデルの画像認識処理を実装すれば、推論処理がシンプルに並列分散化できます。結果もDataframeで受け取れるので、推論のinput画像ファイルと結果データの管理を別々にする必要がなくなり、効率化できます。
ここではバイナリデータとして画像ファイルを例に説明しましたが、もちろんその他の全てのバイナリデータも同様に扱えます。
サンプルコード: DataFrameで一括して画像処理し、Exportする
サンプルとして以下の処理を追っていきます。
- DataframeにJPGを読み込む。
- 画像処理(グレースケール変換)を実施
- 再度、ストレージに書き出す
1. DataframeにJPGを読み込む(サンプルのImage Dataframeを作成)
Databricks Datasets(サンプルデータセット)に含まれる画像ファイルディレクトリを読み込んでみます。
image_df = (
  spark
  .read
  .format("binaryFile")
  .option("mimeType", "image/*")
  .load('/databricks-datasets/cctvVideos/train_images/label=0/Browse2frame000*.jpg')
)

display( image_df )
fomrat("binaryFile")で画像データを読み込むと、ファイルパス、更新時刻、ファイルサイズとともに、画像データのバイナリのカラムで構成されたDataframeが作成されます。

2. 画像処理(グレイスケール変換)を一括でかける
2.1 画像処理をUDFにする
ここではPillow(PIL)を使ってグレースケール変換を実施していますが、OpenCVなどのライブラリでも同様のことが可能です。
@udf('binary')
def convert_grayscale(content):
  '''
  contentをグレイスケール変換する

  param:
    content: Imageのバイナリデータのカラム
  return:
    procced_image_binary: 画像処理後のバイナリ
  '''
  import os, io
  from PIL import Image

  # `content`カラム = imageバイナリの読み込み
  f=io.BytesIO(content)
  im = Image.open(f)

  # 画像処理
  grayscaled_im = im.convert('L')

  # imageバイナリを返却する
  out = io.BytesIO()
  grayscaled_im.save(out, format='JPEG')
  return out.getvalue()
2.2 UDFを適用して、画像処理(grayscale変換)を実施
grayscaled_df = image_df.withColumn('grayscaled_content', convert_grayscale('content'))

display(
  grayscaled_df
)
カラムgrayscaled_contentに処理結果が追加されています。

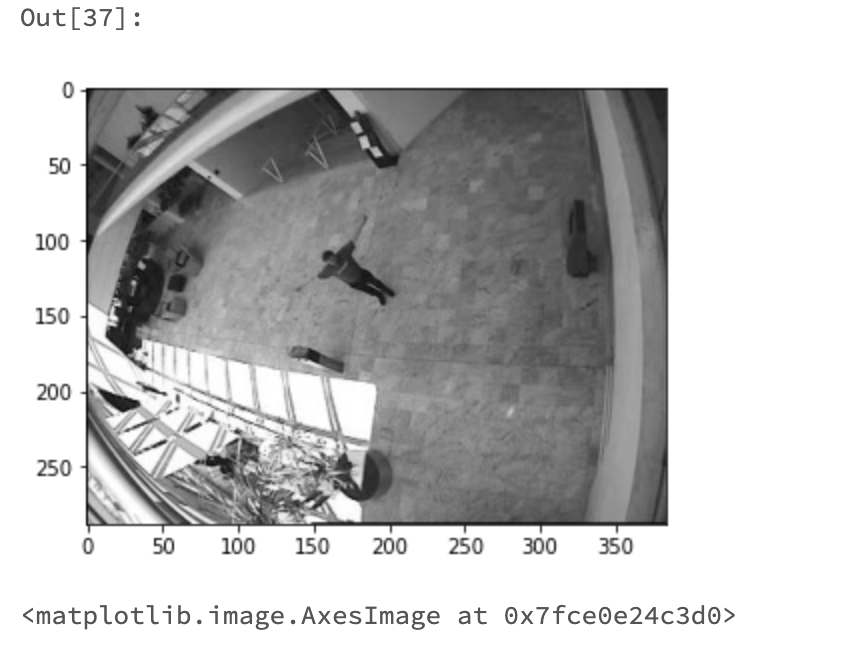
2.3 変換後の画像を一枚取り出して、プレビュー確認
import io
from matplotlib.pyplot import imshow
import numpy as np
from PIL import Image

byte_image = grayscaled_df.limit(1).select('grayscaled_content').collect()[0]['grayscaled_content'] # <=変換後(グレイスケール)
# byte_image = grayscaled_df.limit(1).select('content').collect()[0]['content'] #<= オリジナル

f=io.BytesIO(byte_image)
im = Image.open(f, formats=['JPEG'])
imshow(np.asarray(im), cmap = "gray")
3. ストレージに書き出す(Dataframe内の画像ファイルの一括でExportする)
3.1 画像ファイルをExportするするためのUDFを作成
@udf('string')
def export_as_jpg(path, content):
  '''
  contentをJPGファイルとして出力する。

  param:
    path: ファイルパスのカラム
    content: Imageのバイナリデータのカラム
  return:
    export_path: 出力先のパス

  '''
  import os, io
  from PIL import Image

  # ファイルの出力ファイル名を構成
  # オリジナルが`image001.jpg`であれば、`image001_proc.jgp`として出力
  base=os.path.basename(path)
  basename, ext = os.path.splitext(base)
  export_filename=f'{basename}_proc{ext}'

  export_base='/dbfs/tmp/images/' # 出力するディレクトリ
  os.makedirs(export_base, exist_ok=True)
  export_path = os.path.join(export_base, export_filename)

  f=io.BytesIO(content)
  im = Image.open(f)
  im.convert('L').save(export_path)

  return export_path
3.2 DataframeにUDFを適用する!
display(
  grayscaled_df.withColumn('output_path', export_as_jpg('path', 'grayscaled_content'))
)
3.3 出力ファイルを確認する
%fs ls /tmp/images/

%sh file /dbfs/tmp/images/Browse2frame0000_proc.jpg

[結果]
/dbfs/tmp/images/Browse2frame0000_proc.jpg: JPEG image data, JFIF standard 1.01, aspect ratio, density 1x1, segment length 16, baseline, precision 8, 384x288, components 1
fileコマンドでグレースケールの画像であると確認できました。
まとめ
binaryフォーマットのサポートによって、いろいろとSparkを使用でいる範囲が広くなったと思います。大量のバイナリファイルの処理を抱えている場面でぜひ使ってみてください。
参考