気軽にWebアプリが作れて、ローカルでの検証もしやすくて、本番デプロイも簡単。
そんな構成を目指して、FastAPIとNuxtJS(SPA)がLambda上で動作するアプリ環境をServerlessFrameworkで構築してみました。

ソースコードはこちら
前提条件
ServerlessFrameworkを使います。
nodejsとpython3.8とdockerをインストールしておいてください。
ServerlessFrameworkインストール & プロジェクト作成
ServerlessFrameworkをグローバルにインストールして、プロジェクトを新規作成します。
# ServerlessFrameworkをグローバルにインストール
npm install -g serverless
sls --version

# プロジェクト作成
sls create --template aws-python3 --name sample-app --path sample-app
cd sample-app

# pythonのライブラリをlayerとしてまとめるためのプラグインをインストール
sls plugin install -n serverless-python-requirements
sample-app/
| .gitignore
| handler.py
| package-lock.json
| package.json
| serverless.yml
serverless.ymlにデプロイ先リージョンと、serverless-python-requirements プラグインを利用する設定を追記しておきましょう。
provider:
  region: ap-northeast-1

plugins:
  - serverless-python-requirements
Lambda上でFastAPIを動作させる
APIGatewayの設定
APIGatewayでLambdaプロキシ統合を設定していきます。
ルーティングはLambda内のFastAPIが担当しますので、APIGatewayはすべてのリクエストを同じLambdaに渡せばよいです。
binaryMediaTypes はAPIGatewayがバイナリファイルを返却するために必要な設定です。
これがないとAPIGatewayは画像ファイルなどを返却できません。(この設定を知らずに4時間くらいハマりました、、、)
provider:
  # ... 略 ...
  apiGateway:
    binaryMediaTypes:
      - '*/*'

functions:
  hello:
    handler: handler.hello
    events:
      - http:
          path: /
          method: ANY
      - http:
          path: /{path+}
          method: ANY
Layerの設定
Lambdaが巨大化するとデプロイに時間がかかるので、必要なライブラリはLayerにまとめていきます。
serverless-python-requirements プラグインを利用すると、 serverless.yml と同階層にある requirements.txt をLayerとしてデプロイできます。
今回必要なライブラリは fastapi と mangum の2つです。
fastapi[all]
mangum
serverless.yml にLayerをビルドするための下記設定を追加します。
※ Ref: PythonRequirementsLambdaLayer は固定値です。serverless-python-requirements プラグインによって作成されたLayerを参照します。
functions:
  hello:
    # ... 略 ...
    layers: # 作成したLayerをLambdaから利用するための設定
      - Ref: PythonRequirementsLambdaLayer
custom:
  pythonRequirements:
    dockerizePip: non-linux # deploy時にpythonライブラリのinstall & buildをdockerで行う設定
    layer: true # レイヤーを作成する
FastAPIアプリの実装
デフォルトの handler.py を削除して、FastAPIのアプリを実装しましょう。
rm handler.py
mkdir -p api
touch api/main.py api/__init__.py
Lambda上でFastAPIを動作させるには Mangum というライブラリを利用します。
MangumはAPIGatewayのイベントをLambda上のASGIアプリケーションが扱える形式に変換するアダプタとして機能します。
ちなみに、APIGatewayから渡されたイベントは Request.scope['aws.event'] から取得できます。
とりあえず今回は簡単に /api/hello と /api/event というAPIを作りたいと思います。
import os
from fastapi import FastAPI, APIRouter
from mangum import Mangum
from starlette.requests import Request
from fastapi.middleware.cors import CORSMiddleware

router = APIRouter()
@router.get("/hello")
def hello():
    return {"Hello": "World"}

@router.get("/event")
def event(request: Request):
    return {
        "event": request.scope["aws.event"],
    }

app = FastAPI()
app.include_router(router, prefix="/api")

# CORS: https://fastapi.tiangolo.com/tutorial/cors/
app.add_middleware(
    CORSMiddleware,
    allow_origins=["*"],
    allow_credentials=True,
    allow_methods=["*"],
    allow_headers=["*"],
)

handler = Mangum(app) # このhandlerをLambdaのハンドラとして指定します。
Lambdaのハンドラに app/main.py の handler = Mangum(app) を指定し、デプロイパッケージには api/ のみを含めるように設定します。
functions:
  hello:
    handler: api.main.handler
    # ... 略 ...

package:
  patterns:
    - '!**' # すべてのファイルをexclude
    - 'api/**' # fastapiのソースコードをinclude
一度デプロイ
これで一度デプロイしてみましょう
sls deploy --stage dev
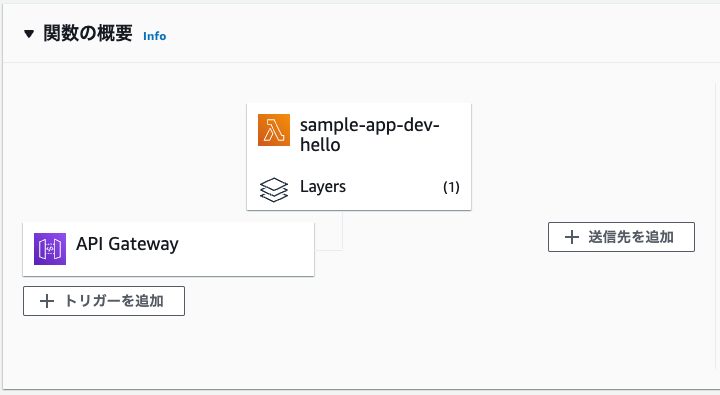
こんな感じの構成で、/dev/api/hello /dev/api/event へのリクエストに成功すればOKです。
https://xxxxxxxxxx.execute-api.ap-northeast-1.amazonaws.com/dev/api/hello
https://xxxxxxxxxx.execute-api.ap-northeast-1.amazonaws.com/dev/api/event
NuxtJSの導入
NuxtJSはSPA方式を利用します。
npm run generate で静的ファイルを生成して、FastAPIの静的ファイルサーバー機能で提供します。
NuxtJSのプロジェクト作成
front ディレクトリに sample-app というプロジェクトを作成します。
ssr=false target='static' なSPA方式とします。
npm init nuxt-app front

create-nuxt-app v4.0.0
✨  Generating Nuxt.js project in front
? Project name: sample-app
? Programming language: JavaScript
? Package manager: Npm
? UI framework: Vuetify.js
? Nuxt.js modules: Axios - Promise based HTTP client
? Linting tools: (Press <space> to select, <a> to toggle all, <i> to invert selection)
? Testing framework: Jest
? Rendering mode: Single Page App
? Deployment target: Static (Static/Jamstack hosting)
? Development tools: jsconfig.json (Recommended for VS Code if you're not using typescript)
? Continuous integration: None
? Version control system: Git
# nuxtプロジェクトの.gitを削除します。
rm -rf front/.git
NuxtJSプロジェクトの設定
ビルド結果の出力先を変更
パッケージのビルド先を front/dist から front_dist に変更します。
import colors from 'vuetify/es5/util/colors'

export default {
  // ... 略 ...

  // npm run generate で生成されるビルド済みファイルの出力先ディレクトリの指定
  generate: {
    dir: "../front_dist"
  },
}
NuxtJSでビルドした静的ファイルをLambdaのパッケージに含めるため、patterns に front_dist ディレクトリを追加します。
package:
  patterns:
    - '!**' # すべてのファイルをexclude
    - 'api/**' # fastapiのソースコードをinclude
    - 'front_dist/**' # nuxtのビルド結果をinclude
ベースURIの設定
APIGatewayを利用するとURIの先頭にステージ名がついてしまいます。
※ 例えば sls deploy --stage dev でデプロイすると /api/hello は /dev/api/hello となります。
この仕様、本気でいらないと思うのですが、どうしようもないのでNuxtJS側にベースURIを設定します。
今回は ビルド時にAPI_BASE_PATH という環境変数を定義することで、ベースURIを設定できるようにします。
import colors from 'vuetify/es5/util/colors'

export default {
  // ... 略 ...
  head: {
    // ... 略 ...
    link: [
      // ファビコンのパスの先頭にAPI_BASE_PATHを設定します。
      { rel: 'icon', type: 'image/x-icon', href: (process.env.API_BASE_PATH ?? "") + '/favicon.ico' }
    ]
  },

  // ... 略 ...

  axios: {
    // axiosによるリクエスト送信時にベースURIが付与されます。
    // API_BASE_PATHが存在しない場合はローカル開発サーバーとみなして、//127.0.0.1:8000/をベースURIとします。
    baseURL: process.env.API_BASE_PATH ?? "//127.0.0.1:8000",
  },

  // ... 略 ...

  router: {
    // 生成されるリンクの先頭にベースURIが付与され、HTMLにbaseタグ( `<base href="xxxx">` ) が追加されます。
    // https://nuxtjs.org/docs/configuration-glossary/configuration-router/#base
    base: process.env.API_BASE_PATH ?? ""
  },
}
baseタグは相対パスで記述されたURIの基準となるので、絶対パスを相対パスに書き換えていきます。
/v.png -> v.png
<template>
  <v-row>
    <v-col class="text-center">
      <img
        src="v.png"
        alt="Vuetify.js"
        class="mb-5"
      >
      <!-- 略 -->
/vuetify-logo.svg -> vuetify-logo.svg
<template>
  <img
    class="vuetify-logo"
    alt="Vuetify Logo"
    src="vuetify-logo.svg"
  >
  <!-- 略 -->
APIをコールするページの作成
ボタンをクリックすると /api/hello APIをコールする簡単なサンプルを実装してみます。
<template>
  <div>
    <div>
      <v-btn @click="hello">HELLO</v-btn>
    </div>
    <h1>{{ message }}</h1>
  </div>
</template>

<script>
export default {
  data() {
    return {
      message: ""
    }
  },
  methods: {
    hello() {
      let data = this.$data;
      this.$axios.get("/api/hello")
        .then(res => {
          data.message = res.data["Hello"];
        })
        .catch((e) => {
          console.error(e);
        })
    }
  }
}
</script>
FastAPIでfront_dist配下を静的ファイルとして返却する
NuxtJSのビルド結果の静的ファイルをFastAPIの静的ファイルサーバー機能で提供できるようにします。
FastAPI側でもベースURIの設定を行うため、 API_BASE_PATH を環境変数としてLambdaに渡します。
provider:
  # ... 略 ...
  environment:
    API_BASE_PATH: ${env:API_BASE_PATH, ""}
FastAPIの初期化時に引数 root_path に API_BASE_PATH を設定し、 app.mount で front_dist ディレクトリを / にマウントします。
こうすることで、ブラウザで / にアクセスしたときに front_dist/index.html が参照されるようになります。
# ... 略 ...

# 追加: StaticFilesインポート
from fastapi.staticfiles import StaticFiles

# ... 略 ...

# 追加: root_pathにAPI_BASE_PATHを設定する
app = FastAPI(root_path=os.getenv(f"API_BASE_PATH", ""))
app.include_router(router, prefix="/api")

# 追加: front_distディレクトリを "/" にマウント
# StaticFilesのオプションはこちらを参照:  https://www.starlette.io/staticfiles/
PROJECT_ROOT = os.path.dirname(os.path.dirname(os.path.realpath(__file__)))
app.mount("/", StaticFiles(directory=f"{PROJECT_ROOT}/front_dist", html=True), name="front")

app.add_middleware(
    CORSMiddleware,
    allow_origins=["*"],
    allow_credentials=True,
    allow_methods=["*"],
    allow_headers=["*"],
)

handler = Mangum(app)
デプロイ
export API_BASE_PATH="/dev"

# 環境変数でベースURIを定義してビルド
(cd front && npm run generate)

# デプロイ
sls deploy --stage dev
動作確認
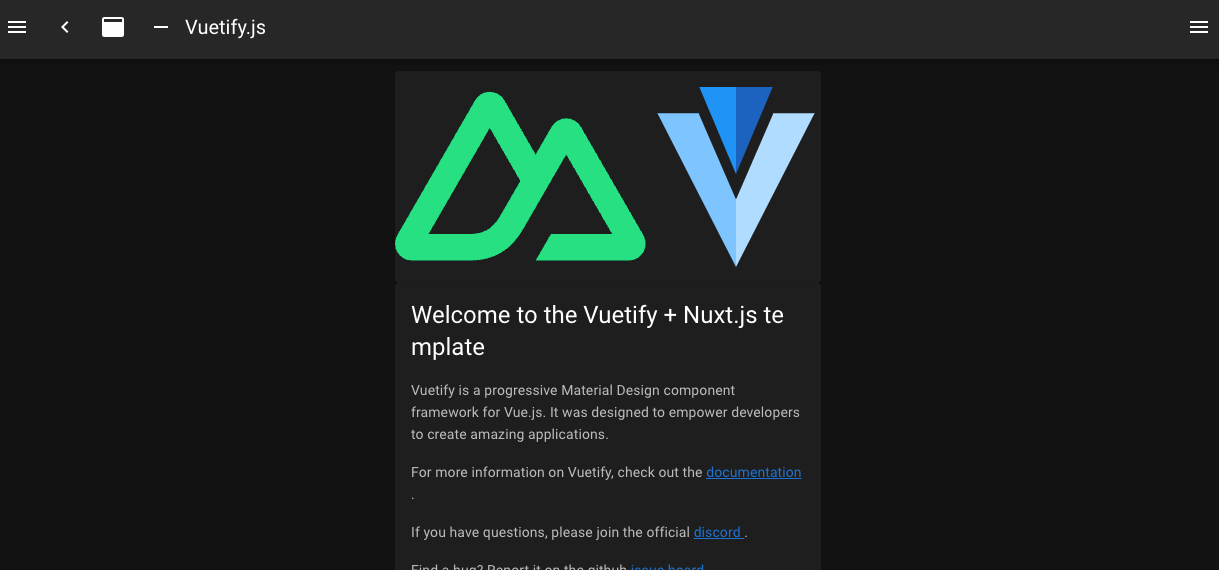
https://xxxxxxxxx.execute-api.ap-northeast-1.amazonaws.com/dev/ にアクセスするとNuxtのWelcomeページが表示されます。
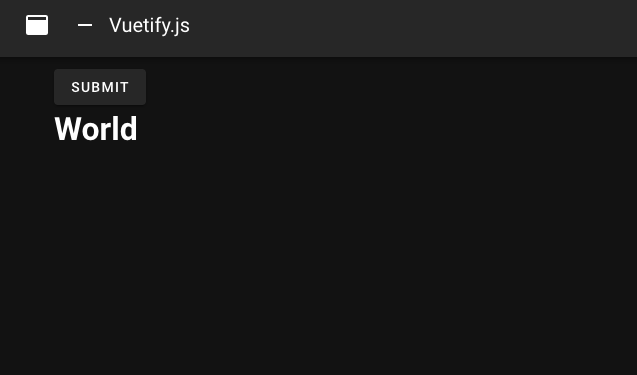
https://xxxxxxxxx.execute-api.ap-northeast-1.amazonaws.com/dev/hello にアクセスして「HELLO」ボタンをクリックすると「World」が表示されます。
おまけ: ローカルで開発サーバーを起動する
ローカルで開発サーバーを起動する場合は、FastAPIとNuxtJSの開発サーバーをそれぞれ起動します。
FastAPIの開発サーバー起動
export API_BASE_PATH=""

# pythonパッケージをローカルにインストール
python3.8 -m venv .venv
source .venv/bin/activate
pip install -r requirements.txt

# FastAPI開発サーバー起動
uvicorn api.main:app --reload
http://127.0.0.1:8000/ にアクセス
NuxtJSの開発サーバー起動
export API_BASE_PATH=""
cd front

# パッケージをローカルにインストール
npm install

# NuxtJSの開発サーバー起動
npm run dev
http://127.0.0.1:3000/ にアクセス
参考