はじめに
Angular でアプリを開発する場合、コンポーネントを開発していくことでアプリ全体を開発することになる。
コンポーネントは別のコンポーネントを子コンポーネント、もしくは外部コンテンツとしてビューに取り込むことができる。本記事ではその子コンポーネントと外部コンテンツの取り込みについてみていく。
後述の 関連記事 に挙げるライフサイクルメソッドについての記事と重複する部分もあるがご容赦願いたい。
更新情報
2021/01/03
- 記事内で扱ったコードを Angular
v11.0.5で確認しました
作業環境
| 環境 | バージョン | 備考 |
|---|---|---|
| Angular CLI |
|
$ ng --version |
| Angular |
|
同上 |
| TypeScript | v4.0.2 | 同上 |
| Node.js |
|
$ node --version |
| npm |
|
$ npm --version |
ng version の結果
$ ng version

     _                      _                 ____ _     ___
    / \   _ __   __ _ _   _| | __ _ _ __     / ___| |   |_ _|
   / △ \ | '_ \ / _` | | | | |/ _` | '__|   | |   | |    | |
  / ___ \| | | | (_| | |_| | | (_| | |      | |___| |___ | |
 /_/   \_\_| |_|\__, |\__,_|_|\__,_|_|       \____|_____|___|
                |___/


Angular CLI: 11.0.5
Node: 12.18.3
OS: darwin x64

Angular: 11.0.5
... animations, cli, common, compiler, compiler-cli, core, forms
... platform-browser, platform-browser-dynamic, router
Ivy Workspace: Yes

Package                         Version
---------------------------------------------------------
@angular-devkit/architect       0.1100.5
@angular-devkit/build-angular   0.1100.5
@angular-devkit/core            11.0.5
@angular-devkit/schematics      11.0.5
@schematics/angular             11.0.5
@schematics/update              0.1100.5
rxjs                            6.6.0
typescript                      4.0.2
関連記事
- [Angular] ライフサイクルメソッドをみる(ngAfterContentInit と ngAfterContentChecked)
- [Angular] ライフサイクルメソッドをみる(ngAfterViewInit と ngAfterViewChecked)
- [Angular] 親子関係にあるコンポーネント間でデータの受け渡しを行う
子コンポーネントや外部コンテンツの参照の取得
Angularでは子コンポーネントや外部コンテンツの参照を取得するためのデコレータが用意されている。
次の表はそのデコレータについての簡単な説明。
| デコレータ | 用途 | 備考 |
|---|---|---|
| @ViewChild | 単一のコンポーネントを取得する | |
| @ViewChildren | 指定したコンポーネントのリストを取得する | QueryList として集合が格納される |
| @ContentChild | 単一の外部コンテンツ(コンポーネント)を取得する | |
| @ContentChildren | 指定した外部コンテンツ(コンポーネント)のリストを取得する | QueryList として集合が格納される |
上記の通り双方共に単体、リストを取得するためのデコレータが用意されていて、使い方は @ViewChild と @ContentChild、また @ViewChildren と @ContentChildren とで大きな違いはない。
本記事では
- 子コンポーネントの取り込みでは @ViewChildren
- 外部コンテンツの取り込みでは @ContentChild
を使用し、実際にコードを書いて動きを確認していく。
なお QueryList については 本家の API リファレンス(QueryList) を参照いただくとして、本記事では割愛させていただく。
構成
コードの前に本記事で扱う構成についての簡単な紹介を。
ツリー構造
親コンポーネントから子コンポーネントと外部コンテンツを取り込むので、アプリの構成は次に示すものとする。
src/
  `-app/
       `-content-child/
       |   `-content-child.component.css
       |   `-content-child.component.html
       |   `-content-child.component.ts
       `-content-parent/
       |   `-content-parent.component.css
       |   `-content-parent.component.html
       |   `-content-parent.component.ts
       `-view-child/
       |   `-view-child.component.css
       |   `-view-child.component.html
       |   `-view-child.component.ts
       `-view-parent/
       |   `-view-parent.component.css
       |   `-view-parent.component.html
       |   `-view-parent.component.ts
       `- app.component.css
       `- app.component.html
       `- app.component.ts
       `- app.module.ts
-
子コンポーネントの確認のための構成として以下を配置する
-
親コンポーネントに view-parent
-
子コンポーネントに view-child
-
外部コンテンツの確認のための構成として以下を配置する
-
親コンポーネントに content-parent
-
子コンポーネントに content-child
テンプレートの定義(app.component.html)
上記で挙げた親コンポーネント-子コンポーネントの定義、そして親コンポーネントと外部コンテンツの定義をテンプレートとして app.component.html に実装したのが次のコード。
<div>
  <div class="block-header">
    <p>子コンポーネントの取り込みを確認するためのブロック</p>
  </div>

  <div class="block-body">
    <app-view-parent>
    </app-view-parent>
</div>

<div>
  <div class="block-header">
    <p>外部コンテンツの取り込みを確認するためのブロック</p>
  </div>

  <div class="block-body">
    <app-content-parent>
      <app-content-child class="external-contents-component">
      </app-content-child>
    </app-content-parent>
  </div>
</div>
app.component では親コンポーネントとして content-parent, view-parent の2つのコンポーネントを配置し、外部コンテンツとして content-child を content-parent のタグに挟んでいる。
(各コンポーネントのタグはそれぞれ接頭辞として「app-」が付与されている)
子コンポーネントの取り込み確認
それでは実際に子コンポーネントを取り込む動きについて @ViewChildren を使用して確認をしていく。
親コンポーネント、子コンポーネントは次の通り。
親コンポーネント
テンプレート
テンプレートでは同じ子コンポーネントを複数配置している。これは後述の 子コンポーネントの参照をリストで取得 する動きを確認するためである。
<div>
  <app-view-child></app-view-child>
</div>
<div>
  <app-view-child></app-view-child>
</div>
<div>
  <app-view-child></app-view-child>
</div>
<hr />
<div>
  <p>子コンポーネントで入力された値が次の行に表示される</p>
  <p>{{valueBox[0]}} {{valueBox[1]}} {{valueBox[2]}}</p>
</div>
クラス
クラスの実装では ViewChildren と QueryList を使用して子コンポーネントの参照をリストで取得し、foreach を用いて処理している。
コード中のコメントにも記してあるが、ngAfterViewChecked でビューの更新を行うと例外が発生するので遅延評価を行っている点に注目。
import { Component } from '@angular/core';

// ngAfterViewChecked を利用するための import
import { AfterViewChecked } from '@angular/core';

// 子コンポーネントの参照をリストで取得するための import
import { ViewChildren, QueryList } from '@angular/core';

// 子コンポーネントを import
import { ViewChildComponent} from '../view-child/view-child.component';

@Component({
  selector: 'app-view-parent',
  templateUrl: './view-parent.component.html',
  styleUrls: ['./view-parent.component.css']
})
export class ViewParentComponent implements AfterViewChecked {

  /**
   * 子コンポーネントの参照から値をセットするためのプロパティ
   *
   * @type {String}
   * @memberof ViewChildComponent
   */
  public valueBox: String[] = ['', '', ''];

  /**
   * 子コンポーネントの参照
   * テンプレートで指定した子コンポーネントをリストで取得できる
   *
   * @type {ViewChildComponent}
   * @memberof ViewParentComponent
   */
  @ViewChildren(ViewChildComponent) viewChildren!: QueryList<ViewChildComponent>;

  constructor() { }

  /**
   * ビューの変更をフックする
   *
   * @memberof ViewParentComponent
   */
  ngAfterViewChecked() {

    this.viewChildren.forEach((item, index) => {
      if (this.valueBox[index] !== item.inputValue) {

        // ERROR Error: ExpressionChangedAfterItHasBeenCheckedError: Expression has changed after it was checked
        // の回避のために遅延評価を行う
        setTimeout(() => {
          this.valueBox[index] = item.inputValue;
        }, 0);
      }
    });
  }
}
子コンポーネント
テンプレート
テンプレートでは入力フォームを設置する。ここで入力した値が親コンポーネントで扱われる。
<label for="inputText">入力項目 :</label>
<input id="inputText" name="inputText" type="text" [(ngModel)]="inputValue" />
クラス
クラスの実装ではビューで扱われるプロパティの定義のみ行う。
import { Component } from '@angular/core';

@Component({
  selector: 'app-view-child',
  templateUrl: './view-child.component.html',
  styleUrls: ['./view-child.component.css']
})
export class ViewChildComponent {

  /**
   * テキストボックスの入力値
   *
   * @type {String}
   * @memberof ViewChildComponent
   */
  public inputValue: String = '';

  constructor() { }
}
動作確認
起動時
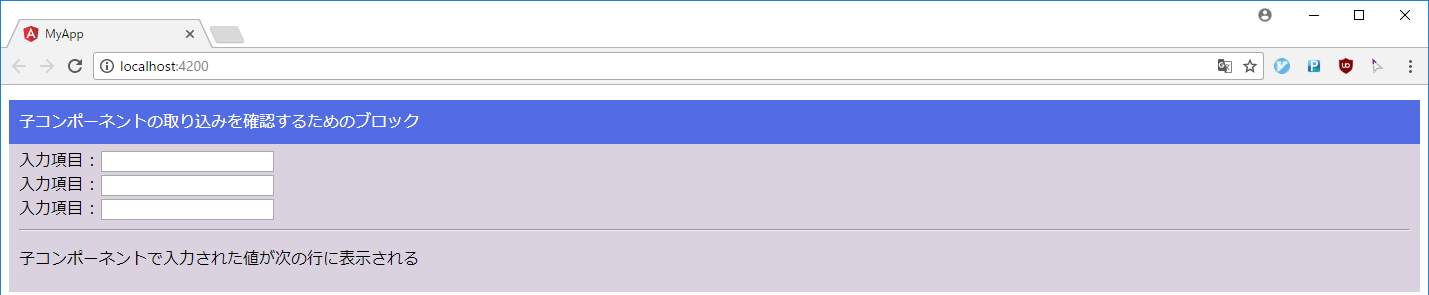
起動時は初期値未設定につき、入力フォームは空白の状態。
入力後

入力項目の3つに対して入力した内容がオレンジ枠で囲った箇所に表示されていることが確認できる。
このオレンジ枠で囲った部分が親コンポーネント( view-parent.component.ts )で子コンポーネントの参照を取得した結果となる。
コードで確認
コードで示すと
  /**
   * 子コンポーネントの参照
   * テンプレートで指定した子コンポーネントをリストで取得できる
   *
   * @type {ViewChildComponent}
   * @memberof ViewParentComponent
   */
  @ViewChildren(ViewChildComponent) viewChildren: QueryList<ViewChildComponent>;
で子コンポーネントへの参照をリストで取得し、
  /**
   * ビューの変更をフックする
   *
   * @memberof ViewParentComponent
   */
  ngAfterViewChecked() {

    this.viewChildren.forEach((item, index) => {
      if (this.valueBox[index] !== item.inputValue) {

        // ERROR Error: ExpressionChangedAfterItHasBeenCheckedError: Expression has changed after it was checked
        // の回避のために遅延評価を行う
        setTimeout(() => {
          this.valueBox[index] = item.inputValue;
        }, 0);
      }
    });
  }
foreach でリストを評価し、子コンポーネントのプロパティを this.valueBox[index] = item.inputValue; で親コンポーネント自身のプロパティである valuBox にセット。そして
<div>
  <p>子コンポーネントで入力された値が次の行に表示される</p>
  <p>{{valueBox[0]}} {{valueBox[1]}} {{valueBox[2]}}</p>
</div>
テンプレートで valueBox の値を出力している。
外部コンテンツの取り込み確認
今度は外部コンテンツの取り込みについて @ContentChild を使用して確認していく。
親コンポーネント、子コンポーネントは次の通り。
親コンポーネント
テンプレート
テンプレートでは外部コンテンツを取り込むためのタグである ng-content を一つ配置している。これは後述の 外部コンテンツの参照を単独で取得 する動きを確認するためである。
<ng-content></ng-content>
<hr />
<div>
  <p>外部コンテンツで入力された値が次の行に表示される</p>
  <p>{{contentValue}}</p>
</div>
クラス
クラスの実装では ContentChild を使用して外部コンテンツの参照を取得し処理している。
なお ngAfterViewChecked と違って、 ngAfterContentChecked ではビューの更新を行っても ERROR Error: ExpressionChangedAfterItHasBeenCheckedError: Expression has changed after it was checked は発生しないので setTimout による遅延評価は行っていない。
import { Component } from '@angular/core';

// ngAfterContentChecked を利用するための import
import { AfterContentChecked } from '@angular/core';

// 外部コンテンツの参照を単独で取得するための import
import { ContentChild } from '@angular/core';

// 外部コンテンツを import
import { ContentChildComponent} from '../content-child/content-child.component';

@Component({
  selector: 'app-content-parent',
  templateUrl: './content-parent.component.html',
  styleUrls: ['./content-parent.component.css']
})
export class ContentParentComponent implements AfterContentChecked {

  /**
   * 外部コンテンツの参照から値をセットするためのプロパティ
   *
   * @type {String}
   * @memberof ContentParentComponent
   */
  public contentValue: String = '';

  /**
   * 外部コンテンツの参照
   * テンプレートで指定した外部コンテンツを取得できる
   *
   * @type {ContentChildComponent}
   * @memberof ContentParentComponent
   */
  @ContentChild(ContentChildComponent) contentChild!: ContentChildComponent;

  constructor() { }

  /**
   * 外部コンテンツの変更をフックする
   *
   * @memberof ContentParentComponent
   */
  ngAfterContentChecked() {

    if (this.contentValue !== this.contentChild.inputValue) {
      this.contentValue = this.contentChild.inputValue;
    }
  }
}
外部コンテンツ
テンプレート
子コンポーネントの取り込み確認 と同じく、テンプレートでは入力フォームを設置する。ここで入力した値が親コンポーネントで扱われる。
<label for="inputText">入力項目 :</label>
<input id="inputText" name="inputText" type="text" [(ngModel)]="inputValue" />
クラス
こちらも 子コンポーネントの取り込み確認 と同じく、クラスの実装ではビューで扱われるプロパティの定義のみ行う。
import { Component } from '@angular/core';

@Component({
  selector: 'app-content-child',
  templateUrl: './content-child.component.html',
  styleUrls: ['./content-child.component.css']
})
export class ContentChildComponent {

  /**
   * テキストボックスの入力値
   *
   * @type {String}
   * @memberof ContentChildComponent
   */
  public inputValue: String = '';

  constructor() { }
}
動作確認
起動時

子コンポーネントの取り込み確認 と同じく、起動時は初期値未設定につき、入力フォームは空白の状態。
入力後
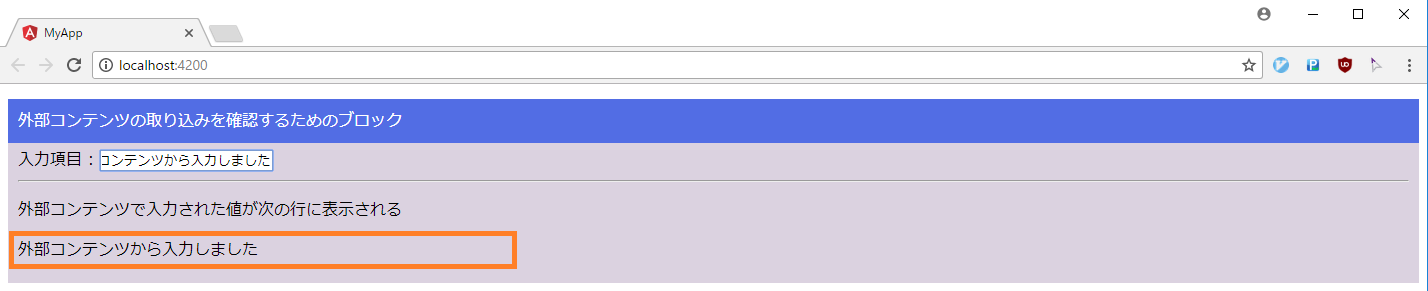
入力項目で入力した内容がオレンジ枠で囲った箇所に表示されていることが確認できる。
このオレンジ枠で囲った部分が親コンポーネント( content-parent.component.ts )で外部コンテンツの参照を取得した結果となる。
コードで確認
こちらもコードでみていくと
  /**
   * 外部コンテンツの参照
   * テンプレートで指定した外部コンテンツを取得できる
   *
   * @type {ContentChildComponent}
   * @memberof ContentParentComponent
   */
  @ContentChild(ContentChildComponent) contentChild!: ContentChildComponent;
で外部コンテンツへの参照を取得し、
  /**
   * 外部コンテンツの変更をフックする
   *
   * @memberof ContentParentComponent
   */
  ngAfterContentChecked() {

    if (this.contentValue !== this.contentChild.inputValue) {
      this.contentValue = this.contentChild.inputValue;
    }
  }
外部コンテンツのプロパティを this.contentValue = this.contentChild.inputValue; で親コンポーネント自身のプロパティである contentValue にセット。そして
<div>
  <p>外部コンテンツで入力された値が次の行に表示される</p>
  <p>{{contentValue}}</p>
</div>
テンプレートで contentValue の値を出力している。
まとめにかえて
関連記事であげた 2つ の記事と本記事とで子コンポーネントや外部コンテンツの参照の取得と、ライフサクルメソッドによるビューやコンテンツの変更をフックする仕組みについて確認できた。
ここではこれまで取り上げた内容について、改めて箇条書きでまとめておく。
-
子コンポーネントについて
-
子コンポーネントの参照は @ViewChild や @ViewChildren で取得できる
-
ライフサクルメソッドは ngAfterViewInit と ngAfterViewChecked が用意されている
-
ngAfterViewInit や ngAfterViewChecked でビューの更新を行うと例外が発生する
-
この例外を回避するために setTimeout を用いて遅延評価を行う
-
外部コンテンツについて
-
外部コンテンツとはコンポーネントのタグで囲った部分のコンテンツを指す
-
外部コンテンツの参照は @ContentChild や @ContentChildren で取得できる
-
ライフサクルメソッドは ngAfterContentInit と ngAfterContentChecked が用意されている
-
ngAfterContentInit や ngAfterContentChecked でコンテンツの更新を行っても例外は発生しない
-
双方に言えることして
-
ngAfterViewChecked や ngAfterContentChecked はビューやコンテンツの変更のたびにフックされるので使い方や使い所に注意した方が良い
とりあえず「親が子( コンポーネントや外部コンテンツ含む )の状態をチェック」する仕組みについては確認することができた。
次は「親から子に値を渡す」ケースや「子から親に値を渡す(注1)」ケースについてみていきたい。
- 注1
- 主体が子である点に注意
- これまでみてきたような「親が子の参照を取得して値を取得する」のではなく「子が親に値を渡す」動きをみる
ソースコード
今回の記事で動作確認に使用したコードは ここ にアップしたので、ご参考までに。。。