Grafana reporterとは?
GrafanaのダッシュボードをPDF化します。
そんなの必要ある?って私も思ってましたがGrafanaで自分で好きな範囲に変更してみたら良いのでは?と思ってましたが月一でレポート作れないの?って要望がありまして・・
そんなの無いだろうと思ったらありました!
せっかく使ってみたのでメモ代わりに記載します。
環境
| バージョン | |
|---|---|
| CentOS | 7.5 |
| Grafana | 5.2.1 |
| Zabbix | 4.0.0 alpha9 |
CentOS7上でGrafanaを入れています。今回はZabbixは関係ないですが、データはZabbixから引っ張ってきています。
完成のイメージ
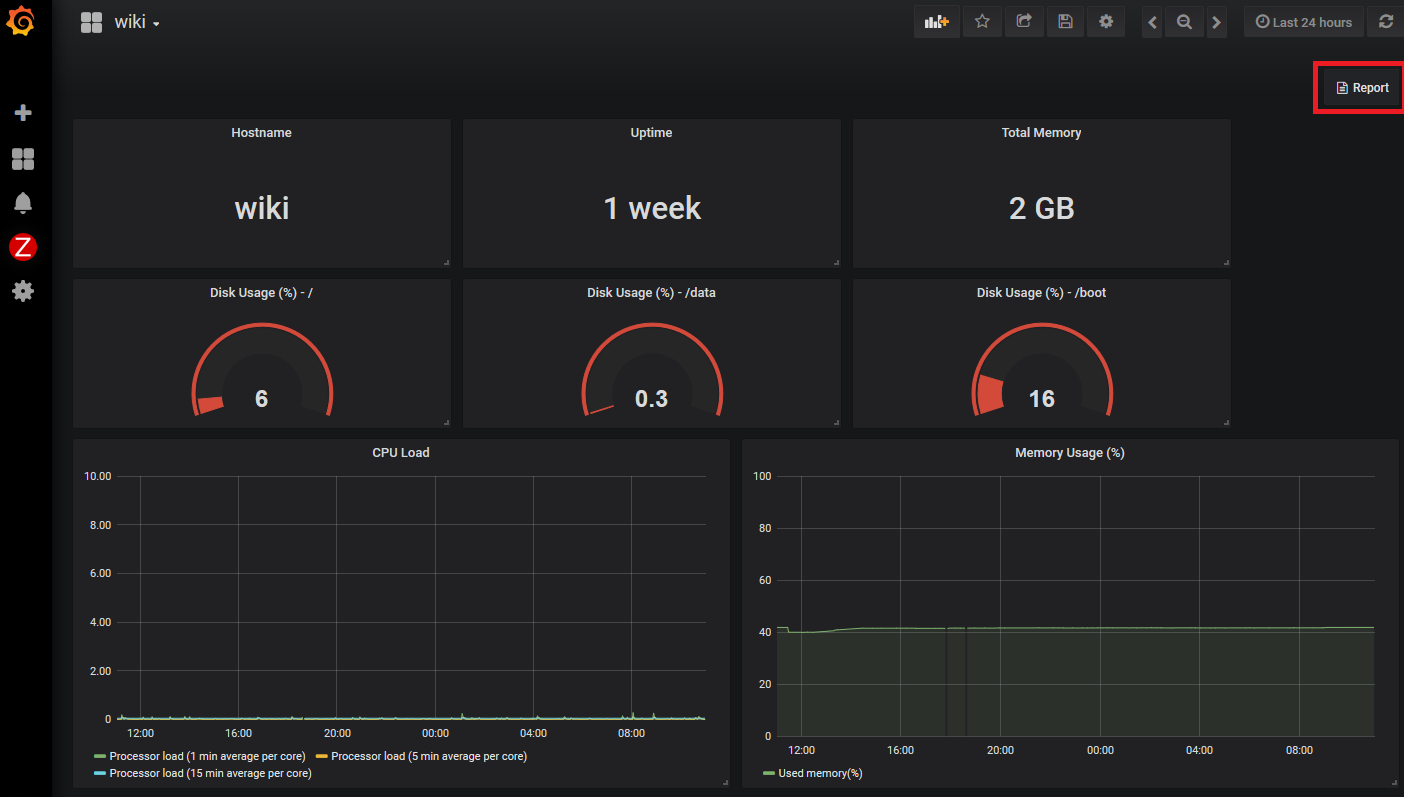
Grafanaのダッシュボードの右上にPDF作成のリンクを作成して、クリックするだけでPDFを作成します。
以下の例では「Report」という名前のリンクを作っています。
LaTeX関連のパッケージインストール
早速進めていきましょう!CentOS7にログインしてパッケージを追加していきます。
LaTeXは全然詳しくないので、偉そうなことは言えませんが有名な文書処理システムのやつです。
関連パッケージを入れます。
# yum install texlive-pdftex texlive-latex-bin texlive-texconfig* texlive-latex* texlive-metafont* texlive-cmap* texlive-ec texlive-fncychap* texlive-pdftex-def texlive-fancyhdr* texlive-titlesec* texlive-multirow texlive-framed* texlive-wrapfig* texlive-parskip* texlive-caption texlive-ifluatex* texlive-collection-fontsrecommended texlive-collection-latexrecommended texinfo-tex
Go関連のパッケージをインストール
Grafana reporterはGoで動作するようなのでGo関連のパッケージをインストールします。
# wget https://dl.google.com/go/go1.10.2.linux-amd64.tar.gz
# tar -C /usr/local -xzf go1.10.2.linux-amd64.tar.gz
# export PATH=$PATH:/usr/local/go/bin
Grafana reporterインストール
いよいよGrafana reporterをインストール!
# go get github.com/IzakMarais/reporter/...
# go install -v github.com/IzakMarais/reporter/cmd/grafana-reporter
Grafana reporterをsystemdに登録
まずファイルの場所を移動します。
なんとなく/usr/local/binにしてますが、お好きな場所に格納してください。
cd /usr/local/bin
mv /root/go ./
次にGrafana reporterをsystemdに登録しましょう。
viエディタなどで以下のように記載して保存します。
# vi /etc/systemd/system/grafana-reporter.service

[Unit]
Description = Grafana reporter daemon
[Service]
ExecStart = /usr/local/bin/go/bin/grafana-reporter
Restart = always
Type = simple
[Install]
WantedBy=multi-user.target
Grafana reporter起動
登録したら次に起動しましょう。
ついでに自動起動と起動したことを確認します。
# systemctl start grafana-reporter
# systemctl enable grafana-reporter
# systemctl status grafana-reporter
APIキー作成
次にGrafana上でAPIキーを作成します。
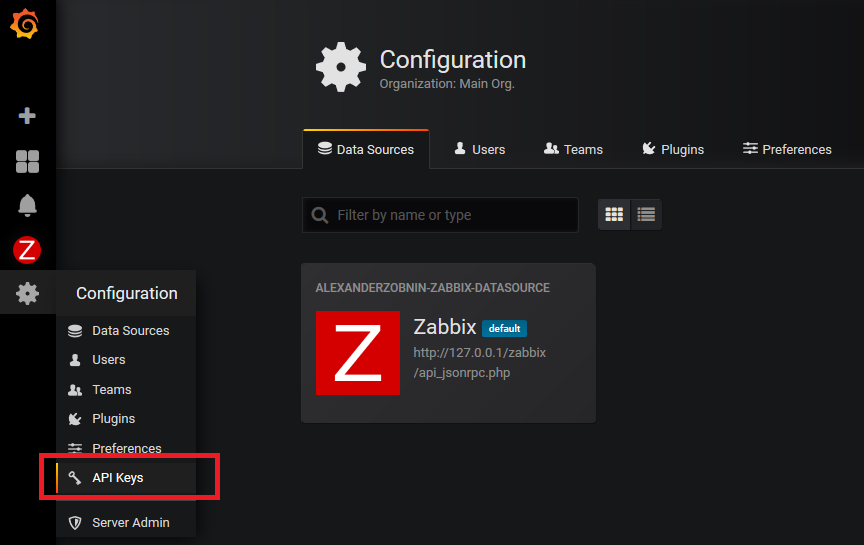
Grafanaの左側のメニューから「Configuration」→「API Keys」を選択します
次に任意のAPIキーの名前を入力して「add」をクリックします。
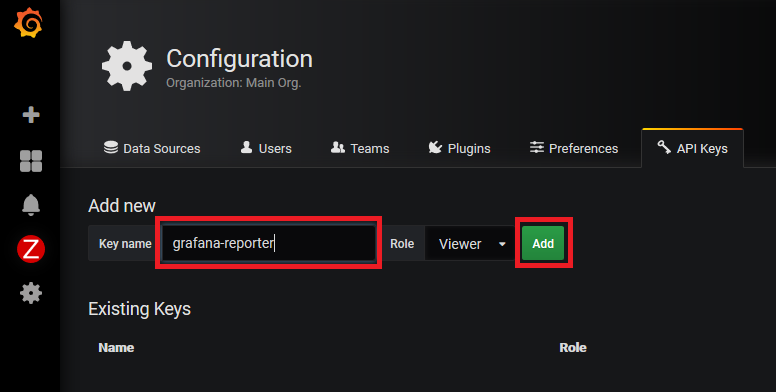
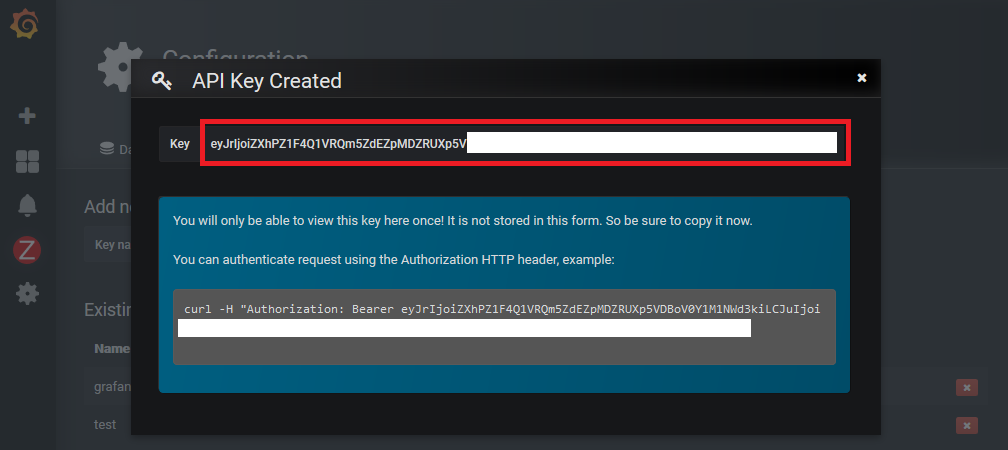
作成したAPIキーをメモしましょう。
一部隠していますが、以下のように表示されます。
reportボタン作成
次にGrafanaのダッシュボードにボタンを作成します。
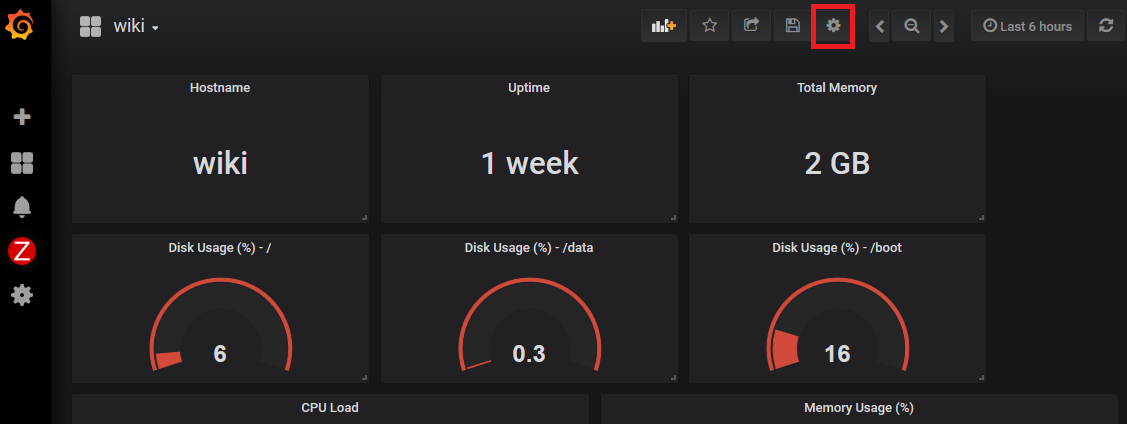
ボタンを設置したいダッシュボードを開いて上部の「Setting」をクリックします。
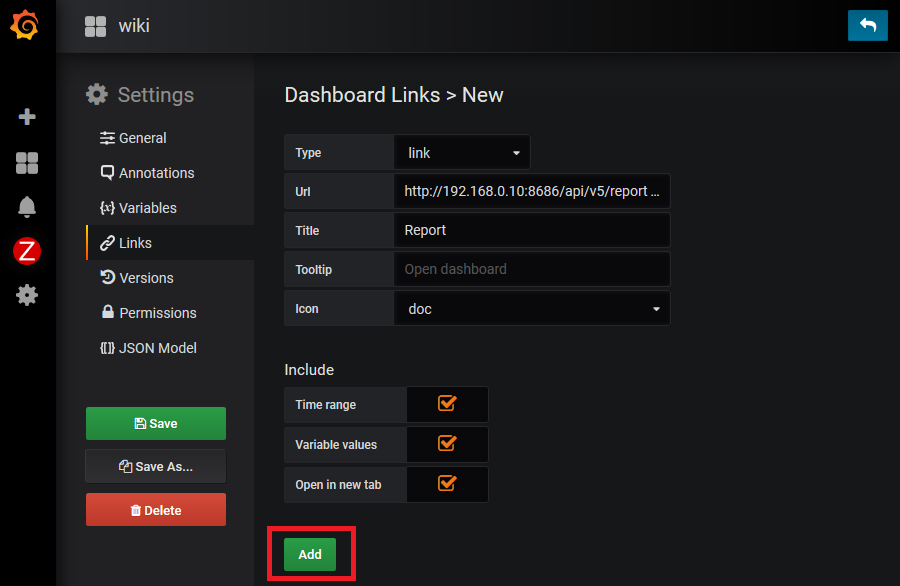
次に左側メニューから「Links」を選択し「Add Dashboard Link」をクリック
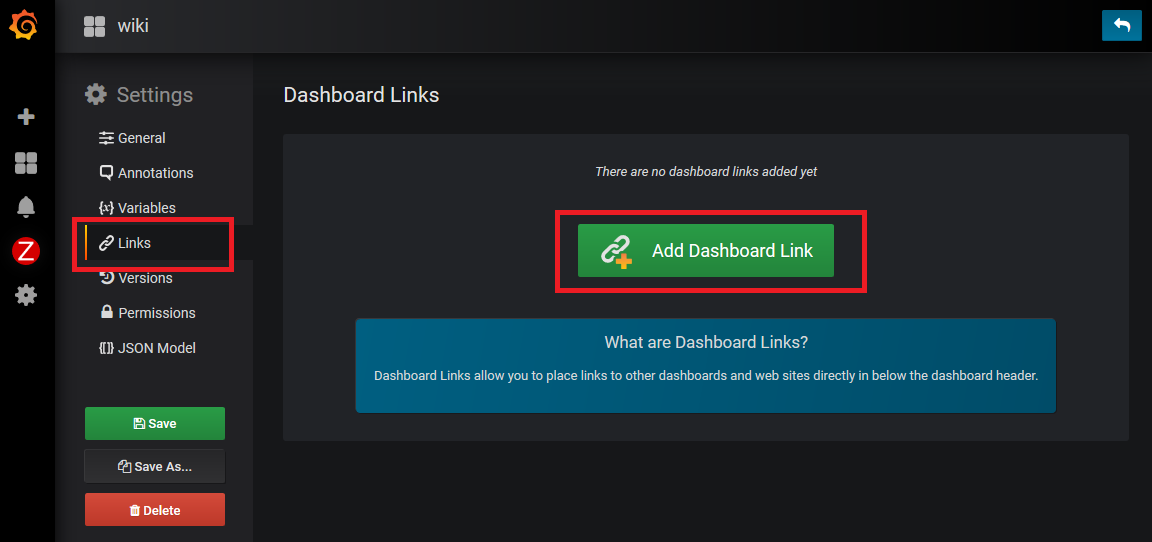
入力情報の詳細
| 項目 | 入力値 |
|---|---|
| Type | link |
| Url | http://<サーバIPアドレス>:8686/api/v5/report/\?apitoken=\&from=now-24h&to=now |
| Title | Report |
| Tooltip | 空欄 |
| Icon | doc |
Includeの項目はすべてチェックを入れてください。
ややこしいのはUrlだと思いますがサーバIPアドレスはGrafana reporterをインストールしたIPアドレスです。
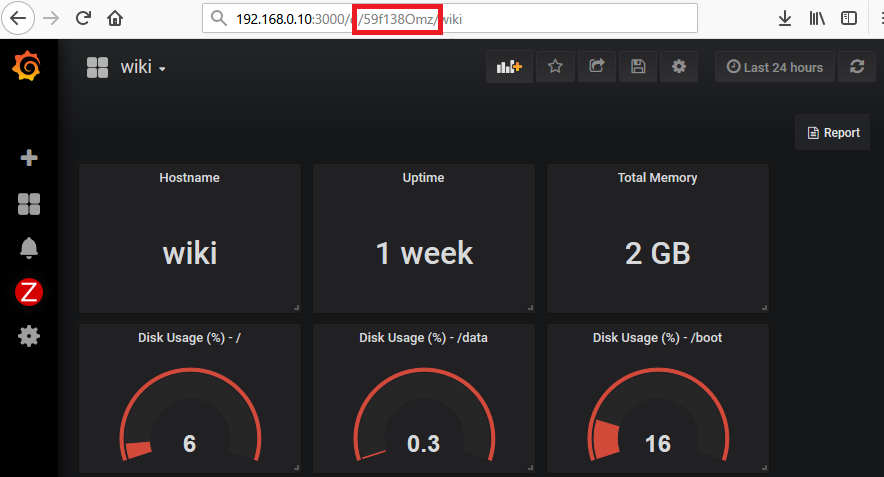
dashboardUID?と思うかもしれませんがUIDはダッシュボードを開いたときに表示されています。
以下の画像の赤枠の部分がUIDです。
APIキーは先ほど作ったものを張り付けてください。
from=now-24h&to=nowは作成するPDFの期間です。24時間以外の書式がわからん!と思われるかもしれませんが、それも以下の画像のように調べられますので、お好みの期間を設定してください。

サーバアドレスが192.168.0.10
dashboardUIDがaaaa
apitokenがbbbb
とするとUrlに入力する値は以下になります
http://192.168.0.10:8686/api/v5/report/aaaa?apitoken=bbbb&from=now-24h&to=now
といわけで無事に完成です。
右上のリンクを「ポチっと」するとPDFができあがります。

参考ページ
http://www.bujarra.com/generando-informes-con-grafana-y-programar-su-envio/?lang=ja
https://github.com/IzakMarais/reporter
