はじめに
RaspberryPiを使うたびに、HDMIケーブルでディスプレイに繋ぐって意外と面倒なものです。
RaspberryPi3はwifiモジュールがオンボードです。
SSH接続ができれば電源に繋いでいるだけでRaspberryPiの操作ができるようになります。
机の上がスッキリしますね。
ということで、今回はPC(Windows)からSSH接続をしてみましょう。
ipアドレスを固定する
SSH接続を行う場合、一般的にRaspberryPi側のipアドレスを固定します。
固定しなければ、毎回ipアドレスが変わってしまうかもしれないので、接続ができなくなります。
1.ipアドレスを調べる
まずはRaspberryPiがルータから割り振られているipアドレスを調べます。
$ sudo ifconfig | grep inet
  inet  192.168.×××.××× netmask 255.255.×××.××× broadcast 192.168.×××.×××
  inet6 ××××::××××:××××:××××:××××  prefixlen ××  scopeid 0x××<link>
  inet ×××.×.×.×  netmask ×××.×.×.×
  inet6 ::×  prefixlen ×××  scopeid 0x××<host>
※「×」は各環境によって数字が異なります。
以上の様に表示されたと思います。
もしくは下記の様にipアドレスを調べます
$ ip route
default via 192.168.0.1 dev wlan0 src 192.168.0.15 metric 303
192.168.0.0/24 dev waln0 proto kernel scope link src 192.168.0.15 metric 303
ルータのipアドレスが「192.168.0.1」であり、DNSから振られているラズパイのipアドレスが「192.168.0.16」であることが分かりました。
これらの情報に基づき、下記のファイルを編集します。
2.ipアドレスを固定する
2、3年前の記事を見るとよく
/etc/network/interfaces
にip固定を記述しているものを見かけます。
現在では/etc/network/interfacesにアクセスすると以下の様な記述があります。
# Please note that this file is written to be used with dhcpcd
# For static IP, consult /etc/dhcpcd.conf and 'man dhcpcd.conf'
現在では次のファイルに記述するようになっています。
/etc/dhcpcd.conf
では、ipアドレスを固定します。
$ sudo vim /etc/dhcpcd.conf
末尾に以下の記述を追加します。
interface wlan0
static ip_address=192.168.0.15/24
static routers=192.168.0.1
static domain_name_servers=192.168.0.1
routers、domain_name_serverは基本的にルータのipアドレスを指定します。
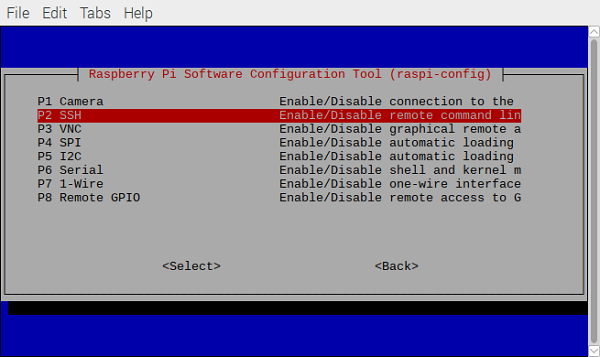
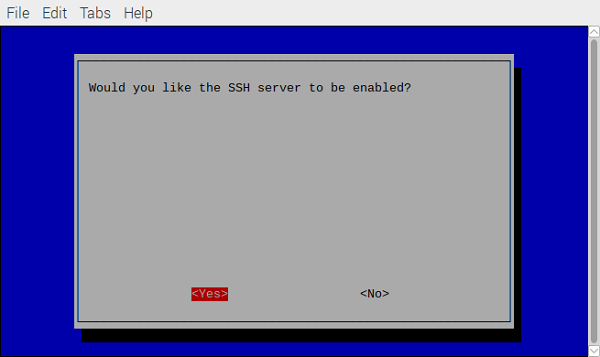
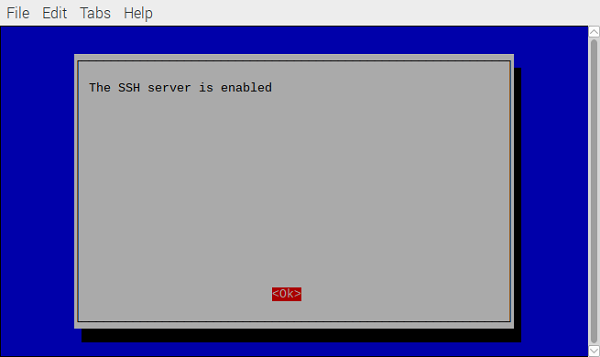
SHHを有効化する
ますは設定画面を開きます。
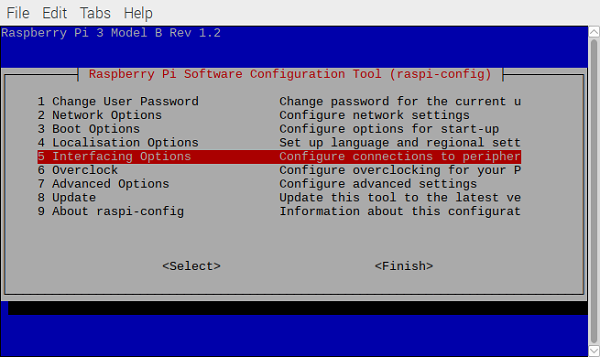
$ sudo raspi-config
「5 Interfacing Options」を選択します。
矢印キーで移動し、Enterキーで選択できます。
SSHで接続する
1. TeraTermをインストールする
PC(Windows)にTera Termをインストールします。
https://ja.osdn.net/projects/ttssh2/releases/
このリンクをクリックすると最新版のダウンロードが始まります。
※2018年5月29日現在の最新版は4.98です。
ダウンローダの手順に従ってインストールを行ってください。
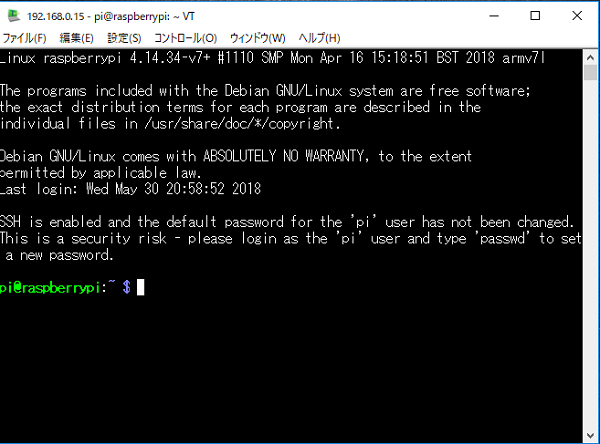
2. SSH接続を行う
TeraTermを起動します。
ホストには先ほど固定したipアドレスを入力します。
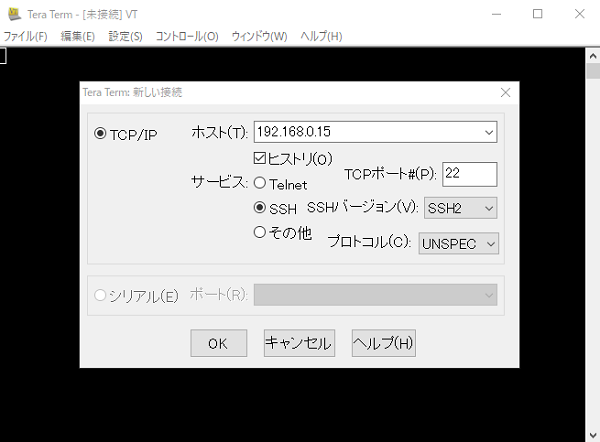
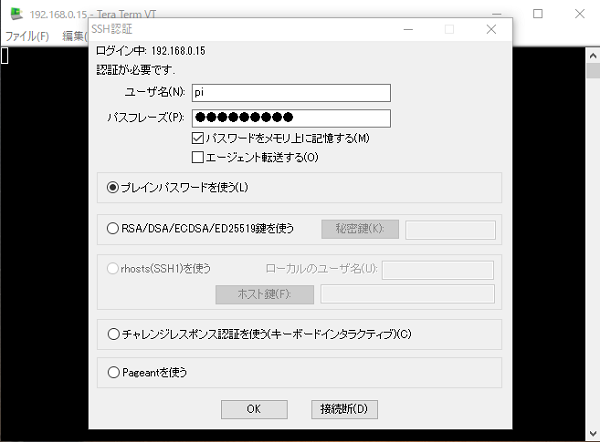
RaspberryPiのユーザ名とパスワードを入力し[OK]をクリックします。
特に変更していなければ、ユーザ名は「pi」、パスワードは「raspberry」です。
おわりに
以上でSSH接続が完了しました。
次回からはRaspberryPiをディスプレイに接続する必要が無くなりましたので、
机のスペースを有効活用できるかと思います。
