Aboutページの作成とテストを体験(コントローラテスト)
テストの概念についてはこちら
最初のテスト
rails generate controllerを実行した時点でテストファイルがちゃんと作成されているので、それを利用。
$ ls test/controllers/
static_pages_controller_test.rb
生成されたテストを見てみましょう 。
 require 'test_helper'

class StaticPagesControllerTest < ActionDispatch::IntegrationTest

  test "should get home" do
    get static_pages_home_url
    assert_response :success
  end

  test "should get help" do
    get static_pages_help_url
    assert_response :success
  end
end
doの後の2つのコードの意味は
Homeページのテスト。GETリクエストをhomeアクションに対して発行 (=送信) せよ。そうすれば、リクエストに対するレスポンスは[成功]になるはず。
試しに現在のテストスイートをそのまま実行して、問題なくパスすることを確認しておきます。テストの実行には、次のようにrailsコマンドを使います。
$ rails test
2 tests, 2 assertions, 0 failures, 0 errors, 0 skips
テストは失敗から進めて行くサイクル
テスト概念にもあった通り
「失敗するテストを最初に書く」
↓
「次にアプリケーションのコードを書いて成功させる (パスさせる)」
↓
「必要ならリファクタリングする」
のように進みます。多くのテストツールでは、テストの失敗を red 、成功したときを green で表します。
ここから、このサイクルを「red ・ green ・ REFACTOR」と呼ぶこともあります。
先ずはAboutページの作成をREDからはいっていく
 require 'test_helper'
.
.
.
  test "should get about" do
    get static_pages_about_url
    assert_response :success
  end
end
テストを実行すると、期待どおり失敗します。
リスト 3.16: red
$ rails test
.
.
NameError: undefined local variable or method `static_pages_about_url'
.
.
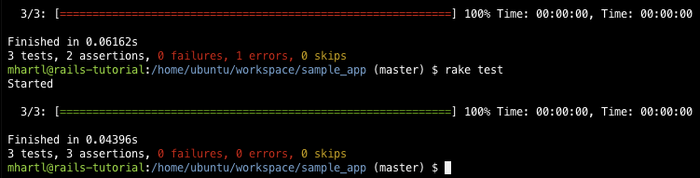
3 tests, 2 assertions, 0 failures, 1 errors, 0 skips
メッセージによるとAboutページへのURLが見つからないらしいのでルート設定
 Rails.application.routes.draw do
  get  'static_pages/home'
  get  'static_pages/help'
  get  'static_pages/about'
  root 'application#hello'
end
/static_pages/aboutというURLに対してGETリクエストが来たら、StaticPagesコントローラのaboutアクションに渡すようRailsに指示しています。この結果、自動的に次のようなヘルパーが使えるようになります。
static_pages_about_url
テスト
$ rails test
AbstractController::ActionNotFound:
The action 'about' could not be found for StaticPagesController
このエラーメッセージから、「StaticPagesコントローラにaboutアクションがない」らしいのでアクション追加
省略
テスト
$ rails test
ActionController::UnknownFormat: StaticPagesController#about
is missing a template for this request format and variant.
今度はテンプレートがないようです。Railsでは、テンプレートとはすなわち「ビュー」を指します。
てことで
$ touch app/views/static_pages/about.html.erb

#これをそのままはりつけてしまう
<h1>About</h1>
<p>
  <a href="https://railstutorial.jp/">Ruby on Rails Tutorial</a>
  is a <a href="https://railstutorial.jp/#ebook">book</a> and
  <a href="https://railstutorial.jp/#screencast">screencast</a>
  to teach web development with
  <a href="http://rubyonrails.org/">Ruby on Rails</a>.
  This is the sample application for the tutorial.
</p>
テスト
$ rails test
3 tests, 3 assertions, 0 failures, 0 errors, 0 skips
結果:GREEN
実際にブラウザを起動して、テストが正しく動いているかどうかを確かめる
高度なセットアップ。テスト用設定について解説。
大きく分けると、成功/失敗の表示設定をする「minitest reporters 」と、ファイルの変更を検出して必要なテストだけを自動実行してくれる「Guard 」の2つ。参考までに示したコードはそれなりに高度なので、今すぐ理解できるようになる必要はありません。
なお、このセクションで紹介するセットアップはmasterブランチで行う必要があるので、今のうちにブランチをmasterに切り替えておきましょう。
$ git checkout master
minitest repoters
Railsのデフォルトのテストで red や green を表示するためには、下コードをテスト用ヘルパーファイルに追加するだけです。このコードでは、この章最初で追加したminitest-reporters gemを利用しています。
 ENV['RAILS_ENV'] ||= 'test'
require File.expand_path('../../config/environment', __FILE__)
require 'rails/test_help'
require "minitest/reporters"
Minitest::Reporters.use!

class ActiveSupport::TestCase
  # Setup all fixtures in test/fixtures/*.yml for all tests
  # in alphabetical order.
  fixtures :all

  # Add more helper methods to be used by all tests here...
end
この変更により、Cloud IDE上の表示が red から green に変わります 。
Guardによるテストの自動化
Guardを使ってテストを自動的に実行させるようにしてみましょう。Guardは、ファイルシステムの変更を監視し、例えばstatic_pages_test.rbファイルなどを変更すると自動的にテストを実行してくれるツールです。具体的には、「home.html.erbファイルが変更されたらstatic_pages_controller_test.rbを自動的に実行する」といったことをGuardで設定することができます。
実は既に、最初のGemfileでguard gemをアプリケーション内に取り込んでいます。したがって、あとは初期化をするだけで動かすことができます。
$ bundle exec guard init
Writing new Guardfile to /home/ubuntu/workspace/sample_app/Guardfile
00:51:32 - INFO - minitest guard added to Guardfile, feel free to edit it
統合テストとビューが更新されたら自動的に適切なテストが実行されるように、生成されたGuardfileを編集します
# Guardのマッチング規則を定義
guard :minitest, spring: "bin/rails test", all_on_start: false do
  watch(%r{^test/(.*)/?(.*)_test\.rb$})
  watch('test/test_helper.rb') { 'test' }
  watch('config/routes.rb')    { integration_tests }
  watch(%r{^app/models/(.*?)\.rb$}) do |matches|
    "test/models/#{matches[1]}_test.rb"
  end
  watch(%r{^app/controllers/(.*?)_controller\.rb$}) do |matches|
    resource_tests(matches[1])
  end
  watch(%r{^app/views/([^/]*?)/.*\.html\.erb$}) do |matches|
    ["test/controllers/#{matches[1]}_controller_test.rb"] +
    integration_tests(matches[1])
  end
  watch(%r{^app/helpers/(.*?)_helper\.rb$}) do |matches|
    integration_tests(matches[1])
  end
  watch('app/views/layouts/application.html.erb') do
    'test/integration/site_layout_test.rb'
  end
  watch('app/helpers/sessions_helper.rb') do
    integration_tests << 'test/helpers/sessions_helper_test.rb'
  end
  watch('app/controllers/sessions_controller.rb') do
    ['test/controllers/sessions_controller_test.rb',
     'test/integration/users_login_test.rb']
  end
  watch('app/controllers/account_activations_controller.rb') do
    'test/integration/users_signup_test.rb'
  end
  watch(%r{app/views/users/*}) do
    resource_tests('users') +
    ['test/integration/microposts_interface_test.rb']
  end
end

# 与えられたリソースに対応する統合テストを返す
def integration_tests(resource = :all)
  if resource == :all
    Dir["test/integration/*"]  else
    Dir["test/integration/#{resource}_*.rb"]
  end
end

# 与えられたリソースに対応するコントローラのテストを返す
def controller_test(resource)
  "test/controllers/#{resource}_controller_test.rb"
end

# 与えられたリソースに対応するすべてのテストを返す
def resource_tests(resource)
  integration_tests(resource) << controller_test(resource)
end
上のコードにある次の行にご注目ください。
guard :minitest, spring: "bin/rails test", all_on_start: false do
この行ではGuardからSpringサーバーを使って読み込み時間を短縮しています (SpringはRailsの機能の1つです)。また、開始時にテストスイートをフルで実行しないようGuardに指示しています。
Guard使用時のSpringとGitの競合を防ぐには、.gitignoreファイルにspring/ディレクトリを追加します。.gitignoreはGitの設定ファイルの1つで、ここで指定されたファイルはGitリポジトリに追加されなくなります。クラウドIDEでは次の操作を行います。
1.「Show hidden files」を選択して、アプリケーションのルートディレクトリにある.gitignoreファイルを表示,以下を張付け
# See https://help.github.com/articles/ignoring-files for more about
# ignoring files.
#
# If you find yourself ignoring temporary files generated by your
# text editor or operating system, you probably want to add
# a global ignore instead:
#   git config --global core.excludesfile '~/.gitignore_global'

# Ignore bundler config.
/.bundle

# Ignore the default SQLite database.
/db/*.sqlite3
/db/*.sqlite3-journal

# Ignore all logfiles and tempfiles.
/log/*
/tmp/*
!/log/.keep
!/tmp/.keep

# Ignore Byebug command history file.
.byebug_history

# Ignore Spring files.
/spring/*.pid
2.Guardの設定が完了したら、新しいターミナルを開き (1.3.2でやったようにRailsサーバーのターミナルと別にするのがポイントです)、次のコマンドを実行します。
$ bundle exec guard
このguardfileのルールは本チュートリアルに最適化したものなので、例えばコントローラのファイルを変更すると、Guardは即座にそれを検出して、そのコントローラの統合テストを自動実行します。テストを変更ファイルだけではなく、フルで実行したい場合は、guard>プロンプトでReturnキーを押します (このとき、Springサーバーに接続できないなどのエラーが表示されることがあります。問題を修正するには、もう一度Returnキーを押します)。
Guardを終了するにはCtrl-Dキーを押します。