WindowsServerのWDSを使用し、LiveCD LinuxをPXEブートさせる
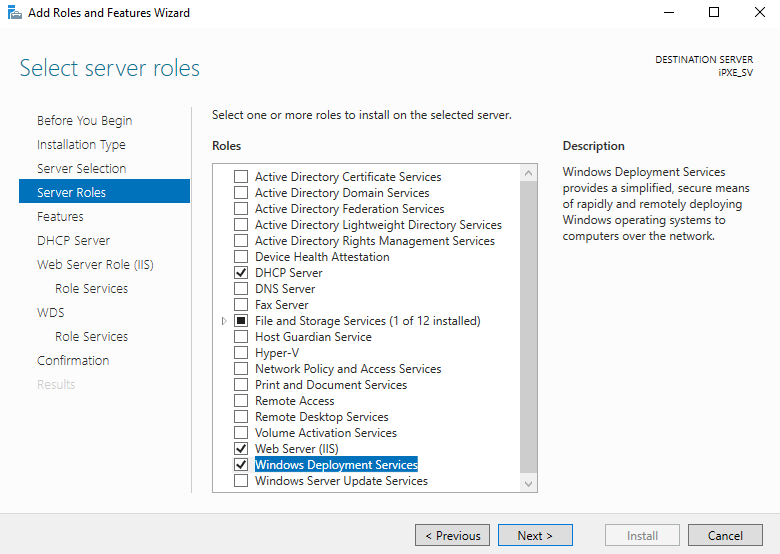
Windows Server 2019(2016でも可能)で、以下のサービスをインストール
・DHCP Server
・Web Server (IIS)
・Windows Deployment Services
undionly.kpxe と memdisk.bin ファイルを https://www.ipxe.org/download/ からダウンロードし、作成する。
menu.ipxeを作成(以下、例)
initrd http://10.0.0.1/Images/CentOSlivecd.iso
chain memdisk.bin iso raw
boot.ipxeを作成(以下、例)
chain --replace --autofree http://10.0.0.1/Images/menu.ipxe ||
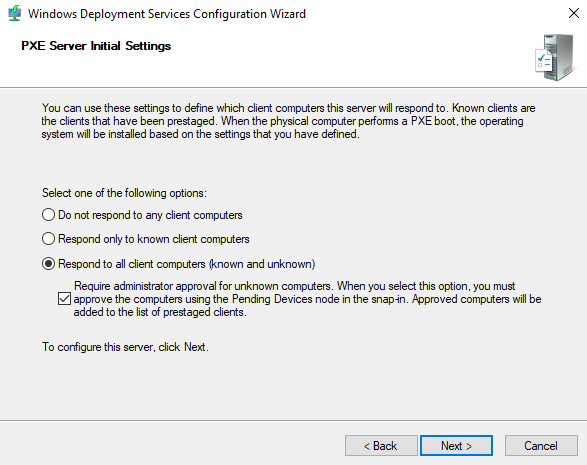
WDSサービスを設定し起動する
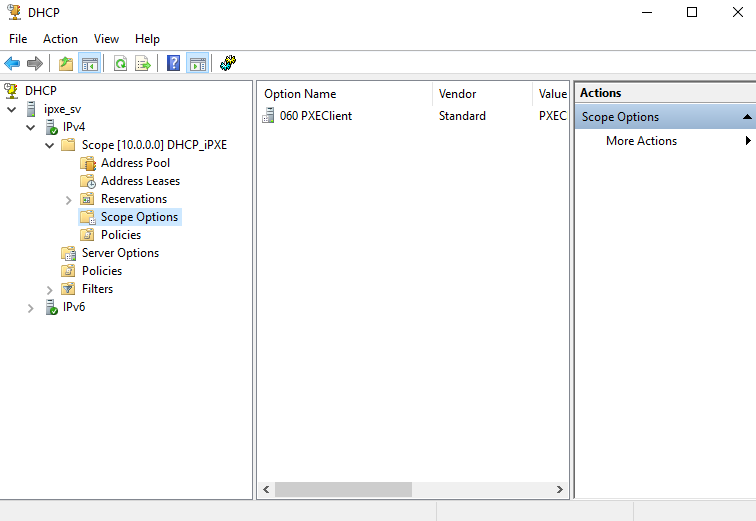
DHCPサービスで、新しいスコープを追加する

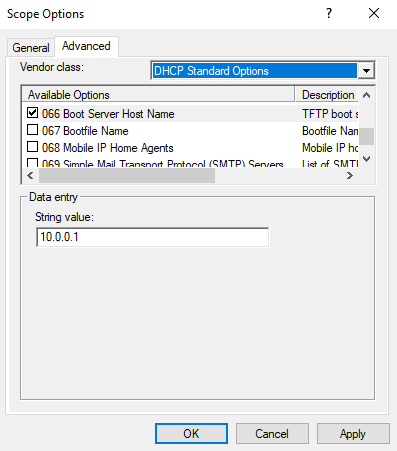
スコープオプションで066 Boot Server Host Nameを追加、サーバーIPを入力する
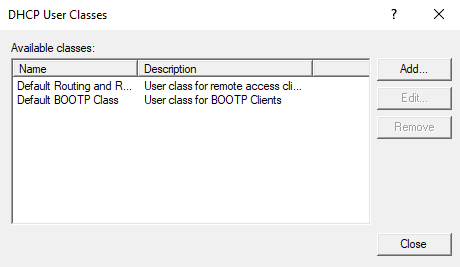
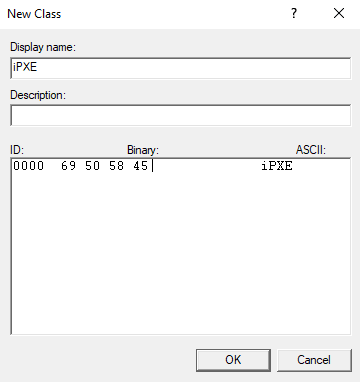
ユーザークラスにiPXEを追加する
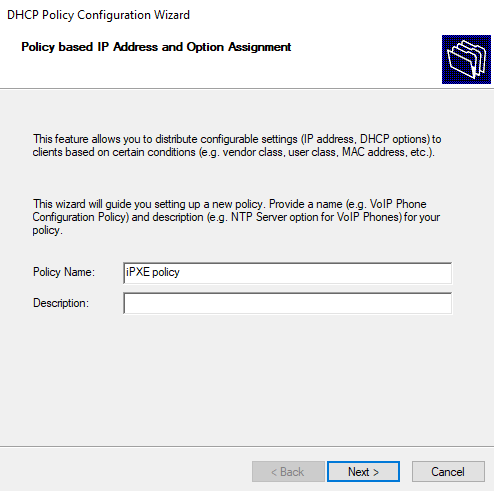
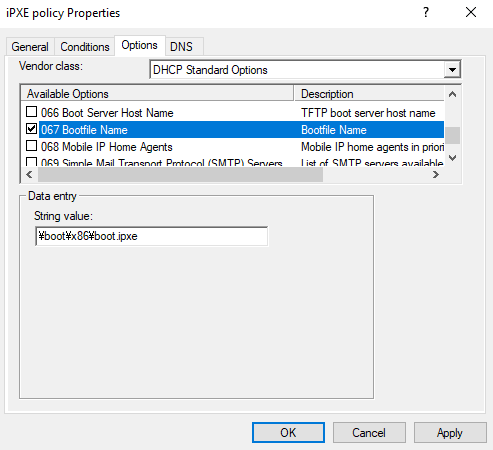
新しいポリシー(iPXE Policy)を追加、User Class, Equals, iPXEおよび067で\Boot\x86\boot.ipxeを設定する

IISのVertial Directoryで、Default Web Siteで以下を追加する

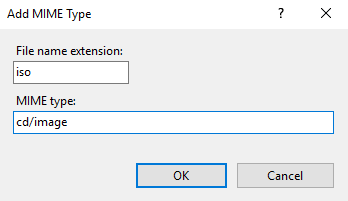
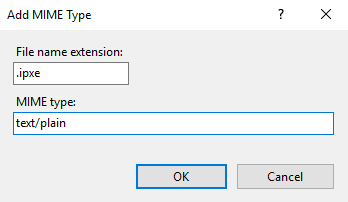
MIMEタイプでisoとipxeを追加する
以下のファイルを \RemoteInstall\Boot\x86 フォルダへコピー
・undionly.kpxe
・boot.ipxe
以下のファイルを、 \RemoteInstall\Boot\x86\Images フォルダへコピー
・menu.ipxe
・memdisk.bin
・起動したいLinuxイメージ.iso
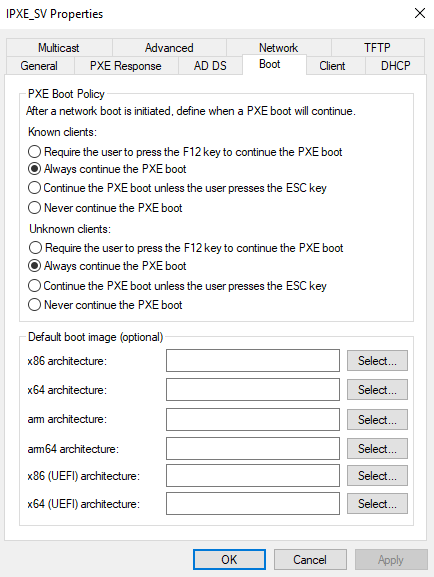
WDS上のWDS serverのプロパティで、以下のように設定する
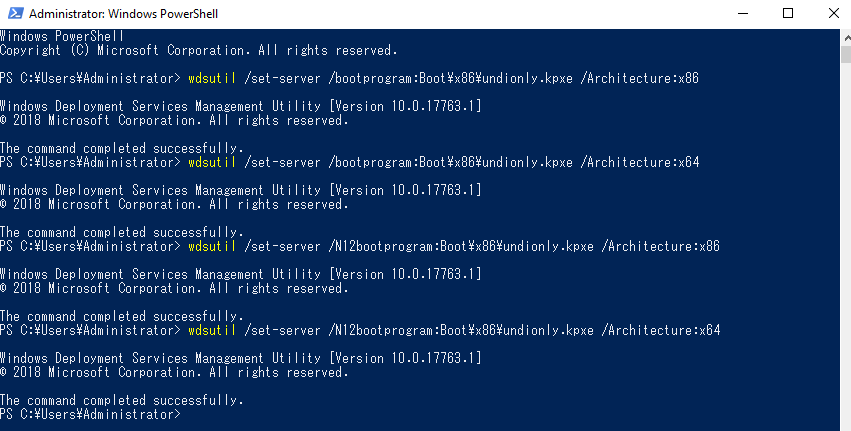
管理者権限のコマンドプロンプトで、以下を実行する
wdsutil /set-server /bootprogram:Boot\x86\undionly.kpxe /Architecture:x86
wdsutil /set-server /bootprogram:Boot\x86\undionly.kpxe /Architecture:x64
wdsutil /set-server /N12bootprogram:Boot\x86\undionly.kpxe /Architecture:x86
wdsutil /set-server /N12bootprogram:Boot\x86\undionly.kpxe /Architecture:x64
That's all :D
OMAKE
menu.ipxeと同じフォルダにpngファイルを入れ、menu.ipxe内に
console --picture background.png
と指定しておくと、iso読込中に、画像表示できる
他には、iso複数指定したい場合は、
以下のようにmenu.ipxeを作成すればOK
set server 10.0.0.1
console --picture background.png
:start
menu === BOOT MENU ===
item --key a Linux1 Linux_1st_image
item --key b Linux2 Linux_2nd_image
choose --default Linux1 --timeout 10000 target && goto ${target}
goto ${selected}
:cancel
echo canceled
:failed
echo FAILED...
goto shell
:back
set submenu-timeout 0
clear submenu-default
goto start
:Linux1
initrd http://${server}/Images/Linux1.iso
chain memdisk.bin iso raw || goto failed
goto start
:Linux2
initrd http://${server}/Images/Linux2.iso
chain memdisk.bin iso raw || goto failed
goto start
...That's all. ☆ Knowledge of zealous young🌙🐰