はじめに
CocoaPodsを使って、FontAwesomeのアイコンを利用する方法を書きます。
「FontAwesomeとは?」の辺りはここでは省略させてもらいます。
Webアプリの方が馴染みがあるかもしれませんが、フリーで利用できるアイコンフォントです。
Swiftでは思っていたより使えるアイコンが少なかったので、たまに重宝しています。
CocoaPodsについて
以前はCocoaPodsに苦手意識があって、CocoaPodsを使わない方法でやっていました。
ずっとこちら↓↓の記事を参考にさせていただいてました。大変感謝しております。
iOSでFont Awesomeを使う
ただ、フォントファイルの設置やInfo.plistの記述、フォントの呼び出し方を毎回忘れるのでw、
徐々に面倒くさくなってしまい、最近ではCocoaPodsを利用することが多いです。
CocoaPodsの導入方法もここでは省略させていただきます。
私はこちら↓↓の記事を参考に導入させていただきました。大変お世話になりました。
CocoaPodsを導入してみた
環境
Xcode 11.2.1
Swift 5.1.2
※私の個人的な好みにより、画面レイアウトにはStoryBoardを使わず、コードのみで記述しています。
StoryBoardを使われる方は色々置き換えていただかなければならない箇所があると思いますので、ご注意ください!!
作るのはこんな感じのもの
新規プロジェクトを作って、ラベル、ボタン、ナビゲーションバーボタンの3つにFontAwesomeのアイコンを設定してみたいと思います。

手順
事前準備
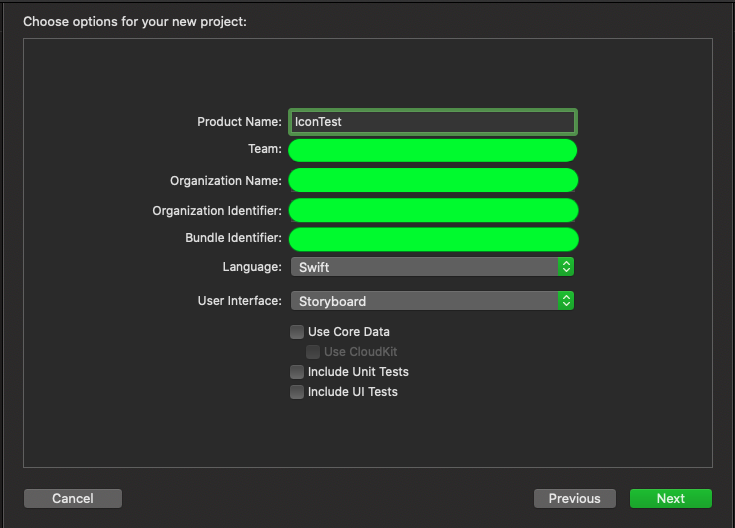
1. 新規プロジェクトで Single View App を作成します。

2. 名前は適当に IconTest と付けておきます。
3. プロジェクトができたら、プロジェクトファイルは一旦閉じておきます。
4. 続いて、ターミナルを起動し、プロジェクト名のディレクトリに移動して「pod init」を実行します。

5. ディレクトリに Podfile ができるので、そのまま「vi Podfile」を実行してターミナル上で編集しても良いですし、テキストエディタで開いて編集してもOKです。

6. Podfile に「pod 'FontAwesome.swift'」の1行を追加し、保存して閉じます。
# Uncomment the next line to define a global platform for your project
# platform :ios, '9.0'

target 'IconTest' do
  # Comment the next line if you don't want to use dynamic frameworks
  use_frameworks!

  # Pods for IconTest

  pod 'FontAwesome.swift'

end
7. ターミナルに戻って、そのままのディレクトリで「pod install」を実行します。
8. コマンドの実行が終わると、ディレクトリ内に「プロジェクト名.xcworkspace」ファイルができているはずなので、それをXcodeで開きます。

画面の作成
1. まず SceneDelegate を開き、「func scene( ...」の部分を以下のように修正、追記します。
import UIKit

class SceneDelegate: UIResponder, UIWindowSceneDelegate {

    var window: UIWindow?

    func scene(_ scene: UIScene, willConnectTo session: UISceneSession, options connectionOptions: UIScene.ConnectionOptions) {
        // guard let _ = (scene as? UIWindowScene) else { return }

        guard let windowScene = (scene as? UIWindowScene) else { return }
        let window = UIWindow(windowScene: windowScene)
        self.window = window
        let rootView = ViewController(nibName: nil, bundle: nil)
        window.rootViewController = UINavigationController(rootViewController: rootView)
        window.makeKeyAndVisible()
    }

    === 以下、省略 ===

}
これは、今回StoryBoardを使わないので、このような記述しています。
起動時に開く View を ViewController に指定し、ナビゲーションバーを付けて開く、といった意味合いです。
2. 続いて、ViewController を開いて、以下のように追記します。解説はコメントで入れておきます。
import UIKit
import FontAwesome_swift    // FontAwesomeを使用することを宣言

class ViewController: UIViewController {
    override func viewDidLoad() {
        super.viewDidLoad()

        // ナビゲーションバーが見やすいように背景色を指定
        view.backgroundColor = UIColor.darkGray

        // ラベルの場合(ブランドというスタイルからGitHubアイコンを指定)
        let gitHubLabel = UILabel()
        gitHubLabel.font = UIFont.fontAwesome(ofSize: 100, style: .brands)
        gitHubLabel.text = String.fontAwesomeIcon(name: .github)
        gitHubLabel.textColor = UIColor.white

        // ボタンの場合(レギュラーというスタイルから閉じるボタンのようなアイコンを指定)
        let closeButton = UIButton()
        closeButton.titleLabel?.font = UIFont.fontAwesome(ofSize: 40, style: .regular)
        closeButton.setTitle(String.fontAwesomeIcon(name: .windowClose), for: .normal)
        closeButton.addTarget(self, action: #selector(didTapCloseButton(_:)), for: .touchUpInside)  // タップした時のアクションを指定

        // ナビゲーションバーボタンの場合(ソリッドスタイルから設定ボタンのような歯車マークのアイコンを指定)
        let attributes = [NSAttributedString.Key.font: UIFont.fontAwesome(ofSize: 20, style: .solid)]
        let settingButton = UIBarButtonItem(title: String.fontAwesomeIcon(name: .cog),
                                            style: .plain,
                                            target: self,
                                            action: #selector(didTapSettingButton(_:)))     // タップした時のアクションを指定
        settingButton.setTitleTextAttributes(attributes, for: .normal)                      // 通常状態のボタン
        settingButton.setTitleTextAttributes(attributes, for: .highlighted)                 // タップされてハイライトした時のボタン
        navigationItem.setRightBarButton(settingButton, animated: true)                     // ナビゲーションバーの右ボタンに設置

        // オートレイアウトで配置を指定
        view.addSubview(gitHubLabel)
        view.addSubview(closeButton)

        gitHubLabel.translatesAutoresizingMaskIntoConstraints = false
        closeButton.translatesAutoresizingMaskIntoConstraints = false

        gitHubLabel.centerXAnchor.constraint(equalTo: view.centerXAnchor, constant: -80).isActive = true
        gitHubLabel.centerYAnchor.constraint(equalTo: view.centerYAnchor, constant: 0).isActive = true

        closeButton.centerXAnchor.constraint(equalTo: view.centerXAnchor, constant: 80).isActive = true
        closeButton.centerYAnchor.constraint(equalTo: view.centerYAnchor, constant: 0).isActive = true
    }

    // closeButtonがタップされた時の動作
    @objc private func didTapCloseButton(_ sender: UIButton) {
        print("Did tap close button.")
    }

    // settingButtonがタップされた時の動作
    @objc private func didTapSettingButton(_ sender: UIButton) {
        print("Did tap setting button.")
    }
}
あとはビルドすれば、最初のスクショのような画面ができあがるはずです。
最後に
Pod 提供元のGitHubがこちら↓↓です。
FontAwesome.swift
FontAwesomeの公式とは違うと思っているのですが、この辺りはあまり詳しくないのでよく分かりませんw
GitHubのReadmeにツールバーのボタンや画像として使う方法なども載っていますので、
(英語ですが)そちらもご興味あれば参考にしてみてください。
最後までご覧いただき、ありがとうございました!
至らない点や無駄な記述など、お気付きの点はご指摘いただけるとありがたいです!