📝 概要
この記事では、Stripe CLI を利用して Stripe Checkout を簡単にセットアップし、以下の決済フローを構築する方法を解説します
- サブスクリプション方式(継続課金)
- 買い切り方式(One-Time Payment)
さらに、Firebase Firestore を連携して、決済後のデータ管理を行う実践例もご紹介します。
🎯 この記事の目標
- Stripe CLI を使って簡単に決済フローをセットアップする
- サブスク方式 と 買い切り方式 の決済ロジックを理解する
- Firebase Firestore を利用した決済後のデータ更新方法を学ぶ
🔧 必要なツールとセットアップ
- Stripe CLI のインストール
公式ドキュメントを参考に、Stripe CLI をダウンロードしてセットアップします:
Stripe CLI ダウンロード
セットアップ完了後、以下のコマンドを実行してログインします
stripe login
- プロダクトと価格の作成
プロダクトを作成
まず、Stripe CLI を使ってプロダクトを作成します
stripe products create --name="Basic"
価格を作成
プロダクトID(例: prod_RMlR8SYY4Y4Oex)を指定して価格を設定します。
サブスク方式(月額課金)の例
stripe prices create \
  -d "product=prod_RMlR8SYY4Y4Oex" \
  -d "unit_amount=1000" \
  -d "currency=jpy" \
  -d "recurring[interval]=month"
買い切り方式(1回払い)の例
stripe prices create \
  -d "product=prod_RMlR8SYY4Y4Oex" \
  -d "unit_amount=5000" \
  -d "currency=jpy"
作成済みプロダクト一覧を確認
stripe products list
🌐 決済フローの構築
Webhook シークレットキーの設定
Stripe Checkout の Webhook イベントを受け取るために、Webhook シークレットキーを設定します。
Webhook シークレットキーの取得
ローカル環境で次のコマンドを実行
stripe listen --forward-to http://localhost:4242/webhook
実行結果に表示されるキー(例: whsec_xxxxxxx)を環境変数ファイル .envに保存します。
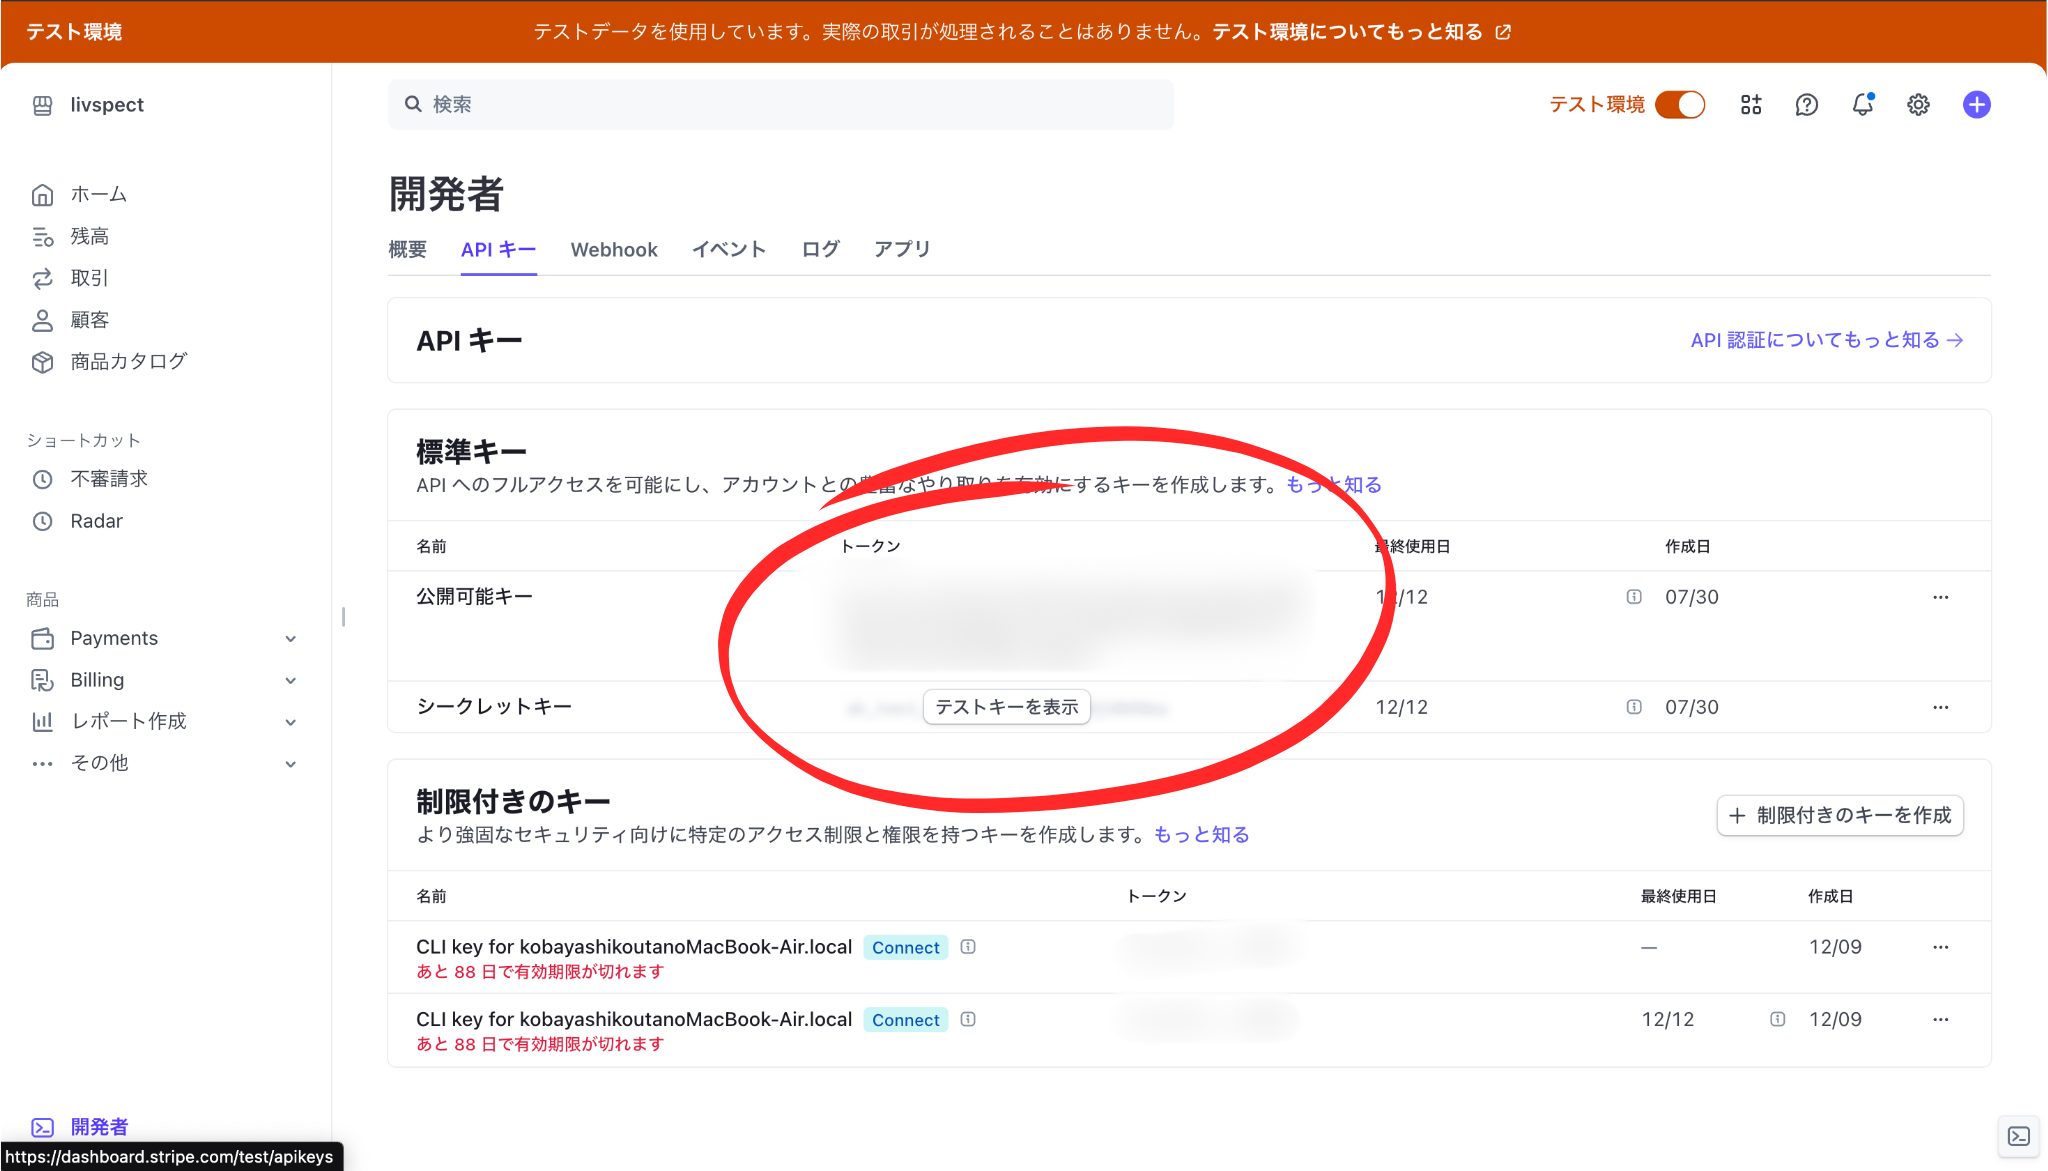
また、以下の画像のように Stripe ダッシュボードから公開可能キー (pk_test_xxxxxxx)とシークレットキー (sk_test_xxxxxxx) を取得します。
サーバー構築
以下は、Node.js と Express を使った基本的なサーバー構成です。
このコードは、GitHubリポジトリから引用しています。
const express = require('express');
const bodyParser = require('body-parser');
const stripe = require('stripe')(process.env.STRIPE_SECRET_KEY);

const app = express();
app.use(bodyParser.json());

// Checkout セッションを作成
app.post('/create-checkout-session', async (req, res) => {
  const session = await stripe.checkout.sessions.create({
    payment_method_types: ['card'],
    mode: 'subscription', // "payment" に変更すると買い切り方式
    line_items: [
      {
        price: 'price_xxxxxxxxxxxx', // Stripe CLI で作成した Price ID を指定
        quantity: 1,
      },
    ],
    success_url: 'http://localhost:4242/success',
    cancel_url: 'http://localhost:4242/cancel',
  });

  res.json({ id: session.id });
});

// Webhook ハンドラ
app.post('/webhook', express.raw({ type: 'application/json' }), (req, res) => {
  const sig = req.headers['stripe-signature'];
  let event;

  try {
    event = stripe.webhooks.constructEvent(req.body, sig, process.env.STRIPE_ENDPOINT_SECRET);
  } catch (err) {
    console.error('Webhook Error:', err.message);
    return res.status(400).send(`Webhook Error: ${err.message}`);
  }

  if (event.type === 'checkout.session.completed') {
    const session = event.data.object;
    console.log('Payment successful:', session);
  }

  res.status(200).send('Received');
});

app.listen(4242, () => console.log('Server is running on port 4242'));
📂 Firestore と連携
決済成功後に Firebase Firestore を利用してユーザー情報を更新する例です。
このコードも GitHubリポジトリから引用しています。
const admin = require('firebase-admin');
admin.initializeApp();
const db = admin.firestore();

app.post('/webhook', express.raw({ type: 'application/json' }), async (req, res) => {
  const sig = req.headers['stripe-signature'];
  let event;

  try {
    event = stripe.webhooks.constructEvent(req.body, sig, process.env.STRIPE_ENDPOINT_SECRET);
  } catch (err) {
    console.error('Webhook Error:', err.message);
    return res.status(400).send(`Webhook Error: ${err.message}`);
  }

  if (event.type === 'checkout.session.completed') {
    const session = event.data.object;
    const userId = session.metadata.userId; // 必要ならセッションに userId を渡す

    try {
      const userRef = db.collection('Users').doc(userId);
      await userRef.update({
        activeSubscription: true,
      });
      console.log('User subscription updated');
    } catch (err) {
      console.error('Firestore Error:', err);
    }
  }

  res.status(200).send('Received');
});
💡 Stripe CLI コマンドの活用
以下のコマンドを使いこなすことで、Stripe の開発がさらに効率化します
# プロダクトの作成
stripe products create --name="Basic"

# 価格の作成
stripe prices create \
  -d "product=prod_RMlR8SYY4Y4Oex" \
  -d "unit_amount=1000" \
  -d "currency=jpy" \
  -d "recurring[interval]=month"

# Webhook イベントを受信
stripe listen --forward-to http://localhost:4242/webhook

# プロダクト一覧の確認
stripe products list
🌟 この記事の GitHub リポジトリ
この記事で使用したコードは、以下のリポジトリで公開しています。
セットアップや動作確認にぜひ活用してください! 🚀
🔗 参考リンク
-
Stripe公式ドキュメント
-
GitHubリポジトリ
-
Firebase関連
-
Node.js関連
