Next.js + TypeScript での Payjp.js実装してみた
クレカ支払い実装をpayjp.jsとNext.js + TypeScriptで実装する機会があったので、備忘録として記事にしてみました。
🚀 今回の実装に関わるライブラリ一覧
| ライブラリ名 | バージョン |
|---|---|
| next | 14.2.15 |
| react | 18.3.1 |
| typedef-payjp-js | 1.2.0 |
| @types/react | 18.3.12 |
| @types/react-dom | 18.3.1 |
| @types/node | 20.17.7 |
| typescript | 5.7.2 |
| tailwindcss | 3.4.15 |
💳 Pay.jpとpayjp.jsとは?
Pay.jp は日本国内向けのオンライン決済サービスで、クレジットカード決済、サブスクリプション、Apple Pay / Google Pay などを安全かつ簡単に組み込めます。
その中核となるフロントエンドライブラリが payjp.js です。主な役割は:
- クレジットカード情報を トークン化
- 自社サーバにカード番号を送らず、安全に決済
- PCI DSS準拠のセキュアな決済フロー実現
🔄 クレジットカード決済の仕組み
- ユーザーがWebサイトでクレジットカード情報を入力
- フロント側(payjp.js)がカード情報をトークン化
- バックエンドにトークンを送信
- バックエンドがトークンを使ってpay.jp APIに課金リクエスト
- Pay.jpがカード会社に与信確認
- 承認されると決済完了
この仕組みを使うことで、加盟店側はカード情報を直接保存・処理しなくてもよく、PCI DSSへの対応負担を大幅に軽減できます。
⚙️ Next.js + TypeScriptでのpayjp.js実装手順
1. ライブラリと型定義のインストール
npm install @payjp/payjp-js payjp
npm install --save-dev @types/payjp typedef-payjp-js
2. 環境変数の設定
.env.local に公開鍵と秘密鍵を設定:
NEXT_PUBLIC_PAYJP_PUBLIC_KEY=pk_test_xxxxxxxxx
PAYJP_SECRET_KEY=sk_test_xxxxxxxxx
3. カード入力フォームの作成(app/checkout/page.tsx)
"use client";

import React, { useEffect, useRef, useState } from "react";
import type PayjpJs from "typedef-payjp-js";

declare global {
  interface Window {
    Payjp?: (key: string) => PayjpJs.Payjp;
    __payjpInstance__?: PayjpJs.Payjp; // グローバルにインスタンス保持
  }
}

export default function CheckoutPage() {
  const [payjp, setPayjp] = useState<PayjpJs.Payjp | null>(null);
  const [ready, setReady] = useState(false);

  const numberRef = useRef<PayjpJs.PayjpElement | null>(null);
  const expiryRef = useRef<PayjpJs.PayjpElement | null>(null);
  const cvcRef = useRef<PayjpJs.PayjpElement | null>(null);

  // Payjpインスタンスを1回だけ作る
  useEffect(() => {
    if (typeof window === "undefined" || !window.Payjp) return;

    if (!window.__payjpInstance__) {
      const publicKey = "pk_test_token";
      window.__payjpInstance__ = window.Payjp(publicKey);
    }

    setPayjp(window.__payjpInstance__!);
    setReady(true);
  }, []);

  // カード要素を1回だけmountする
  useEffect(() => {
    if (!payjp || !ready) return;

    const elements = payjp.elements();

    if (!numberRef.current) {
      const numberElement = elements.create("cardNumber");
      numberElement.mount("#number-form");
      numberRef.current = numberElement;
    }

    if (!expiryRef.current) {
      const expiryElement = elements.create("cardExpiry");
      expiryElement.mount("#expiry-form");
      expiryRef.current = expiryElement;
    }

    if (!cvcRef.current) {
      const cvcElement = elements.create("cardCvc");
      cvcElement.mount("#cvc-form");
      cvcRef.current = cvcElement;
    }

    return () => {
      numberRef.current?.unmount();
      expiryRef.current?.unmount();
      cvcRef.current?.unmount();
      numberRef.current = null;
      expiryRef.current = null;
      cvcRef.current = null;
    };
  }, [payjp, ready]);

  const getToken = async () => {
    if (!payjp || !numberRef.current) {
      alert("カードフォームが初期化されていません");
      return;
    }

    const result = await payjp.createToken(numberRef.current);
    if (result.error) {
      alert(`エラー: ${result.error.message}`);
    } else {
      alert(`Token取得成功: ${result.id}`);
      // サーバーへの送信処理はここで書く
    }
  };

  return (
    <div className="max-w-md mx-auto p-4 bg-white rounded-lg shadow">
      <h2 className="text-xl font-bold mb-4">お支払い情報</h2>

      <div className="mb-4">
        <label className="block text-sm font-medium mb-1">カード番号</label>
        <div id="number-form" className="p-3 border rounded bg-gray-50" />
      </div>

      <div className="flex gap-4 mb-4">
        <div className="flex-1">
          <label className="block text-sm font-medium mb-1">有効期限</label>
          <div id="expiry-form" className="p-3 border rounded bg-gray-50" />
        </div>
        <div className="flex-1">
          <label className="block text-sm font-medium mb-1">セキュリティコード</label>
          <div id="cvc-form" className="p-3 border rounded bg-gray-50" />
        </div>
      </div>

      <button
        onClick={getToken}
        className="w-full p-3 bg-blue-600 hover:bg-blue-700 text-white rounded-md font-medium"
      >
        ¥3,000を支払う
      </button>
    </div>
  );
}
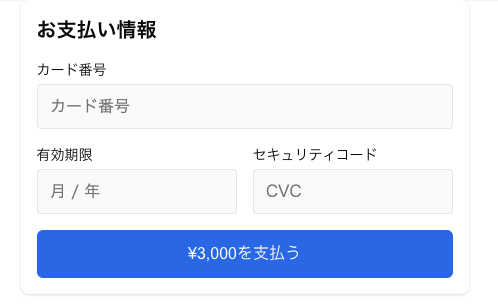
完成したUI
🛡️ セキュリティと実装上の注意点
必ず実装すべき対策
- ✅ 環境変数管理: 公開鍵・秘密鍵を
.envファイルで管理し、コードに直書きしない - ✅ サーバーサイド検証: 金額・商品情報をサーバー側で再検証(フロントの値を信用しない)
- ✅ HTTPS強制: TLS1.2以上を使用し、すべての通信を暗号化
- ✅ CORS設定: 適切なオリジン制限でクロスサイトリクエストを保護
- ✅ エラーハンドリング: ユーザーに分かりやすいエラーメッセージを表示
- ✅ 認証と認可: 支払い処理前にユーザーの認証状態を確認
推奨対策
- ✅ 不正検知: 不自然な購入パターンの監視
- ✅ ロギング: 決済処理の適切なログ記録(個人情報は除く)
- ✅ タイムアウト設定: 長時間の処理を防止
- ✅ Webhookの活用: 非同期決済状態の更新に対応
- ✅ 依存パッケージ管理: 定期的なアップデートと脆弱性チェック