概要
VueなどでSPAを構築する場合、大体こんな感じのメニューがあると思います。
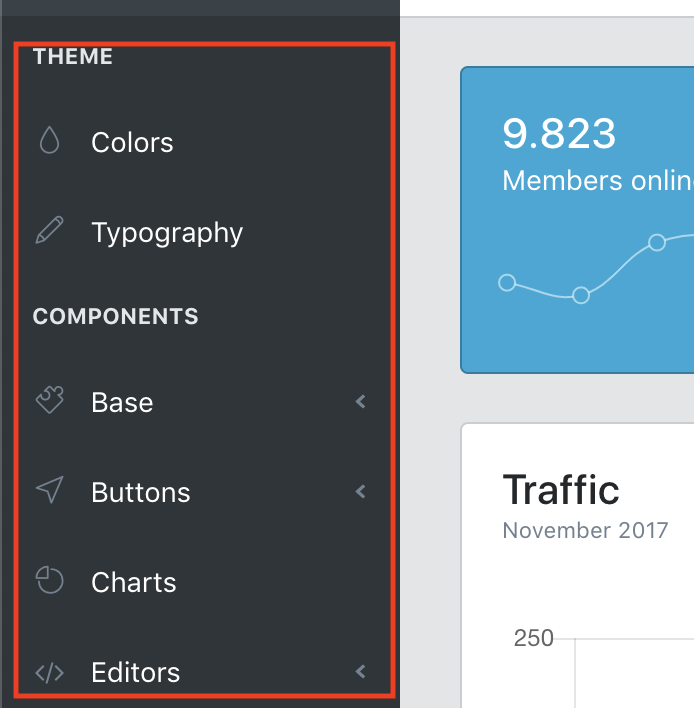
クリックされた項目でURLをルーティングして内容を変化させるやつですね。
権限制御を行う
このメニューで、以下のような権限制御を行う場合の例をご紹介します。
(※バックエンドについては今回省略します。)
- ユーザーのロールに設定された権限によりメニューの項目を出し分けたい
- 使用する権限を持っていない場合、項目は非表示とする
- URL直打ちでも開けないようにしたい
環境
- Vue 2.6
- VueRouter 3.0
- Vuex 3.0
- Vue Router Multiguard
- VueRouterのbeforeEnternに使用可能なヘルパー関数を用意してくれます
- URLごとにナビゲーションガードを行うために使用します
- https://github.com/atanas-angelov-dev/vue-router-multiguard#readme
テーブル
テーブルはこんな感じです
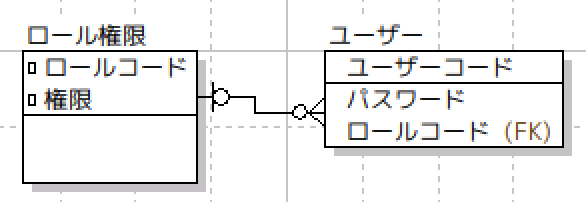
ユーザーはロールを1つ持ち、ロールは権限を複数持つ構成となっています。
ユーザーテーブルのレコード例
| ユーザーコード | パスワード | ロールコード |
|---|---|---|
| admin | ******* | admin |
| user1 | ******* | writer |
| user2 | ******* | readonly |
ロール権限のレコード例
| ロールコード | 権限 |
|---|---|
| admin | menu1 |
| admin | menu2 |
| admin | menu3 |
| writer | menu1 |
| writer | menu2 |
| readonly | menu1 |
権限を取得
ストア
- ユーザーに紐付いた権限を保持します。
action-types.js
export const GET_MENU_FLGS = "GET_MENU_FLGS";

export const ACTION = {
  GET_MENU_FLGS
};
mutation-types.js
export const UPDATE = "UPDATE";

export const MUTATION = {
  UPDATE
};
menu-store.js
import { MUTATION } from "./mutation-types";
import { ACTION } from "./action-types";
import axios from "axios";

const state = {
  //権限
  menuFlgs: {}
};

const getters = {
  menuFlgs: state => {
    return state.menuFlgs;
  }
};

const actions = {
  //ログインユーザーのメニュー使用権限を取得します。
  async [ACTION.GET_MENU_FLGS]({ commit }) {
    await axios
      .get("menus")
      .then(res => {
        commit(MUTATION.UPDATE, {
          menuFlgs: res.data
        });
      })
      .catch(err => {
        throw err;
      });
  }
};

const mutations = {
  [MUTATION.UPDATE](state, { menuFlgs }) {
    state.menuFlgs = menuFlgs;
  }
};

export default {
  state: state,
  getters: getters,
  actions: actions,
  mutations: mutations
};
権限のJSONはこのようなイメージです。
menuFlgs: [
  {
    menu1: true
  },
  {
    menu2: true
  },
  {
    menu3: true
  }
];
VueRouter
- ①URLごとに権限を持っているかを判定します
- 権限がない場合は遷移をキャンセルします
- ②ストアに権限が保持されていない場合、取得します
router.js
import Vue from "vue";
import Router from "vue-router";
import multiguard from "vue-router-multiguard";
import store from "/store/store.js";
import { GET_MENU_FLGS } from "/store/menu/action-types";

Vue.use(Router);

/* *
 * ①ナビゲーションガード
 * */
const menu1Guard = (to, from, next) => {
  if (store.getters.menuFlgs.menu1) {
    next();
  } else {
    next(false);
  }
};

const menu2Guard = (to, from, next) => {
  if (store.getters.menuFlgs.menu2) {
    next();
  } else {
    next(false);
  }
};

const menu3Guard = (to, from, next) => {
  if (store.getters.menuFlgs.menu3) {
    next();
  } else {
    next(false);
  }
};

/* *
 * ルート定義
 * */
const router = new Router({
  routes: [
    {
      path: "/menu1",
      //①
      beforeEnter: multiguard([menu1Guard]),
      component: () => import("@/components/pages/menu1/menu1Template")
    },
    {
      path: "/menu2",
      //①
      beforeEnter: multiguard([menu2Guard]),
      component: () => import("@/components/pages/menu2/menu2Template")
    },
    {
      path: "/menu3",
      //ナビゲーションガードを複数設定することもできます。
      beforeEnter: multiguard([menu1Guard, menu2Guard, menu3Guard]),
      component: () => import("@/components/pages/menu3/menu3Template")
    }
  ]
});


/* *
 * ②権限を取得します。
 * */
router.beforeEach(async (to, from, next) => {
  if (!Object.keys(store.getters.menuFlgs).length) {
    await store.dispatch(GET_MENU_FLGS);
  }

  next();
});

export default router;
メニュー表示
- ①メニューを配列で定義しておきます。
- ②ストアの権限から、使用可能なメニューのみ表示します
<template>
  <v-list>
    <v-list-tile v-for="menu in availableMenus" :key="menu.id">
      <router-link :to="menu.url">{{menu.title}}</router-link>
    </v-list-tile>
  </v-list>
</template>

<script>
export default {
  data() {
    return {
      //①メニューマスタ
      menuMaster: [
        {
          id: 1,
          title: "メニュー1",
          url: "/menu1"
        },
        {
          id: 2,
          title: "メニュー2",
          url: "/menu2"
        },
        {
          id: 3,
          title: "メニュー3",
          url: "/menu3"
        }
      ]
    };
  },
  computed: {
    //②使用可能なメニューで絞り込みます
    availableMenus() {
      let available = [];
      for (const menu of this.menuMaster) {
        if (this.isAvailable(menu.url)) {
          available.push(menu);
        }
      }
      return available;
    }
  },
  methods: {
    //ログインユーザーがメニューの使用権限を持っているかを判定します。
    isAvailable(url) {
      const menuName = url.slice(1);
      return this.$store.getters.menuFlgs[menuName];
    }
  }
};
</script>
まとめ
- Vue Router Multiguardを使うとナビゲーションガードが扱いやすくなりました
- 権限をどのタイミングで取得するかは賛否両論ありそうです