はじめに
システムを作る上で認証機能はどんなシステムでも利用する。認証機能を作るのは手間だし、マイクロサービス化する際の課題になったりする。どうしようかなぁと思いつつ、Auth0という便利なものがあるので、実際に触ってみることにしました。
アジェンダ
1.Auth0とは
2.Auth0の認証キー作成
3.Reactのアプリケーション作成
1. Auth0とは
Auth0とはIDaaS(Identity as a Service)。IDaaSとはログイン管理やSSO、アクセス制御などの認証・認可をクラウド上で実施できるサービスのこと。
2. Auth0の認証キー作成
①Auth0のアカウントを作成する。
Auth0の公式サイトから作成してください。
■Auth0のサインアップ
②Auth0の統合認証アプリケーションを作成する。
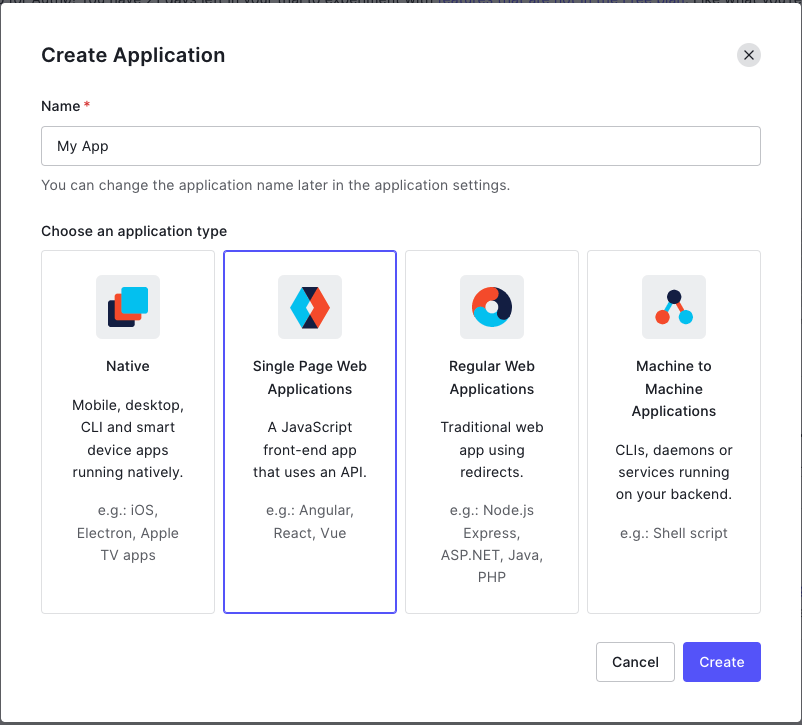
2-1. アプリケーションを作成する。
「Create Application」でアプリケーションを作成する

2-2. 認証時の処理を記載する。
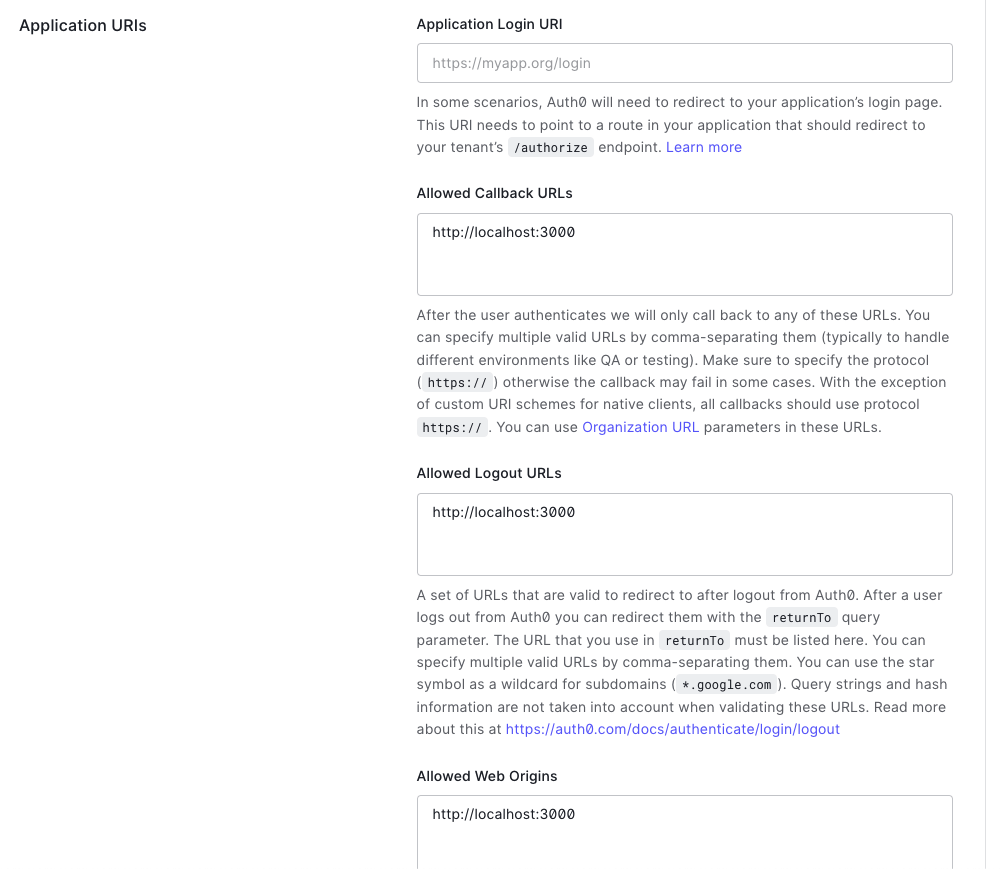
「Settings」タブにURLを設定する。設定内容は下記の通り。
・Allowed Web Origins:「http://localhost:3000」
・Allowed Callback URLs:「http://localhost:3000」
・Allowed Logout URLs:「http://localhost:3000」
2-3. 認証キーを控える
「Settings」タブのBasic Information項目にある「Domain」と「Client ID」をメモしておいてください。後ほど利用します。
3. Reactのアプリケーションを作成する。
3-1. Reactのプロジェクトを作成する。
Reactのプロジェクトを作成する。今回は「auth0_tutorial」で作成します。
Success! Created auth0_tutorial at /Users/kawamurakouji/develop/react/auth0_tutorial
Inside that directory, you can run several commands:

  npm start
    Starts the development server.

  npm run build
    Bundles the app into static files for production.

  npm test
    Starts the test runner.

  npm run eject
    Removes this tool and copies build dependencies, configuration files
    and scripts into the app directory. If you do this, you can’t go back!

We suggest that you begin by typing:

  cd auth0_tutorial
  npm start

Happy hacking!
3-2. Auth0のライブラリをインストールする。
~/develop/react $ yarn add @auth0/auth0-react
yarn add v1.22.5
warning package-lock.json found. Your project contains lock files generated by tools other than Yarn. It is advised not to mix package managers in order to avoid resolution inconsistencies caused by unsynchronized lock files. To clear this warning, remove package-lock.json.
[1/4] 🔍  Resolving packages...
[2/4] 🚚  Fetching packages...
[3/4] 🔗  Linking dependencies...
warning " > @auth0/auth0-react@1.9.0" has unmet peer dependency "react@^16.11.0 || ^17".
warning " > @auth0/auth0-react@1.9.0" has unmet peer dependency "react-dom@^16.11.0 || ^17".
[4/4] 🔨  Building fresh packages...
success Saved lockfile.
success Saved 10 new dependencies.
info Direct dependencies
└─ @auth0/auth0-react@1.9.0
info All dependencies
├─ @auth0/auth0-react@1.9.0
├─ @auth0/auth0-spa-js@1.21.0
├─ abortcontroller-polyfill@1.7.3
├─ browser-tabs-lock@1.2.15
├─ core-js@3.21.1
├─ es-cookie@1.3.2
├─ fast-text-encoding@1.0.3
├─ lodash@4.17.21
├─ promise-polyfill@8.2.3
└─ unfetch@4.2.0
✨  Done in 15.86s.
3-3. ソースファイル修正
現在のファイルは下記。
~/develop/react/auth0_tutorial $ tree -I node_modules
.
├── README.md
├── package-lock.json
├── package.json
├── public
│   ├── favicon.ico
│   ├── index.html
│   ├── logo192.png
│   ├── logo512.png
│   ├── manifest.json
│   └── robots.txt
├── src
│   ├── App.css
│   ├── App.test.tsx
│   ├── App.tsx
│   ├── index.css
│   ├── index.tsx
│   ├── logo.svg
│   ├── react-app-env.d.ts
│   ├── reportWebVitals.ts
│   └── setupTests.ts
└── tsconfig.json

2 directories, 19 files
import React from "react";
import ReactDOM from "react-dom";
import "./index.css";
import App from "./App";
import reportWebVitals from "./reportWebVitals";
import { Auth0Provider } from "@auth0/auth0-react";

ReactDOM.render(
  <Auth0Provider
    domain=""
    clientId=""
    redirectUri={window.location.origin}
  >
    <React.StrictMode>
      <App />
    </React.StrictMode>
  </Auth0Provider>,
  document.getElementById("root")
);

reportWebVitals();
import React from "react";
import logo from "./logo.svg";
import "./App.css";
import { useAuth0 } from "@auth0/auth0-react";

function App() {
  const { isAuthenticated, loginWithRedirect, logout } = useAuth0();

  return (
    <div className="App">
      <header className="App-header">
        {!isAuthenticated ? (
          <button onClick={loginWithRedirect}>ログイン</button>
        ) : (
          <button
            onClick={() => {
              logout({ returnTo: window.location.origin });
            }}
          >
            Log out
          </button>
        )}
      </header>
    </div>
  );
}

export default App;
4. プロジェクト実行
4-1. プロジェクト実行
~/develop/react/auth0_tutorial $ yarn start
Compiled successfully!

You can now view auth0_tutorial in the browser.

  Local:            http://localhost:3000
  On Your Network:  http://192.168.0.134:3000

Note that the development build is not optimized.
To create a production build, use npm run build.

assets by path static/js/*.js 1.76 MiB
  asset static/js/bundle.js 1.75 MiB [emitted] (name: main) 1 related asset
  asset static/js/node_modules_web-vitals_dist_web-vitals_js.chunk.js 6.93 KiB [emitted] 1 related asset
asset index.html 1.67 KiB [emitted]
asset asset-manifest.json 458 bytes [emitted]
cached modules 1.64 MiB [cached] 104 modules
runtime modules 31.7 KiB 16 modules
webpack 5.72.0 compiled successfully in 2071 ms
Files successfully emitted, waiting for typecheck results...
Issues checking in progress...
No issues found.
4-2. ブラウザでアクセス
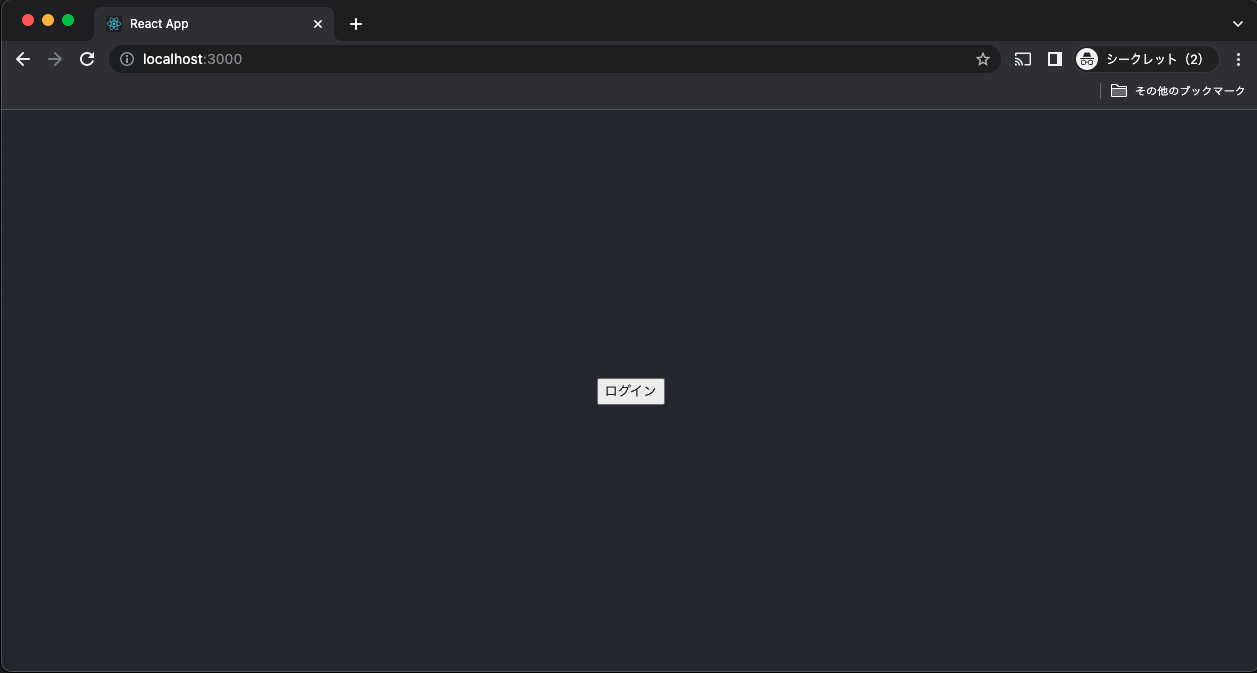
ログインボタンが表示されることを確認。ログインボタンを押す。

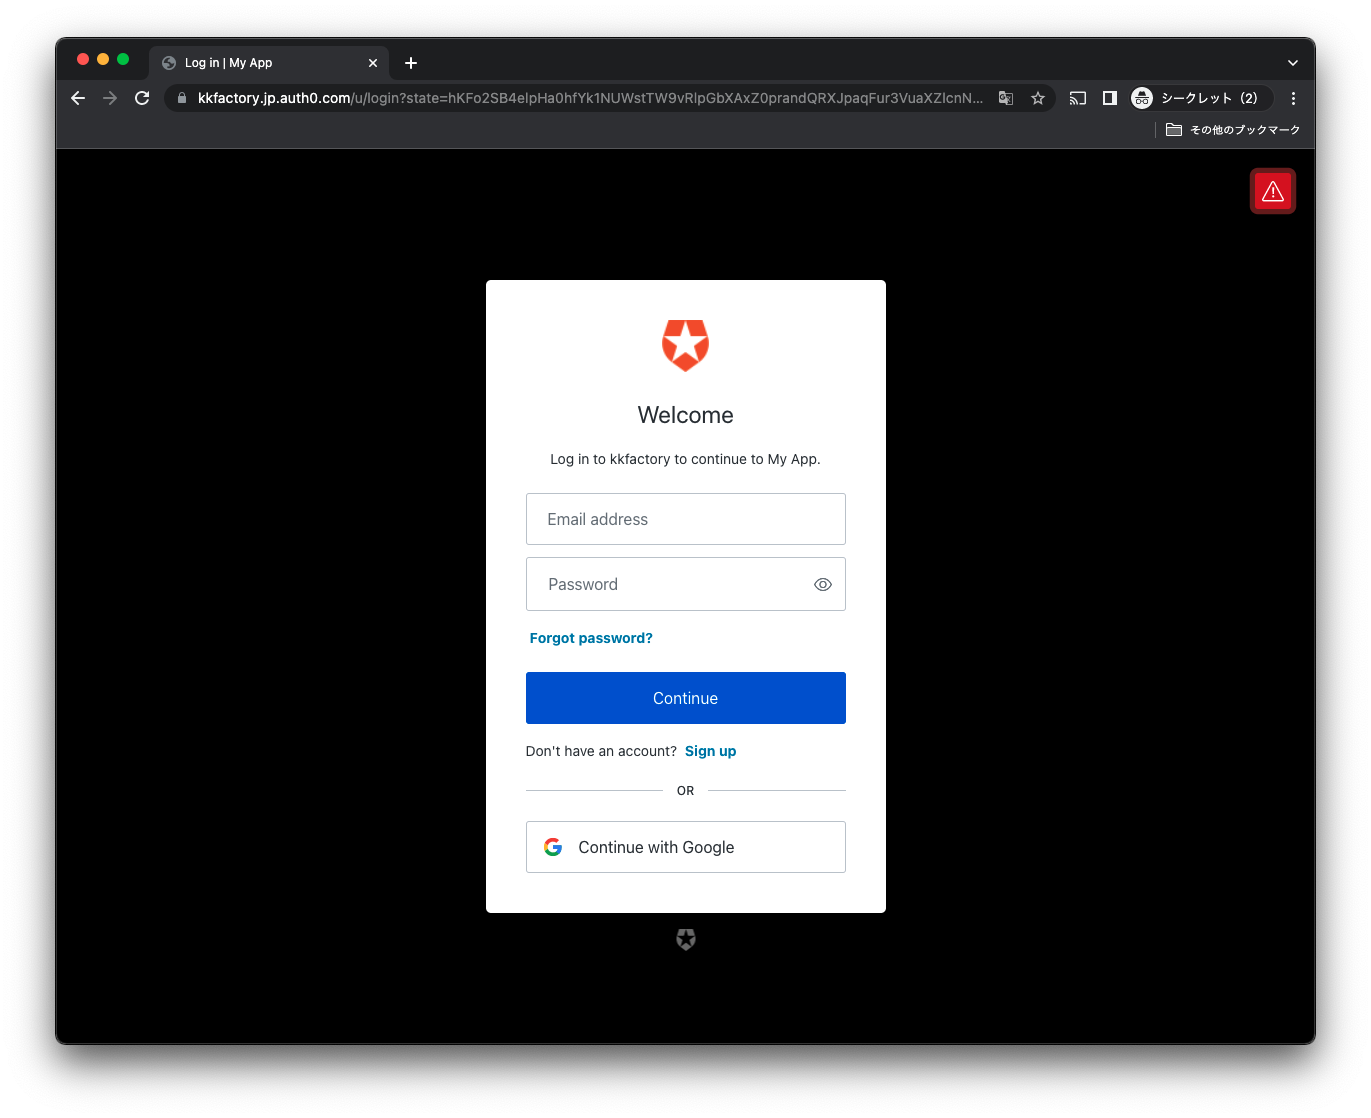
ログイン画面が表示される。アカウントが未作成の場合は、「Sign up」からユーザアカウントを作成する。

■参考サイト


