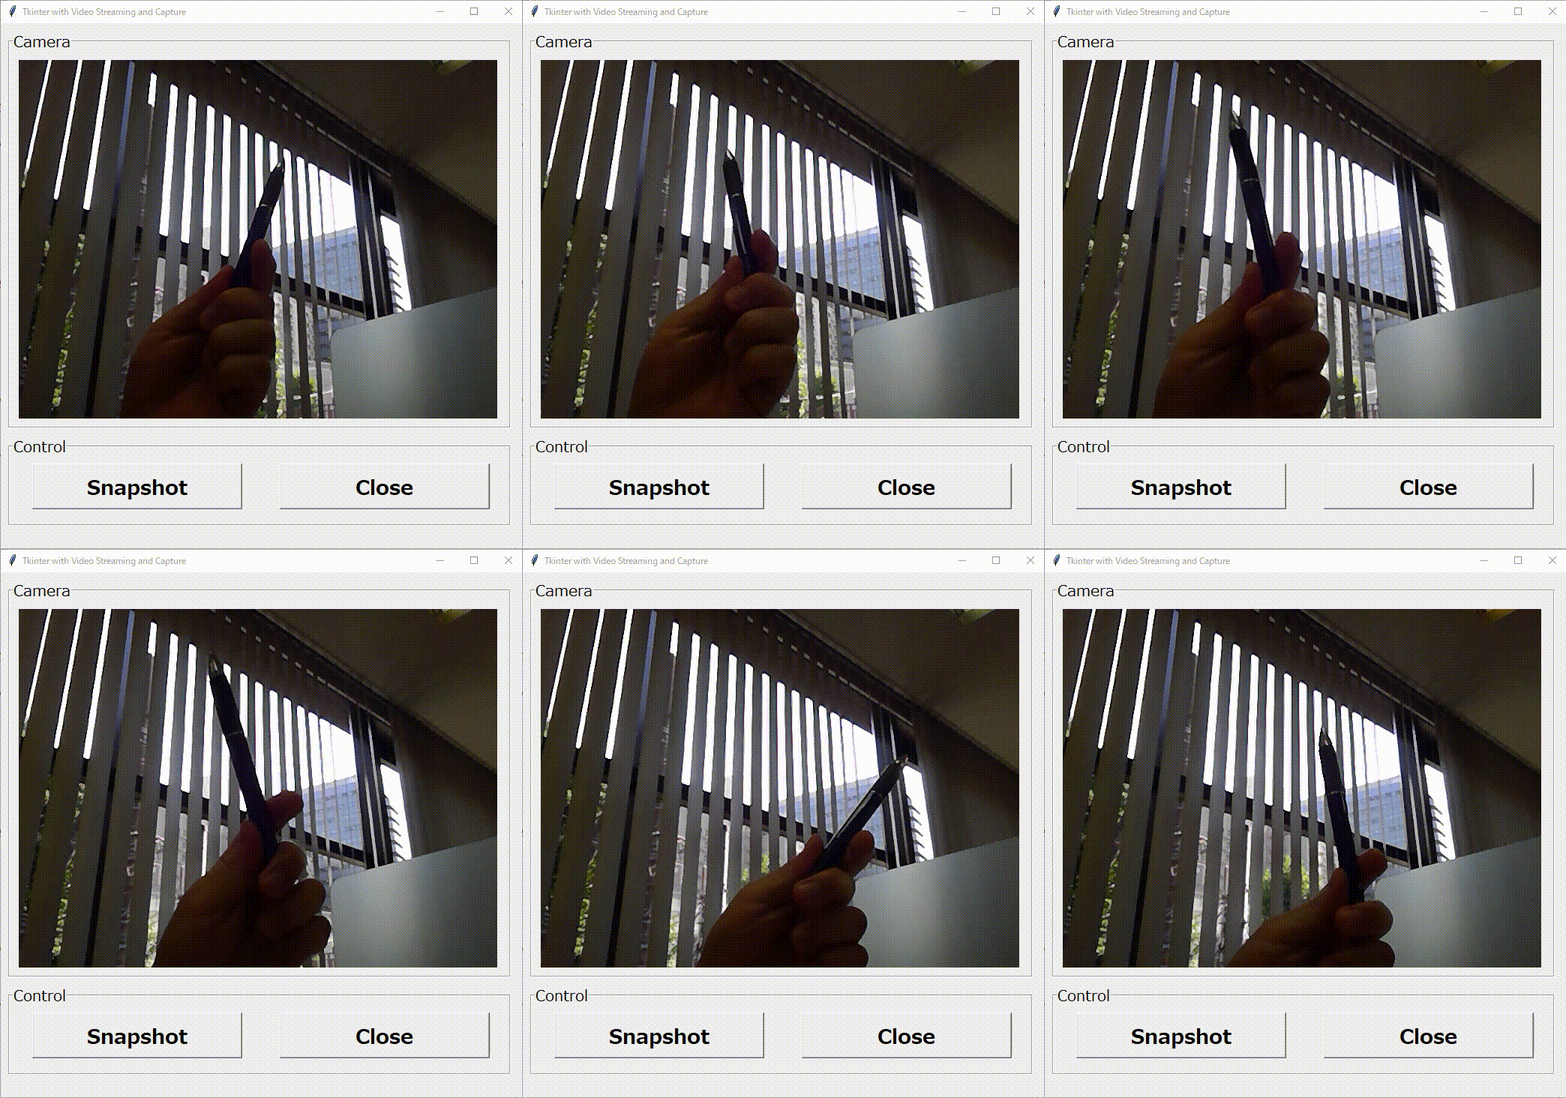
1.やりたいこと
カメラから撮れた映像をGUIの画面上に表示します。
カメラのシャッターを押すと、スナップショットを取る機能も追加します。
2.プログラムの内容
- OpenCVのVideoCapture()で、カメラのインスタンスを立てます。
- 映像(画像)を表示するスクリーンとしてTkinterのCanvasを使います。
- OpenCVのread()を利用し、カメラの停止画(Frame)を取得します。
- 3.で取得したカメラの停止画(Frame)をTkinterのCanvasに表示します。
- Pythonのupdate()とafter()を利用し、3-4のループを回します。(=Canvasに画像を表示する。これを一秒間数十回行うので、動画に見えます。)
3.設計
3.1. カメラのインスタンス
VideoCapture()を利用し、カメラのインスタンス vcapを立てます。
video_source = 0 内臓カメラ
video_source = 1 USBカメラ
当時に、Videoの画像のwidthとheightも取得します。
self.vcap = cv2.VideoCapture( video_source )
self.width = self.vcap.get( cv2.CAP_PROP_FRAME_WIDTH )
self.height = self.vcap.get( cv2.CAP_PROP_FRAME_HEIGHT )
3.2. TkinterのCanvas
Tkinterを利用し、Canvasインスタンスを立てます。
self.canvas1 = tk.Canvas(self.frame_cam)
self.canvas1.configure( width= self.width, height=self.height)
self.canvas1.grid(column= 0, row=0,padx = 10, pady=10)
3.3. read()でカメラの停止画を取得
OpenCVのread()を利用して、vcapの画像を取得します。取得したものをframeに格納します。
BGRで取得したものをRGBに変換し、frameに改めて格納します。
_, frame = self.vcap.read()
frame = cv2.cvtColor(frame, cv2.COLOR_BGR2RGB)
3.4.カメラの停止画をTkinterのCanvasに表示します。
一旦、取得したframeをPillowを利用し、photoに変換します。理由は、CanvasにはPillowで処理した画像しか表示できないからです。(多分)
そして、そのphotoをCanvasに表示します。
# OpenCV frame -> Pillow Photo
self.photo = PIL.ImageTk.PhotoImage(image = PIL.Image.fromarray(frame))

# self.photo -> Canvas
self.canvas1.create_image(0,0, image= self.photo, anchor = tk.NW)
3.5.Pythonのupdate()とafter()を利用し、3-4のループを回します。
delayでupdate周期を設定します。単位はミリ秒です。今回は15ミリ秒と設定します。
このdelayの値を変更したとき、動画のFPSがどう変わるか確かめてください。
update()をメインの部分に、after()を画像をCanvasに表示する部分に挿入します。
self.delay = 15 #[mili seconds]
self.update()

# ...............
def update(self):
    #Get a frame from the video source
     _, frame = self.vcap.read()

    frame = cv2.cvtColor(frame, cv2.COLOR_BGR2RGB)
    self.photo = PIL.ImageTk.PhotoImage(image = PIL.Image.fromarray(frame))

    #self.photo -> Canvas
    self.canvas1.create_image(0,0, image= self.photo, anchor = tk.NW)

    self.master.after(self.delay, self.update)
3.6.スナップショット
スナップショットは、OpenCVのread()で習得したframeをRGBに変換した後、cv2.imwriteでファイルとして保存することで処理します。
    def press_snapshot_button(self):
        # Get a frame from the video source
        _, frame = self.vcap.read()
        frame1 = cv2.cvtColor(frame, cv2.COLOR_BGR2RGB)

        cv2.imwrite( "frame-" + time.strftime( "%Y-%d-%m-%H-%M-%S" ) + ".jpg",
                     cv2.cvtColor( frame1, cv2.COLOR_BGR2RGB ) )
4.実行結果
5.まとめ
- カメラから撮れた映像をGUIの画面上に表示できた。
- OpenCVとTkinterを利用します。
- Pythonのupdate(), after()を利用することが肝要です。
6.参考資料
1.Python OpenCV - show a video in a Tkinter window
2.【ラズベリーパイ】カメラモジュールの映像をTkinterに表示する方法
3.Python, OpenCVで動画を読み込み(ファイル・カメラ映像)
4.改造版: Pythonのtkinterでブロック崩しを作ってみた。
7.プログラムコード
import tkinter as tk
from tkinter import ttk
import cv2
import PIL.Image, PIL.ImageTk
from tkinter import font
import time


class Application(tk.Frame):
    def __init__(self,master, video_source=0):
        super().__init__(master)

        self.master.geometry("700x700")
        self.master.title("Tkinter with Video Streaming and Capture")

        # ---------------------------------------------------------
        # Font
        # ---------------------------------------------------------
        self.font_frame = font.Font( family="Meiryo UI", size=15, weight="normal" )
        self.font_btn_big = font.Font( family="Meiryo UI", size=20, weight="bold" )
        self.font_btn_small = font.Font( family="Meiryo UI", size=15, weight="bold" )

        self.font_lbl_bigger = font.Font( family="Meiryo UI", size=45, weight="bold" )
        self.font_lbl_big = font.Font( family="Meiryo UI", size=30, weight="bold" )
        self.font_lbl_middle = font.Font( family="Meiryo UI", size=15, weight="bold" )
        self.font_lbl_small = font.Font( family="Meiryo UI", size=12, weight="normal" )

        # ---------------------------------------------------------
        # Open the video source
        # ---------------------------------------------------------

        self.vcap = cv2.VideoCapture( video_source )
        self.width = self.vcap.get( cv2.CAP_PROP_FRAME_WIDTH )
        self.height = self.vcap.get( cv2.CAP_PROP_FRAME_HEIGHT )

        # ---------------------------------------------------------
        # Widget
        # ---------------------------------------------------------

        self.create_widgets()

        # ---------------------------------------------------------
        # Canvas Update
        # ---------------------------------------------------------

        self.delay = 15 #[mili seconds]
        self.update()


    def create_widgets(self):

        #Frame_Camera
        self.frame_cam = tk.LabelFrame(self.master, text = 'Camera', font=self.font_frame)
        self.frame_cam.place(x = 10, y = 10)
        self.frame_cam.configure(width = self.width+30, height = self.height+50)
        self.frame_cam.grid_propagate(0)

        #Canvas
        self.canvas1 = tk.Canvas(self.frame_cam)
        self.canvas1.configure( width= self.width, height=self.height)
        self.canvas1.grid(column= 0, row=0,padx = 10, pady=10)

        # Frame_Button
        self.frame_btn = tk.LabelFrame( self.master, text='Control', font=self.font_frame )
        self.frame_btn.place( x=10, y=550 )
        self.frame_btn.configure( width=self.width + 30, height=120 )
        self.frame_btn.grid_propagate( 0 )

        #Snapshot Button
        self.btn_snapshot = tk.Button( self.frame_btn, text='Snapshot', font=self.font_btn_big)
        self.btn_snapshot.configure(width = 15, height = 1, command=self.press_snapshot_button)
        self.btn_snapshot.grid(column=0, row=0, padx=30, pady= 10)

        # Close
        self.btn_close = tk.Button( self.frame_btn, text='Close', font=self.font_btn_big )
        self.btn_close.configure( width=15, height=1, command=self.press_close_button )
        self.btn_close.grid( column=1, row=0, padx=20, pady=10 )


    def update(self):
        #Get a frame from the video source
        _, frame = self.vcap.read()

        frame = cv2.cvtColor(frame, cv2.COLOR_BGR2RGB)
        self.photo = PIL.ImageTk.PhotoImage(image = PIL.Image.fromarray(frame))

        #self.photo -> Canvas
        self.canvas1.create_image(0,0, image= self.photo, anchor = tk.NW)

        self.master.after(self.delay, self.update)

    def press_snapshot_button(self):
        # Get a frame from the video source
        _, frame = self.vcap.read()

        frame1 = cv2.cvtColor(frame, cv2.COLOR_BGR2RGB)

        cv2.imwrite( "frame-" + time.strftime( "%Y-%d-%m-%H-%M-%S" ) + ".jpg",
                     cv2.cvtColor( frame1, cv2.COLOR_BGR2RGB ) )

    def press_close_button(self):
        self.master.destroy()
        self.vcap.release()


def main():
    root = tk.Tk()
    app = Application(master=root)#Inherit
    app.mainloop()

if __name__ == "__main__":
    main()
