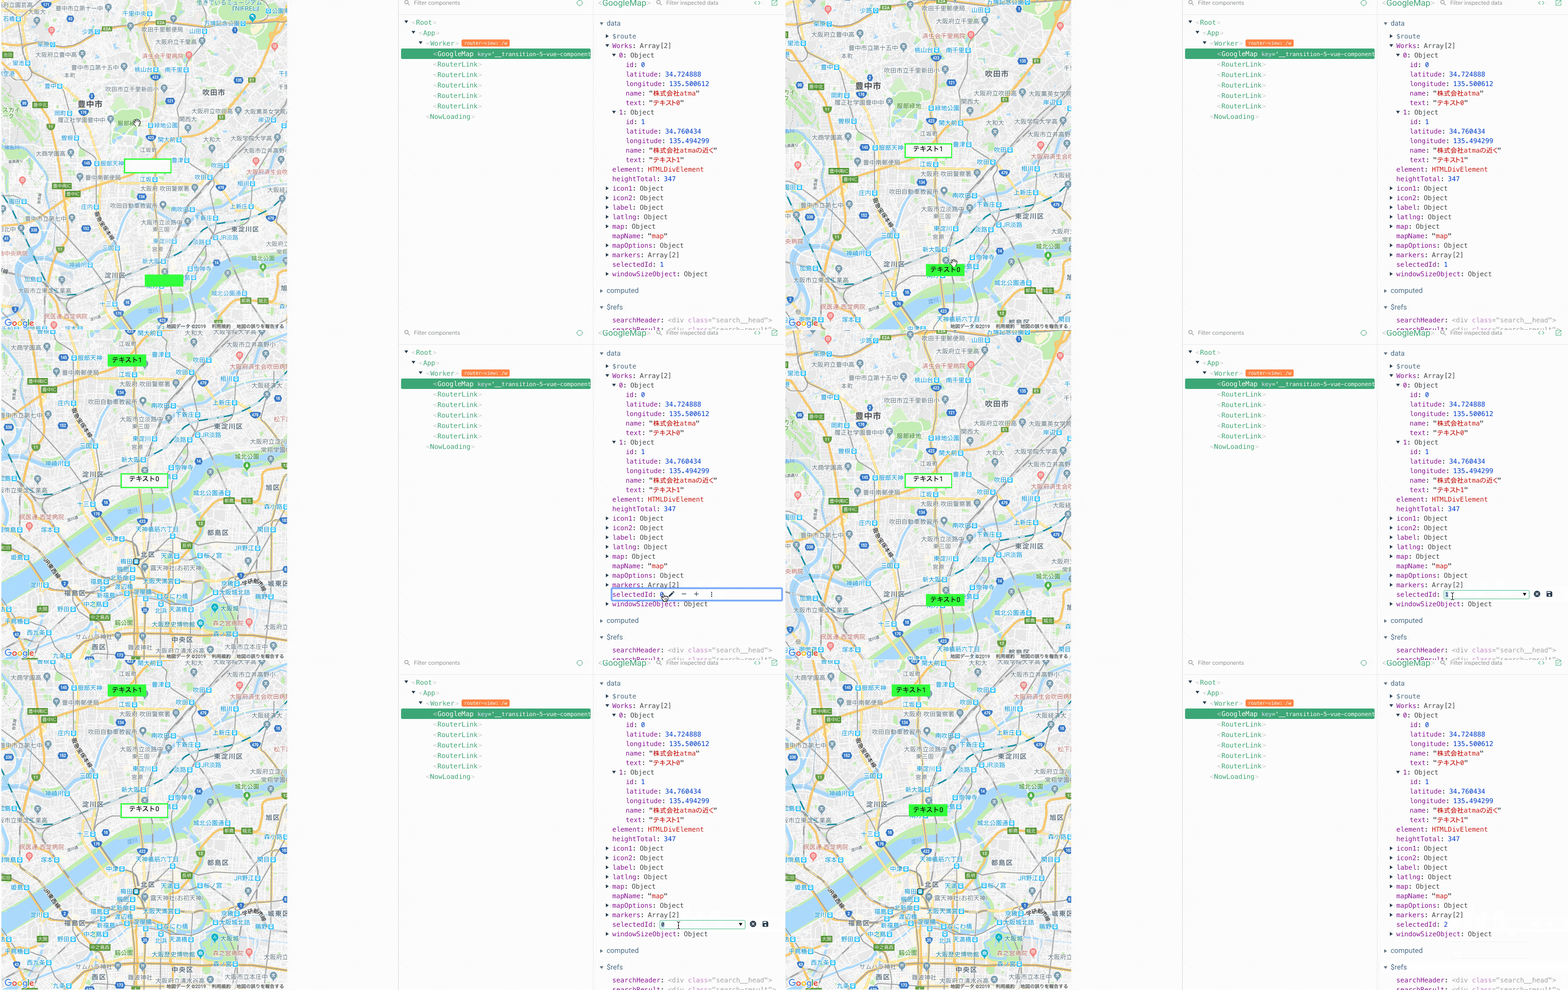
経緯
はじめまして
こーたです。
今回GoogleMapを触る機会があり、
今後のAPI変更に耐えられるような実装にしたかった為
vue2-google-mapといったライブラリを使わずにVue.jsにgooglemapを実装しました。
制作物
要件
- 配列を読み込む
- 配列を元にマーカーを表示
- 配列が更新された場合、マーカーを再描画
- 選択されたマーカーの状態を保持し、マーカーの画像を変更
- 選択されたマーカーの中心へ移動
配列はこのようなものを想定しています。
        {
          name: 'atma株式会社',
          latitude: 34.724888,
          longitude: 135.500612,
          text: 'テキスト0',
          id: 0
        }, {
          name: 'atma株式会社の近く',
          latitude: 34.760434,
          longitude: 135.494299,
          text: 'テキスト1',
          id: 1
        }
上から順に
- マーカー名 (無くても問題ない)
- 緯度
- 経度
- 表示するテキスト
- 管理用ID
となっています。
準備
<script src="https://maps.googleapis.com/maps/api/js?key=<%= process.env.VUE_APP_GOOGLE_MAP_KEY %>"></script>
index.htmlにJSを記載します。
簡単に非同期で外部jsが読み込めるscriptjsというライブラリを使用することをオススメしますが、
今回は速度を重視していなかったので使用していません。
https://www.npmjs.com/package/scriptjs
API keyはenvから読むようにしています。
必要に応じて変更して下さい。
<template>
  <div :id="mapName" class="google-map" />
</template>

<style scoped>
.google-map {
  width: 100%;
  height: 500px;
  margin: 0 auto;
  background: gray;
}
</style>
これでマップの表示は完了です。
CSSは適当にいじって下さい。
実装
まずdata()にてグローバル変数を定義します。
(今回は配列を直接dataにて宣言してしまいます。)
<script>
  name: 'GoogleMap',
  data() {
    return {
      mapName: 'map',
      element: null,
      latlng: null,
      mapOptions: null,
      map: null,
      label: null,
      icon1: null,
      icon2: null,
      array: [
        {
          name: 'atma株式会社',
          latitude: 34.724888,
          longitude: 135.500612,
          text: 'テキスト0',
          id: 0
        }, {
          name: 'atma株式会社の近く',
          latitude: 34.760434,
          longitude: 135.494299,
          text: 'テキスト1',
          id: 1
        }
      ],
      markers: [],
      selectedId: null,
    }
  },
</script>
次にmethodsに関数を宣言して行きます。
関数の内容はコメントに記載してあるので参考になればと思います。
<script>
  methods: {
    /**
     * googlemapを初期化
     */
    loadMap(){
      this.element = document.getElementById(this.mapName)
      this.latlng = new google.maps.LatLng(34.724888, 135.500612) //デフォルト中心座標
      this.mapOptions = {
        zoom: 12, //表示時の地図の大きさ
        center: this.latlng, //表示時の地図の中心座標
        gestureHandling: 'greedy',
        scaleControl: false,
        mapTypeControl: false,
        zoomControl: false,
        streetViewControl: false,
        fullscreenControl: false,
      }
      this.map = new google.maps.Map(this.element, this.mapOptions)
      this.label = {
        color: '#000', //色
        fontFamily: 'Arial', //フォント指定
        fontSize: '13px', //フォントのサイズ指定
        fontWeight: 'bold' //文字の太さ
      }
      this.icon1 = {
        url: '/img/pin1.svg', //マーカーの画像
          scaledSize: new google.maps.Size(81, 36), //マーカーの画像サイズ(pixel)
          size: new google.maps.Size(81, 36),
        }
      this.icon2 = {
          url: '/img/pin2.svg', //マーカーの画像
          scaledSize: new google.maps.Size(100, 41), //マーカーの画像サイズ(pixel)
          size: new google.maps.Size(100, 41),
      }
    },
    /**
     * マーカーの設定
     */
    setMarkers() {
      this.array.forEach((coord) => {
        const position = new google.maps.LatLng(coord.latitude, coord.longitude)
        const marker = new google.maps.Marker({
          position,
          label: coord.text,
          map: this.map,
          icon: this.icon1,
        })
        marker.metadata = {id: coord.id}
        //マーカーがクリックされた場合
        marker.addListener('click', (event) => {
          // マーカーにIDを代入
          this.selectedId = marker.metadata.id
        })
        this.markers.push(marker)
      })
    },
    /**
     * 全てのマーカーを削除
     */
    deleteMarker() {
      this.markers.forEach(marker => {
        marker.setMap(null)
        marker = null
      })
      this.markers = []
    },
    /**
     * 全てのマーカーのアイコンをicon1に設定
     */
    setIconToAllMarkers() {
      this.markers.forEach(marker => {
        marker.setIcon(this.icon1)
        marker = null
      })
    },
  },
</script>
最後に上記にて宣言した関数の実行タイミングを書いて行きます。
selectedId(id)に関しては
this.setIconToAllMarkers()全てのマーカーのアイコンをicon1に設定した後、
forEachで選択されたマーカーのIDを探し、
マーカーのアイコンをicon2に変えた後、panToでそのアイコンへ移動しています。
<script>
watch: {
    array: {
      handler () {
        this.deleteMarker()
        this.setMarkers()
      },
      deep: true,
    },
    selectedId(id) {
      // iconを全てicon0に設定
      this.setIconToAllMarkers()
      this.markers.forEach(marker => {
        if (marker.metadata.id === id) {
          marker.setIcon(this.icon2)
          this.map.panTo(new google.maps.LatLng(marker.position.lat(), marker.position.lng()))
        }
      })
    }
  },
  mounted() {
    this.loadMap()
    this.setMarkers()
  },
</script>
完成
このように実装できているかと思います。
最後に
GoogleMapsApiの仕様を理解するところで色々詰まった部分がありましたが、
理解してしまえば簡単に実装できるように感じました。
以上GoogleMapをライブラリを使わずにVue.jsに実装でした!

