@koshi_life です。
GoogleDrive上で教師データ作成のためのラベル付作業を行いたく、
Rubyでフォルダやスプレッドシートの扱い方を調べたので備忘します。
利用ライブラリ
Rubyだと Google製の公式ライブラリ googleapis/google-api-ruby-client も提供されていますが、情報が比較的多く、シンプルで使いやすかったのを理由に gimite/google-drive-ruby を選びました。
- Google製のライブラリは 以下、Quickstartで試しました。
前提
- ruby: v2.6
- google-drive-ruby: v3.0.2
利用準備
- GCPの利用プロジェクトの APIコンソール画面で
Drive APIとGoogle Sheets APIを有効化 - 認証キー(OAuth クライアント ID)を作成 参考:Authorizationのページ
- ドキュメントオーナーは個人にしたくなったので、コマンドラインでの実行ユーザも兼ねてGoogleユーザを作成。サービスアカウント認証も対応していたが、各ドキュメントのサービスアカウントに対してシェア設定が必要になるので
OAuth クライアント IDでの認証とした。
- ドキュメントオーナーは個人にしたくなったので、コマンドラインでの実行ユーザも兼ねてGoogleユーザを作成。サービスアカウント認証も対応していたが、各ドキュメントのサービスアカウントに対してシェア設定が必要になるので
client_id, client_secret を手に入れたら、以下キーを持つjsonを作成する。
{
    "client_id": "xxx.apps.googleusercontent.com",
    "client_secret": "xxx"
}
Gemファイルに以下、1行を追加して、bundle install でライブラリをインストールする。
gem 'google_drive'
使い方
少しづつコードに継ぎ足しをしながら理解を深めます。
Step1: 初回実行時に認可、リフレッシュトークンを取得
require 'google_drive'

session = GoogleDrive::Session.from_config('config.json')
2行のみGoogleDrive::Sessionの初期化まで書きました。
実行してみます。
$ bundle exec ruby hello1.rb

1. Open this page:
https://accounts.google.com/o/oauth2/auth?access_type=offline&client_id=xxx.apps.googleusercontent.com&redirect_uri=urn:ietf:wg:oauth:2.0:oob&response_type=code&scope=https://www.googleapis.com/auth/drive%20https://spreadsheets.google.com/feeds/

2. Enter the authorization code shown in the page: [★☆★☆★ここに貼り付け★☆★☆★]
ユーザ認証用のURLが表示されるのでブラウザで開き認可します。
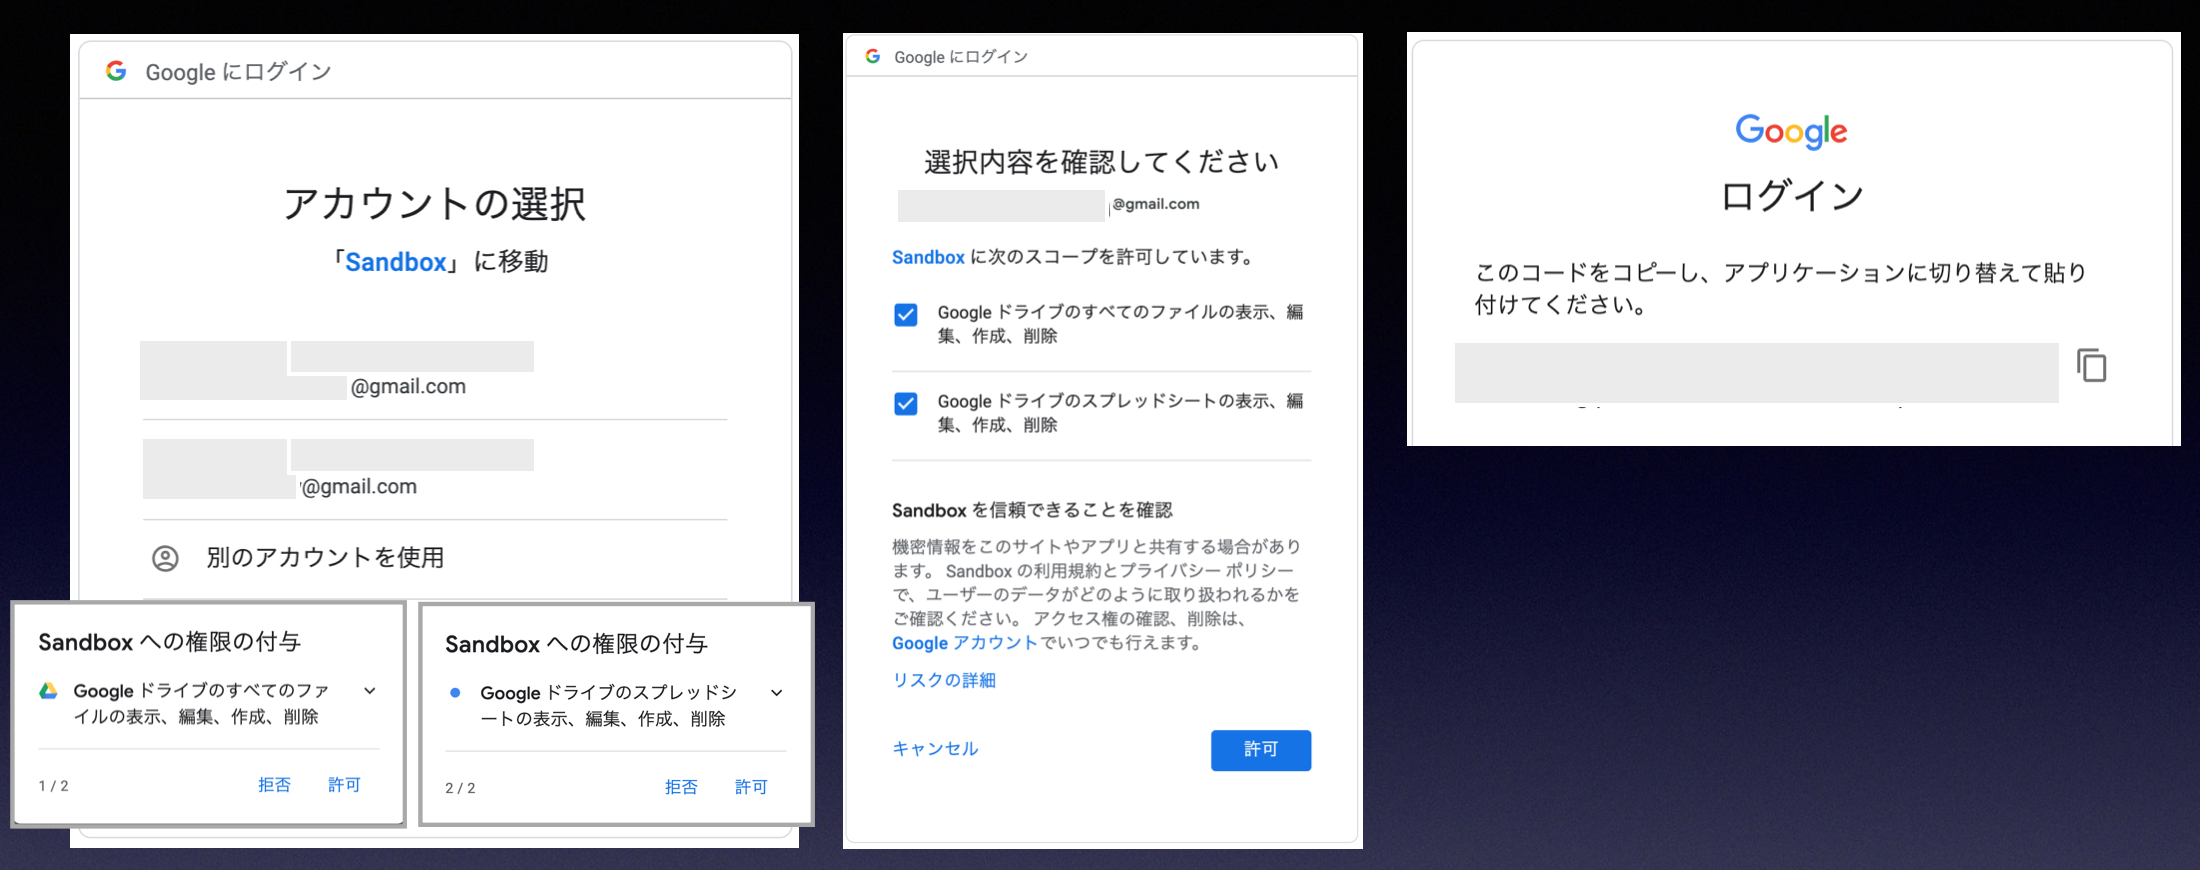
最後の画面のコードをコンソールに貼り付けてEnter押下で完了です。
実行後 config.json を見ると、
scope と refresh_token の項目が追加されていることがわかります。
スコープの内容はこちら参照。
{
  "client_id": "xxx.apps.googleusercontent.com",
  "client_secret": "xxx",
  "scope": [
    "https://www.googleapis.com/auth/drive",
    "https://spreadsheets.google.com/feeds/"
  ],
  "refresh_token": "xxx"
}
2回目の実行からはブラウザ開いて認証&認可は不要になります。
ライブラリ側でこのリフレッシュトークンを元にアクセストークンが作られ、APIアクセスしていると思われる。
Step2: 何も考えずファイル一覧
一旦動いている感を得たいので、session 取得後に1行追加して実行してみる。
require 'google_drive'

session = GoogleDrive::Session.from_config('config.json')
session.files.each { |file| p file.title }
$ bundle exec ruby hello2.rb
"a"
"b"
"c"
...
動いている感を得られました。
Step3: サブフォルダを作ってみる
require 'google_drive'

session = GoogleDrive::Session.from_config('config.json')

# Google DriveでFolderを選択した時のURLの末尾のハッシュ値
# 例: https://drive.google.com/drive/folders/xxx_xxx_xxx
root_folder_id = 'xxx_xxx_xxx'
sub_folder_name = 'hello_sub_folder'

root_folder = session.collection_by_id(root_folder_id)
sub_folder = root_folder.create_subfolder(sub_folder_name)

puts "SUBFOLDER: #{sub_folder.human_url}"
$ bundle exec ruby hello3.rb
SUBFOLDER: https://drive.google.com/drive/folders/yyy_yyy_yyy
表示されたURLを開くとフォルダが作られていることが確認できます。
Step4: 任意のファイルを指定フォルダにアップする
アップロード対象のファイル hello_upload.txt
指定のフォルダに配置するところまでやってみます。
$ cat hello_upload.txt
Hello Google Drive API
require 'google_drive'

session = GoogleDrive::Session.from_config('config.json')

# Title 指定、Google Documentに変換しない でアップロード
file = session.upload_from_file('hello_upload.txt', 'hello.txt', convert: false)
puts "FILE: #{file.human_url}"

# サブフォルダへ配下に移動
sub_folder_id = 'yyy_yyy_yyy'
sub_folder = session.collection_by_id(sub_folder_id)
sub_folder.add(file)
Content-type 指定などもできるらしい。
詳細は Session:upload_from_file 参照
Step5: スプレッドシートのテンプレートをコピーして値を入れる
よくあるデータ加工業務のパターン。
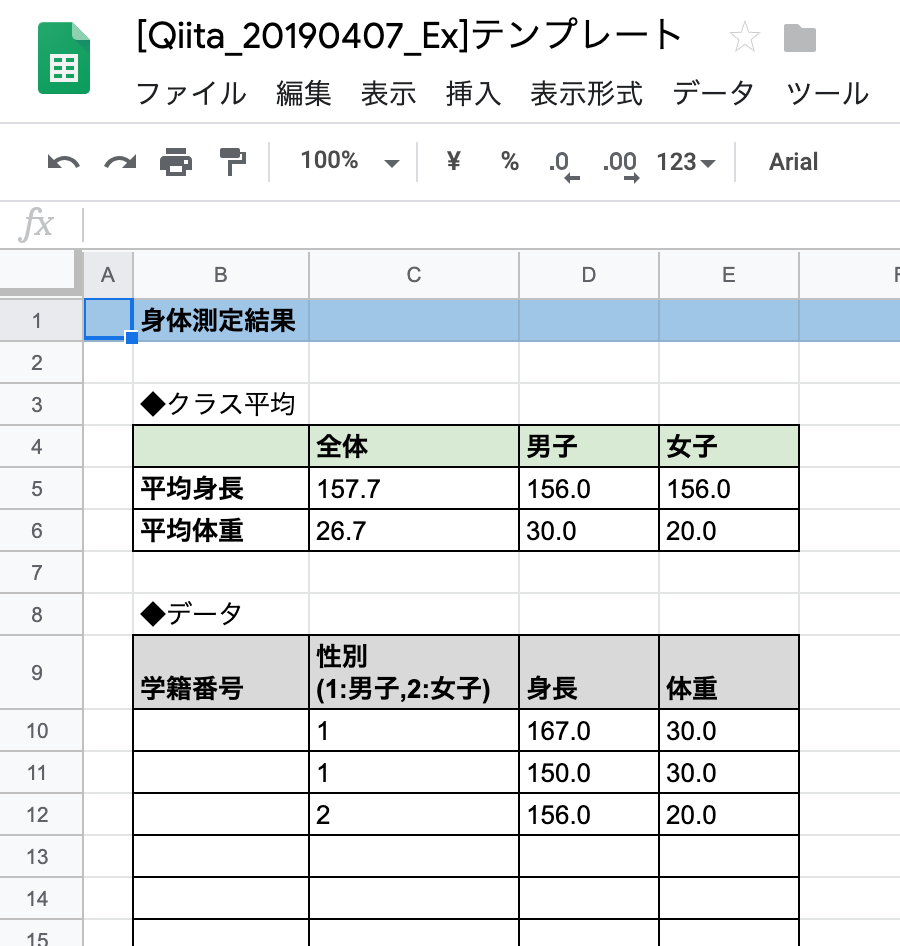
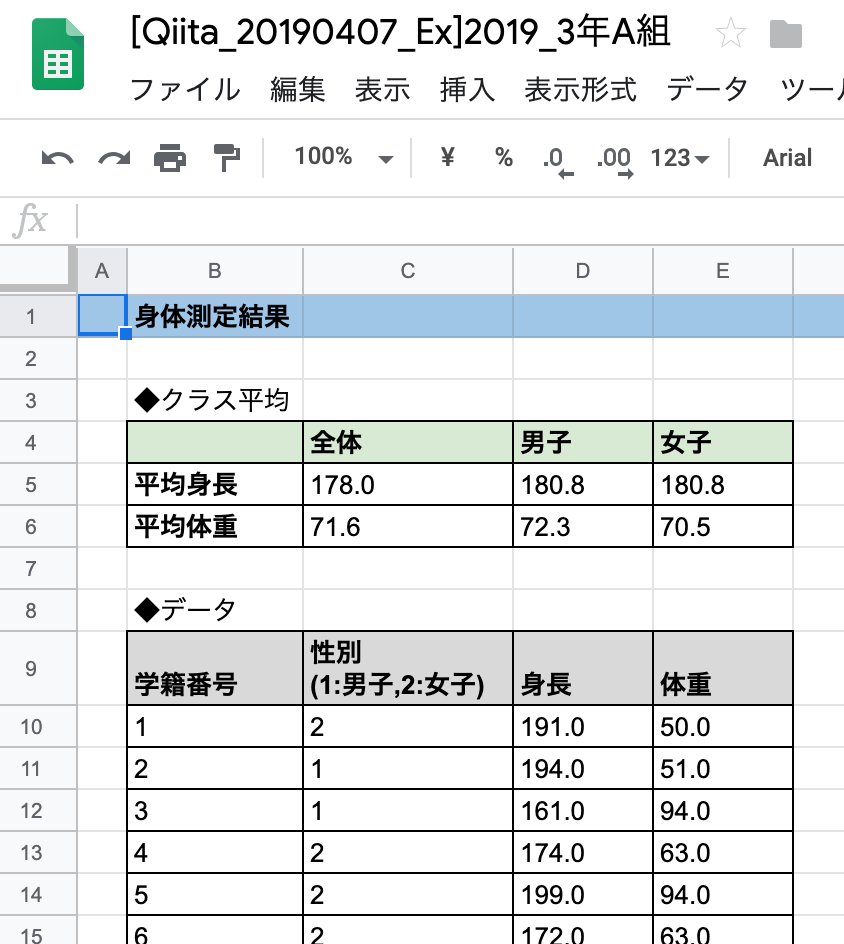
テンプレートのスプレッドシートを用意しておき、シートをコピーして値を入れるといった内容。
例として、クラスごとの身体測定結果を管理するデータシートを作る業務をイメージして
テンプレートを作りました。
| テンプレ | データ投入後 |
|---|---|
 |
 |
# テンプレートデータシートから任意のシート名、任意フォルダにシートをコピー
def copy_sheets(sheets_name, template_sheets, root_folder, sub_folder)
  sheets = template_sheets.copy(sheets_name)
  sub_folder.add(sheets)
  # テンプレートファイルと同じフォルダにも新シートの参照が残るので削除しておく
  root_folder.remove(sheets)
  sheets
end

# シートのデータを更新
def update_sheets(sheets, rows)
  top = 10 # データ投入位置 top
  left = 2 # データ投入位置 left
  work_sheet = sheets.worksheets[0]
  work_sheet.update_cells(top, left, rows)
  work_sheet.save
end

# ランダムデータの作成
def generate_random_data
  rows = []
  (1..20).each do |index|
    sex = rand(1..2)
    height = rand(140..200)
    weight = rand(40..100)
    rows << [index, sex, height, weight]
  end
  rows
end

# テンプレートファイルの置いてあるフォルダ
root_folder_id = 'xxx_xxx_xxx'
root_folder = session.collection_by_id(root_folder_id)

# データを配置したいフォルダ
sub_folder_id = 'yyy_yyy_yyy'
sub_folder = session.collection_by_id(sub_folder_id)

# テンプレートシート
template_sheets_id = 'zzz_zzz_zzz'
template_sheets = session.spreadsheet_by_key(template_sheets_id)

# 3年A組のシート作成
sheets_3a = copy_sheets('2019_3年A組', template_sheets, root_folder, sub_folder)
data_3a = generate_random_data
update_sheets(sheets_3a, data_3a)

# 3年B組のシート作成
sheets_3b = copy_sheets('2019_3年B組', template_sheets, root_folder, sub_folder)
data_3b = generate_random_data
update_sheets(sheets_3b, data_3b)
参考
- OAuth理解
- Ruby x google-drive-ruby