開発当初はローカル環境でgitを使っていたが、
途中からgitHubにpushする際の手順を説明します。
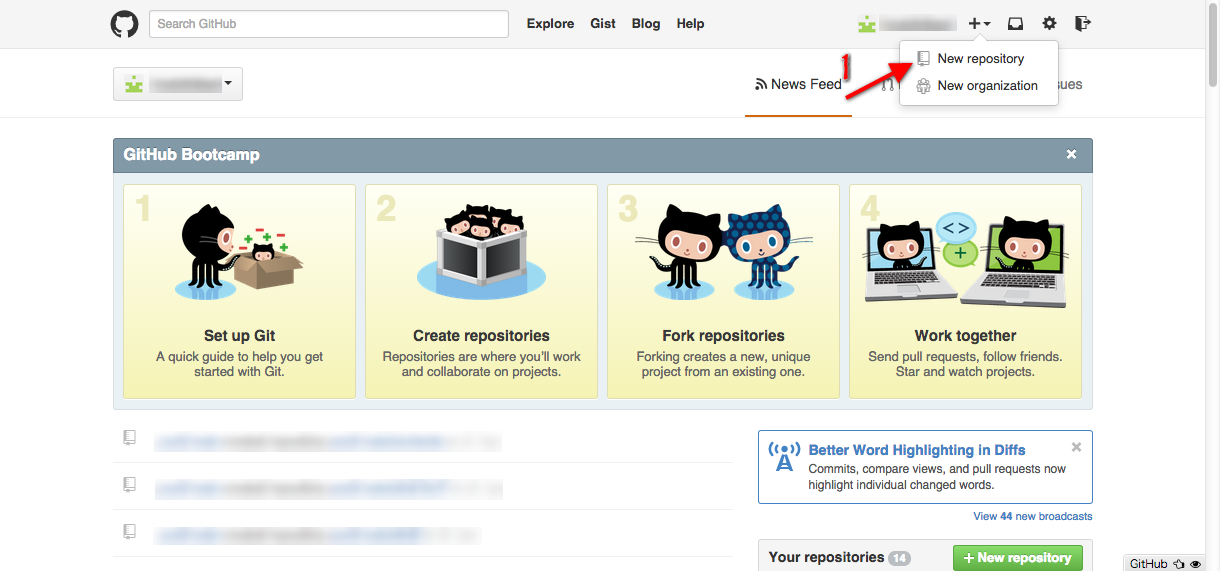
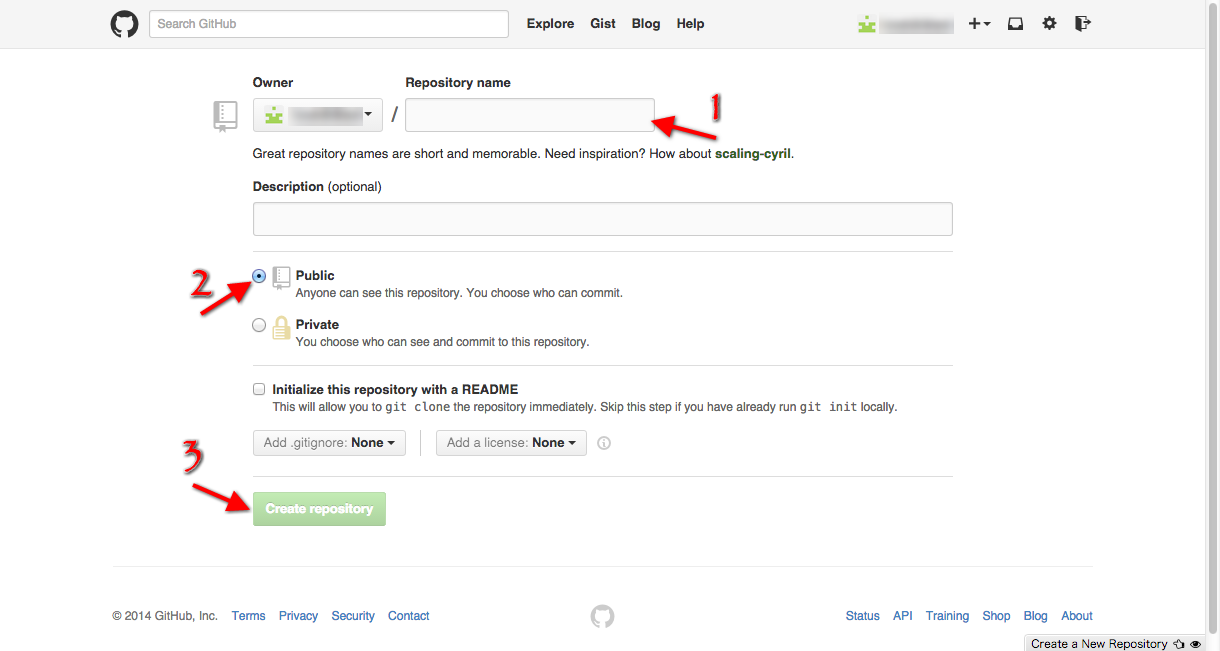
gitHubにアクセスし、新規リポジトリを作成する
1、リポジトリ名入力
2、Public選択(有料アカウントならPrivateも選択可能)
3、Create repositoryをクリックしてリポジトリを作成する。
リモートリポジトリを登録する
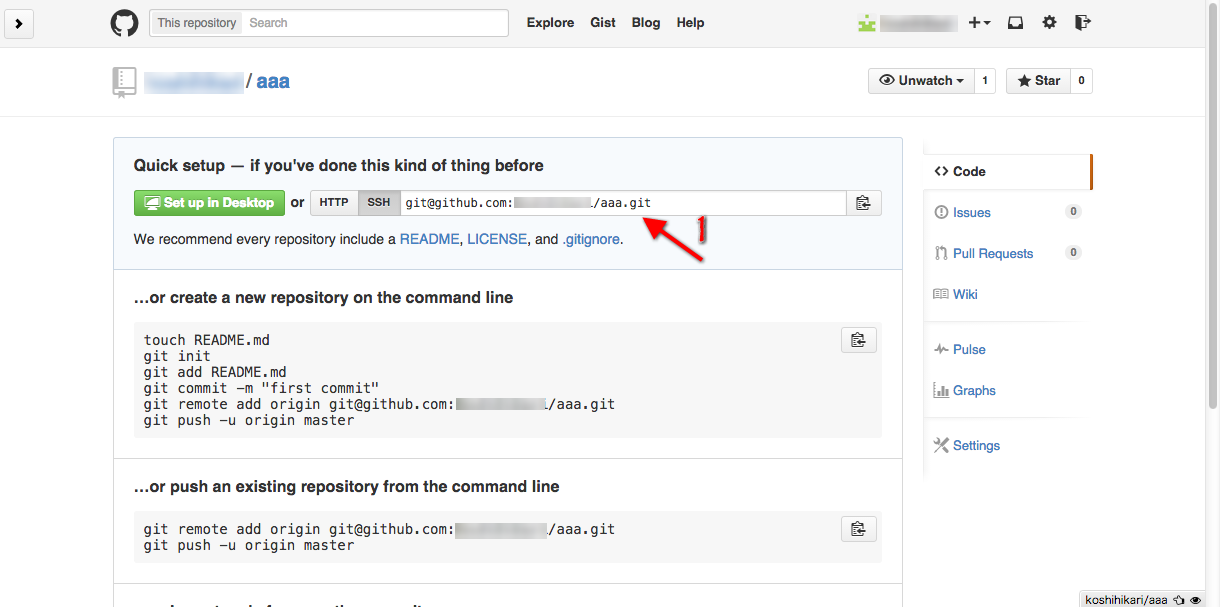
新規リポジトリ作成後に表示される上記画面の1の内容をコピーし、
以下の内容をターミナルに入力する。
git remote add origin 上記画面でコピーした内容
例)
git remote add origin git@github.com:your-account/repository-name.git
上記コマンドによってoriginという名前(識別子)で
git@github.com:your-account/repository-name.gitのリモートリポジトリを指すようになります。
ローカルの内容をリモートリポジトリに送信する
ローカルのmasterブランチの内容を上記で登録したリモートリポジトリに送信します。
ローカルのブランチがmasterでない場合は下記のコマンドでmasterブランチに移動しておいてください。
git checkout master
下記のコマンドを入力してローカルの内容をリモートリポジトリに送信します。
``
git push -u origin master
>To git@github.com:アカウント名/リポジトリ名.git
 * [new branch]      master -> master
Branch master set up to track remote branch master from origin.


というメッセージが表示されると成功です。
上記コマンドでリモートリポジトリにmasterという名前のブランチが作成され、
ローカルのmasterブランチの内容が送信されました。


master以外のブランチをリモートに送信するには以下のコマンドを入力します。
※ローカルのfeatureブランチをリモートのfeatureブランチに送信する場合。
git checkout feature
git push origin feature
``


