Ruby on Railsのバージョン:7.2.1
Rubyのバージョン:3.3.5
CRUD機能の実装について備忘録としてまとめます。
1.Railsアプリの初期設定
Railsアプリの作成
rails new post_app
データベースの設定
rails db:create
2.Postモデルの作成
Postモデルの生成
rails generate model Post title:string content:text
マイグレーション実行
rails db:migrate
3.コントローラーとルーティングの設定
Postsコントローラーの作成
オプションでアクション名を記載すると、アクションとビューファイルを作成できる
rails generate controller posts index show new edit create update destroy
ルーティングの設定
resources :posts
上記のように記載することで下記ルーティングが生成される
posts GET      /posts(.:format)           posts#index
POST           /posts(.:format)           posts#create
new_post GET   /posts/new(.:format)       posts#new
edit_post GET  /posts/:id/edit(.:format)  posts#edit
post GET       /posts/:id(.:format)       posts#show
PATCH          /posts/:id(.:format)       posts#update
PUT            /posts/:id(.:format)       posts#update
DELETE         /posts/:id(.:format)       posts#destroy
コントローラーに事前にストロングパラメータを作成します。
before_action :set_post, only: [:show, :edit, :update, :destroy]

〜
〜
〜

private

  def user_params
    params.require(:post).permit(:title, :content)
  end

  def set_post
    @post = Post.find(params[:id])
  end
user_paramsメソッドは、フォームから送信されたpostキーのデータの中のtitleとcontentカラムデータだけを取り出すメソッドです。
ちなみにこのpostキーは、フォームが関連付けられているモデル(Post)に由来します
set_postメソッドはPost.findでパラメータのidを呼び出して@postに代入している
show,edit,update,destroyそれぞれのアクションは事前に特定のレコードを取得する必要があります。
そのため、before_actionで各アクションで共通する「Post モデルの特定のレコードを取得する」処理を1か所にまとめることができます。
4.ビューの作成
①index.html.erb(投稿一覧)
<h1>投稿一覧</h1>

<% if @posts.present? %>
  <% @posts.each do |post| %>
    <div>
      <h2><%= link_to post.title, post_path(post) %></h2>
      <p><%= post.content.truncate(100) %></p>
      <%= form_with url: post_path(post), method: :delete, local: true do %>
        <%= submit_tag "削除", data: { confirm: "本当に削除しますか?" } %>
      <% end %>
    </div>
    <hr>
  <% end %>
<% else %>
  <p>まだ投稿がありません。</p>
<% end %>
<%= link_to '新規投稿', new_post_path %>
全ての投稿を表示するので、Post.allで下記のように@postsに投稿データ一覧を配列で格納する。
def index
    @posts = Post.all
end
<%= form_with url: post_path(post), method: :delete, local: true do %>
    <%= submit_tag "削除", data: { confirm: "本当に削除しますか?" } %>
<% end %>
この部分は最初記載した時下記でした。
<%# <%= link_to "削除", post_path(@post), method: :delete, data: { confirm: "本当に削除しますか?", turbo: false } %>
後ほど各アクションの編集をしますが、問題があったため記載しておきます。
上記のように記載していたのですが、削除を押下しても画面がうんともすんとも言わなかったので、form_withで記載してます。原因は最初turbo関係かと思ってましたが、どうも違うっぽい。Deleteメソッドが送られて欲しいところにGETメソッドが送られていて、@rails/ujsの設定に問題があるみたいです。この辺りの設定が私一人だとうまくいかなったため代替案に逃げました。ご了承ください。
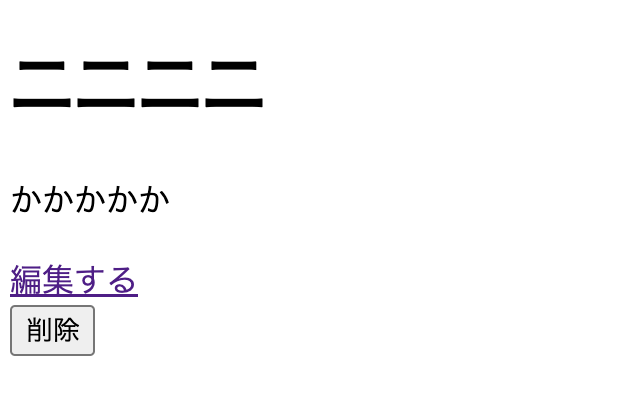
②show.html.erb(投稿詳細)
<h1><%= @post.title %></h1>
<p><%= @post.content %></p>
<%= form_with url: post_path(@post), method: :delete, local: true do %>
  <%= submit_tag "削除", data: { confirm: "本当に削除しますか?" } %>
<% end %>
5.新規投稿機能の実装
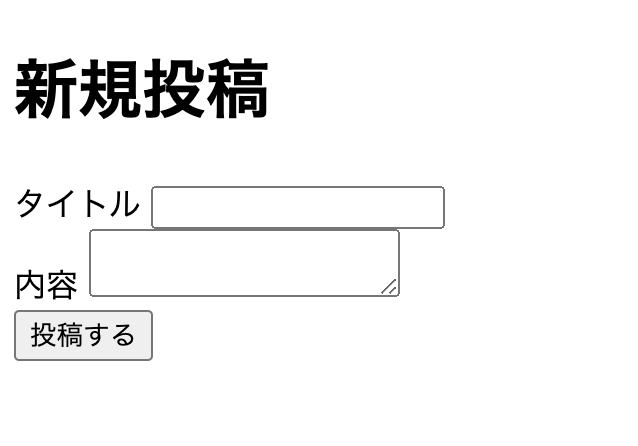
①new.html.erb(新規投稿)
<%= form_with model: @post do |f| %>
  <div>
    <%= f.label :title %>
    <%= f.text_field :title %>
  </div>
  <div>
    <%= f.label :content %>
    <%= f.text_area :content %>
  </div>
  <%= f.submit "投稿する" %>
<% end %>
フォームを正しく表示したり、エラーメッセージを表示するためにフォームがどのオブジェクト(モデル)に関連付けられているのかを指定する必要があるため、下記のように空のPostオブジェクトを@postに渡す必要がある。←何気に重要ぽい
def new
    @post = Post.new
end
②createアクションの実装
def create
  @post = Post.new(post_params)
  if @post.save
    redirect_to posts_path, notice: "投稿を作成しました。"
  else
    render :new, status: :unprocessable_entity
  end
end
ここでposts_pathがどこのページを指しているのか少し考えてしまったので、下記のURLを確認して再認識しました。
status: :unprocessable_entity
このステータスコードは「リクエストが受理され、理解されたが、入力データが不正で処理できない」ことを示します。適切なステータスコードを返すことで、クライアント(フロントエンドや外部サービス)がエラーの内容を正確に把握し、適切に対処できるようになります。詳しくは下記URL参照。
6.編集と更新機能の実装
①edit.html.erb の作成
<%= form_with model: @post do |f| %>
  <div>
    <%= f.label :title %>
    <%= f.text_field :title %>
  </div>
  <div>
    <%= f.label :content %>
    <%= f.text_area :content %>
  </div>
  <%= f.submit "更新する" %>
  <%= link_to '投稿一覧に戻る', posts_path %>
<% end %>
②update アクションの実装
def update
  if @post.update(post_params)
    redirect_to post_path(@post), notice: "投稿を更新しました。"
  else
    render :edit, status: :unprocessable_entity
  end
end
ここでredirect_toとrenderの違いがなんとなくでしか理解してなかったとふと思ったので、調べたところ下記のような記事があったので参考にしてください。
まとめると下記のような感じかと
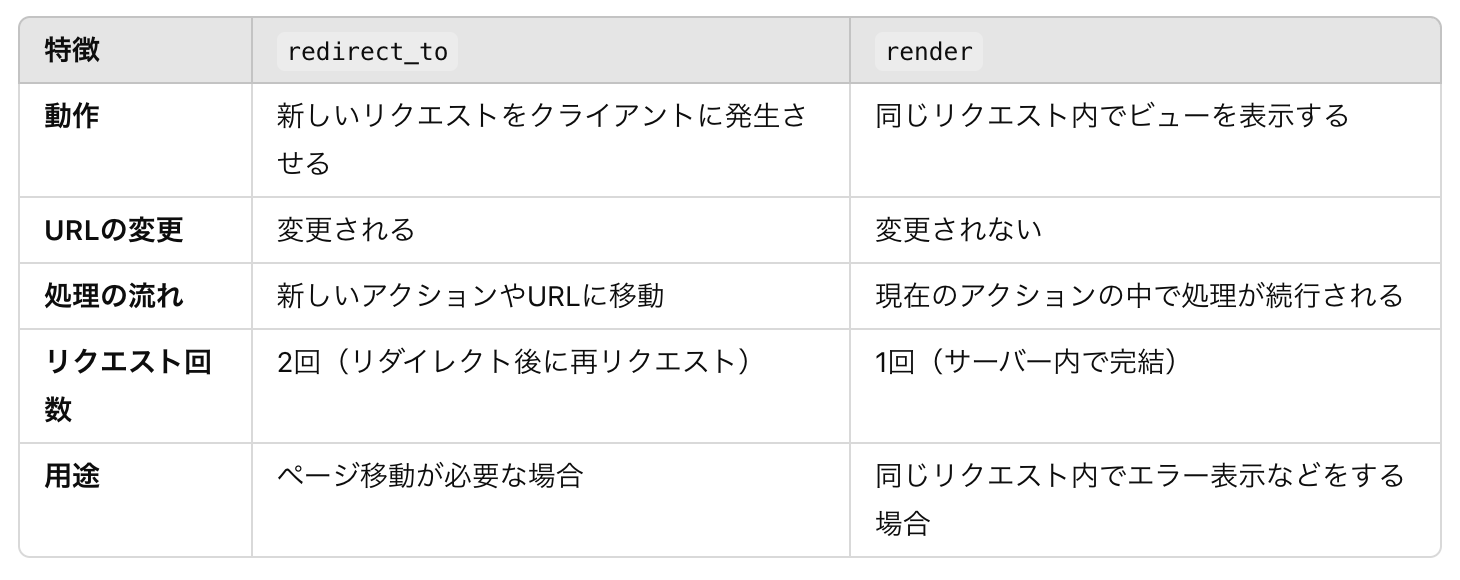
また、編集機能を実装したので編集するボタンを投稿詳細ページ(show.html.erb)に追加します。
<h1><%= @post.title %></h1>
<p><%= @post.content %></p>
<%= link_to '編集する', edit_post_path(@post) %> #追加
<%= form_with url: post_path(@post), method: :delete, local: true do %>
  <%= submit_tag "削除", data: { confirm: "本当に削除しますか?" } %>
<% end %>
7.削除機能の実装
問題の削除機能の実装ですね、、、
<%= link_to "削除", post_path(post), method: :delete, data: { confirm: "本当に削除しますか?" } %>
最初、削除リンクを上記のように実装しようとしたところ削除できない、画面が動かないなどの不具合があったため下記コードを代替案で実装してます。
<%= form_with url: post_path(post), method: :delete, local: true do %>
  <%= submit_tag "削除", data: { confirm: "本当に削除しますか?" } %>
<% end %>
def destroy
    @post.destroy!
    redirect_to posts_path, notice: "投稿を削除しました。"
end
これを投稿一覧(index)、投稿詳細(show)画面に実装してます。
8.バリデーションとエラーメッセージ、フラッシュメッセージの表示の実装
①モデルにバリデーションを追加
app/models/post.rb に以下を追記
class Post < ApplicationRecord
  validates :title, presence: true, length: { maximum: 32 }
  validates :content, presence: true, length: { maximum: 100 }
end
タイトルと投稿の空白をエラー表示、タイトルの文字数が33文字以上だとエラー、投稿の文字数が101文字以上だとエラーになるように設定。
②エラーメッセージの表示を実装
app/views/shared/_error_messages.html.erb を作成する
<% if object.errors.any? %>
  <div id="error_explanation">
    <h2><%= pluralize(object.errors.count, "error") %> prevented this post from being saved:</h2>
    <ul>
      <% object.errors.full_messages.each do |message| %>
        <li><%= message %></li>
      <% end %>
    </ul>
  </div>
<% end %>
pluralizeはエラーが1件ならerror、2件以上ならerrorsと表示するようにする。
object.errors.full_messagesは、指定されたモデルオブジェクトの全てのエラーメッセージを配列形式で取得するためのメソッド
またobject.errors.full_messagesで取得されるエラーメッセージは、railsが自動で生成してくれているものを使用してます。またエラーメッセージのカスタマイズも可能です。(今回は割愛します。)
これでバリデーションエラーが出た時に表示する機能が実装できました。
エラーメッセージを新規投稿(new)、編集(edit)で表示したいのでそれぞれ下記のようにパーシャルファイルを読み込ませます。
<h1>新規投稿</h1>

<%= form_with model: @post, local: true, data: { turbo: false } do |form| %>
  <%= render 'shared/error_messages', object: @post %> ←追加
  <%# エラーメッセージは基本的にはフォームの一番上に記載する %>
  <div>
    <%= form.label :title, "タイトル" %>
    <%= form.text_field :title %>
  </div>
  <div>
    <%= form.label :content, "内容" %>
    <%= form.text_area :content %>
  </div>
  <div>
    <%= form.submit "投稿する" %>
  </div>
<% end %>
<h1>投稿を編集</h1>

<%= form_with model: @post, local: true, data: { turbo: false } do |form| %>
  <%= render 'shared/error_messages', object: @post %> ←追加
  <div>
    <%= form.label :title, "タイトル" %>
    <%= form.text_field :title %>
  </div>
  <div>
    <%= form.label :content, "内容" %>
    <%= form.text_area :content %>
  </div>
  <div>
    <%= form.submit "更新する" %>
  </div>
  <%= link_to '投稿一覧に戻る', posts_path
<% end %>
if object.errors.any?の部分のobjectについて理解が足りなかったので調べてみました。
自分なりに理解してみましたが、
<%= render 'shared/error_messages', object: @post %>のコードで、
object: @postと記載することでパーシャルファイルのobject(if object.errors.any?のobject)は@postとなりその情報をもとにエラーメッセージを表示するようになる。
と認識しました。間違っていればご指摘をお願いします。
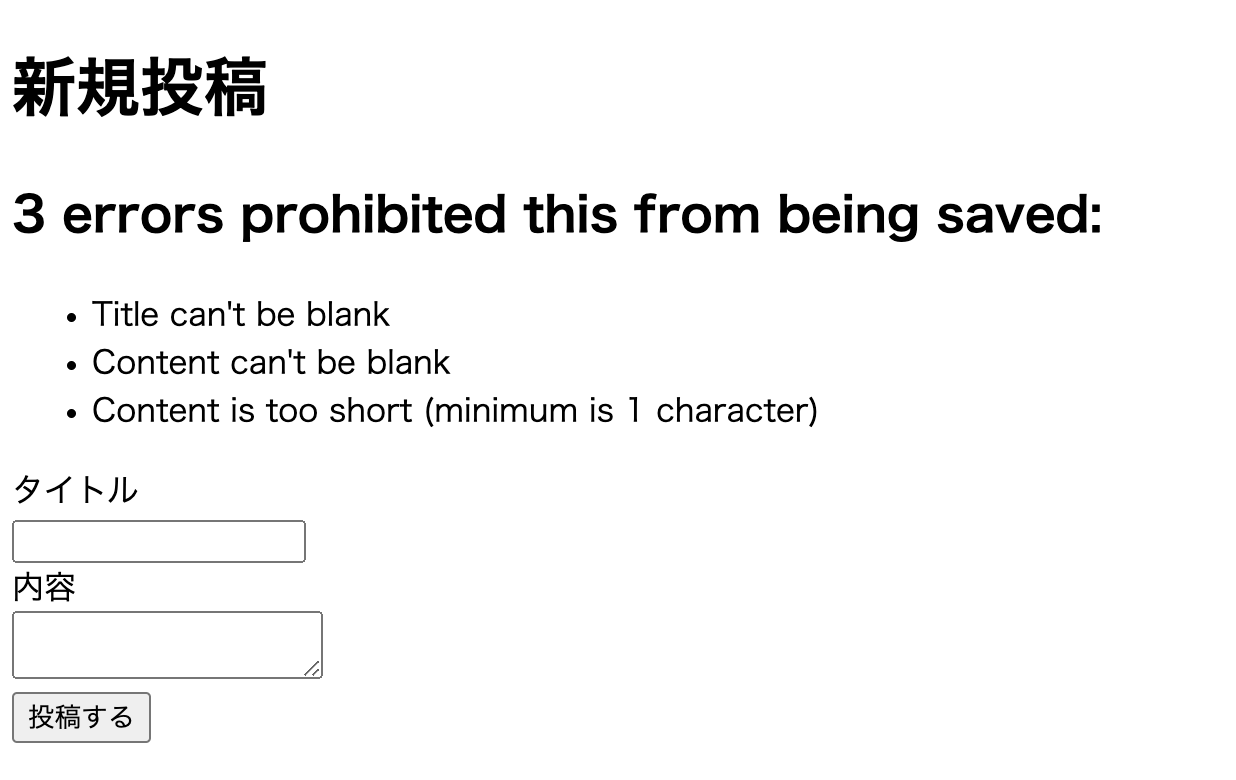
バリデーションエラーメッセージは下のスクショのような感じになります。(タイトル、内容どちらも空白で投稿するを押しました。)
③フラッシュメッセージの表示
app/views/layouts/application.html.erbのbody内に以下を記載
<body>
    <% if flash[:notice] %>
      <div class="notice"><%= flash[:notice] %></div>
    <% end %>
    <% if flash[:alert] %>
      <div class="alert"><%= flash[:alert] %></div>
    <% end %>

    <%= yield %>
</body>
ここである疑問が生まれました。
コントローラーでフラッシュメッセージの記載をしていたのになぜここでビューファイルにフラッシュメッセージの記載をしなければいけないのか?調べました。
単純に、コントローラーの記載だけだとフラッシュメッセージの表示はできないから、が結論でした。なんかコントローラーに投稿できた時のメッセージ記載してるしそのままフラッシュメッセージ表示できんじゃね?って単純に思ってしまった私を叱ってください。
コントローラーとビューファイルの記載どちらも必要です!
また、レイアウトファイル(application.html.erb)にフラッシュメッセージの表示コードを追加することで、すべてのビューで表示できるようになります。
④フラッシュメッセージのスタイルを追加
app/assets/stylesheets/application.cssに下記を追加
.notice {
  background-color: #d4edda;
  color: #155724;
  padding: 10px;
  margin: 10px 0;
  border: 1px solid #c3e6cb;
  border-radius: 5px;
}

.alert {
  background-color: #f8d7da;
  color: #721c24;
  padding: 10px;
  margin: 10px 0;
  border: 1px solid #f5c6cb;
  border-radius: 5px;
}
この辺りはいい感じのデザインを自分で決めてもいいし、チャットGPTに決めてもらってもいいと思います。
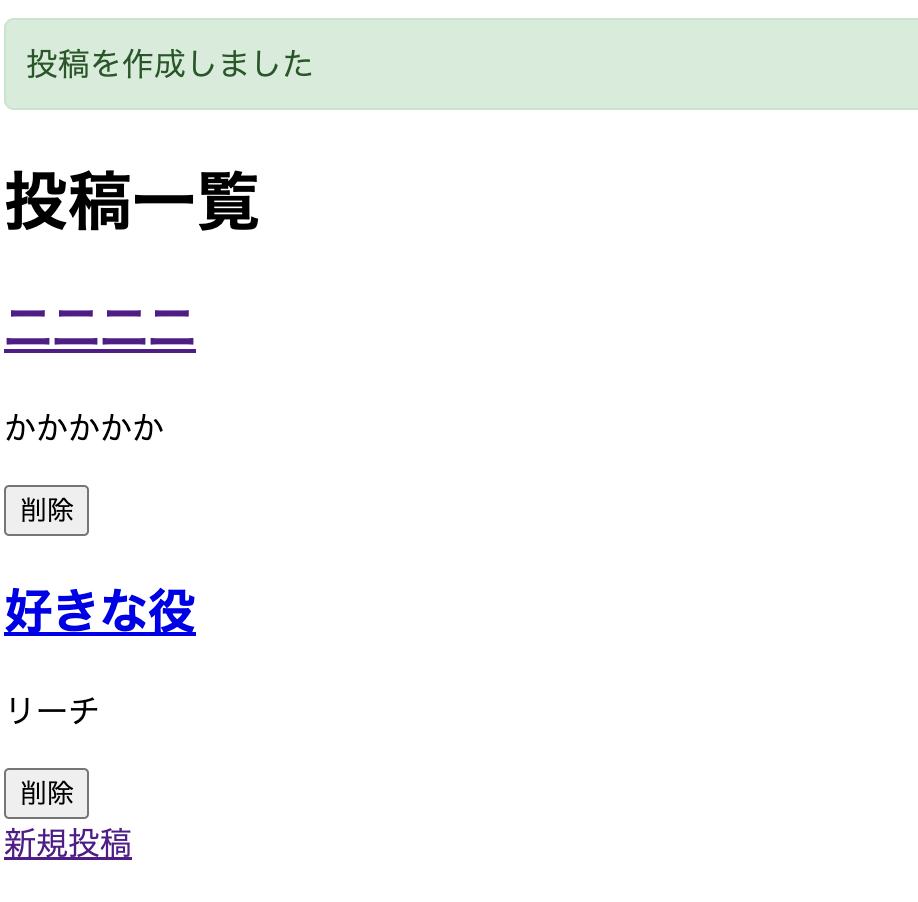
フラッシュメッセージ最終的にスクショのような感じになります。
