仕事でもプライベートでもChatGPT Plusを家族皆が使うので、なるべくコストを抑えるために「さくらVPS」で運用をするためにしたことの備忘録になります。
はじめに
- この記事では、手間とコストを抑えてChatGPT Plusの代替としてLibreChatを導入手順をまとめています
- 今回さくらVPSを利用していますが、基本Dockerコンテナ内で完結させているため、Dockerが利用できればご自身の環境に読み替えて貰えればOKです
方針
- 月額10ドル以下で運用 (ChatGPT Plusの半額を想定)
- ホストOSに依存しないようにDockerを利用
- ホストOSは今回 Rocky Linux 9 を利用
- SSLに関しては無料のLet's encryptを利用
- 記事内ではドメイン名を your_domain.example.com と表記を便利上使う
サーバースペック
LibreChatのドキュメントによると、最低限必要なスペックは以下のようです。
The minimum requirements for running LibreChat:
- 1 GiB RAM
- 1 vCPU
Note: With everything enabled, you might consider increasing the RAM to 2GB for smoother operation.
LibreChat Minimum Requirements
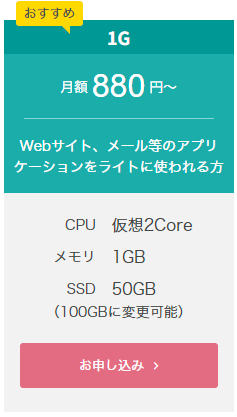
※メモリ 1GBだと少し心許無いので、SWAPを2GB設定しております
Dockerのインストール
1. Dockerリポジトリの追加 & インストール
sudo dnf config-manager --add-repo=https://download.docker.com/linux/centos/docker-ce.repo
sudo dnf -y install docker-ce docker-ce-cli containerd.io
2. Docker の起動 & 自動起動の設定
sudo systemctl start docker
sudo systemctl enable docker
3. docker が起動しているか確認
systemctl status docker
4. docker グループへユーザーを追加
sudo usermod -aG docker $USER
LibreChatのインストール
git clone https://github.com/danny-avila/LibreChat.git
cd LibreChat
cp .env.example .env
docker compose -f deploy-compose.yml up -d
以下のURLにアクセスをして、LibreChatのログイン画面が表示されていればOKです
http://your_domain.example.com/
(あなたのサーバードメインに変換してください)
上記は公式ドキュメントから抜粋したものになりますが、1番最後の行に関しては docker-compose.yml ではなく、deploy-compose.yml が指定されているところにご注意ください。
deploy-compose.ymlにはNginxが内包されており、この後のSSL通信を実現する上でも利用していきます。
CertbotをDockerで利用
Certbotは Let’s Encryptと呼ばれる認証局から無料でSSL認証書を発行が出来るツールです。
CertbotのDocker Imageもあるので今回はそれを利用します。
1. CertbotのDockerイメージを追加する
services:
# 他はそのまま
  certbot:
    image: certbot/certbot
    container_name: certbot
    volumes:
      - ./certbot/conf:/etc/letsencrypt  # SSL証明書の保存場所
      - ./certbot/www:/var/www/certbot   # Webroot用
    entrypoint: "/bin/sh -c 'trap exit TERM; while :; do sleep 6h & wait $${!}; certbot renew; done'"
Let’s Encrypt のSSL証明書は90日間有効なので、6時間に1回の自動更新 (certbot renew) をするために entrypoint を設定しております。
実際にはSSL証明書の有効期限が30日未満になったら更新が行われます。
2. Nginx側にも同様に certbotディレクトリをマウントさせる
以下の最後の2行を追加
services:
# 他はそのまま
  client:
    image: nginx:1.27.0-alpine
    container_name: LibreChat-NGINX
    ports:
      - 80:80
      - 443:443
    depends_on:
      - api
    restart: always
    volumes:
      - ./client/nginx.conf:/etc/nginx/conf.d/default.conf
      - ./certbot/www:/var/www/certbot
      - ./certbot/conf:/etc/letsencrypt
3. nginx.conf を変更
後で再度このファイルは変更をしますが、まずは certbotでSSL証明書が取得できるように最低限の設定だけいれます。
server {
    listen 80 default_server;
    listen [::]:80 default_server;

    server_name localhost;

    location /.well-known/acme-challenge/ {
        root /var/www/certbot;
    }
}
4. 再起動をする
docker compose -f deploy-compose.yml down
docker compose -f deploy-compose.yml up -d
5. certbotでSSL証明書を取得する
docker compose exec certbot certonly --webroot --webroot-path=/var/www/certbot -d your_domain.example.com
ここで、メールアドレスの入力などが必要になります。
your_domain.example.com は置き換えてください
SSL通信できるようにNginxの設定を変更する
server {
    listen 80 default_server;
    listen [::]:80 default_server;

    server_name localhost;

    location /.well-known/acme-challenge/ {
        root /var/www/certbot;
        # Let's Encryptの認証用のディレクトリに対してリダイレクトを無効化
    }

    # それ以外のリクエストはHTTPSにリダイレクト
    location / {
        return 301 https://$host$request_uri;
    }
}

server {
    listen 443 ssl;
    server_name your_domain.example.com;

    ssl_certificate /etc/letsencrypt/live/your_domain.example.com/fullchain.pem;
    ssl_certificate_key /etc/letsencrypt/live/your_domain.example.com/privkey.pem;

    client_max_body_size 25M;

    location /api/ {
        proxy_pass http://api:3080$request_uri;
    }

    location / {
        proxy_pass http://api:3080/;
    }
}
your_domain.example.com は置き換えてください
4. 再起動をする
docker compose -f deploy-compose.yml down
docker compose -f deploy-compose.yml up -d
以下のURLにアクセスをして、httpsでLibreChatのログイン画面が表示されていればOKです
https://your_domain.example.com/
(あなたのサーバードメインに変換してください)
最後に
.envのデフォルトのままだと、アクセスできる人は誰でもLibreChatのアカウント生成ができるので、
アカウント作成後は以下の項目をfalseにしておきます。
ALLOW_REGISTRATION=false
ALLOW_SOCIAL_REGISTRATION=false

