はじめに
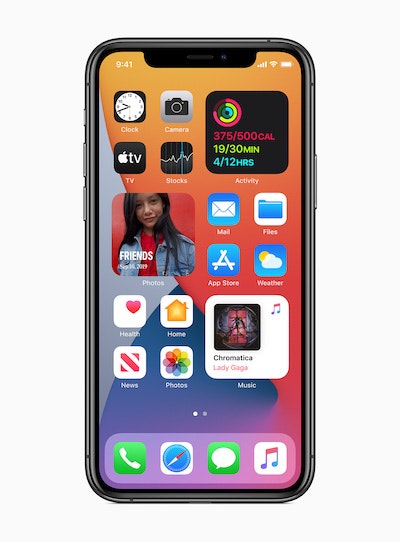
9月リリースが噂されているiOS14から、Widgetが追加されます。
表現が固定されていたホーム画面での体験が大きく変わる機能であり、
多くの人が注目しているかと思います👀✨
よし!自分のアプリにもWidgetを追加しよう!と手を動かそうとしている皆さんに向けて、
既存アプリへの追加手順の紹介と、テンプレートコードの読み解きをします。
本記事は、最低限の挙動と実装を確認したい人に向けての解説記事です。
WidgetKitの利用シーンやWidgetKitの詳しい解説はこちらの記事に丁寧にまとまっているので、割愛させていただきます。
https://qiita.com/shiz/items/309349d9cdb75084e74e
※本記事はXcode12 beta5時点の情報です、beta版の開発画面のスクリーンショットはNDA締結により掲載しておりません。
1.追加手順
Xcodeを開き
- File > New > Target を選択
- Application Extension group セクションから Widget Extension を選択
- Extension の名前をつける
リファレンスには
4. If the widget provides user-configurable properties, check the Include Configuration Intent checkbox.
とありますが、beta5では選択肢出てこず(自分だけ…?)、デフォでuser-configurableのテンプレートが生成されました。
公式リファレンス: https://developer.apple.com/documentation/widgetkit/creating-a-widget-extension
また、Application ExtensionごとにiOS Deployment Targetを設定できるので
iOS14未満をサポートしている場合も対応できそうです。
自分はiOS13対応アプリで正常挙動を確認しました。
(もちろんiOS13ではWidgetは利用できません、iOS12以下未検証)
CharacterWidgetと命名して追加すると
CharacterWidget.swift
CharacterWidget.intentdefinition
Assets.xcassets
Info.plist
のファイルが用意されます。
(Character画像をランダムに表示するWidgetを実装しようと思った命名)
2.テンプレートコードの読み解き
CharacterWidget.swiftのコード内に日本語コメントを含めながら
Widgetを構成する要素を説明します。
Widget
まずはWidgetを定義します。
テンプレートでは端末に基づいた時間が表示されるよう実装されていました。
@main
struct CharacterWidget: Widget {
    let kind: String = "CharacterWidget" // widgetの識別子、何をするwidgetか説明すべき

    var body: some WidgetConfiguration {
        // Configuration
        // StaticConfigration: ユーザが設定不可(ex.株価, ニュース)
        // IntentConfiguration: ユーザが設定可(ex. 場所ごとの天気, 荷物追跡): ← テンプレはこちらが実装されているが時間の表示だけであればStaticで良い
        IntentConfiguration(
            kind: kind,
            intent: ConfigurationIntent.self, // ユーザが設定可能なプロパティを定義するカスタムインテント、.intentdefinition からコード生成される
            provider: Provider() // Timeline セクションで解説
        ) { entry in // SwiftUIのViewを含むクロージャー、ProviderからTimelineEntryパラメーターが渡される
            CharacterWidgetEntryView(entry: entry)
        }
        .configurationDisplayName("🐣 Widget") // Widgetギャラリー(設定画面)にてユーザに表示するタイトル
        .description("This is 🐣 widget.") // 同上メッセージ
        // サイズの設定も加えることができる、デフォルトは3つ全て .supportedFamilies([.systemSmall, .systemMedium, .systemLarge])
    }
}
ConfigurationIntent
は、例えばユーザがアプリ内で選択したキャラクターのWidgetを表示したい場合などに実装します。
テンプレートではデフォルトで実装してあるが特に利用していないので、ユーザ設定が必要ない場合はStaticに書き換えてください。
        StaticConfiguration(
            kind: kind,
            provider: StaticProvider()
        ) { entry in
            CharacterWidgetEntryView(entry: entry)
        }
公式リファレンス: https://developer.apple.com/documentation/widgetkit/intentconfiguration
TimelineProvider
WidgetではTimelineという、いつどのViewを表示するか管理する仕組みを実装します。
まずはEntryを定義します。
struct SimpleEntry: TimelineEntry {
    let date: Date // 表示する時間
    let configuration: ConfigurationIntent
}
続いて、IntentTimelineProviderの実装です。
テンプレートでは1時間おきに5回、時間を更新して表示されるよう実装されていました。
struct Provider: IntentTimelineProvider {
    /// ユーザ設定可能の場合、初めて表示する時に表示されるプレースホルダー
    /// ウィジェットが何を表示するかについて一般的な考えをユーザに提供するべき
    func placeholder(in context: Context) -> SimpleEntry {
        SimpleEntry(date: Date(), configuration: ConfigurationIntent())
    }

    /// 表示するSnapshotを定義
    func getSnapshot(for configuration: ConfigurationIntent, in context: Context, completion: @escaping (SimpleEntry) -> ()) {

        let entry = SimpleEntry(date: Date(), configuration: configuration)
        // context.isPreview = true の時、widget galleryに表示されているので、サーバーからの取得がある場合はフラグを立ててローディング表示など実装するとよい
        // ex) if context.isPreview && !hasFetchedGameStatus { ... }
        completion(entry)
    }

    /// タイムラインを定義
    func getTimeline(for configuration: ConfigurationIntent, in context: Context, completion: @escaping (Timeline<Entry>) -> ()) {
        var entries: [SimpleEntry] = []

        // 現在の時間から開始して、1時間おきに切り替わる5つのEntryで構成されるタイムラインを生成
        let currentDate = Date()
        for hourOffset in 0 ..< 5 {
            // hourOffset時間後の時間を生成
            let entryDate = Calendar.current.date(byAdding: .hour, value: hourOffset, to: currentDate)!
            let entry = SimpleEntry(date: entryDate, configuration: configuration)
            entries.append(entry)
        }
        // 配列に含めてTimelineにする
        let timeline = Timeline(entries: entries, policy: .atEnd)// policy: .atEnd タイムライン終了後新しいタイムラインを要求するポリシー
        completion(timeline)
    }
}
Timelineのpolicyは.adEndの他に
- never: 新しい要求がくるまで何もしない
- after(_ date: Date): タイムラインをリクエストする日時を指定
を選択できます。
こちらもIntentを利用しない場合はStaticに書き換えてください。
struct StaticProvider: TimelineProvider {
    typealias Entry = SimpleEntry

    func getSnapshot(in context: Context, completion: @escaping (SimpleEntry) -> Void) {
        let entry = SimpleEntry(date: Date())
        completion(entry)
    }

    func getTimeline(in context: Context, completion: @escaping (Timeline<Entry>) -> Void) {
        var entries: [SimpleEntry] = []

        let currentDate = Date()
        for hourOffset in 0 ..< 5 {
            let entryDate = Calendar.current.date(byAdding: .minute, value: hourOffset, to: currentDate)!
            let entry = SimpleEntry(date: entryDate)
            entries.append(entry)
        }
        let timeline = Timeline(entries: entries, policy: .never)
        completion(timeline)
    }
}
View
最後に、実際に表示するWidgetを実装します。
テンプレートではシンプルにTextでentry.dateを表示するだけだったので、
3つのWidget family(サイズ)ごとの実装について追記しました。
/// widgetのView、SwiftUIで実装する
struct CharacterWidgetEntryView : View {
    @Environment(\.widgetFamily) var family: WidgetFamily// Widget familyをサポートする
    var entry: Provider.Entry

    @ViewBuilder // viewにバリエーションがある時宣言
    var body: some View {
        // サイズごとにViewを指定する実装
        switch family {
        case .systemSmall: Text(entry.date, style: .time); Text("small")
        case .systemMedium: Text(entry.date, style: .time); Text("medium")
        case .systemLarge: Text(entry.date, style: .time); Text("large")
        @unknown default: fatalError()
        }
    }
}
SwiftUIで実装するのでもちろんPreviewもできます。
struct CharacterWidget_Previews: PreviewProvider {
    static var previews: some View {
        CharacterWidgetEntryView(entry: SimpleEntry(date: Date()))
            .previewContext(WidgetPreviewContext(family: .systemSmall))
    }
}
以上です。大まかな流れが掴めていると幸いです🙋♂️
3.intentdefinition
CharacterWidget.intentdefinitionからテンプレートで実装されているConfigurationIntent周りのコードが自動生成されます。
Siri Shortcutsを実装したことがある方なら馴染みがあるかもしれません。
テンプレでは用意されているだけで利用していないので割愛しますが、
需要があればこちらについても解説する投稿をしようかなと思います。
https://developer.apple.com/documentation/widgetkit/making-a-configurable-widget
おわりに
Widgetのサンプルコードも用意されているのでぜひぜひ一度動かしてみて、
ユーザにとって需要のある機能実装の模索をしてみましょう💪
