はじめに
MacOSからIDCFクラウドに対してコマンドラインツールを利用して操作できるようにします。
事前準備
今回インストールするにあたって、gitとpipの2つのコマンドが必要となります。
なので、まだインストールしていない場合は以下のコマンドでインストールしておいてください。
$ sudo brew install git
$ curl -kL https://raw.github.com/saghul/pythonz/master/pythonz-install | bash
$ sudo easy_install pip
インストール
事前準備が完了したら、いよいよコマンドのインストールを行います。
インストールはidcfのgithubリポジトリにあるcloudstack-apiをします。
https://github.com/idcf/cloudstack-api
$ sudo pip install git+https://github.com/idcf/cloudstack-api

・・・
    cc -fno-strict-aliasing -fno-common -dynamic -arch i386 -arch x86_64 -g -Os -pipe -fno-common -fno-strict-aliasing -fwrapv -DENABLE_DTRACE -DMACOSX -DNDEBUG -Wall -Wstrict-prototypes -Wshorten-64-to-32 -DNDEBUG -g -fwrapv -Os -Wall -Wstrict-prototypes -DENABLE_DTRACE -arch i386 -arch x86_64 -pipe -I/usr/include/libxml2 -Isrc/lxml/includes -I/System/Library/Frameworks/Python.framework/Versions/2.7/include/python2.7 -c src/lxml/lxml.etree.c -o build/temp.macosx-10.11-intel-2.7/src/lxml/lxml.etree.o -w -flat_namespace
    In file included from src/lxml/lxml.etree.c:320:
    src/lxml/includes/etree_defs.h:14:10: fatal error: 'libxml/xmlversion.h' file not found
    #include "libxml/xmlversion.h"
             ^
    1 error generated.
    Compile failed: command 'cc' failed with exit status 1
    creating tmp
    cc -I/usr/include/libxml2 -I/usr/include/libxml2 -c /tmp/xmlXPathInit3sJd9Z.c -o tmp/xmlXPathInit3sJd9Z.o
    /tmp/xmlXPathInit3sJd9Z.c:1:10: fatal error: 'libxml/xpath.h' file not found
    #include "libxml/xpath.h"
             ^
    1 error generated.
    *********************************************************************************
    Could not find function xmlCheckVersion in library libxml2. Is libxml2 installed?
    Perhaps try: xcode-select --install
    *********************************************************************************
    error: command 'cc' failed with exit status 1

    ----------------------------------------
Command "/usr/bin/python -u -c "import setuptools, tokenize;__file__='/private/tmp/pip-build-GIuK3z/lxml/setup.py';exec(compile(getattr(tokenize, 'open', open)(__file__).read().replace('\r\n', '\n'), __file__, 'exec'))" install --record /tmp/pip-Mmw1r6-record/install-record.txt --single-version-externally-managed --compile" failed with error code 1 in /private/tmp/pip-build-GIuK3z/lxml
You are using pip version 8.0.2, however version 8.1.1 is available.
You should consider upgrading via the 'pip install --upgrade pip' command.
なにやらインストールが失敗してしまったみたいです。。。
でもよく見ると、
*********************************************************************************
    Could not find function xmlCheckVersion in library libxml2. Is libxml2 installed?
    Perhaps try: xcode-select --install
    *********************************************************************************
という表示が出ています。
インストールに必要な関数(xmlCheckVersion)が見つからないみたいです。Perhaps tryという箇所でインストール方法も教えてくれているので、とりあえずその通りに実行します。
$ xcode-select --install
xcode-select: note: install requested for command line developer tools
再度インストールを実行します。
$ sudo pip install git+https://github.com/idcf/cloudstack-api

The directory '/Users/kohei/Library/Caches/pip/http' or its parent directory is not owned by the current user and the cache has been disabled. Please check the permissions and owner of that directory. If executing pip with sudo, you may want sudo's -H flag.
The directory '/Users/kohei/Library/Caches/pip' or its parent directory is not owned by the current user and caching wheels has been disabled. check the permissions and owner of that directory. If executing pip with sudo, you may want sudo's -H flag.
Collecting git+https://github.com/idcf/cloudstack-api
  Cloning https://github.com/idcf/cloudstack-api to /tmp/pip-FkXf1Z-build
Requirement already satisfied (use --upgrade to upgrade): setuptools in /System/Library/Frameworks/Python.framework/Versions/2.7/Extras/lib/python (from cloudstack.compute==0.10.2)
Requirement already satisfied (use --upgrade to upgrade): httplib2 in /Library/Python/2.7/site-packages (from cloudstack.compute==0.10.2)
Requirement already satisfied (use --upgrade to upgrade): simplejson in /Library/Python/2.7/site-packages (from cloudstack.compute==0.10.2)
Requirement already satisfied (use --upgrade to upgrade): argparse in /Library/Python/2.7/site-packages (from cloudstack.compute==0.10.2)
Requirement already satisfied (use --upgrade to upgrade): prettytable==0.5 in /Library/Python/2.7/site-packages (from cloudstack.compute==0.10.2)
Requirement already satisfied (use --upgrade to upgrade): parsedatetime==0.8.7 in /Library/Python/2.7/site-packages (from cloudstack.compute==0.10.2)
Collecting lxml (from cloudstack.compute==0.10.2)
  Downloading lxml-3.6.0.tar.gz (3.7MB)
    100% |████████████████████████████████| 3.7MB 151kB/s
Installing collected packages: lxml, cloudstack.compute
  Running setup.py install for lxml ... done
  Running setup.py install for cloudstack.compute ... done
Successfully installed cloudstack.compute-0.10.2 lxml-3.6.0
You are using pip version 8.0.2, however version 8.1.1 is available.
You should consider upgrading via the 'pip install --upgrade pip' command.
今度はインストールできたみたいです。
一応試しにコマンドを実行してみると、
$ cloudstack-api --version
cloudstack-api v0.10.2
ちゃんとバージョン情報の確認ができました。
ただ、このままではインストールしただけなので、次は環境へアクセスできるように設定を行います。
環境設定
idcfヘアクセスできるようにするには.idcfrcというファイルを作成し、そこに必要な情報を記載してあげる必要があります。
ということではじめに必要な情報の取得です。
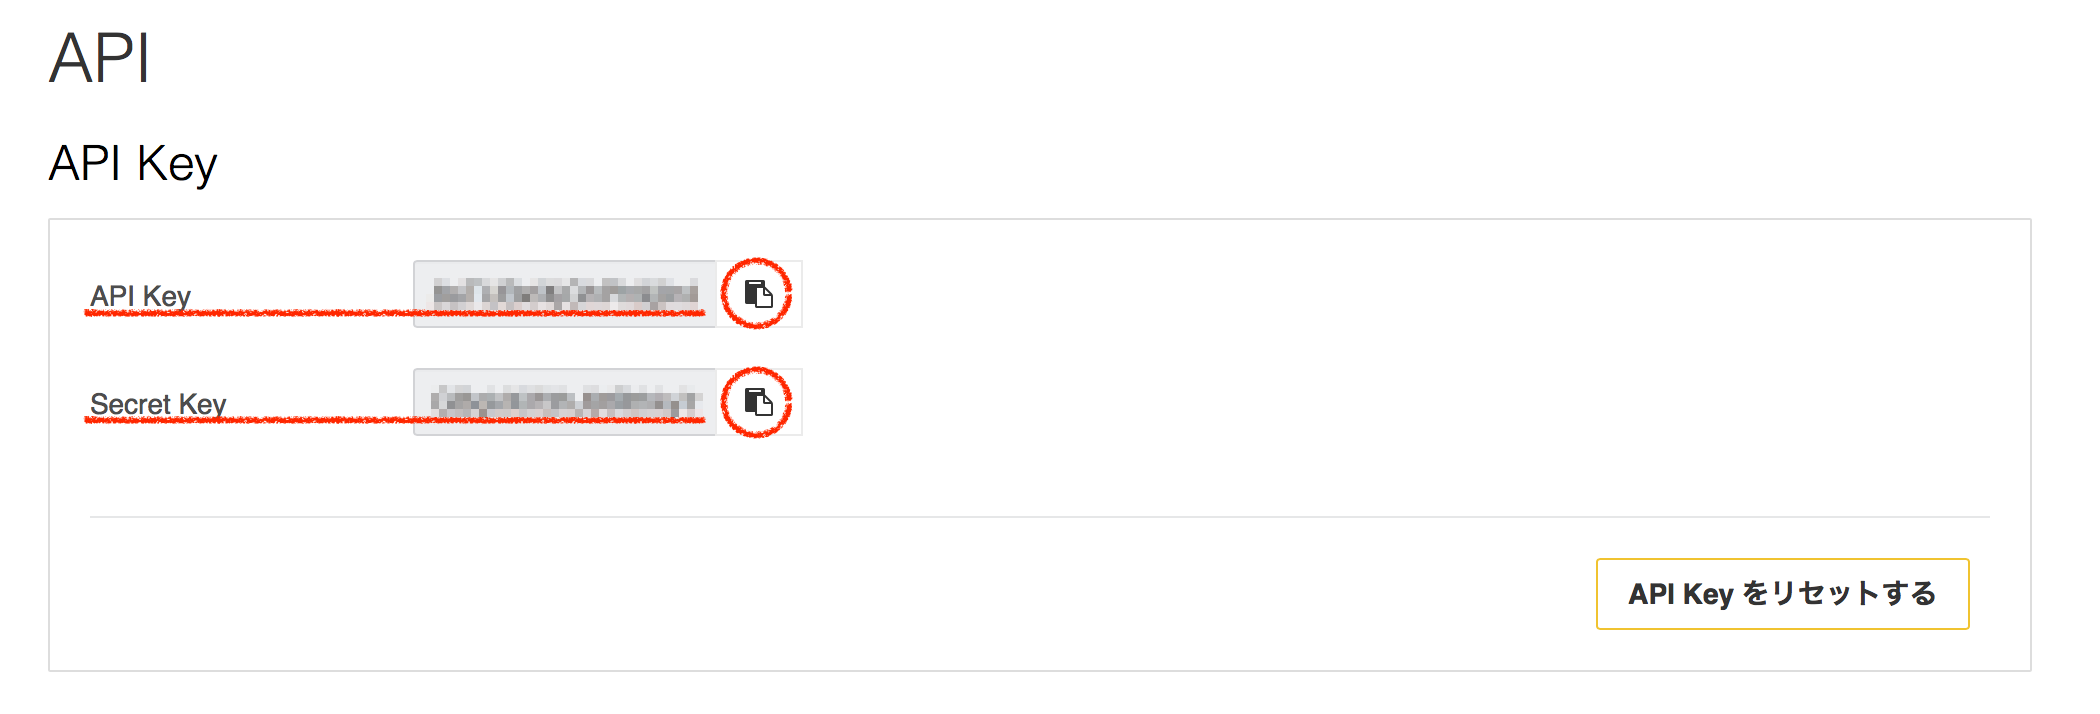
情報は管理コンソールの「仮想マシン」>「API」から確認できます。
まずは、API KeyとSecret Keyは画面の「API」の項目から取得できます。ボードクリップアイコンをクリックするとコピーできます。
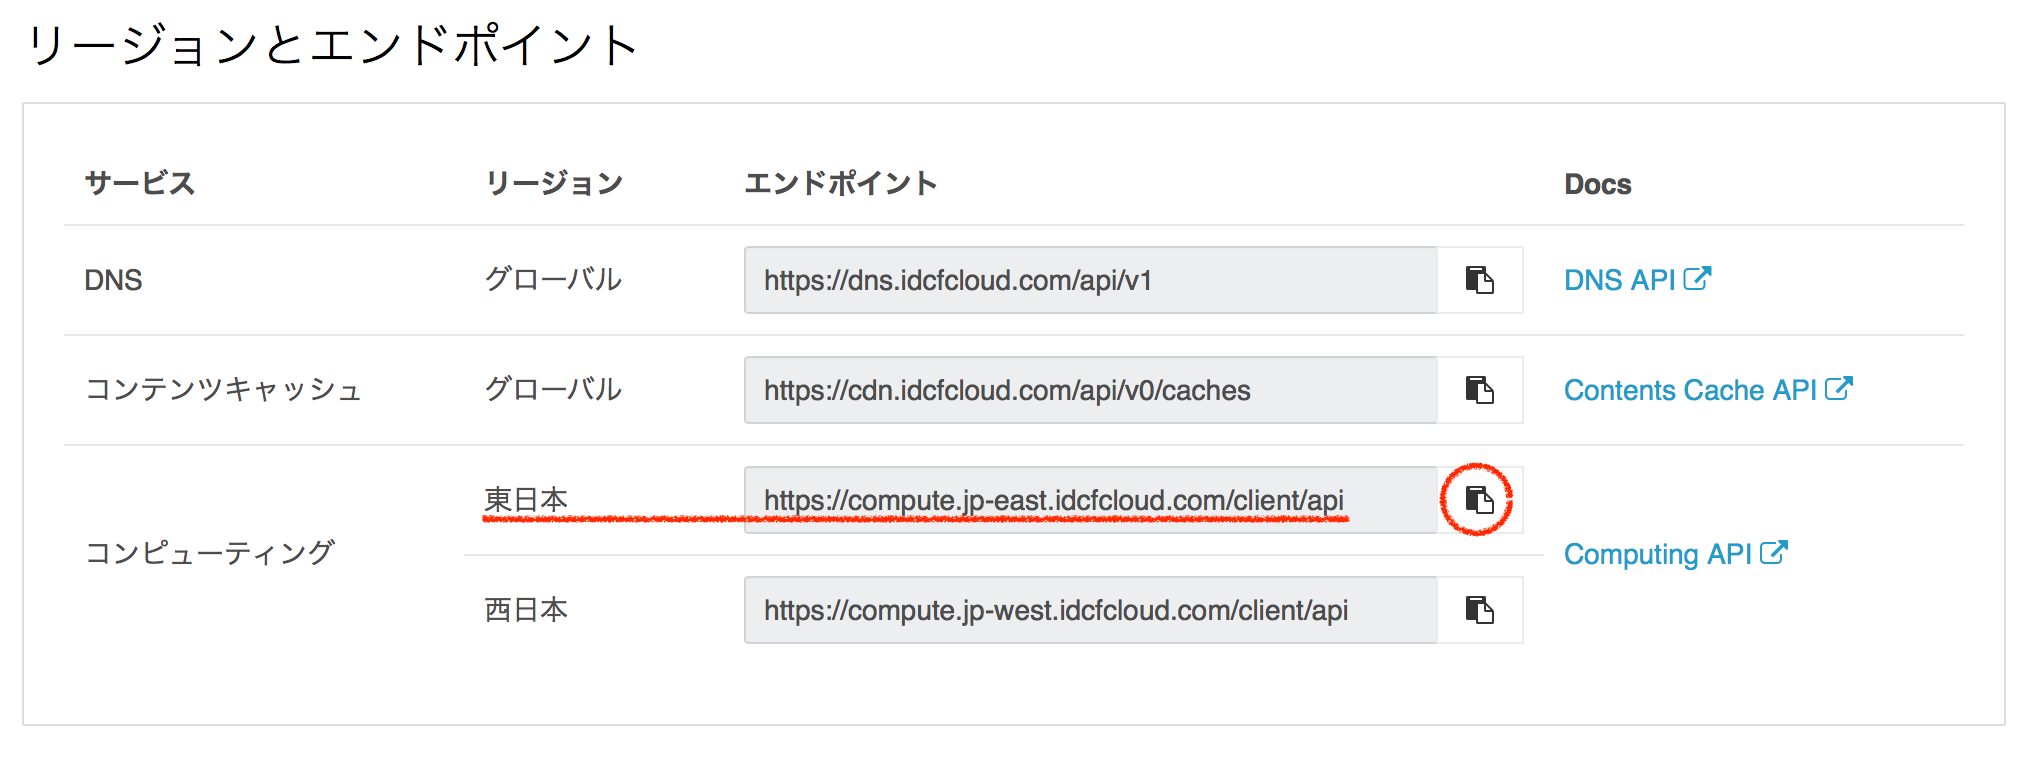
次にエンドポイント情報を取得します。今回は「東日本リージョン」ということで進めたいと思うので、先ほどと同じように東日本の箇所にあるクリップボードアイコンをクリックしてコピーします。
3つの情報が取得できたらいよいよ「.idcfrc」ファイルを作成します。
$ vi ~/.idcfrc

[account]
host=https://compute.jp-east.idcfcloud.com/client/api
api_key=***********************************
secret_key=***********************************
hostにはエンドポイントが入ります。
また、アクセス権限をユーザーだけが読み書きできるように変更もしておきます。
$ chmod 600 ~/.idcfrc
以上で環境へアクセスできるところまで準備ができました。
確認
環境設定まで完了したので実際にアクセスできるか確認してみましょう。
$ cloudstack-api listZones
{
  "listzonesresponse": {
    "count": 5,
    "zone": [
      {
        "allocationstate": "Enabled",
・・・
レスポンス内容は割愛しますが、ずらっとJSON形式でゾーン情報が表示されればOKです。
補足ですが、もし環境設定の情報が間違っていたりすると、
$ cloudstack-api listZones
No option 'api_key' in section: 'account'
といった内容が表示されます。
おわりに
今回はIDCFクラウドをAPIコマンドで操作できるようにするためのセットアップを行いました。
これによって仮想マシンを作成するたびに管理コンソールへいちいちログインするのではなく、コマンドで一発作成が可能となります。また、スクリプトなどを組んでおけば仮想マシンの作成からグローバルIPの付与といった一連の処理も可能です。
ただ、現在使えるcloudstack-apiコマンドは限られています。
詳しい内容はIDCFのAPI Referencesに一覧があるので参考にしてください。