はじめに
サクッと作れてサクッと削除できるのがクラウドの良い点です。ですが、そうなるとこまめに構成図などを修正しないといけなかったりという管理の手間があります。
そういったことから解放してくれる良いものが無いかなと探していたところ、DUOというところが出しているCloudMapperというツールを見つけました。
CloudMapperとは?
DUOが提供するAWS Visualization Toolです。
今のところオープンソースのツールでGitHubに公開されています。
環境準備
今回は自分のPCがMacということもあり、MacOSで行います。
まずはGitHubにあるCloudMapperをgit cloneで取得します。
$ git clone git@github.com:duo-labs/cloudmapper.git
次にこのツールで必要なライブラリなどをインストールなどを行います。
$ brew install autoconf automake libtool jq
$ cd cloudmapper/
$ virtualenv venv
$ source venv/bin/activate
$ pip install -r requirements.txt
demoの実行
ツールをダウンロードした際に、すでにdemoとしてサンプルが用意されています。
$ python cloudmapper.py prepare --config config.json.demo --account demo
Building data for account demo (123456789012)
- 0 nodes built in region ap-south-1
- 0 nodes built in region eu-west-2
- 0 nodes built in region eu-west-1
- 0 nodes built in region ap-northeast-2
- 0 nodes built in region ap-northeast-1
- 0 nodes built in region sa-east-1
- 0 nodes built in region ca-central-1
- 0 nodes built in region ap-southeast-1
- 0 nodes built in region ap-southeast-2
- 0 nodes built in region eu-central-1
- 8 nodes built in region us-east-1
- 0 nodes built in region us-east-2
- 0 nodes built in region us-west-1
- 0 nodes built in region us-west-2
- 3 external CIDRs built
- 17 connections built
Complete

$ python cloudmapper.py webserver
CloudMapper serving on 127.0.0.1:8000
ローカルでwebサーバーが起ち上がったので http://127.0.0.1:8000/ にアクセスしてみます。
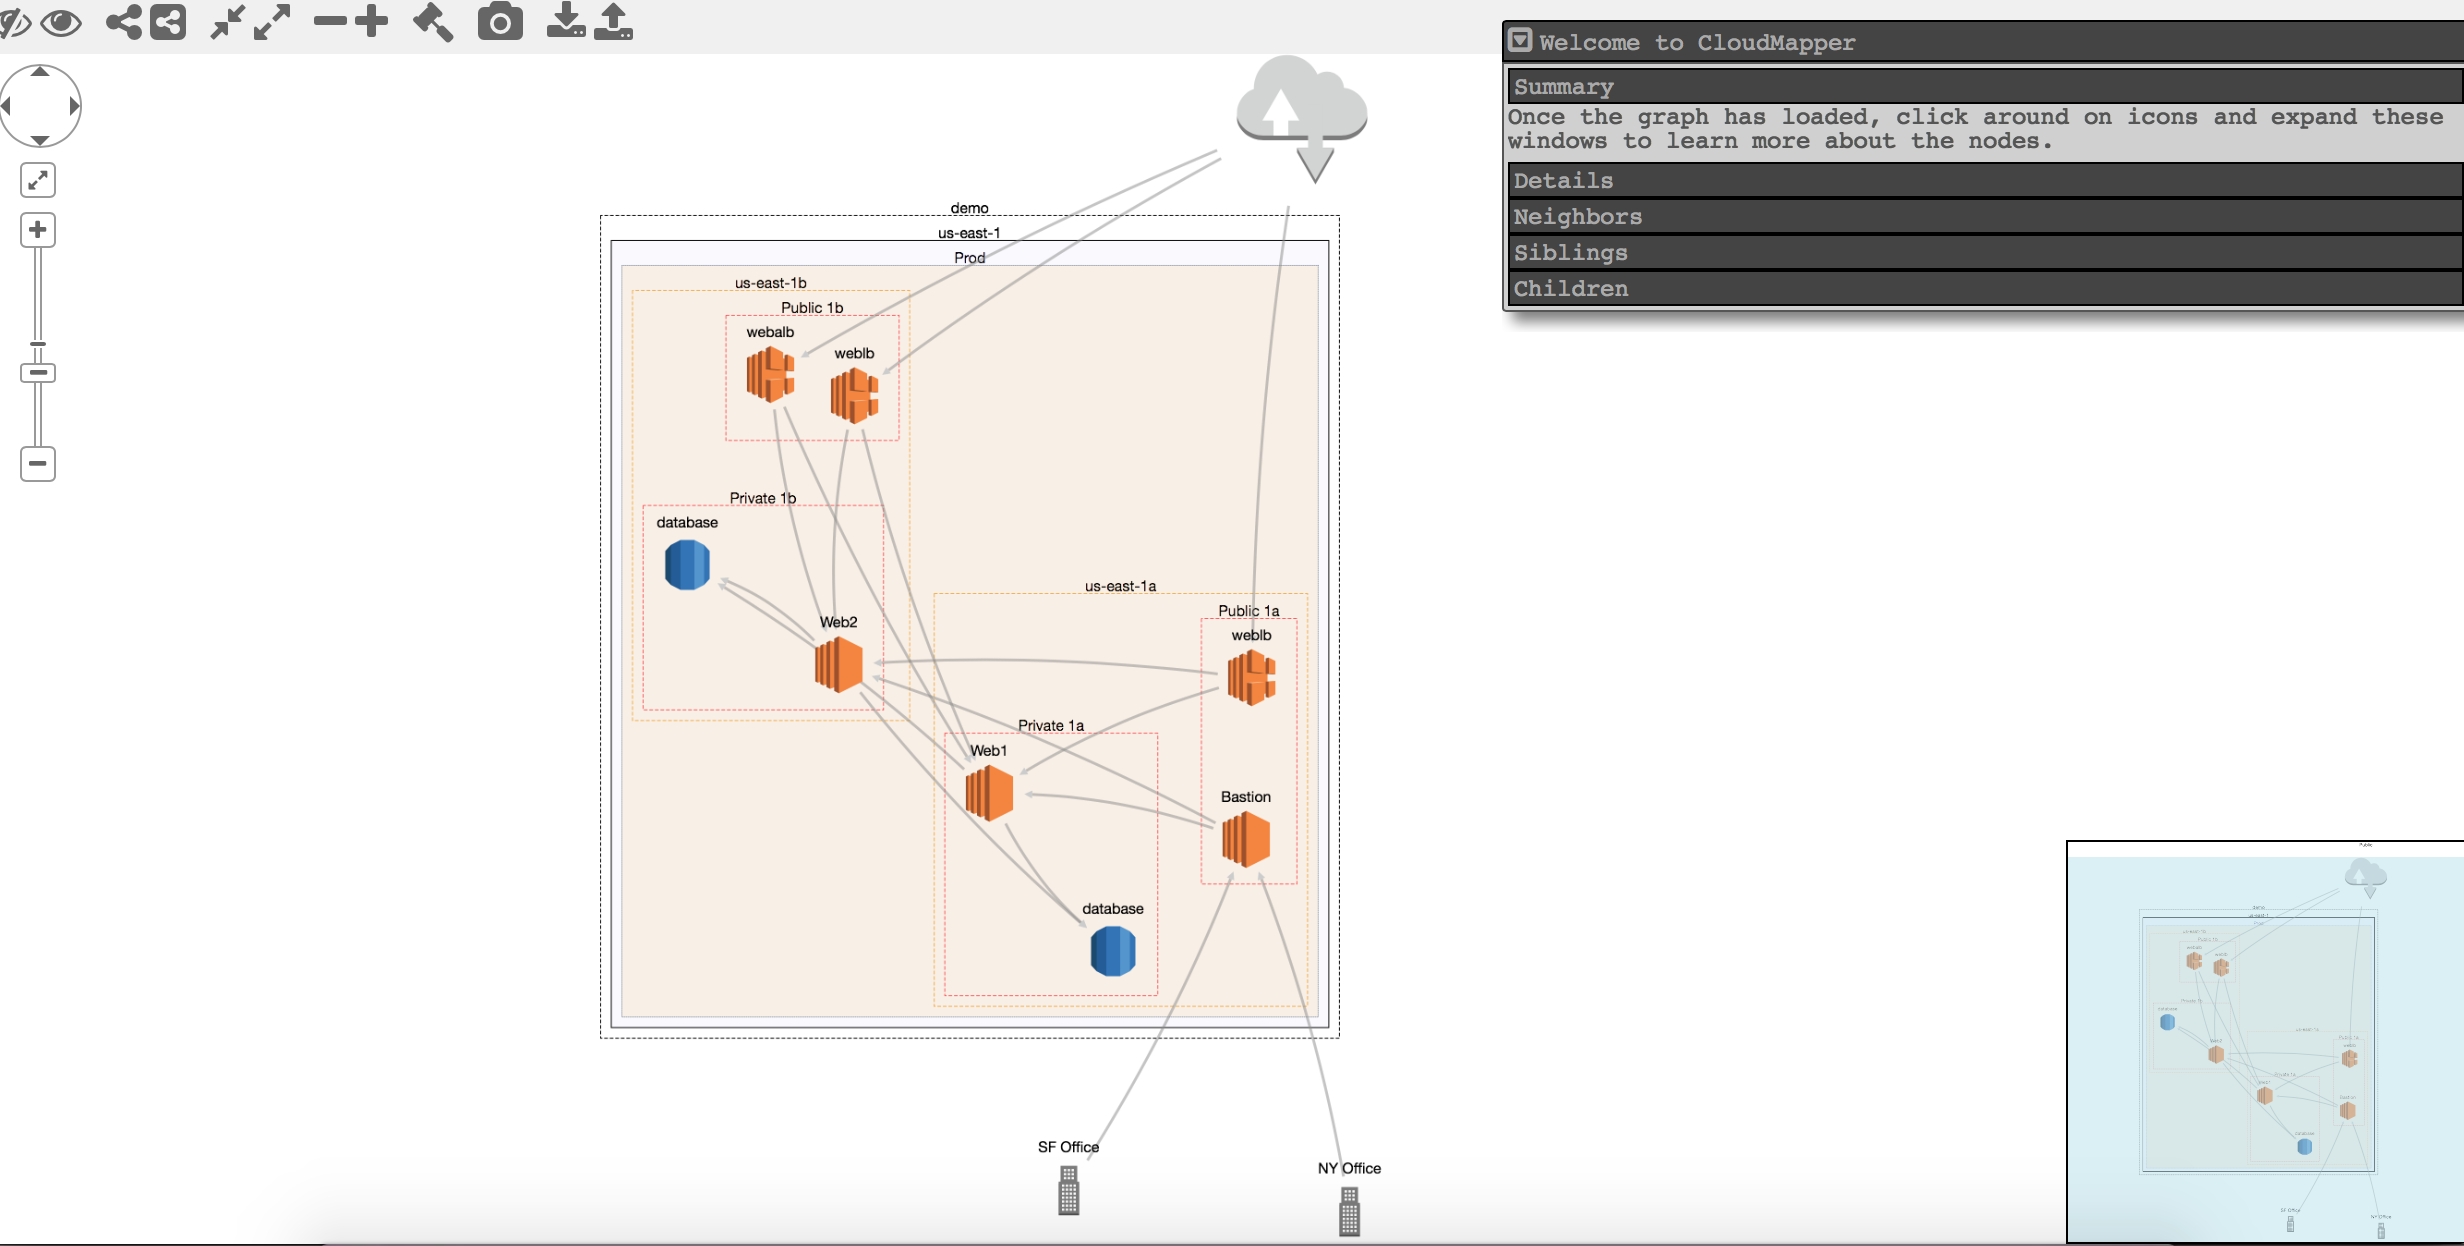
すると以下のような構成図が表示されます。
構成図の作成
それでは今度は実際に自分のAWS環境の構成図を描画したいと思います。
IAMユーザーの作成
まずは、AWS環境の情報を取得する必要があります。そのためのIAMユーザーを作成します。
$ aws iam create-user --user-name cloudmapper
{
    "User": {
        "Path": "/",
        "UserName": "cloudmapper",
        "UserId": "xxxxxxxxxxxxxxxxxxxx",
        "Arn": "arn:aws:iam::xxxxxxxxxxxx:user/cloudmapper",
        "CreateDate": "2018-04-25T15:26:05.024Z"
    }
}
IAMユーザーを作成したら必要な権限のみをポリシーで与えます。
$ aws iam put-user-policy --user-name cloudmapper --policy-name cloudmapper_readonly_policy --policy-document '{
   "Version": "2012-10-17",
   "Statement": [
     {
       "Effect": "Allow",
       "Resource": "*",
       "Action": [
         "ec2:DescribeRegions",
         "ec2:DescribeAvailabilityZones",
         "ec2:DescribeVpcs",
         "ec2:DescribeSubnets",
         "ec2:DescribeSecurityGroups",
         "ec2:DescribeVpcPeeringConnections",
         "ec2:DescribeInstances",
         "ec2:DescribeNetworkInterfaces",
         "rds:DescribeDBInstances",
         "elasticloadbalancing:DescribeLoadBalancers"
       ]
     }
   ]
 }'
次にツールからアクセスするためのアクセスキーを作成します。
$ aws iam create-access-key --user-name cloudmapper
{
    "AccessKey": {
        "UserName": "cloudmapper",
        "AccessKeyId": "AKIxxxxxxxxxxxxxxxxx",
        "Status": "Active",
        "SecretAccessKey": "xxxxxxxxxxxxxxxxxxxxxxxxxxxxxxxxxxxxxxxx",
        "CreateDate": "2018-04-25T15:32:24.676Z"
    }
}
アクセスキーを作成したら以下のように_credentials_に設定します。
[cloudmapper]
aws_access_key_id = AKIxxxxxxxxxxxxxxxxx
aws_secret_access_key = xxxxxxxxxxxxxxxxxxxxxxxxxxxxxxxxxxxxxxxx
output = json
region = ap-northeast-1
これで準備完了です。
config設定
次にconfigの設定を行います。
$ cp config.json.demo config.json
今回は以下のように修正します。
$ cat config.json
{  "accounts":
    [
        {"id": "xxxxxxxxxxxx", "name": "hogehoge", "default": true}
    ],
    "cidrs":
    {
        "1.2.3.4/32": {"name": "Tokyo Office"},
        "4.3.2.1/32": {"name": "Osaka Office"}
    }
}
データ収集
それでは描画するためのデータ収集を行います。
$ ./collect_data.sh --account hogehoge --profile cloudmapper
* Startup checks
* Getting region names
* Getting VPC info
* Getting AZ info
* Getting subnet info
* Getting EC2 info
* Getting RDS info
* Getting ELB info
* Getting ALB info
* Getting security group info
* Getting network interface info
* Getting VPC peering info
データの準備
収集したデータをブラウザで見れるように変換します。
$ python cloudmapper.py prepare --account hogehoge
Building data for account hogehoge (xxxxxxxxxxxx)
- 0 nodes built in region ap-south-1
- 0 nodes built in region eu-west-3
- 0 nodes built in region eu-west-2
- 0 nodes built in region eu-west-1
- 0 nodes built in region ap-northeast-2
- 10 nodes built in region ap-northeast-1
- 0 nodes built in region sa-east-1
- 0 nodes built in region ca-central-1
- 0 nodes built in region ap-southeast-1
- 0 nodes built in region ap-southeast-2
- 0 nodes built in region eu-central-1
- 0 nodes built in region us-east-1
- 0 nodes built in region us-east-2
- 0 nodes built in region us-west-1
- 0 nodes built in region us-west-2
- 14 external CIDRs built
- 28 connections built
Complete
それではブラウザで確認します。
$ python cloudmapper.py serve
CloudMapper serving on 127.0.0.1:8000
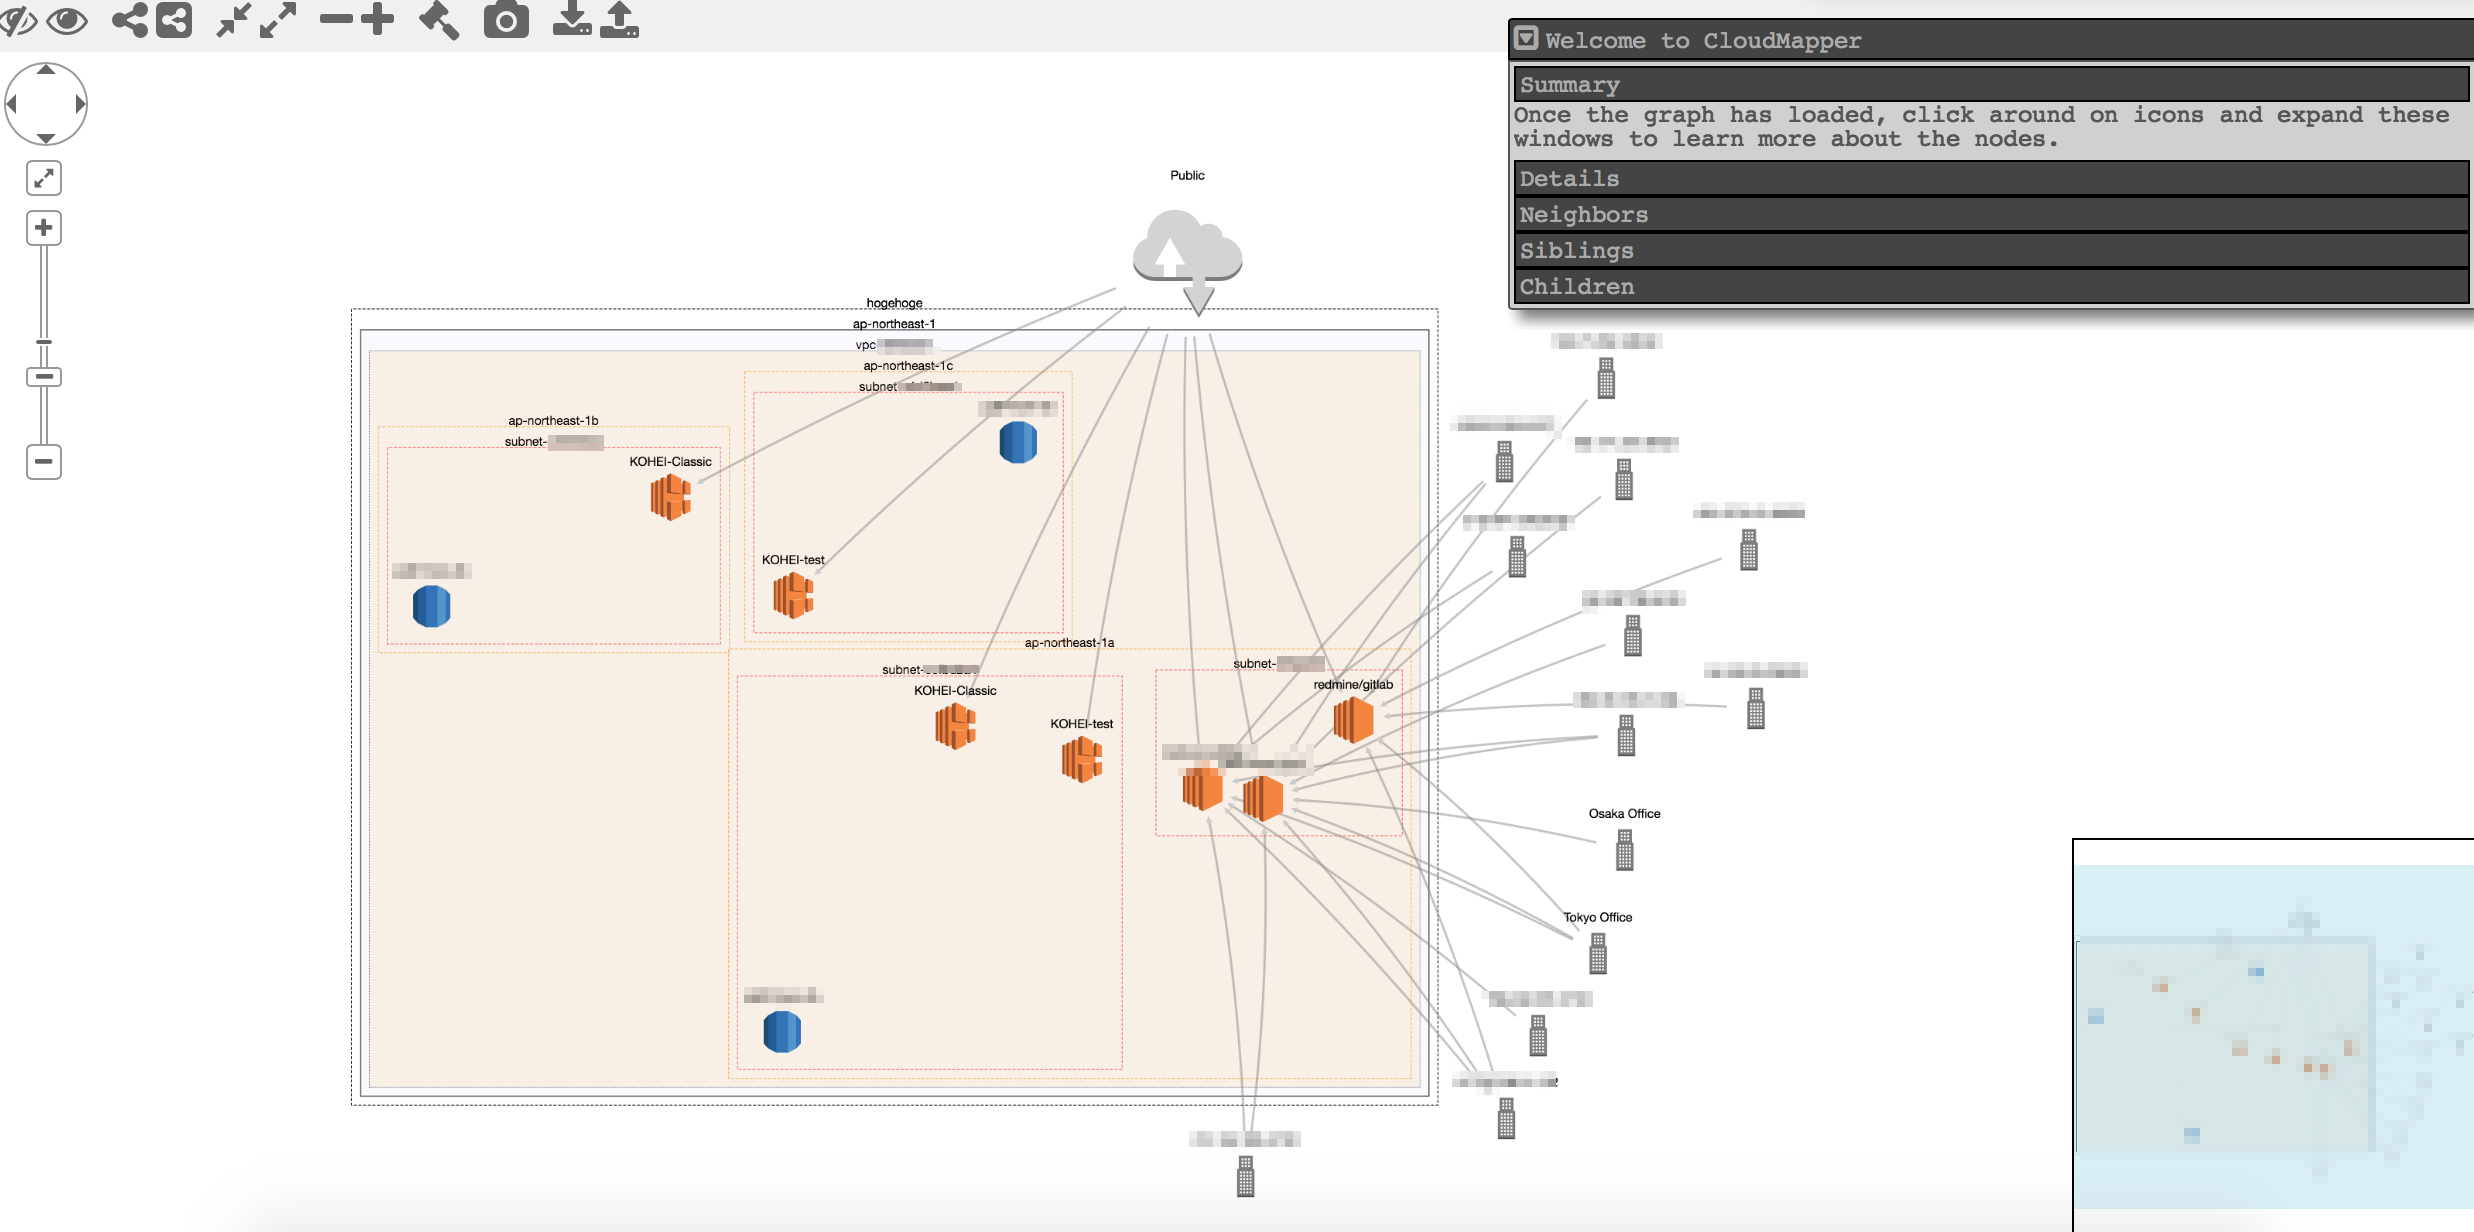
先ほど取得した情報が以下のように可視化されました。
config.jsonについて
先ほどconfig設定の際に修正した内容について説明しておきます。
まず先ほどの内容は以下です。
$ cat config.json
{  "accounts":
    [
        {"id": "xxxxxxxxxxxx", "name": "hogehoge", "default": true}
    ],
    "cidrs":
    {
        "1.2.3.4/32": {"name": "Tokyo Office"},
        "4.3.2.1/32": {"name": "Osaka Office"}
    }
}
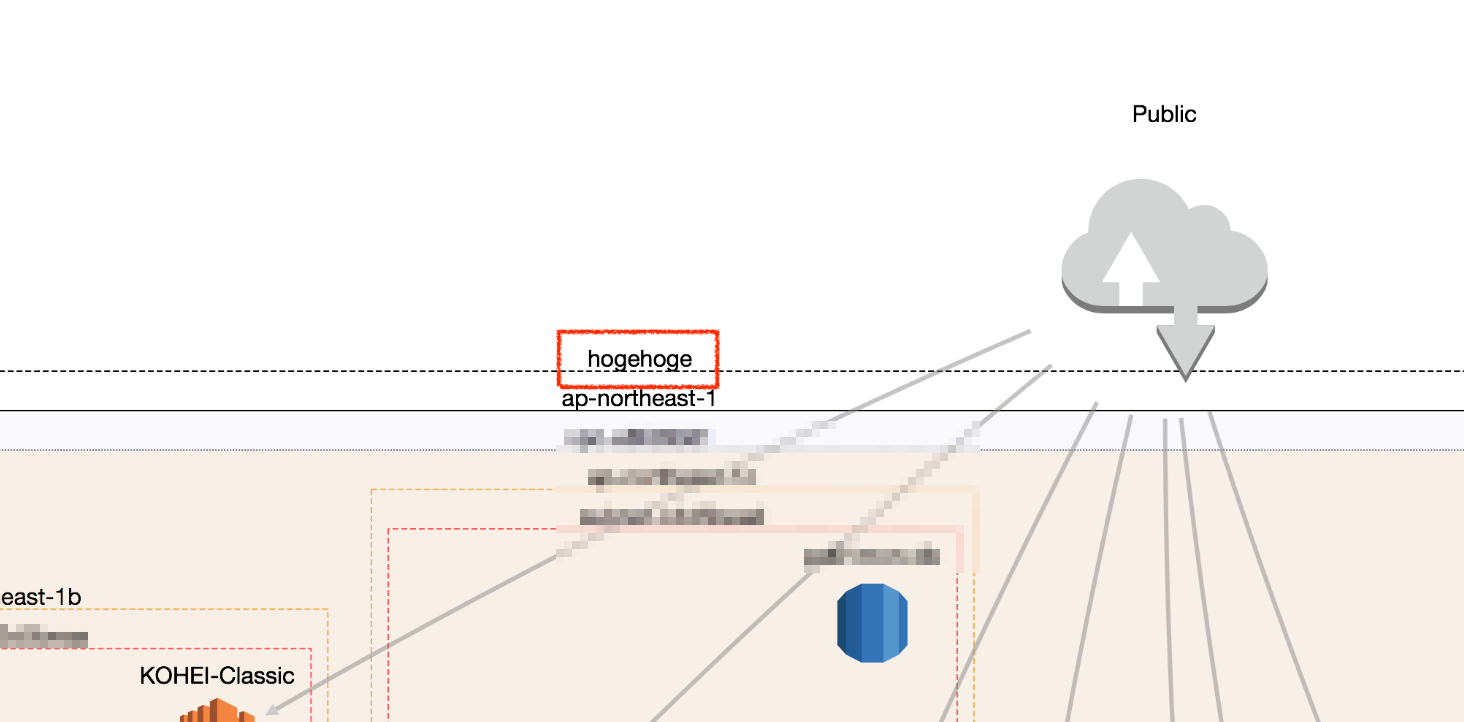
ここで name を hogehoge とすることで以下のようにAWSアカウント名を付ける事ができます。
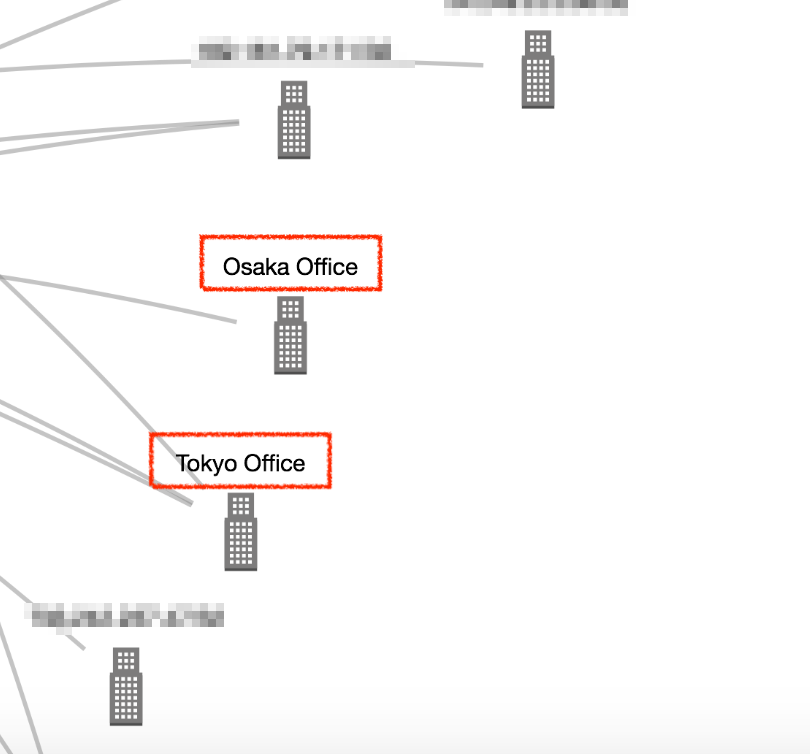
cidrs の項目では、通常だとIPが表示されるところを name の値に変えてくれます。
おわりに
定期的に可視化して確認する事で、外部からのアクセス状況のチェックもできます。
なので、ただの構成描画というだけでなく、セキュリティチェックの役にも立つのでとても良いツールだと思います。