64
43

Delete article

Deleted articles cannot be recovered.

Draft of this article would be also deleted.

Are you sure you want to delete this article?

More than 3 years have passed since last update.

MapKitで現在地にフォーカスを合わせる+ユーザの位置に追従させる

Last updated at Posted at 2015-07-31

最初は CoreLocation でユーザの現在地を取得して、MapViewにセットしていたのですが、MapKit だけでも実装できたのでメモ。

準備

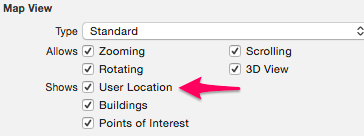
MapView の User Location にチェックを入れておきましょう。

image

現在地にフォーカスを合わせる

MapView自体がユーザの現在地を保持しているので、そちらをそのまま地図の中心点としてセットします。

mapView.setCenterCoordinate(mapView.userLocation.coordinate, animated: true)

これで地図の中心がユーザの現在地に移動します。アニメーションがいらない場合は animated を 'false' にしてください。

ユーザの位置に追従させる

userTrackingMode プロパティに .follow をセットすることで、ユーザの移動に合わせて地図の中心点を追従してくれます。

mapView.userTrackingMode = .follow

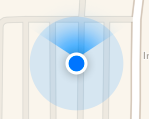
また、.followWithHeading をセットすることで、ユーザが向いている方向も表示してくれます。
image

64
43
5

Register as a new user and use Qiita more conveniently

  1. You get articles that match your needs
  2. You can efficiently read back useful information
  3. You can use dark theme
What you can do with signing up
64
43

Delete article

Deleted articles cannot be recovered.

Draft of this article would be also deleted.

Are you sure you want to delete this article?