こんにちは、12/8担当の @koogawa です!よろしくお願いします。
iOS 8から UILocalNotification に Location Notification という機能が新しく追加されました。従来の UILocalNotification では時刻指定によるユーザへの通知が可能でしたが、iOS 8 からは 位置情報ベースによる通知 が可能になりました。これが Location Notification です。
この機能により、領域観測(指定した領域へのユーザの出入りを検出する機能)がより簡単に実装できるようになりました。というわけで、今回は「指定した目的地に着いたら教えてくれるアプリ」を作ってみました。
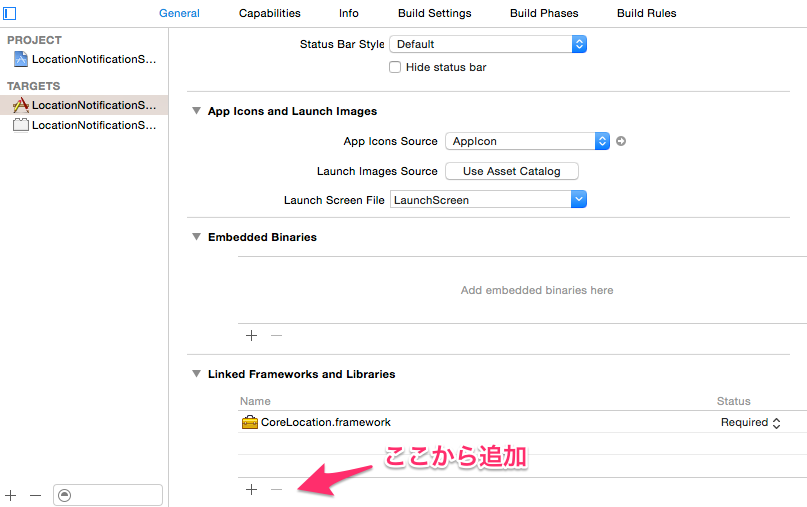
CoreLocation.framework追加
まずは位置情報を扱うために CoreLocation.framework を追加します。
位置情報の使用許可
ユーザに位置情報の使用許可をリクエストします。
- (void)locationManager:(CLLocationManager *)manager
didChangeAuthorizationStatus:(CLAuthorizationStatus)status
{
    switch (status)
    {
        case kCLAuthorizationStatusDenied:
            [manager requestWhenInUseAuthorization];
            break;

        default:
            break;
    }
}
Location Notificationでユーザの位置情報を監視するためには、「Appの使用中のみ許可」を設定してもらう必要があります。そのため requestWhenInUseAuthorization メソッドを使ってユーザに位置情報の使用許可をリクエストします。
iOS 8での位置情報の扱いについては次の記事を参照してください。
通知の許可設定
通知を出すための設定を行います。iOS 8からはLocal Notificationを使う場合でもユーザの許可が必要になりました。
- (BOOL)application:(UIApplication *)application didFinishLaunchingWithOptions:(NSDictionary *)launchOptions
{
    // Override point for customization after application launch.
    if ([application respondsToSelector:@selector(registerUserNotificationSettings:)])
    {
        UIUserNotificationSettings *settings =
        [UIUserNotificationSettings settingsForTypes:UIUserNotificationTypeAlert|UIUserNotificationTypeSound
                                          categories:nil];
        [application registerUserNotificationSettings:settings];
    }

    return YES;
}
今回はバッジを表示する必要はないので、UIUserNotificationTypeAlert と UIUserNotificationTypeSound のみ登録しています。
Location Notificationの実装
UILocalNotification を使って Location Notification を実装します。
- (void)setNotification
{
    // 設定する前に、設定済みの通知をキャンセルする
    [[UIApplication sharedApplication] cancelAllLocalNotifications];

    // 目的地を設定
    CLLocationCoordinate2D target = CLLocationCoordinate2DMake(35.6663268, 139.731032);  // 六本木
    CLLocationDistance radius = 100.0;  // 半径何メートルに入ったら通知するか
    NSString *identifier = @"identifier"; // 通知のID

    CLCircularRegion *region = [[CLCircularRegion alloc] initWithCenter:target
                                                                 radius:radius
                                                             identifier:identifier];

    // Notificationセット
    UILocalNotification *localNotification = [[UILocalNotification alloc] init];
    localNotification.alertBody = @"目的地に着きました!";
    localNotification.soundName = UILocalNotificationDefaultSoundName;
    localNotification.alertAction = @"OK";
    localNotification.regionTriggersOnce = YES;
    localNotification.region = region;

    [[UIApplication sharedApplication] scheduleLocalNotification:localNotification];
}
目的地の情報は CLCircularRegion で設定します。領域の中心点と半径をメートルで指定できます。
この CLCircularRegion を UILocalNotification の region プロパティにセットします。このとき regionTriggersOnce プロパティに YES をセットすることで、領域に入った際に一度だけ通知を出すよう設定できます(デフォルトはYES)。
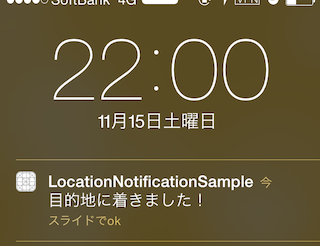
最後にUILocalNotification を scheduleLocalNotification で登録して完了です。
この状態でユーザが目的地に領域に入ると、次の通知が表示されます。
地図で可視化
この実装だけで領域観測が可能になるのですが、今どこに目的地がセットされているのか?が視覚的にわかったほうが便利なので、地図で表示してみました。(青い点が現在地、赤い円が目的地です)
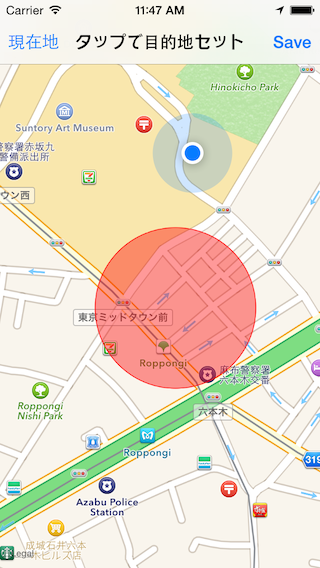
また、せっかくなので地図をタップすることで簡単に目的地をセットできるようにしてみました。地図に円を描く方法は次の記事を参照してください。
サンプルソースはこちらに置いてあるのでぜひ使ってみてください。
注意点
- ユーザに位置情報の使用を許可してもらう必要があります(「このAppの使用中のみ許可」権限が必要)
- Location Notificationを設定する時点で既に目的地領域内にいる場合は何も起きません
- アプリ起動直後などNotificationを設定するタイミングが早過ぎるとうまく動作しないようです(位置情報が取得できた後に設定することが重要)
参考にさせて頂いた資料
- Location Notification を使って領域観測で通知する - 私の質問にも親切に答えて頂きました。諏訪さん、ありがとうございました!