2021/05/26追記: OpenWrtの現在のstable release (19.07)のJoolパッケージはバージョン3.5.7ですが、次のOpenWrt 21.02では4.1.5に更新されているようです。
Jool 4.x向けに記事の内容を変更しましたが、3.5を使用する場合はこちらを参照してください。
OpenWrtのLAN側のネットワークはデフォルトではIPv4/IPv6デュアルスタックで動作するように設定されていますが、これをIPv6シングルスタックに変更するためJoolとUnboundを使ってNAT64/DNS64環境を構築しました。
環境
root@OpenWrt:~# cat /etc/openwrt_release
DISTRIB_ID='OpenWrt'
DISTRIB_RELEASE='21.02.0-rc1'
DISTRIB_REVISION='r16046-59980f7aaf'
DISTRIB_TARGET='ath79/generic'
DISTRIB_ARCH='mips_24kc'
DISTRIB_DESCRIPTION='OpenWrt 21.02.0-rc1 r16046-59980f7aaf'
DISTRIB_TAINTS=''
root@OpenWrt:~# jool --version
4.1.5.0
root@OpenWrt:~# unbound -V
Version 1.13.1
デフォルトでは以下のようなネットワーク構成になっています。
# ifstatus wan
...
        "proto": "dhcp",
        "device": "eth0.2",
        "ipv4-address": [
                {
                        "address": "10.10.10.113",
                        "mask": 24
                }
        ],
        "dns-server": [
                "10.10.10.1"
        ],
...

# ifstatus wan6
...
        "proto": "dhcpv6",
        "device": "eth0.2",
        "ipv6-prefix": [
                {
                        "address": "2001:db8:fc7e:200::",
                        "mask": 56,
                        "class": "wan6",
                        "assigned": {
                                "lan": {
                                        "address": "2001:db8:fc7e:200::",
                                        "mask": 60
                                }
                        }
                }

        ],
        "dns-server": [
                "2001:db8:fc7e::1"
        ],
...

# ifstatus lan
...
        "proto": "static",
        "device": "br-lan",
        "ipv4-address": [
                {
                        "address": "192.168.1.1",
                        "mask": 24
                }
        ],
        "ipv6-prefix-assignment": [
                {
                        "address": "2001:db8:fc7e:200::",
                        "mask": 60,
                        "local-address": {
                                "address": "2001:db8:fc7e:200::1",
                                "mask": 60
                        }
                },
                {
                        "address": "fd92:2bfc:16ee::",
                        "mask": 60,
                        "local-address": {
                                "address": "fd92:2bfc:16ee::1",
                                "mask": 60
                        }
                }
        ],
...
+------+  |
| Host +--+ LAN +---------+ WAN/ +------+
+------+  |     |         | WAN6 |      |
          +-----+ OpenWrt +------+  GW  |
+------+  |     |         |      |      |
| Host +--+     +---------+      +------+
+------+  |

<---------------- v4/v6 ---------------->
これを以下のように変更します。
+------+  |
| Host +--+ LAN +---------+ WAN/ +------+
+------+  |     |         | WAN6 |      |
          +-----+ OpenWrt +------+  GW  |
+------+  |     |         |      |      |
| Host +--+     +---------+      +------+
+------+  |

<---- v6 ----> NAT64/DNS64 <--- v4/v6 --->
NAT64/DNS64を利用してIPv4への接続性を確保しつつ、LAN側のIPv4を無効にします。
必要なパッケージのインストール
# opkg update
# opkg install unbound-daemon kmod-jool jool-tools
DNS64 (Unbound)の設定
# uci set unbound.@unbound[0].dns64='1'
# uci commit unbound
全ての名前解決を別のDNSキャッシュサーバにforwardしたい場合は以下のようにforward-zoneを設定する。
forward-zone:
        name: "."
        forward-addr: 10.10.10.1
        forward-addr: 2001:db8:fc7e::1
DnsmasqのDNSサーバを無効にする。
# uci set dhcp.@dnsmasq[0].port='0'
# uci commit dhcp
# service dnsmasq restart
# service unbound restart
名前解決できているか確認する。
# nslookup ipv4.google.com localhost
Server:         localhost
Address:        ::1#53

Name:      ipv4.google.com
ipv4.google.com canonical name = ipv4.l.google.com
Name:      ipv4.l.google.com
Address 1: 172.217.25.110
ipv4.google.com canonical name = ipv4.l.google.com
Address 2: 64:ff9b::acd9:196e
NAT64 (Jool)の設定
# modprobe jool
# jool instance add "example" --iptables --pool6 64:ff9b::/96
# ip6tables -t mangle -A PREROUTING -j JOOL --instance "example"
# iptables -t mangle -A PREROUTING -j JOOL --instance "example"
起動時にJoolが有効になるように、initスクリプトと設定ファイルを作成する。
# mkdir /etc/jool
# cat << "EOF" > /etc/jool/jool.conf
{
	"comment": "Configuration for the NAT64 Jool service.",

	"instance": "example",
	"framework": "iptables",

	"global": {
		"pool6": "64:ff9b::/96"
	}
}
EOF
# cat << "EOF" >> /etc/firewall.user
ip6tables -t mangle -A PREROUTING -j JOOL --instance "example"
iptables -t mangle -A PREROUTING -j JOOL --instance "example"
EOF
# cat << "EOF" >> /etc/sysupgrade.conf
/etc/init.d/jool
/etc/jool/
EOF
# wget -O /etc/init.d/jool https://gist.githubusercontent.com/konosukef/d0a3b8fa73458defd4f61c95649dd029/raw/jool
# chmod +x /etc/init.d/jool
# service jool enable
# service jool restart
# service firewall restart
LANのIPv4の設定を削除する。
# uci delete network.lan.ipaddr
# uci delete network.lan.netmask
# uci commit network
# service network restart
接続テスト
root@OpenWrt:~# jool instance display
+--------------------+-----------------+-----------+
|          Namespace |            Name | Framework |
+--------------------+-----------------+-----------+
|           8064df98 |         example |  iptables |
+--------------------+-----------------+-----------+

root@OpenWrt:~# jool --instance "example" global display
  manually-enabled: true
  pool6: 64:ff9b::/96
  lowest-ipv6-mtu: 1280
  logging-debug: false
  zeroize-traffic-class: false
  override-tos: false
  tos: 0
  mtu-plateaus: 65535,32000,17914,8166,4352,2002,1492,1006,508,296,68
  address-dependent-filtering: false
  drop-externally-initiated-tcp: false
  drop-icmpv6-info: false
  source-icmpv6-errors-better: true
  f-args: 11 (0b1011): SrcAddr:1 SrcPort:0 DstAddr:1 DstPort:1
  handle-rst-during-fin-rcv: false
  tcp-est-timeout: 2:00:00 (HH:MM:SS)
  tcp-trans-timeout: 0:04:00 (HH:MM:SS)
  udp-timeout: 0:05:00 (HH:MM:SS)
  icmp-timeout: 0:01:00 (HH:MM:SS)
  logging-bib: false
  logging-session: false
  maximum-simultaneous-opens: 10
  ss-enabled: false
  ss-flush-asap: true
  ss-flush-deadline: 2000
  ss-capacity: 512
  ss-max-payload: 1452

root@OpenWrt:~# ip6tables -t mangle -L
Chain PREROUTING (policy ACCEPT)
target     prot opt source               destination
JOOL       all      anywhere             anywhere             instance:example
...

root@OpenWrt:~# iptables -t mangle -L
Chain PREROUTING (policy ACCEPT)
target     prot opt source               destination
JOOL       all  --  anywhere             anywhere             instance:example
...
LAN側のホストからipv4.google.comにpingしてみます。
user@host:~$ ping6 ipv4.google.com
PING ipv4.google.com(nrt13s51-in-f14.1e100.net (64:ff9b::acd9:196e)) 56 data bytes
64 bytes from nrt13s51-in-f110.1e100.net (64:ff9b::acd9:196e): icmp_seq=1 ttl=116 time=5.18 ms
64 bytes from nrt13s51-in-f110.1e100.net (64:ff9b::acd9:196e): icmp_seq=2 ttl=116 time=5.00 ms
64 bytes from nrt13s51-in-f110.1e100.net (64:ff9b::acd9:196e): icmp_seq=3 ttl=116 time=5.20 ms
64 bytes from nrt13s51-in-f110.1e100.net (64:ff9b::acd9:196e): icmp_seq=4 ttl=116 time=5.36 ms
...
ICMPセッションテーブルを確認します。
root@OpenWrt:~# jool --instance "example" session display --icmp
---------------------------------
Expires in 0:00:49.412
Remote: nrt13s51-in-f110.1e100.net#63022 2001:db8:fc7e:200:8e3:5b48:3ed8:e40#1
Local: 10.10.10.113#63022       64:ff9b::acd9:196e#1
---------------------------------
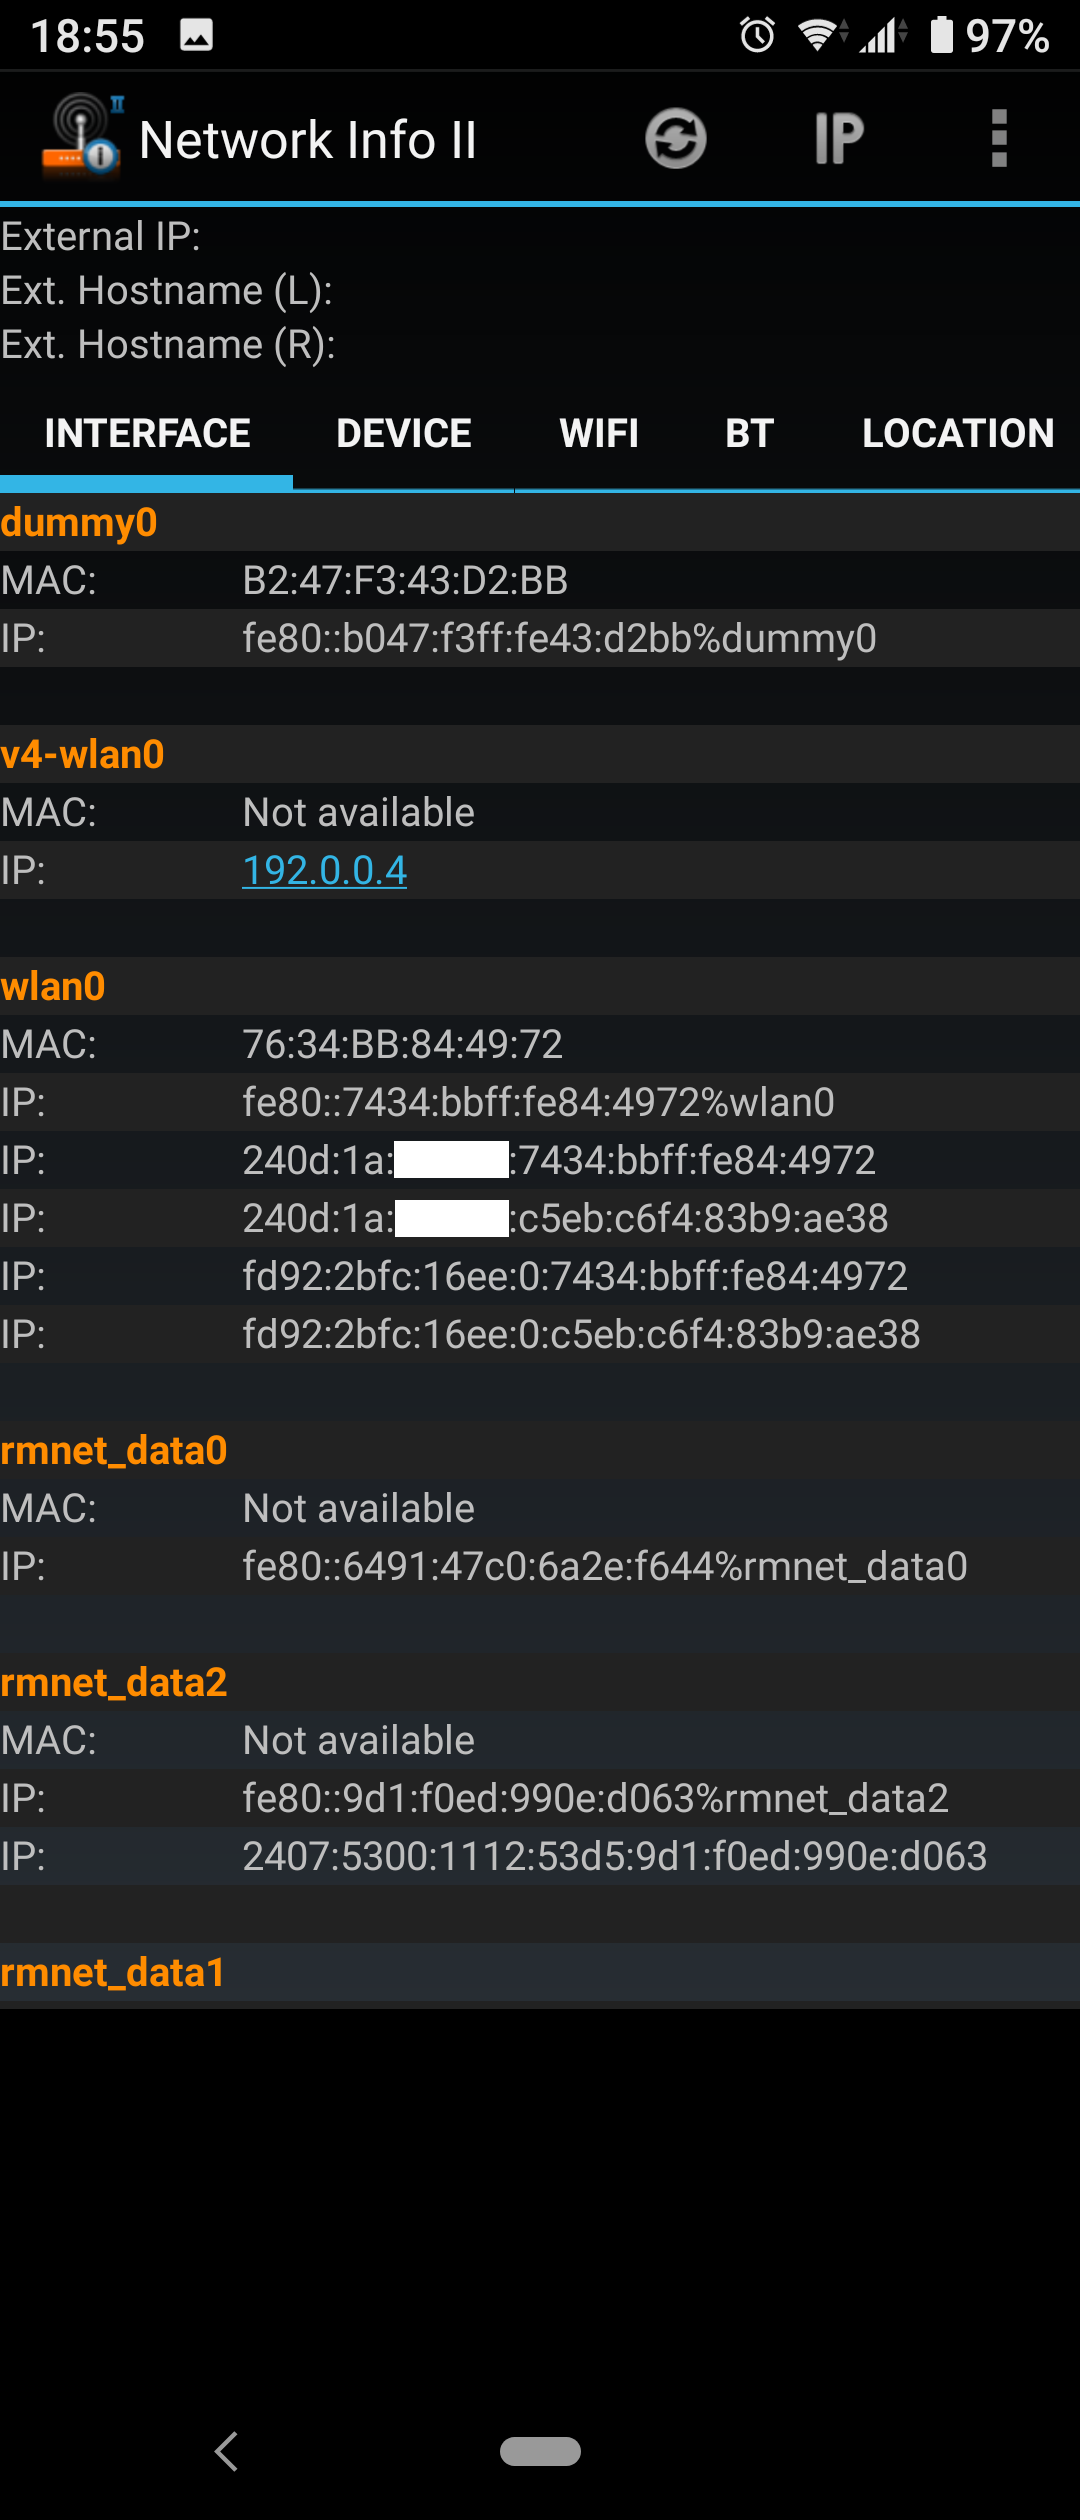
以下のようにAndroidではclatdが動いて192.0.0.4が自動設定されているので464XLATも問題ないようです。
