本記事は、Ansible Advent Calendar 2021 の24日目です。
はじめに
みなさん、Ansibleのテストを書いていますか?
いろいろな現場を見ていると、Ansibleでテストまで書いている人は少ないのではないかなと思っています。
そこで、今回はアドベントカレンダーのために作った自動テストを試すためのハンズオンレポジトリを紹介します。
こちらを一通りやることであなたもAnsible自動テストマスターです!
手順
1. プロジェクト準備
1.1. GitLab.com にログイン
予め作成しておいたアカウントを使用して、 https://gitlab.com/users/sign_in からGitLab.comにログインしましょう。
ユーザーアカウントが未作成の場合は、 https://gitlab.com/users/sign_up からユーザー作成を行ってください。なお、アカウント作成の際にはメールアドレスの存在確認が必要となります。
1.2. 元プロジェクトをフォーク
GitLab上でCIパイプラインの実行やコードの編集をできるように、以下の手順で当プロジェクトのフォーク(派生プロジェクト)を自分のアカウント配下に作成しましょう。
- ブラウザから https://gitlab.com/konono/ansible_ci_demo にアクセスして、*画面右上にある Fork ボタンをクリック
- 遷移した Fork project ページで自分のアカウントに表示されている Select ボタンを選択
- フォークしたプロジェクト https://gitlab.com/{あなたのユーザーID}/ansible_ci_demo に移動していることを確認
1.3. Repositoryのクローン
git clone [your repositoy]
1.4. pyenvのインストール
# Clone repository
git clone https://github.com/pyenv/pyenv.git ~/.pyenv

# Configure environment
echo 'export PYENV_ROOT="$HOME/.pyenv"' >> ~/.bash_profile
echo 'export PATH="$PYENV_ROOT/bin:$PATH"' >> ~/.bash_profile
echo 'eval "$(pyenv init -)"' >> ~/.bash_profile

# Instlal python

pyenv install 3.7.7
pyenv install 3.8.3
2. 静的テスト
2.1.1. ansible-lint
以下のコマンドでansible-lintをインストールしましょう。
pip3 ansible-lint
次にファイルを以下のように編集してみてください。
「name: Ensure proper Apache configuration」を削除します。
diff --git a/roles/apache/tasks/main.yml b/roles/apache/tasks/main.yml
index bd0aeac..af74986 100644
--- a/roles/apache/tasks/main.yml
+++ b/roles/apache/tasks/main.yml
@@ -5,9 +5,8 @@
     state: present
   notify: apache-restart

-- name: Ensure proper Apache configuration  <-- nameをtask optionから削除する
-  template:
-    src: httpd.conf.j2
+- template:
+    src: httpd.conf.j2
     dest: /etc/httpd/conf/httpd.conf
     mode: 0644
   notify: apache-restart
それではansible-lintを実行して、lintチェックができるかを確かめてみてください。
予測される実行結果
❯ ansible-lint
WARNING  Listing 1 violation(s) that are fatal
unnamed-task: All tasks should be named
roles/apache/tasks/main.yml:8 Task/Handler: template src=httpd.conf.j2 dest=/etc/httpd/conf/httpd.conf mode=420

You can skip specific rules or tags by adding them to your configuration file:
# .ansible-lint
warn_list:  # or 'skip_list' to silence them completely
  - unnamed-task  # All tasks should be named

Finished with 1 failure(s), 0 warning(s) on 22 files.
2.1.2. ansible-lint custom lint rules
Ansible-lintではコーディング規約などで決められたruleをpythonでを記述することで、custom lint ruleを作ることが出来ます。
例えば、「YAMLファイルの拡張子は.ymlで統一する」といったルールがあった場合には以下のように表現することが出来る。
cat rules/YamlExtensionRule.py
from ansiblelint.constants import odict
from ansiblelint.errors import MatchError
from ansiblelint.file_utils import Lintable
from ansiblelint.rules import AnsibleLintRule
from typing import Any
from typing import List


class YamlExtensionRule(AnsibleLintRule):
    id = 'yaml-extension'
    shortdesc = 'Playbooks should have the ".yml" extension'
    description = ''
    tags = ['yaml']
    done = []

    def matchplay(
        self, file: Lintable, data: "odict[str, Any]"
    ) -> List[MatchError]:
        if file.path.suffix in ('.yaml'):
            return [
                self.create_matcherror(
                    message="Playbook doesn't have '.yml' extension: " +
                    str(data['__file__']) + ". " + self.shortdesc,
                    linenumber=data['__line__'],
                    filename=file
                )
            ]
        return []
次にテスト用のファイルを作成します。
vim site.yaml
---
- name: 'Lint test playbook'
  hosts: 'all'
  tasks:
    - name: 'Include apache'
      include_role:
        name: 'apache'
それでは書いたcustom lint ruleを実際に使ってみましょう。
git add site.yaml
❯ ansible-lint
WARNING  Listing 1 violation(s) that are fatal
yaml-extension: Playbook doesn't have '.yml' extension: site.yaml. Playbooks should have the ".yml" extension
site.yaml:2

You can skip specific rules or tags by adding them to your configuration file:
# .ansible-lint
warn_list:  # or 'skip_list' to silence them completely
  - yaml-extension  # Playbooks should have the ".yml" extension

Finished with 1 failure(s), 0 warning(s) on 23 files.
yamlファイルを検出してErrorを返すことが確認できました。
最後にgit reset --hardを実行して、編集したファイルをもとに戻しましょう。
2.2. yamllint
以下のコマンドでyamllintをインストールしましょう。
pip3 yamllint
次にファイルを以下のように編集してみてください。
src: の後に[ ]を追加しています。
❯ git diff
diff --git a/roles/apache/tasks/main.yml b/roles/apache/tasks/main.yml
index a54e21a..b7c8562 100644
--- a/roles/apache/tasks/main.yml
+++ b/roles/apache/tasks/main.yml
@@ -7,7 +7,7 @@

 - name: Ensure proper Apache configuration
   template:
-    src: httpd.conf.j2
+    src:  httpd.conf.j2
     dest: /etc/httpd/conf/httpd.conf
     mode: 0644
   notify: apache-restart
それでは*yamllint .*を実行して、lintチェックができるかを確かめてみてください。
予測される実行結果
❯ yamllint .
./roles/apache/tasks/main.yml
  10:10     error    too many spaces after colon  (colons)
デフォルトルールに違反しているyamlを検出することが出来ました。
最後にgit reset --hardを実行して、編集したファイルをもとに戻しましょう。
3. 動的テスト
3.1. molecule
以下のコマンドでmoleculeをインストールしましょう
pip3 molecule[docker]
以下の3ファイルをroles/apache/molecule/default配下に配置します。
❯ cat roles/apache/molecule/default/converge.yml
---
- name: Converge
  hosts: all
  tasks:
    - name: "Include apache"
      include_role:
        name: "apache"
❯ cat roles/apache/molecule/default/molecule.yml
---
dependency:
  name: galaxy
driver:
  name: docker
platforms:
  - name: instance
    image: registry.access.redhat.com/ubi8/ubi-init
    pre_build_image: true
    command: /sbin/init
    privileged: true
    volumes:
      - /sys/fs/cgroup:/sys/fs/cgroup:ro
provisioner:
  name: ansible
verifier:
  name: ansible
❯ cat roles/apache/molecule/default/verify.yml
---
# This is an example playbook to execute Ansible tests.

- name: Verify
  hosts: all
  gather_facts: false
  tasks:
    - name: Check httpd server is running
      uri:
        url: http://localhost
        status_code: 200
次に**roles/apache/**に移動してmolecule testを実行します。
このmoleculeを使ったUnit testではcontainerを立ち上げ、containerに対してapacheをインストールするroleを実行し。
http get requestを実行し200が返ってくることをテストしています。
予測される実行結果
❯ molecule test
--> Test matrix

└── default
    ├── dependency
    ├── lint
    ├── cleanup
    ├── destroy
    ├── syntax
    ├── create
    ├── prepare
    ├── converge
    ├── idempotence
    ├── side_effect
    ├── verify
    ├── cleanup
    └── destroy

--> Scenario: 'default'
--> Action: 'dependency'
Skipping, missing the requirements file.
Skipping, missing the requirements file.
--> Scenario: 'default'
--> Action: 'lint'
--> Lint is disabled.
--> Scenario: 'default'
--> Action: 'cleanup'
Skipping, cleanup playbook not configured.
--> Scenario: 'default'
--> Action: 'destroy'
--> Sanity checks: 'docker'
    PLAY [Destroy] *****************************************************************

    TASK [Destroy molecule instance(s)] ********************************************
    changed: [localhost] => (item=instance)

    TASK [Wait for instance(s) deletion to complete] *******************************
    ok: [localhost] => (item=None)
    ok: [localhost]

    TASK [Delete docker network(s)] ************************************************

    PLAY RECAP *********************************************************************
    localhost                  : ok=2    changed=1    unreachable=0    failed=0    skipped=1    rescued=0    ignored=0

--> Scenario: 'default'
--> Action: 'syntax'
    playbook: /Users/yyamashi/gitrepo/ansible_ci_demo/roles/apache/molecule/default/converge.yml
--> Scenario: 'default'
--> Action: 'create'
    PLAY [Create] ******************************************************************

    TASK [Log into a Docker registry] **********************************************
    skipping: [localhost] => (item=None)

    TASK [Check presence of custom Dockerfiles] ************************************
    ok: [localhost] => (item=None)
    ok: [localhost]

    TASK [Create Dockerfiles from image names] *************************************
    skipping: [localhost] => (item=None)

    TASK [Discover local Docker images] ********************************************
    ok: [localhost] => (item=None)
    ok: [localhost]

    TASK [Build an Ansible compatible image (new)] *********************************
    skipping: [localhost] => (item=molecule_local/registry.access.redhat.com/ubi8/ubi-init)

    TASK [Create docker network(s)] ************************************************

    TASK [Determine the CMD directives] ********************************************
    ok: [localhost] => (item=None)
    ok: [localhost]

    TASK [Create molecule instance(s)] *********************************************
    changed: [localhost] => (item=instance)

    TASK [Wait for instance(s) creation to complete] *******************************
    FAILED - RETRYING: Wait for instance(s) creation to complete (300 retries left).
    changed: [localhost] => (item=None)
    changed: [localhost]

    PLAY RECAP *********************************************************************
    localhost                  : ok=5    changed=2    unreachable=0    failed=0    skipped=4    rescued=0    ignored=0

--> Scenario: 'default'
--> Action: 'prepare'
Skipping, prepare playbook not configured.
--> Scenario: 'default'
--> Action: 'converge'
    PLAY [Converge] ****************************************************************

    TASK [Gathering Facts] *********************************************************
    ok: [instance]

    TASK [Include apache] **********************************************************

    TASK [apache : Ensure apache is installed] *************************************
    changed: [instance]

    TASK [apache : Ensure proper Apache configuration] *****************************
    changed: [instance]

    TASK [apache : Deploy index.html] **********************************************
    changed: [instance]

    RUNNING HANDLER [apache : apache-restart] **************************************
    changed: [instance]

    PLAY RECAP *********************************************************************
    instance                   : ok=5    changed=4    unreachable=0    failed=0    skipped=0    rescued=0    ignored=0

--> Scenario: 'default'
--> Action: 'idempotence'
Idempotence completed successfully.
--> Scenario: 'default'
--> Action: 'side_effect'
Skipping, side effect playbook not configured.
--> Scenario: 'default'
--> Action: 'verify'
--> Running Ansible Verifier
    PLAY [Verify] ******************************************************************

    TASK [Check httpd server is running] *******************************************
    ok: [instance]

    PLAY RECAP *********************************************************************
    instance                   : ok=1    changed=0    unreachable=0    failed=0    skipped=0    rescued=0    ignored=0

Verifier completed successfully.
--> Scenario: 'default'
--> Action: 'cleanup'
Skipping, cleanup playbook not configured.
--> Scenario: 'default'
--> Action: 'destroy'
    PLAY [Destroy] *****************************************************************

    TASK [Destroy molecule instance(s)] ********************************************
    changed: [localhost] => (item=instance)

    TASK [Wait for instance(s) deletion to complete] *******************************
    FAILED - RETRYING: Wait for instance(s) deletion to complete (300 retries left).
    changed: [localhost] => (item=None)
    changed: [localhost]

    TASK [Delete docker network(s)] ************************************************

    PLAY RECAP *********************************************************************
    localhost                  : ok=2    changed=2    unreachable=0    failed=0    skipped=1    rescued=0    ignored=0

--> Pruning extra files from scenario ephemeral directory
moleculeを使った動的テストは以上になります。
4. テストの自動化
4.1. pre-commitを使った静的テストの自動化
ansible-lintやyamllintを使って、ansible playbook, yamlに対して静的テストを実施することが出来ました。
しかし、これらのツールをチームに使うよう周知しても人間である以上実行を忘れてcommitしてしまうことがあると思います。
そこで、表題のpre-commitを使うことでLint testをgit commit時に自動実行させることが出来ます。
以下のコマンドでpre-commitをインストールしましょう。
pip3 install pre-commit
pre-commitのconfigurationを以下のように記述します。
---
# See https://pre-commit.com for more information
# See https://pre-commit.com/hooks.html for more hooks
repos:
  - repo: https://github.com/pre-commit/pre-commit-hooks
    rev: v3.4.0
    hooks:
      - id: check-case-conflict
      - id: check-merge-conflict
      - id: check-yaml
      - id: end-of-file-fixer
      - id: mixed-line-ending
  - repo: https://github.com/ansible/ansible-lint.git
    rev: v5.0.12
    hooks:
      - id: ansible-lint
        name: Ansible-lint
        description: This hook runs ansible-lint.
        entry: ansible-lint
        language: python
        # do not pass files to ansible-lint, see:
        # https://github.com/ansible/ansible-lint/issues/611
        always_run: true
        pass_filenames: false
  - repo: https://github.com/adrienverge/yamllint.git
    rev: v1.26.3
    hooks:
      - id: yamllint
まずはpre-commitをこのrepositoryに適用します
pre-commit install
次にファイルを以下のように編集してみてください。
src: の後に[ ]を追加しています。
--- roles/apache/tasks/main.yml 2021-07-13 13:26:00.000000000 +0900
+++ roles/apache/tasks/main.yml_1       2021-07-14 23:01:58.000000000 +0900
@@ -7,7 +7,7 @@

 - name: Ensure proper Apache configuration
   template:
-    src: httpd.conf.j2
+    src:  httpd.conf.j2
     dest: /etc/httpd/conf/httpd.conf
     mode: 0644
   notify: apache-restart
それでは以下のコマンドでpre-commitが動作することを確認しましょう。
git add .
❯ git commit -m 'TEST'
Check for case conflicts.................................................Passed
Check for merge conflicts................................................Passed
Check Yaml...............................................................Passed
Fix End of Files.........................................................Passed
Mixed line ending........................................................Passed
Ansible-lint.............................................................Failed
- hook id: ansible-lint
- exit code: 2

Loading custom .yamllint.yml config file, this extends our internal yamllint config.
WARNING  Listing 1 violation(s) that are fatal
yaml: too many spaces after colon (colons)
roles/apache/tasks/main.yml:10

You can skip specific rules or tags by adding them to your configuration file:
# .ansible-lint
warn_list:  # or 'skip_list' to silence them completely
  - yaml  # Violations reported by yamllint

Finished with 1 failure(s), 0 warning(s) on 22 files.

yamllint.................................................................Failed
- hook id: yamllint
- exit code: 1

roles/apache/tasks/main.yml
  10:10     error    too many spaces after colon  (colons)

flake8...............................................(no files to check)Skipped
このようにansible-lintやyamllintをcommit時に動作させ、不正なコードを判定しcommit前にチェックをすることができます。
4.2. toxを使ったテスト環境構築の自動化とマルチバージョンテスト
toxを使うことで手元のpython環境を汚すことなく、テストを実施することが可能です。
また、PythonやLibraryのマルチバージョンテストも実現すつことが出来ます。
configurationはtox.iniファイルにテスト時に利用するコマンドや、テストに必要なパッケージの情報、テストしたいpython versionを記述します。
今回は以下のように記述します。
[tox]
envlist =
    py{37,38}-ansible29
    py{37,38}-pytest624
    py{37,38}-ansiblelint5012
    py{37,38}-flake8
skipsdist = True

[testenv]
passenv =
    TERM
[testenv:py{37,38}-ansible29]
passenv =
    DOCKER_HOST
    DOCKER_TLS_CERTDIR
    DOCKER_TLS_VERIFY
    DOCKER_CERT_PATH
setenv =
    MOLECULE_DEBUG = 1
deps =
    molecule[docker]
    ansible29: ansible>=2.9,<2.10
    yamllint
changedir = {toxinidir}/roles/apache
commands =
    molecule --version
    yamllint --version
    molecule test

[testenv:py{37,38}-pytest624]
deps =
    ansible>=2.9,<2.10
    ansible-lint==5.0.12
    -rtest-requirements.txt
changedir = {toxinidir}
commands =
    pytest --version
    pytest -v {toxinidir}/tests/Test_YamlExtensionRule.py

[testenv:py{37,38}-ansiblelint5012]
deps =
    ansible>=2.9,<2.10
    ansible-lint==5.0.12
    -rtest-requirements.txt
passenv =
changedir = {toxinidir}
commands =
    ansible-lint --version
    ansible-lint
[testenv:py{37,38}-flake8]
deps =
    hacking==4.1.0
passenv =
changedir = {toxinidir}
commands =
    flake8
toxコマンドを実行するだけで、venvの作成packageのインストールから、実際にテストコマンドの実行までを自動で実施してくれます。
また -eオプションを使うことで特定のテストのみを流すことも可能です。
このサンプルでは、以下のようなテストを試すことができます。
- py{37,38}-ansible29: py37,38を使ったroles/apachのmoleculeテスト
- py{37,38}-pytest624: py37,38を使ったrules/配下のpythonに対してのpytest
- py{37,38}-ansiblelint5012: py37,38を使ったansible-lint
- py{37,38}-flake8: py37,38を使ったpythonのコーディングスタイルテスト
toxの実行例
❯ tox -e py38-ansiblelint5012
py38-ansiblelint5012 installed: ansible==2.9.23,ansible-lint==5.0.12,apipkg==1.5,attrs==21.2.0,bracex==2.1.1,cffi==1.14.6,colorama==0.4.4,commonmark==0.9.1,coverage==5.5,cryptography==3.4.7,enrich==1.2.6,execnet==1.8.1,flaky==3.7.0,iniconfig==1.1.1,Jinja2==3.0.1,MarkupSafe==2.0.1,packaging==20.9,pluggy==0.13.1,psutil==5.8.0,py==1.10.0,pycparser==2.20,Pygments==2.9.0,pyparsing==2.4.7,pytest==6.2.4,pytest-cov==2.12.1,pytest-forked==1.3.0,pytest-xdist==2.2.1,PyYAML==5.4.1,rich==10.2.2,ruamel.yaml==0.17.7,ruamel.yaml.clib==0.2.2,six==1.16.0,tenacity==7.0.0,toml==0.10.2,wcmatch==8.2
py38-ansiblelint5012 run-test-pre: PYTHONHASHSEED='934219599'
py38-ansiblelint5012 run-test: commands[0] | ansible-lint --version
ansible-lint 5.0.12 using ansible 2.9.23
py38-ansiblelint5012 run-test: commands[1] | ansible-lint
______________________________________________ summary _______________________________________________
  py38-ansiblelint5012: commands succeeded
  congratulations :)
4.3. CIを使ったテストの自動化
toxを利用して、静的テスト、動的テストをtox経由で実行できるようになりました。
toxがインストールされたcontainerを利用して、これkらのテストをGitlabCIから実行できるようにしましょう。
CI化することで、repositoryに新たにコードが追加されるたびに、静的/動的テストが自動で実施され、高品質なコードであることを常に確認することが出来ます。
CIを試すためには以下のファイルをrepositoryのrootに作成してください。
❯ cat .gitlab-ci.yml
---
stages:
  - flake8
  - pytest
  - lint
  - molecule

image: quay.io/kono/python_tox

variables:
  ANSIBLE_FORCE_COLOR: 1
  PYTHONUNBUFFERED: 1
  DOCKER_HOST: tcp://docker:2376
  DOCKER_TLS_CERTDIR: "/certs"
  DOCKER_TLS_VERIFY: 1
  DOCKER_CERT_PATH: "$DOCKER_TLS_CERTDIR/client"

services:
  - docker:dind

before_script:
  - docker --version

py37-flake8:
  stage: flake8
  script:
    - tox -e py37-flake8

py38-flake8:
  stage: flake8
  script:
    - tox -e py38-flake8

py37-pytest624:
  stage: pytest
  script:
    - tox -e py37-pytest624

py38-pytest624:
  stage: pytest
  script:
    - tox -e py38-pytest624

py37-ansiblelint5012:
  stage: lint
  script:
    - tox -e py37-ansiblelint5012

py38-ansiblelint5012:
  stage: lint
  script:
    - tox -e py38-ansiblelint5012

py37-ansible29:
  stage: molecule
  script:
    - tox -e py37-ansible29

py38-ansible29:
  stage: molecule
  script:
    - tox -e py38-ansible29
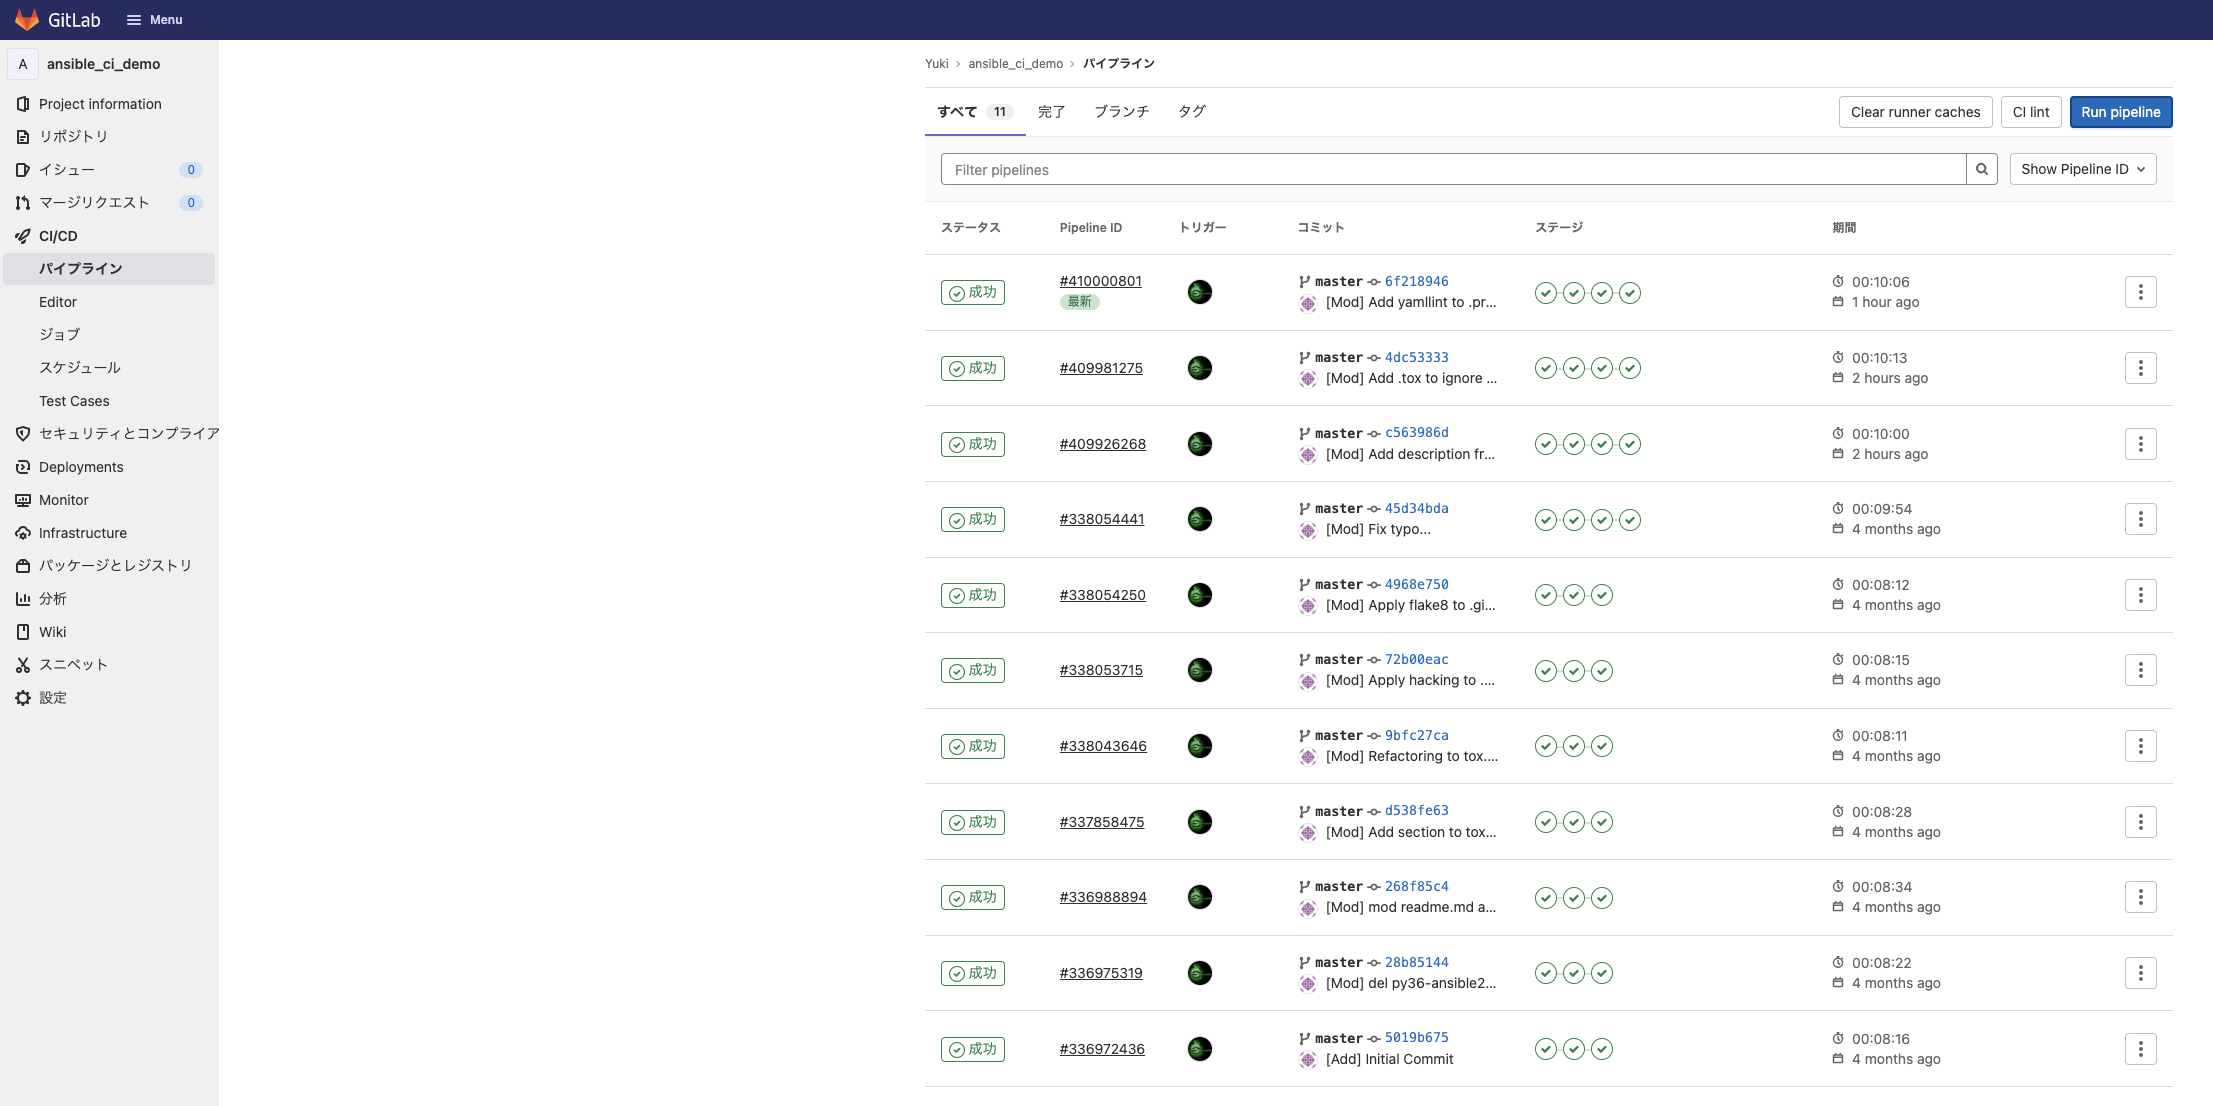
その後、CI/CD -> Pipeline -> Run Pipelineで先程設定したCIを実行することが出来ます。
以上で、ハンズオンは終了となります。
終わりに
これでみなさんのansible開発レポジトリのcommitも綺麗になること間違いなしですね!
お付き合いいただき、ありがとうございました。
引き続きAnsibleアドベントカレンダーをおたのしみください!
明日はHideki Saitoさんが今年のAnsibleを締め括ってくれます!