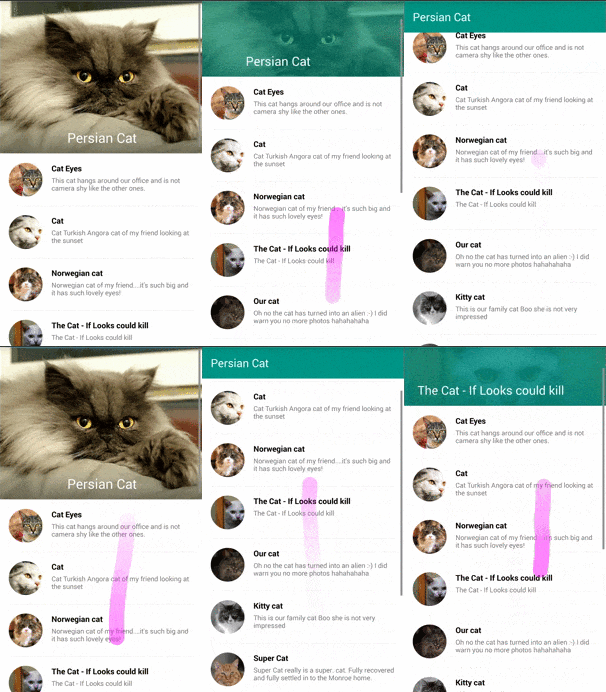
GoogleのデザインガイドラインのScrolling techniquesの項目の動きを実装してみました。
Android2でも動きます。コードはこちら。
アニメーションの説明
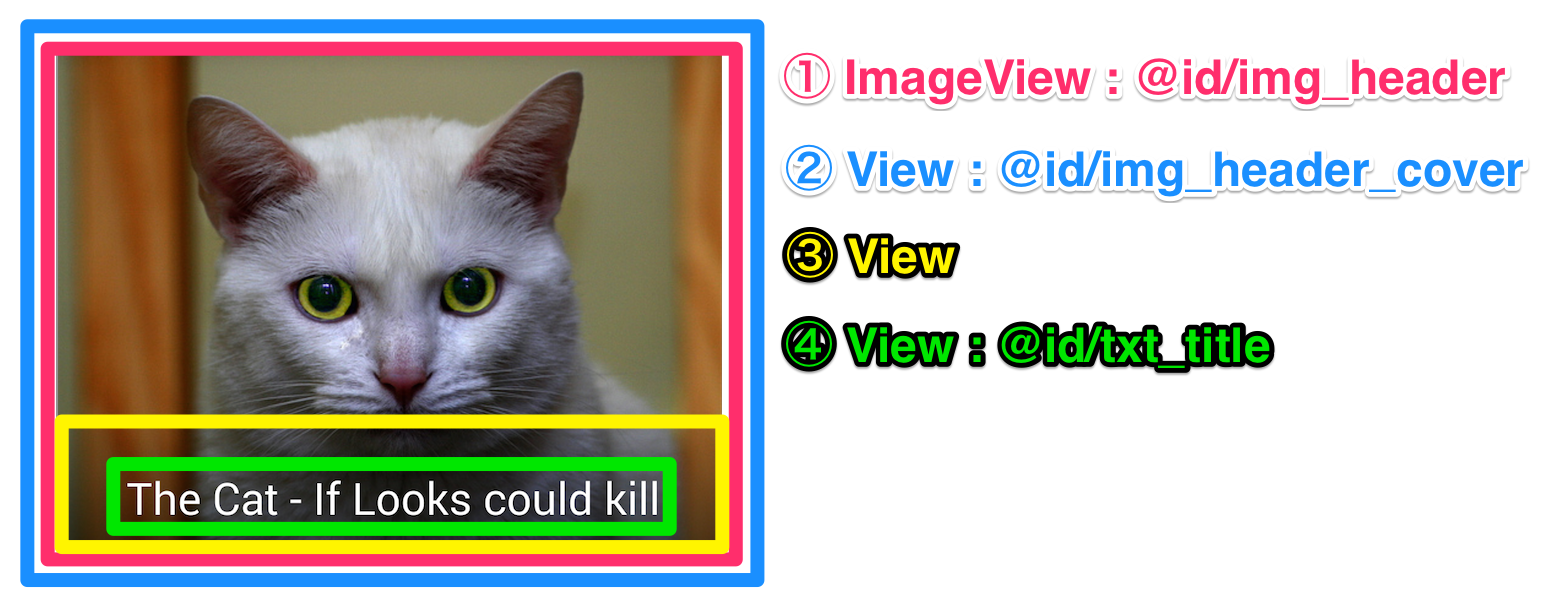
スクロールの位置に応じて4つのViewを変化させています。
- 画像のParallax
- 画像の背景色の透明度(100% ⇒ 0%)
- Toolbarの背景色の透明度(100% ⇒ 0%)
- 画像上のTextViewの位置・大きさ
コードの説明
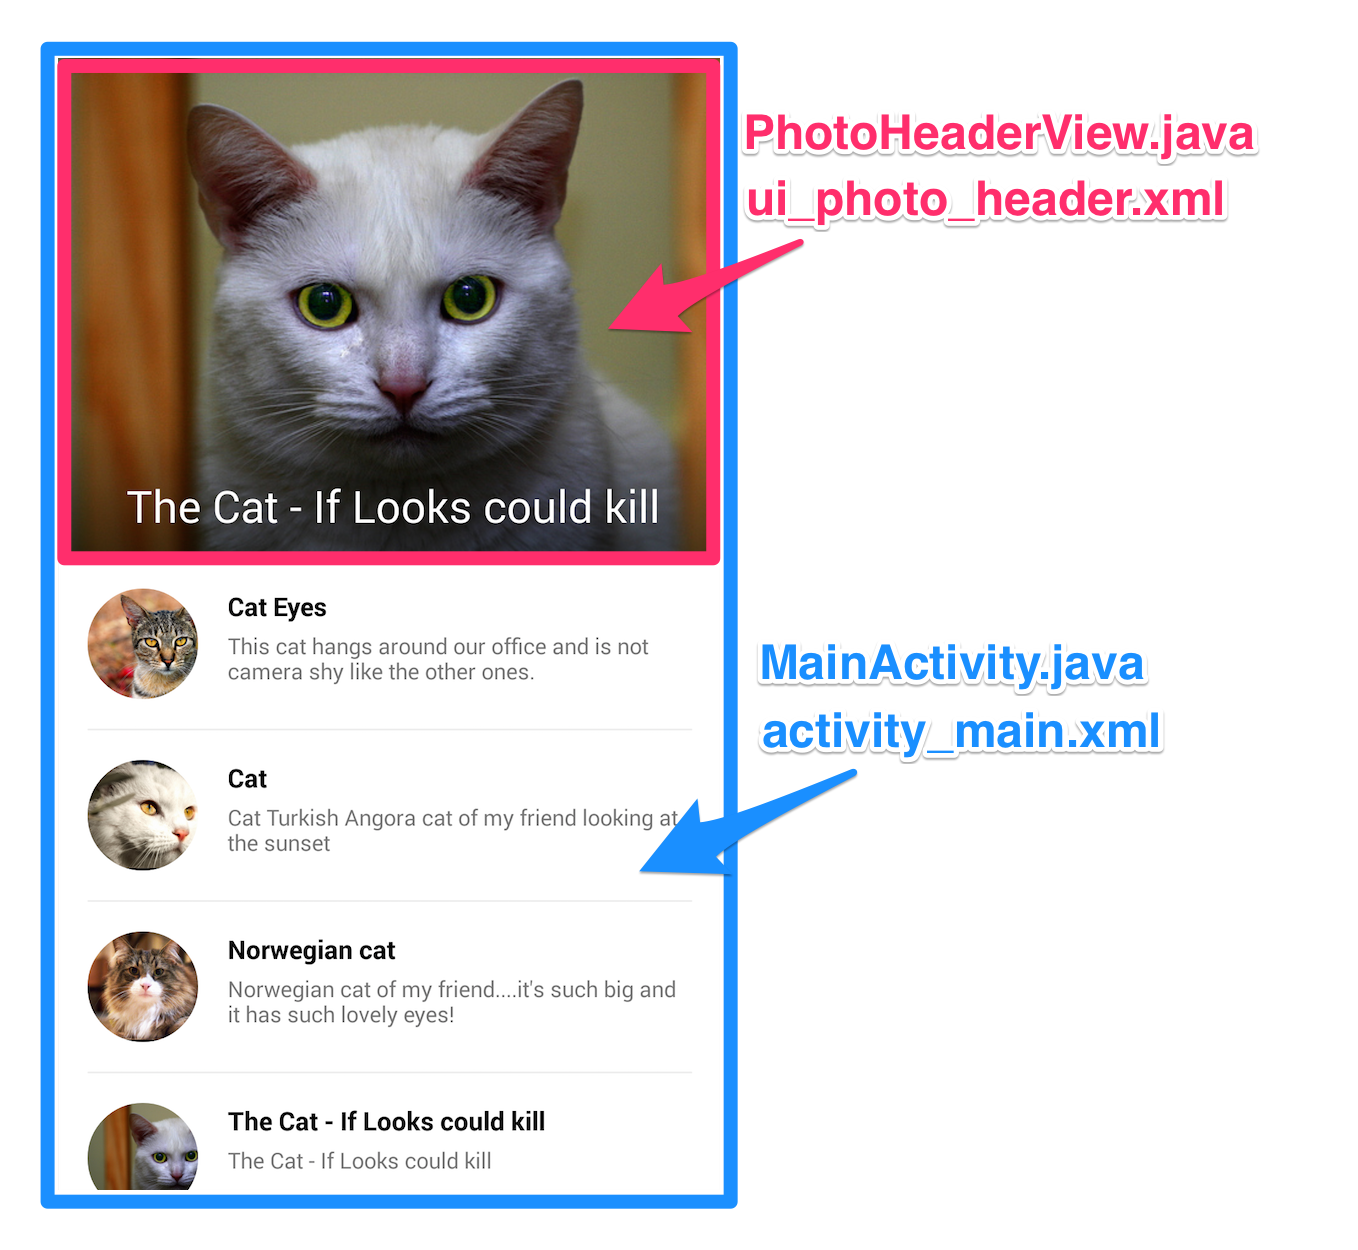
PhotoHeaderViewが肝です。
PhotoHeaderViewのレイアウト
実はレイアウトはちょっとめんどくさいことをしていて、全部で4つのレイアウトで構成されています。
<?xml version="1.0" encoding="utf-8"?>
<RelativeLayout xmlns:android="http://schemas.android.com/apk/res/android"
    xmlns:app="http://schemas.android.com/apk/res-auto"
    android:layout_width="match_parent"
    android:layout_height="wrap_content">

    <!-- ① -->
    <com.konifar.scroll_technique.views.AspectRatioImageView
        android:id="@+id/img_header"
        android:layout_width="match_parent"
        android:layout_height="wrap_content"
        android:scaleType="centerCrop"
        app:imageRatio="1.33" />

    <!-- ③ -->
    <!-- このレイアウトはタイトルのTextViewの文字が見やすいように
      黒のグラデーションをつけるためのものです。 -->
    <FrameLayout
        android:layout_width="match_parent"
        android:layout_height="76dp"
        android:layout_alignParentBottom="true"
        android:background="@drawable/bg_black_gradient" />

    <!-- ② -->
    <View
        android:id="@+id/img_header_cover"
        android:layout_width="match_parent"
        android:layout_height="match_parent"
        android:layout_alignBottom="@id/img_header"
        android:layout_alignLeft="@id/img_header"
        android:layout_alignRight="@id/img_header"
        android:layout_alignTop="@id/img_header" />

    <!-- TextViewのアニメーションで大きさを変えるために
      layout_widthをwrap_contentにする必要があるので
      FrameLayoutでラップしています。 -->
    <FrameLayout
        android:layout_width="match_parent"
        android:layout_height="wrap_content"
        android:layout_alignParentBottom="true"
        android:paddingBottom="12dp"
        android:paddingLeft="4dp"
        android:paddingTop="12dp">

        <!-- ④ -->
        <TextView
            android:id="@+id/txt_title"
            style="@style/TextTitle"
            android:layout_width="wrap_content"
            android:layout_height="wrap_content"
            android:layout_gravity="center"
            android:textColor="@color/white"
            android:textStyle="normal" />
    </FrameLayout>

</RelativeLayout>
PhotoHeaderViewのアニメーション
スクロール位置に合わせてアニメーションするわけですが、PhotoHeaderViewにtranslateというメソッドを作って実装しています。コードはこのあたり。
public void translate(final Toolbar toolbar, final int colorResId) {
    float top = getTop();
    float transitionHeight = (float) (getImgHeader().getHeight() - toolbar.getHeight());

    // 画像のParallax。スクロールした距離の半分を動かすようにしています。
    ViewHelper.setTranslationY(getImgHeader(), -top * 0.5f);

    float ratio = caltulateRatio(-top, transitionHeight);

    // 画像の背景色透過度をスクロール分変化させています。
    final ColorDrawable colorDrawable = new ColorDrawable(getResources().getColor(colorResId));
    colorDrawable.setAlpha((int) (ratio * 255));
    ViewUtils.getInstance().setBackground(getImgHeaderCover(), colorDrawable);

    // タイトルテキストの位置と大きさを変更します。
    interpolate(toolbar, ratio);

    TextView textView = ViewUtils.getInstance().getToolbarTextView(toolbar);
    if (caltulateRatio(-top, transitionHeight) >= 1f) {
        toolbar.setBackgroundResource(colorResId);
        textView.setTextColor(getResources().getColor(R.color.white));
    } else {
        toolbar.setBackgroundResource(android.R.color.transparent);
         textView.setTextColor(getResources().getColor(android.R.color.transparent));
    }
}
あとはこのtranslateメソッドをonScrollで呼び出すだけです。
mListView.setOnScrollListener(new AbsListView.OnScrollListener() {
    @Override
    public void onScrollStateChanged(AbsListView view, int scrollState) {
        // Do nothing
    }

    @Override
    public void onScroll(AbsListView view, int firstVisibleItem, int visibleItemCount, int totalItemCount) {
        header.translate(mToolbar, R.color.theme500);
    }
});
できてないこと
一応基本的な動きは実装できましたが、まだできてないことがあります。
1. interpolator
ガイドラインの動画を見ると、最初スクロールを始めた時はTextViewがアニメーションせず、半分くらいスクロールしたところから位置と大きさが変わってToolbarのタイトルに移動します。
ここはinterpolatorをちょっと工夫すればできそうです。
2. 画像の背景色の透過度
ある程度までスクロールしたら、背景色の透過度を自動で0%まで変化させた方がいいのですが、できてません。
3. onScroll時に毎回計算する
onScroll時に毎回ImageViewの位置やTextViewの大きさを計算してるので、キャッシュできるところはキャッシュした方がよさそうです。
もしかしたら便利なライブラリとかあるかもしれません。
また、もっといい実装があったら是非教えてください!


