Androidで再利用可能なViewを作る方法はいくつかあります。
知識の整理のために、ケース別にまとめてみました。
色や余白幅を共通化したい
dimens.xml、colors.xmlで定義した値を使うことで、アプリ全体で統一感を持ったViewを作ることができます。
<TextView
    android:layout_width="match_parent"
    android:layout_height="wrap_content"
    android:padding="@dimen/spacing_xsmall"
    android:textColor="@color/grey600"
    android:textSize="@dimen/text_small" />
うまくdimens.xml、colors.xmlにまとめておけば、デザインの変更もやりやすくなります。
自分はcolors.xmlをこのようにまとめています。
⇒ colors.xmlマイベストプラクティス
stateを共通化したい
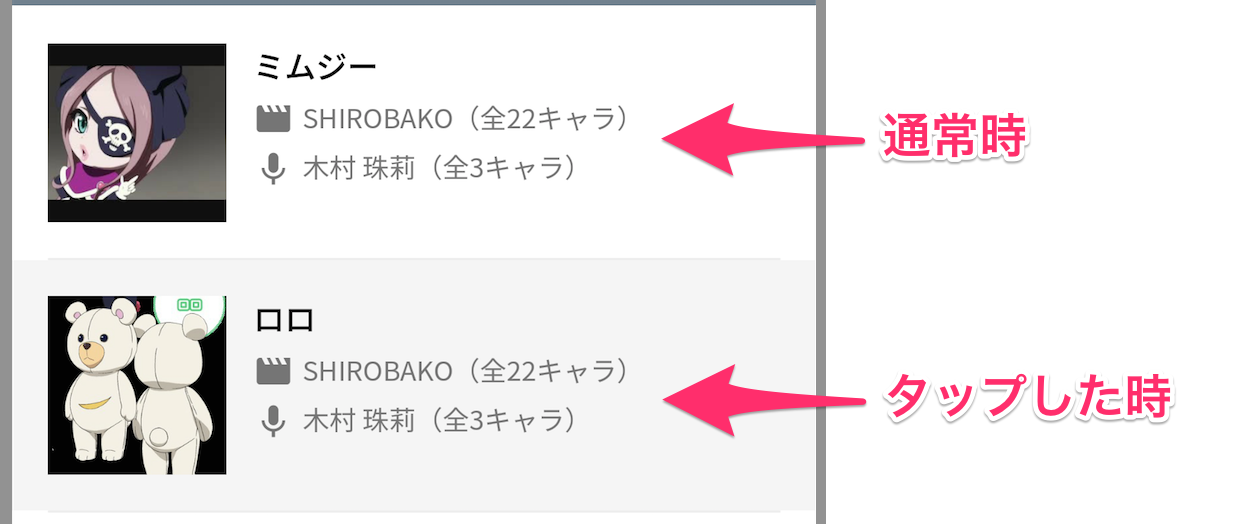
タップした時(state_pressed)、タップできない時(state_enabled)など、stateごとに状態が違うViewを作る場合は、drawable xmlが使えます。
<View
    android:layout_width="match_parent"
    android:layout_height="match_parent"
    android:background="@drawable/bg_feedback" />
<?xml version="1.0" encoding="utf-8"?>
<selector xmlns:android="http://schemas.android.com/apk/res/android">
    <!-- タップした時は透過グレーの色 -->
    <item android:state_enabled="true" android:state_pressed="true">
        <shape android:shape="rectangle">
            <solid android:color="#0a000000" />
        </shape>
    </item>
</selector>
drawableで使えるstateはこちらにまとまっています。
⇒ StateListDrawable
また、CustomViewを作る場合は独自stateを作ることもできます。
⇒ Android: how to add a custom button state
パーツごとにattributeを共通化したい
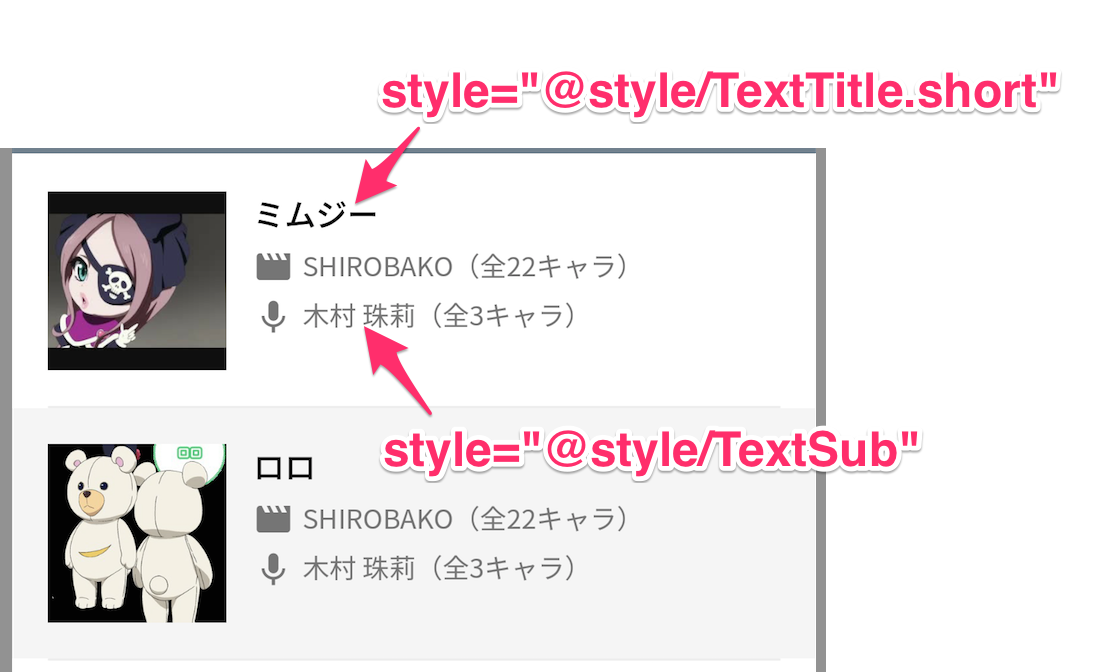
タイトルのTextView、サブタイトルのTextViewなど、xmlのattributeを共通化したい場合は、styles.xmlにまとめられます。
<style name="TextTitle">
    <item name="fontPath">@string/font_medium</item>
    <item name="android:textSize">@dimen/text_large</item>
    <item name="android:textColor">@color/black</item>
</style>

<!-- nameの後に.でつなげることで、他のstyleを継承することもできます -->
<style name="TextTitle.Short">
    <item name="android:textSize">@dimen/text_medium</item>
    <item name="android:lines">1</item>
    <item name="android:ellipsize">end</item>
</style>

<style name="TextSub">
    <item name="android:textSize">@dimen/text_medium</item>
    <item name="android:textColor">@color/grey600</item>
    <item name="android:gravity">center_vertical</item>
</style>
[翻訳] android best practiceでも触れられているとおり、stylesは複数のxmlに分けて管理した方がいいかもしれません。
大きなStyle Fileを避け、複数に分けよう
1つのstyles.xmlだけを持つ事は止めた方が良い。styleファイルはstyle_home.xml、style_item_details.xml、styles_forms.xmlと言ったように複数持つ事ができる。res/valuesの中のファイル名は任意である。
Viewを丸ごと使い回したい
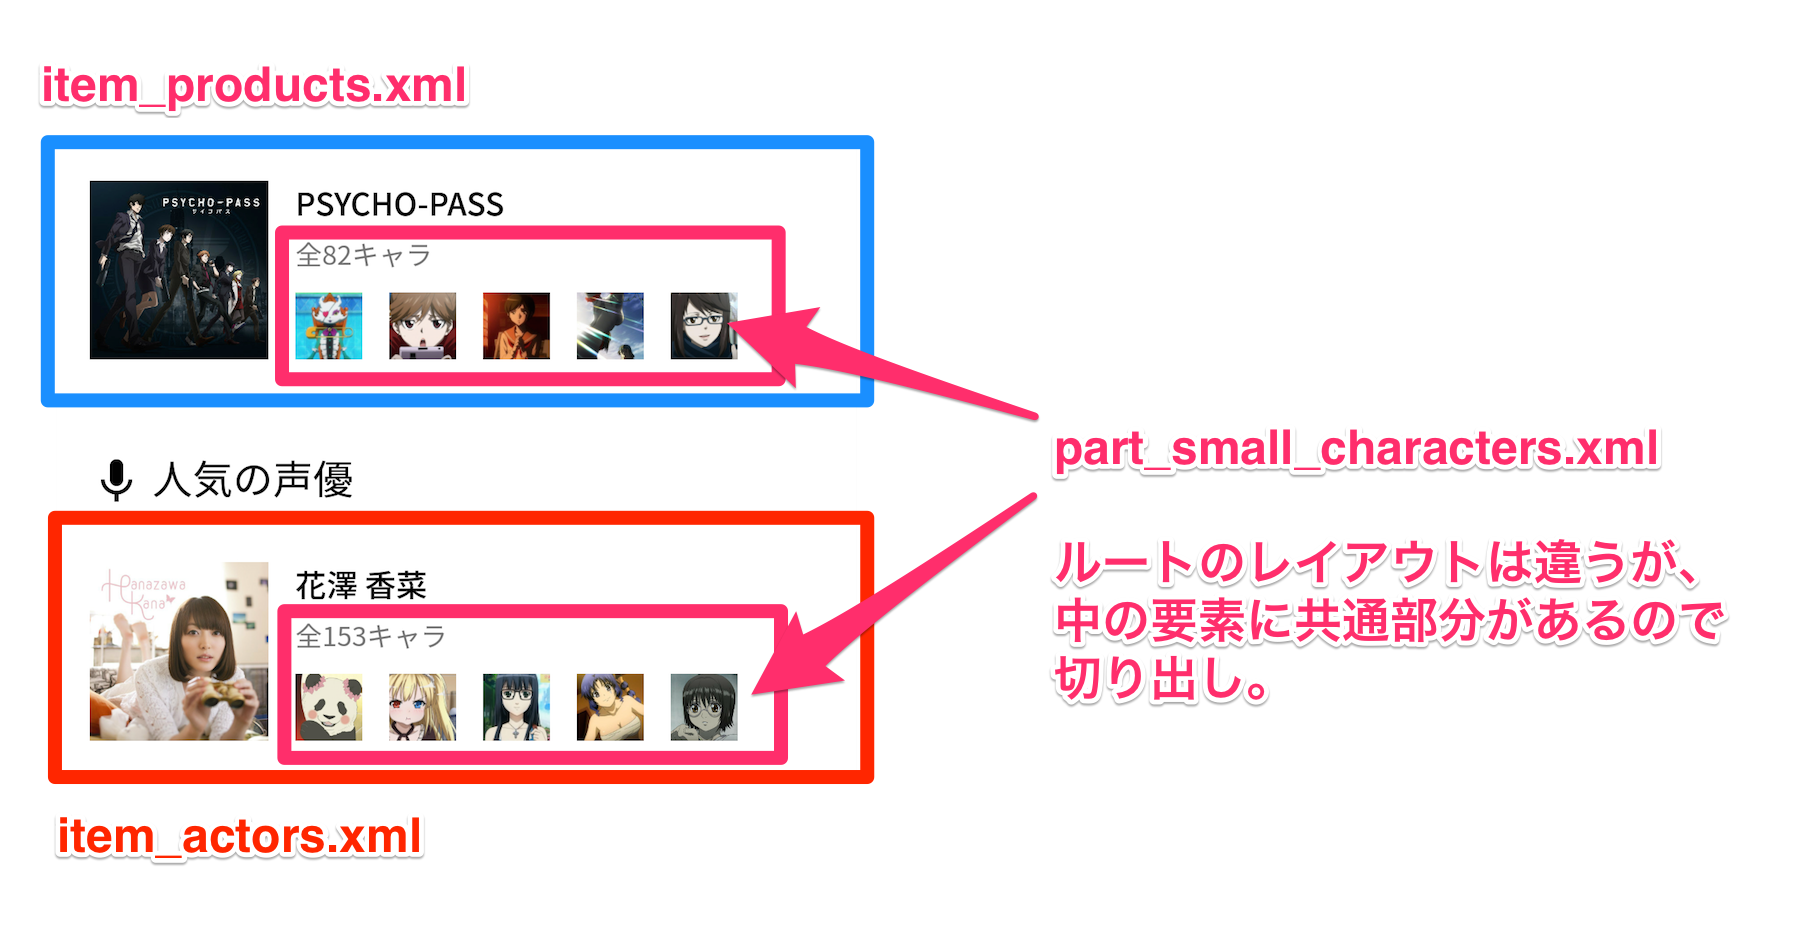
例えば下図のように、ルートのレイアウトは違うけど一部同じレイアウトを使いたいときには<include/>が使えます。

<?xml version="1.0" encoding="utf-8"?>
<RelativeLayout xmlns:android="http://schemas.android.com/apk/res/android"
    xmlns:app="http://schemas.android.com/apk/res-auto"
    android:layout_width="match_parent"
    android:layout_height="wrap_content"
    android:padding="@dimen/spacing">

    <!-- 略 -->

    <FrameLayout
        android:layout_width="match_parent"
        android:layout_height="wrap_content"
        android:layout_below="@id/txt_characters_count"
        android:layout_marginTop="@dimen/spacing_xsmall"
        android:layout_toRightOf="@id/img_thumb">

        <include layout="@layout/part_small_characters" />
    </FrameLayout>

</RelativeLayout>
詳しくはRe-using Layouts with include tagが参考になります。
<include />を使うとViewのネストが1つ多くなってしまうので、<merge/>の使い方を覚えておくとよいです。
⇒ What is the purpose of Android's tag in XML layouts?
ちなみに自分は、<include>だけで使うViewはpart_~という名前で統一するようにしています。
Viewのロジックも丸ごと使い回したい
Viewにデータをバインドしたり、Visibilityを切り替えたりするロジックも丸ごと使い回したい場合は、CustomViewにするとよいです。
例えば下図のような場合。
public class WordBalloonView extends RelativeLayout {

    @InjectView(R.id.txt_balloon)
    TextView mTxtBalloon;

    private String balloonText;

    public WordBalloonView(Context context, AttributeSet attrs) {
        super(context, attrs);
        inflate(context, R.layout.ui_word_balloon, this);
        ButterKnife.inject(this);

        TypedArray a = context.obtainStyledAttributes(attrs, R.styleable.WordBalloonView);
        try {
            balloonText = a.getString(R.styleable.WordBalloonView_balloonText);
        } finally {
            a.recycle();
        }

        mTxtBalloon.setText(balloonText);
    }

    public void setBalloonText(String balloonText) {
        this.balloonText = balloonText;
        mTxtBalloon.setText(balloonText);
    }

}
<com.konifar.whovoice.views.WordBalloonView
    android:id="@+id/balloon_word"
    android:layout_width="match_parent"
    android:layout_height="wrap_content" />
詳しいカスタムビューの作り方は、Androidで独自Viewを作るときの4つのTipsが参考になります。
以上!他にいい方法があれば教えてください。


