2019/11/22にROS 2の新しバージョンEloquent Elusorがリリースされました。
https://discourse.ros.org/t/ros-2-eloquent-elusor-released/11624
今回はUbuntu18.04にROS 2 Eloquentをインストールして、デモを動かしてみたいと思います。
インストール手順
使用する環境やソースコードビルドするかバイナリパッケージをインストールするかで手順が異なります。
ここではUbuntu 18.04のPCにROS 2をパッケージインストールしてみます。
以下のWebページの手順通りに進めます。
https://index.ros.org/doc/ros2/Installation/Eloquent/
手順自体は今までのROS 2インストール手順とほぼ同じです。
localeの設定
$ sudo locale-gen en_US en_US.UTF-8
$ sudo update-locale LC_ALL=en_US.UTF-8 LANG=en_US.UTF-8
$ export LANG=en_US.UTF-8
APTソースリストの設定
$ sudo apt update && sudo apt install curl gnupg2 lsb-release
$ curl -s https://raw.githubusercontent.com/ros/rosdistro/master/ros.asc | sudo apt-key add -
$ sudo sh -c 'echo "deb [arch=amd64,arm64] http://packages.ros.org/ros2/ubuntu `lsb_release -cs` main" > /etc/apt/sources.list.d/ros2-latest.list'
ROS 2パッケージのインストール(Desktop版をインストール)
$ sudo apt update
$ sudo apt install ros-eloquent-desktop
環境変数の設定
$ echo "source /opt/ros/eloquent/setup.bash" >> ~/.bashrc
argcompleteのインストール
ROS 2のコマンドラインツールは自動補完にargcompleteを使用しているようです。自動補完が必要な場合は以下のパッケージをインストールします。
$ sudo apt install python3-argcomplete
デモの実行(Talker/Listener)
Talker/Listenerデモを実行してみます。
ターミナルを起動して以下のコマンドを実行します。
$ ros2 run demo_nodes_cpp talker
別のターミナルを起動して以下のコマンドを実行します。
$ ros2 run demo_nodes_py listener
Listenerノードを実行したターミナル上にHelloWorldが表示されました。
Pub/Subしています!Hello ROS 2 Eloquent!!!
$ ros2 run demo_nodes_py listener
[INFO] [listener]: I heard: [Hello World: 1]
[INFO] [listener]: I heard: [Hello World: 2]
[INFO] [listener]: I heard: [Hello World: 3]
[INFO] [listener]: I heard: [Hello World: 4]
デモの実行(Turtlesim)
次にTurtlesimノードを実行してみます。
デフォルトではインストールされないようなので、以下のコマンドでTurtlesimパッケージを追加します。
$ sudo apt install ros-eloquent-turtlesim
いよいよ亀さんを動かします。
ターミナルを起動して以下のコマンドを実行します。
$ ros2 run turtlesim turtlesim_node
別のターミナルを起動して以下のコマンドを実行します。
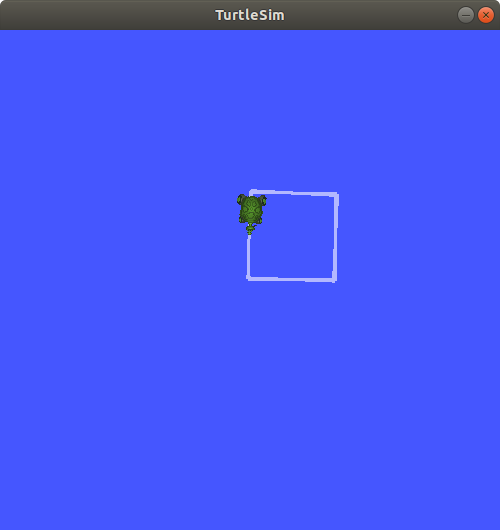
$ ros2 run turtlesim draw_square
表示されたウィンドウ上の亀さんが、正方形を描くように動き始めました!
キーボードで亀さんを操作することもできますが、draw_squareノードを使えば勝手に動いてくれます。可愛らしいですね。

おまけ
とは言え、「これ本当にROS 2 Eloquent?前にインストールしたDashingが実行されているんじゃないの?」と不安な時...
ROS 2 Eloquentから追加されたらしいros2doctorを使えば簡単にROS 2の情報を表示できます。
※$ printenv ROS_DISTROとか$ which ros2とかでもいいんじゃないん?というのは置いておいて。
※表面上はEloquentで中はDashingの可能性もありますがそれも置いておいて。
ターミナルを起動し、以下のコマンドを実行します。
$ ros2 doctor -r
すると以下のような情報が表示されます。
  PLATFORM INFORMATION
system           : Linux
platform info    : Linux-5.0.0-36-generic-x86_64-with-Ubuntu-18.04-bionic
release          : 5.0.0-36-generic
processor        : x86_64

  RMW MIDDLEWARE
middleware name    : rmw_fastrtps_cpp

  ROS 2 INFORMATION
distribution name      : eloquent
distribution type      : ros2
distribution status    : active
release platforms      : {'ubuntu': ['bionic']}

  TOPIC LIST
topic               : none
publisher count     : 0
subscriber count    : 0
ROS 2 INFORMATIONのdistribution nameにeloquentと表示されていますね。
これで一安心(※ただ、新機能を使いたいだけでした...)
ros2doctorはROS 2のセットアップや実行中のシステムの問題を確認するための機能のようですが、このようにROS 2やシステムの情報をレポートとして取得することもできます。便利ですね。
ros2doctorの詳細は以下に記載されています。
https://index.ros.org/doc/ros2/Tutorials/Getting-Started-With-Ros2doctor/
https://github.com/ros2/ros2cli/tree/master/ros2doctor
最後に
ここではROS 2 Eloquentをお試ししてみました。
ROS 2 EloqeuntではDashingと比較し、他にも追加された機能や改善点があるようです。
これから随時確認していこうと思います。