追記(2016/9/23)
Let's encryptのやり方がだいぶ更新されてhomebrewでインストール可能になった
新しい方法を別記事で書いたので参考にしてください
はじめに
無料でSSL証明書を反抗できるLet's encryptを用いて、ステージング環境に対してSSL証明書を使えるようにした。
(以前はオレオレ証明書を使っていた)
ここでは以下のことを実施する
- Railsで組み込めるようにプログラムを変更する
- Let's encryptのコマンドを叩いて証明書を発行する
出来ないこと
SSL証明書の自動更新
普通のLinuxサーバの場合は自サーバでCrondでSSL証明書を更新しているが、Herokuの場合は今のところこれが出来ない。もしやり方がある場合は是非情報を提供していただきたい
Railsプロジェクトに組み込む方法
Let's encryptでは証明書を取得するために、
ドメイン名/.well-known/acme-challenge/xxxx
と言うURLにアクセスしてきて、特定の値をレスポンスとして返す必要がある
URLのxxxxとレスポンスの特定の値は後述するLet's encryptの証明書取得のためのコマンドを実行した際に取得できる
ルーティングの設定をする
config/routes.rb
BestTeacher::Application.routes.draw do
  # ssl証明書発行用
  get ".well-known/acme-challenge/:id" => "index#letsencrypt"

  # 以下省略
end
コントローラの設定をする
適当なコントローラ(index_controller.rb)に、環境変数で指定したURLパラメタがあれば、また環境変数で設定したレスポンスを返すようにする
class IndexController < ApplicationController
  def letsencrypt
    if params[:id] == ENV["LETSENCRYPT_REQUEST"]
    render text: ENV["LETSENCRYPT_RESPONSE"]
    end
  end
end
Herokuの環境変数設定
ここではどう確認のために適当な値を環境設定で入力して、レスポンスが返ってくるか確認する
ステージングにデプロイして、動作確認をする
heroku config:set LETSENCRYPT_REQUEST=SAMPLE_REQUEST_KEY -a YOUR_APP_NAME
heroku config:set LETSENCRYPT_RESPONSE=SAMPLE_RESPONSE_KEY -a YOUR_APP_NAME
Let's Encryptyのインストールと証明書をherokuに追加
git clone https://github.com/letsencrypt/letsencrypt
cd letsencrypt
> ./letsencrypt-auto certonly --manual -d your_app.herokuapp.com
Checking for new version...
Requesting root privileges to run letsencrypt...
   sudo /Users/kon_yu/.local/share/letsencrypt/bin/letsencrypt --no-self-upgrade certonly --manual
Password:
パスワード入力
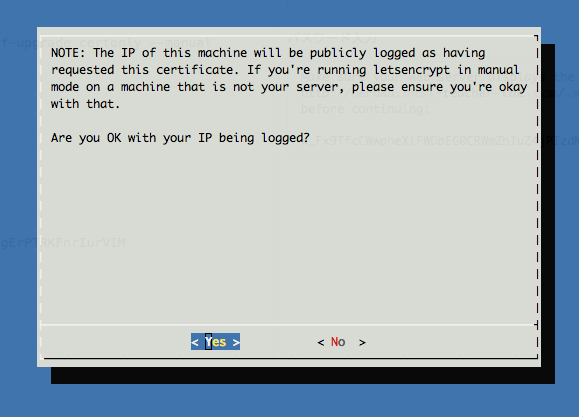
Yesを選択すると、以下のようにずらずら指示が出てくる
Make sure your web server displays the following content at
http://your_app.herokuapp.com/.well-known/acme-challenge/XXXXXXXXXXXXXXXXX before continuing:

XXXXXXXXXXXXXXXXXXXXXXXXXXXXXXXXXXXXXXXXXXXXXXXXXXXXXXXXXXXXXXXXXX

If you don't have HTTP server configured, you can run the following
command on the target server (as root):

mkdir -p /tmp/letsencrypt/public_html/.well-known/acme-challenge
cd /tmp/letsencrypt/public_html
printf "%s" XXXXXXXXXXXXXXXXXXXXXXXXXXXXXXXXXXXXXXXXXXXXXX > .well-known/acme-challenge/XXXXXXXXXXXXXXXXXXXXXXX
# run only once per server:
$(command -v python2 || command -v python2.7 || command -v python2.6) -c \
"import BaseHTTPServer, SimpleHTTPServer; \
s = BaseHTTPServer.HTTPServer(('', 80), SimpleHTTPServer.SimpleHTTPRequestHandler); \
s.serve_forever()"
Press ENTER to continue
大事なのは以下の部分で、
Make sure your web server displays the following content at
http://your_app.herokuapp.com/.well-known/acme-challenge/XXXXXXXXXXXXXXXXX before continuing:

XXXXXXXXXXXXXXXXXXXXXXXXXXXXXXXXXXXXXXXXXXXXXXXXXXXXXXXXXXXXXXXXX
上のように、
http://your_app.herokuapp.com/.well-known/acme-challenge/XXXXXXXXXXXXXXXXX
と言うアクセスに対して
XXXXXXXXXXXXXXXXXXXXXXXXXXXXXXXXXXXXXXXXXXXXXXXXXXXXXXXXXXXXXXXXX
というレスポンスを返すように環境変数を設定してあげる必要がある。
Let's encryptに求められた環境変数の設定
heroku config:set LETSENCRYPT_REQUEST= XXXXXXXXXXXXXXXXX -a YOUR_APP_NAME
heroku config:set LETSENCRYPT_RESPONSE= XXXXXXXXXXXXXXXXXXXXXXXXXXXXXXXXXXXXXXXXXXXXXXXXXXXXXXXXXXXXXXXXX -a YOUR_APP_NAME
※ここでうっかりエンターボタンを押してしまうと、適切なレスポンスを返せずに失敗してしまうが、
もう一度、letsencrypt-autoからやり直しても、ある程度の時間は求められるurlとレスポンスの値は変わらないので安心だ
ここで認証がうまく行ったあとの処理
こんな感じの情報がコンソールに出力される
IMPORTANT NOTES:
 - Congratulations! Your certificate and chain have been saved at
   /etc/letsencrypt/live/your_app.herokuapp.com/fullchain.pem.
   Your cert will expire on 2016-05-22. To obtain a new version of the
   certificate in the future, simply run Let's Encrypt again.
 - If you like Let's Encrypt, please consider supporting our work by:

   Donating to ISRG / Let's Encrypt:   https://letsencrypt.org/donate
   Donating to EFF:                    https://eff.org/donate-le
重要なのは
/etc/letsencrypt/live/your_app.herokuapp.com/fullchain.pem
とそのディレクトリと同列にあるprivkey.pem
- crtファイル: fullchain.pem
- keyファイル: privkey.pem
確認
sudo ls /etc/letsencrypt/live/your_app.herokuapp.com/
cert.pem	chain.pem	fullchain.pem	privkey.pem
Herokuno既存の証明書からLet's Encryptの証明書に置き換える
新規で追加する場合はここを参考にすればよいだろう
http://qiita.com/GenTamura84/items/7a12ca611705017bcb0e
sudo heroku certs:update /etc/letsencrypt/live/your_app.herokuapp.com/fullchain.pem /etc/letsencrypt/live/your_app.herokuapp.com/privkey.pem -a YOUR_APP_NAME
これで登録されたことになる。
SSL証明書を更新する
SSL証明書を取得する場合と同じように以下のコマンドを実行する --renewをつける
※ 動作的に--renewをつけた場合とつけない場合に変化がない気がするがよくわかってない
./letsencrypt-auto certonly --renew --manual -d your_app.herokuapp.com
またリクエストのURLとレスポンスとして返す値を取得できるので、環境変数を設定して
処理を続けると、crtファイル等が手に入る
sudo heroku certs:update /etc/letsencrypt/live/your_app.herokuapp.com/fullchain.pem /etc/letsencrypt/live/your_app.herokuapp.com/privkey.pem -a YOUR_APP_NAME