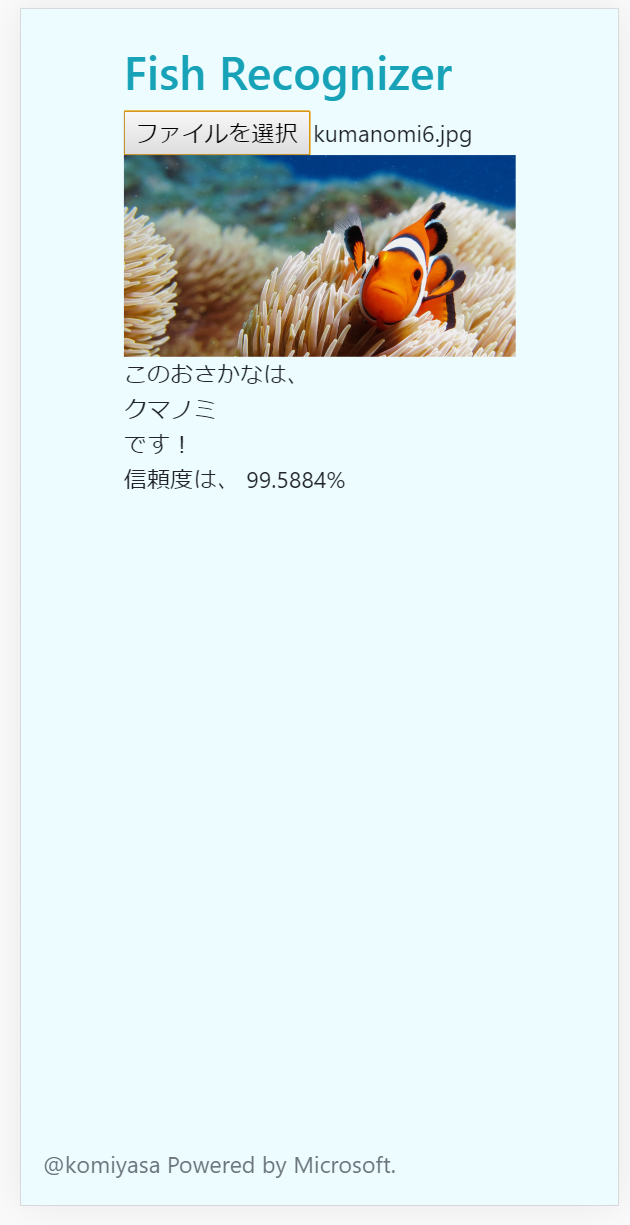
Custom Vision を使用して、おさかな判別アプリを作成する
Microsoft の Cognitive Services のひとつ、Custom Vision を使用して、おさかな自動判別アプリを作成します。Custom Vision API の説明は Microsoft の Document に記載がありますが、少し分かりにくかったので以下メモ代わりに残しておきます。
作成方法は超簡単で、以下 3STEP です。
- Custom Vision リソースを作成し、Custom Vision の WorkSpace で 学習データを作成する
- Azure App Services で アプリをデプロイする WebApp を作成する
- Javascript コードを作成し、Custom Vision を連携させデプロイする
Custom Vision リソースを作成し、Custom Vision の WorkSpace で 学習データを作成する
Azure Portal の新規リソースの作成から Custom Vision を作成します。
デプロイしたリソースのページにCustom Vision に飛ぶことができるリンクがあるので、Custom Vision のポータルへ移動します。(.NET で学習データを作成する方法などありますが、今回は簡単さを求めています。)
Custom Vision Portal にて新しいディレクトリを作成し、学習データを作成します。
以下は Microsoft の Docs によくまとまっているので、この手順に沿って、Publish まで進みます。
https://docs.microsoft.com/ja-jp/azure/cognitive-services/custom-vision-service/test-your-model
Azure App Services でアプリをデプロイする
まずは、Web App を作成します。
※特に注意書きはないですが、Custom Vision と同じ region の方がコスト/速度は良いと思います。
以下GitHub にサンプルコードをアップロードしているのでローカルに保存してください。
https://github.com/komiyasa/FishRecognizerSample
ローカルに保存したファイルを FTP や Git などを用いて WebApp にデプロイしてください。
JavaScript で Custom Vision を扱う
サンプルコードの中の二か所の部分をいじるだけで、Custom Vision と連携させることができます。
$(function () {

    var uploadedImage;

    // 画像を画面に表示
    var showImage = function () {
        if (uploadedImage) {
            var blobUrl = window.URL.createObjectURL(uploadedImage);
            $("#ImageToAnalyze").attr("src", blobUrl);
        }
    };

    //画像の分析
    var getFaceInfo = function () {

        // Custom Vision の Subscription Key と URL をセット
        // サブスクリプション画面に表示される URL および Key をコピーしてください
        var predictionKey = "<Custom Vision の Prediction Key を入力>";
        var endpoint = "EndPointのURLを入れる";

        // Custom Vision 呼び出し URL をセット
        var webSvcUrl = endpoint;

        // 画面に表示するメッセージをセット
        var outputDiv = $("#OutputDiv");
        if(document.getElementById('imageFile').value == "")
        {
            // 初期設定
            outputDiv.text("画像を選択してください");
        }
        else{
            // 画像分析中
            outputDiv.text("分析中...");
        }

        // Face API を呼び出すためのパラメーターをセットして呼び出し
        var xmlHttp = new XMLHttpRequest();
        xmlHttp.open("POST", webSvcUrl, true);
        xmlHttp.setRequestHeader("Prediction-Key", predictionKey);
        xmlHttp.setRequestHeader("Content-Type", "application/octet-stream");
        xmlHttp.send(uploadedImage);
        xmlHttp.onreadystatechange = function () {

            // データが取得出来た場合
            if (this.readyState == 4 && this.status == 200) {

                let data = JSON.parse(this.responseText)

                // 判別結果を取得
                var predictions = data.predictions;

                var probability = [];
                var tagName = [];
                for ( var i = 0; i < predictions.length; i++ )
                {
                    probability[i] = predictions[i].probability;
                    tagName[i] = predictions[i].tagName;
                }

                //小数点6位までを残す関数 (判別スコアの丸めに利用)
                function floatFormat( number ) {
                    return Math.round( number * Math.pow( 10 , 6 ) ) / Math.pow( 10 , 6 ) ;
                }

                var outputText =  "このおさかなは、<br>";
                outputText +=  tagName[0] + "<br>です!<br>" + "信頼度は、 "+ floatFormat(probability[0])*100+ "%";
                outputDiv.html(outputText);

            }
            else
            // データが取得できなかった場合
            {
                outputDiv.text("ERROR!");
            };
        };
    };

    // 画像が変更された場合(再度分析&表示)
    $("#imageFile").on('change', function(e){
        uploadedImage = e.target.files[0];
        showImage();
        getFaceInfo();
    });

});
