この記事のテーマ
Ruby on Railsで広く使われているユーザー認証用のGemであるDeviseを、ステップバイステップで実装していく手順を解説します。
多機能なGemですが、まずは最低限の実装をします。そして徐々に機能を拡張していくことでスムーズに理解できる構成にしています。最初は、ユーザー登録とログインだけができる、(見た目がしょぼい)アプリケーションを作ります。
【使用したバージョン】
rails : 4.2.5
ruby  : 2.3.0
devise: 4.2.0
Deviseのインストール、初期設定まで
まずは初期設定をします。基本的に最初はどんな場合も同じ手順になりますので、機械的に作業してみてください。
新規でアプリを作成する
$ rails new devise_sample
$ cd devise_sample
deviseのインストール
まずはGemをインストール。
追加する
gem 'devise'
$ bundle install
続けてdeviseをインストールします。
$ rails g devise:install
そうすると、必要な設定についての説明が表示されます。
===============================================================================

Some setup you must do manually if you haven't yet:

  1. Ensure you have defined default url options in your environments files. Here
     is an example of default_url_options appropriate for a development environment
     in config/environments/development.rb:

       config.action_mailer.default_url_options = { host: 'localhost', port: 3000 }

     In production, :host should be set to the actual host of your application.

  2. Ensure you have defined root_url to *something* in your config/routes.rb.
     For example:

       root to: "home#index"

  3. Ensure you have flash messages in app/views/layouts/application.html.erb.
     For example:

       <p class="notice"><%= notice %></p>
       <p class="alert"><%= alert %></p>

  4. You can copy Devise views (for customization) to your app by running:

       rails g devise:views

===============================================================================
まず、1番の説明の通り追加をしましょう。
追加
config.action_mailer.default_url_options = { host: 'localhost', port: 3000 }
そして、2番にある通りルートの設定をします。まず「home」コントローラーと、その中に「index」アクションを作成します。それからこの説明通りの設定をしておきます。
$ rails g controller home index
追加
root to: "home#index"
ビューをカスタマイズできるようファイルを作成します。app/views/deviseを見ると大量にファイルが作成されていることがわかります。
$ rails g devise:views
登録するユーザー情報を格納するためのモデルを作成します。1つ目のコマンドで、db/migrateフォルダにマイグレーションファイルが作成されます。今はそのファイルを修正せず、そのままマイグレートしましょう。
$ rails g devise User
$ bundle exec rake db:migrate
サインアップ画面等へのリンクをはる
トップページから、ユーザー登録やログインの画面へのリンクを貼りましょう。
まず、URLの指定をどうすれば良いか確認します。
$ bundle exec rake routes
コンソールでコマンドを実行すると、現在設定されているルートが表示されます。
                Prefix Verb   URI Pattern                    Controller#Action
       new_user_session GET    /users/sign_in(.:format)       devise/sessions#new
           user_session POST   /users/sign_in(.:format)       devise/sessions#create
   destroy_user_session DELETE /users/sign_out(.:format)      devise/sessions#destroy
          user_password POST   /users/password(.:format)      devise/passwords#create
      new_user_password GET    /users/password/new(.:format)  devise/passwords#new
     edit_user_password GET    /users/password/edit(.:format) devise/passwords#edit
                        PATCH  /users/password(.:format)      devise/passwords#update
                        PUT    /users/password(.:format)      devise/passwords#update
cancel_user_registration GET    /users/cancel(.:format)        devise/registrations#cancel
      user_registration POST   /users(.:format)               devise/registrations#create
  new_user_registration GET    /users/sign_up(.:format)       devise/registrations#new
 edit_user_registration GET    /users/edit(.:format)          devise/registrations#edit
                        PATCH  /users(.:format)               devise/registrations#update
                        PUT    /users(.:format)               devise/registrations#update
                        DELETE /users(.:format)               devise/registrations#destroy
このように4行にデータが表示されています。
この見方ですが、例えば一番上の行でいうと、「ホームディレクトリ/users/sign_in」に「GET」の命令が投げられると、「devise/session」コントローラーの「new」アクションが実行されるという意味です。(ただしdeviseがもともと用意してあるコントローラーはディレクトリを確認しても見えなくなっています)。
一番左に「Prefix」というのがありますが、これは認識しやすいようにつけられた別名のようなものです。Prefixが「new_user_session」の場合、後ろに「_path」を追加して、ヘルパーメソッドで「new_user_session_path」と指定すると該当のURLを指すことができます。
新規のユーザー登録をする場合のPrefixは「new_user_registration」ですので、これをリンク先に指定します。
追加
<%= link_to "ユーザー登録はこちら", new_user_registration_path %>
実際にユーザー登録やログインができるか試してみる
ここまでできたら、ひとまずきちんど動作するか試してみましょう。
ブラウザでアプリにアクセスすると、route.rbで設定してある通りindex.html.erbが表示されます。
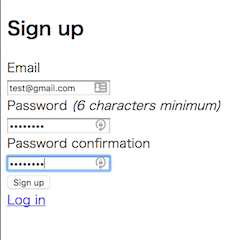
ユーザー登録はこちらをクリックして、実際に登録をしてみましょう。
本当にユーザー登録ができているかDBを確認します。
$ rails c
でコンソールを立ち上げたら「User.all」とコマンドを入力します。
2.3.0 :001 > User.all
  User Load (2.3ms)  SELECT "users".* FROM "users"
 => #<ActiveRecord::Relation []>
2.3.0 :002 > User.all
  User Load (0.4ms)  SELECT "users".* FROM "users"
 => #<ActiveRecord::Relation [#<User id: 1, email: "test@gmail.com", created_at: "2017-02-03 03:14:50", updated_at: "2017-02-03 03:14:50">]>
確認できたらコンソールを終了させましょう。
$ exit
ユーザーのid: 1として、先ほど入力した情報が登録できていることがわかります。
登録画面と同様にして、ログイン画面へのリンクも作成します。なお、先ほどユーザー登録をした際にログインした状態になっています。そのため、一度ログアウトしないとログイン画面に遷移することができません。合わせてログアウト画面へのリンクも作成します。
追加
<%= link_to "ユーザー登録はこちら", new_user_registration_path %>
<%= link_to "ログアウト", destroy_user_session_path, method: "delete" %>
ブラウザで、一度ログアウトしたのちログインできるか確認してみましょう。
これで、ユーザー登録、ログイン、ログアウトの機能を実装することができました。
もちろんこのままでは見た目などアプリケーションとして使うことはできませんが、最低限の機能をつけるための操作を解説いたしました。
続いて、エラーメッセージの表示、画面のスタイリングなどをしていきます。
