2017/10/23
TDでサーマルプリンタをいじったのでメモ
需要があるのか?
やっていきます
一応がんばったら印刷できた、というものなのでもっといいやり方はあるかもです
準備するもの
- Arduino UNO
- Mini Termal Receipt Printer Starter Pack
- (おそらくほぼ同じものがaitendoで購入できるようです。aitendo最高…!→サーマルプリンタユニット - aitendo)
参考
基本的にシリアルで値をぶち込めばプリントできます。データシート参考に。
配線
プリンタの配線をします。付属のケーブルでは黒がGND、黄色がRX、緑がTXなのでそれぞれArduinoのGND、0番ピン、1番ピンへ。またACアダプタでプリンタに電源供給もしてあげます。これだけ、簡単ですね
文字の印刷
 Serial DATの使い方を参考にポートを開けます。Baud Rateは19200にします。あとはCHOP Executeからsend()等で印字したい文字を送信し、改行することでプリントできます。
sendBytes()でASCIIコードを送ってもよい。0x0a(改行)を送るとプリントされます。
→ASCIIコード表: http://www9.plala.or.jp/sgwr-t/c_sub/ascii.html
Serial DATの使い方を参考にポートを開けます。Baud Rateは19200にします。あとはCHOP Executeからsend()等で印字したい文字を送信し、改行することでプリントできます。
sendBytes()でASCIIコードを送ってもよい。0x0a(改行)を送るとプリントされます。
→ASCIIコード表: http://www9.plala.or.jp/sgwr-t/c_sub/ascii.html
— koma (@koma_JB62) 2018年5月31日
def onOffToOn(channel, sampleIndex, val, prev):
    op('serial1').send('Hello World', terminator='\n') # 文字列 + 改行
    op('serial1').sendBytes(0x0a, 0x0a, 0x0a)
    return
for文を使ったりして、tableから文字列を読み出すこともでき、すごい、というかTouchDesignerがすごい
for i in range(op('table1').numRows):
        t = str(op('table1')[i, 0])
        op('serial1').send(t)
        op('serial1').sendBytes(0x20) # space
    op('serial1').sendBytes(0x0a, 0x0a, 0x0a) # print
コマンドによる操作
コマンド入力によって文字を太くするなど様々な設定ができます。
データシートに一覧がのっているので参考にしてください。
文字に関するコマンド
    # print mode select
    op('serial1').sendBytes(0x1b, 0x21, 0b00000000)

    # double width mode
    # op('serial1').sendBytes(0x1b, 0x0e) # enable
    # op('serial1').sendBytes(0x1b, 0x14) # disable

    # character updown mode
    # 0:disable 1:enable
    op('serial1').sendBytes(0x1b, 0x7b, 0)

    # white/black reverse printing
    # 0:disable 1:enable
    op('serial1').sendBytes(0x1d, 0x42, 0)

    # select charset(?)
    op('serial1').sendBytes(0x1b, 0x52, 0)
    # select character code table(?)
    op('serial1').sendBytes(0x1b, 0x52, 0)
print mode selectは2進数の各位の01を切り替えることでモードのon/offを切り替えます。0がoff、1がon。
BIT0:
BIT1:
BIT2:
BIT3: Emphasized mode - 太字
BIT4: Double height mode - 高さが二倍になる
BIT5: Double Width mode - 幅が二倍になる
BIT6: Deleteline mode - 打ち消し線 使えない?
BIT7: Underline mode - 下線
例) 0b10101000: 幅二倍で下線かつ太字
TOPで出力した画像を印刷する
Arduinoのライブラリを使えば簡単にjpg画像を印刷できますが、Arduinoのメモリの問題で大きな画像は印刷できません。SDカードスロットを使うなどの方法があるようですが、今回は動的に生成した画像を印刷したいので、Arduinoのメモリを経由せずにシリアルから直接データを送ることで印刷したいと思います。
横幅384px、高さが255px以上のものは一度に送信ができないので、分割する必要があります。
画像の用意
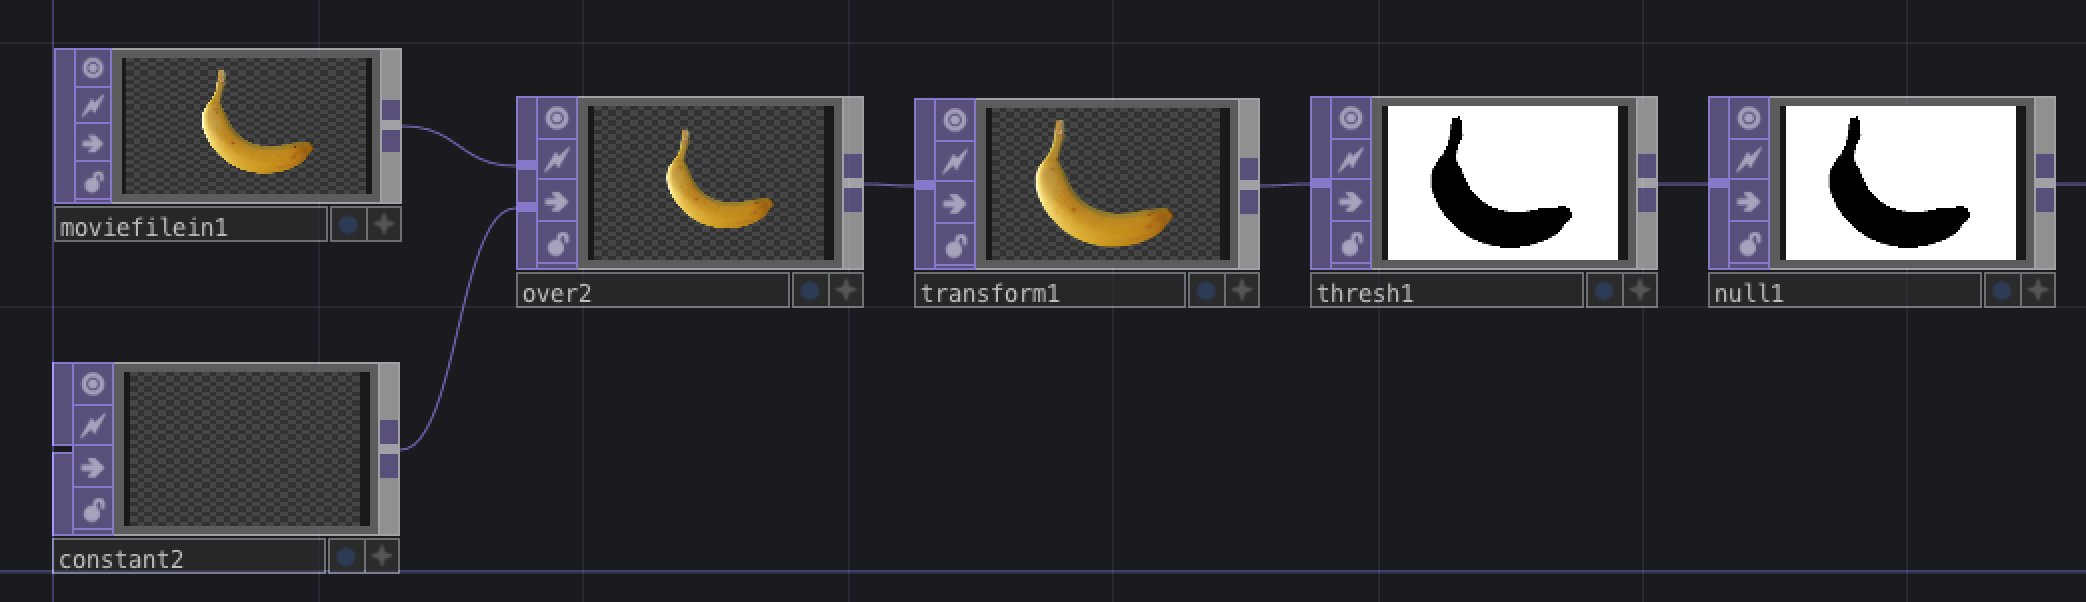 適当な画像を用意します。解像度を384x255以下にし、ThresholdTOPで2値化してnullにおいておきましょう。
bitmap化して送る
画像をプリンタで印刷できる形にするためには、1つ1つのピクセルが白か黒か、という1bitの情報を8bitづつまとめて送る必要があります。
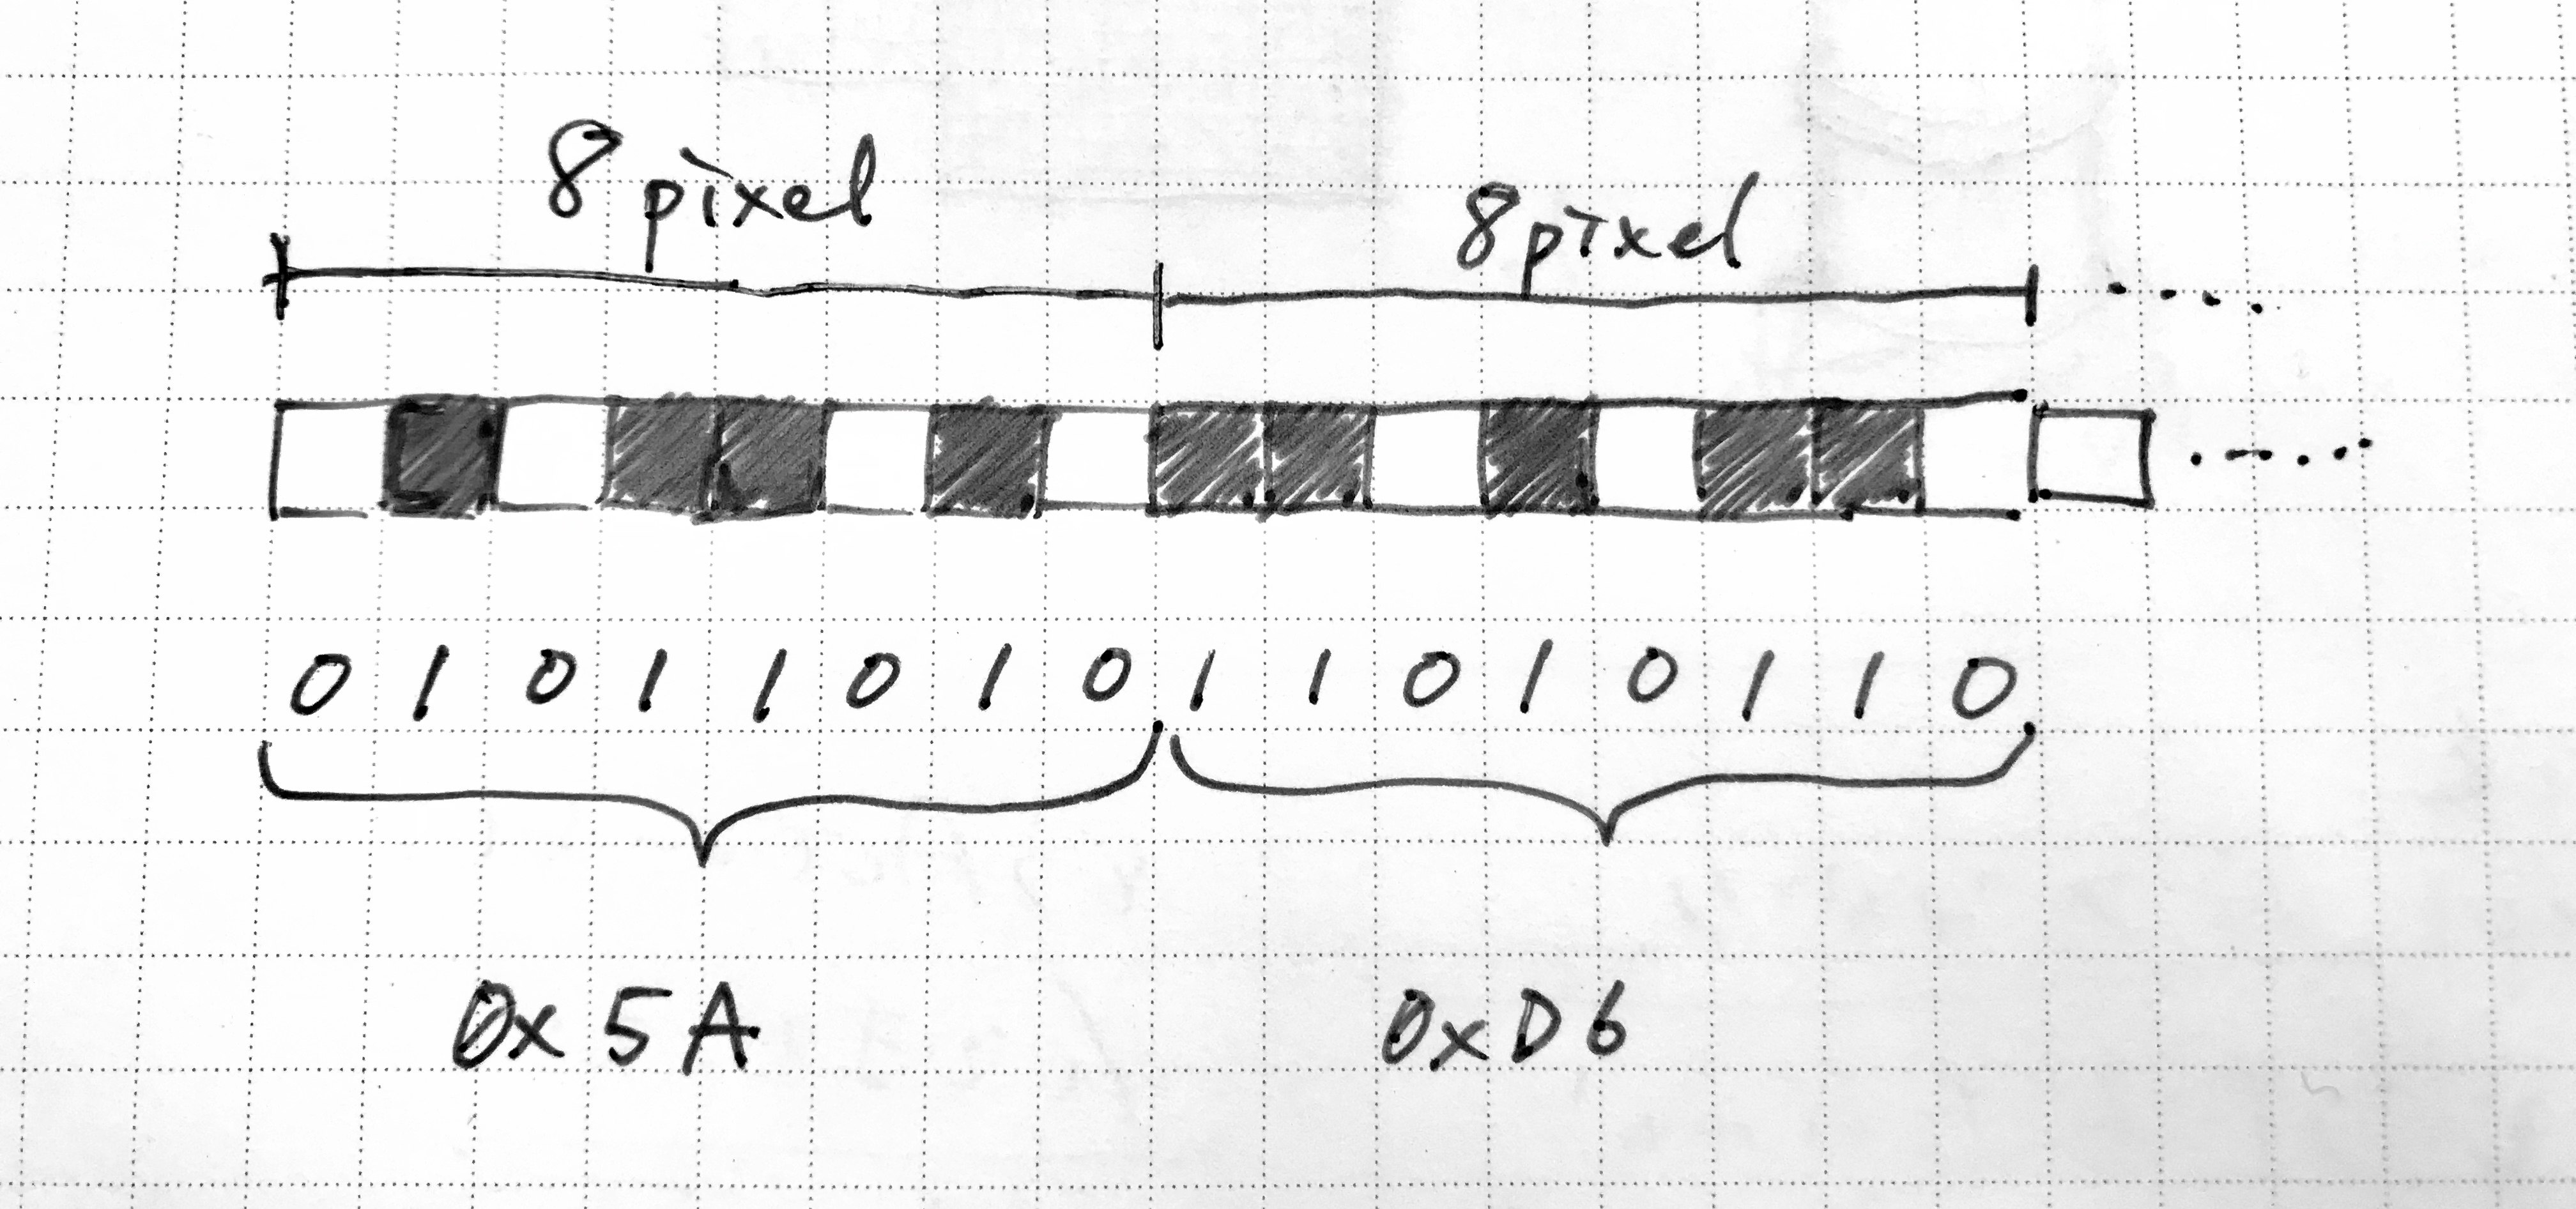
はじめにprint bit imageのコマンド、画像の高さ、横幅のバイト数を送り、その後バイトに変換したデータを一つづつ送ります。一度に大量のデータを送信するとエラーが出るので、処理の途中にsleepを噛ませてあげています。
以下をCHOPExecuteで実行することで印刷ができる!
コードはこれを参考にしました。→https://github.com/adafruit/Python-Thermal-Printer
import time

def onOffToOn(channel, sampleIndex, val, prev):
    image = op('null1')
    serial = op('../serial1')
    width = image.width
    height = image.height

    if width > 384:
        width = 384 # 384px以上は切れる

    rowBytes = int((width + 7) / 8)

    numHeight = int(height / 255)  # 画像を何分割するか

    for l in range(numHeight+1):
        if l == numHeight:
            _height = height-255*numHeight
        else:
            _height = 255

        serial.sendBytes(18, 42, _height, rowBytes) # print bit image

        for y in range(_height):
            n = y * rowBytes
            x = 0
            for b in range(rowBytes):
                sum = 0
                bit = 128
                while bit > 0:
                    if x >= width: break
                    if int(image.sample(x=x, y=(height-255*l)-y)[0]) == 0:
                        sum |= bit
                    x    += 1
                    bit >>= 1
                serial.sendBytes(sum)
                time.sleep(0.001)
        time.sleep(0.01)

    return
プリンタのハック大成功🍌 #touchdesigner pic.twitter.com/n6sLUxBIX2
— koma (@koma_JB62) 2017年11月4日
バナナが伸びてるのは仕様です