この記事について
2024年11月現在、パブリックプレビューとなっている「watsonx.ai Flows Engine」を試してみる記事です。
パブリックプレビュー版を使っていることにご注意ください。
「watsonx.ai Flows Engine」は、watsonx.aiでAIエージェントやRAGなどアプリケーション作成のためのフレームワークです。
作業環境準備
この記事では、作業環境として仮想マシンを使っています。VirtualBoxなどで仮想マシンを用意しましょう。Apple Silicon対応のVirtualBoxもあります。
Windowsを使っている人は、WSL(WSL2)でも良いでしょう。
個人的にUbuntu Serverを好んで使いますが、他のものでも構いません。
Node.jsのインストール
nodesourceを使って、Node.jsをインストールします。次のコマンドを実行します。
curl -sL https://deb.nodesource.com/setup_18.x | sudo -E bash -
sudo apt install -y nodejs
「watsonx.ai Flows Engine」の試し方
今回は、「watsonx.ai Flows Engine」のチュートリアルである、RAGアプリケーションの構築を試します。
チュートリアルの記事の原文(英語)は、下記です。
https://developer.ibm.com/tutorials/awb-build-rag-application-watsonx-ai-flows-engine/
「watsonx.ai Flows Engine」のWebサイトにアクセス
パブリックプレビューの「watsonx.ai Flows Engine」を試すには、https://www.ibm.com/products/watsonx-flows-engine にアクセスし、「Try the preview」をクリックします。

次に、「Log in」をクリックします。IBM idか、Githubのアカウントを使ってログインします。
この記事では、Githubのアカウントを使ってログインしました。

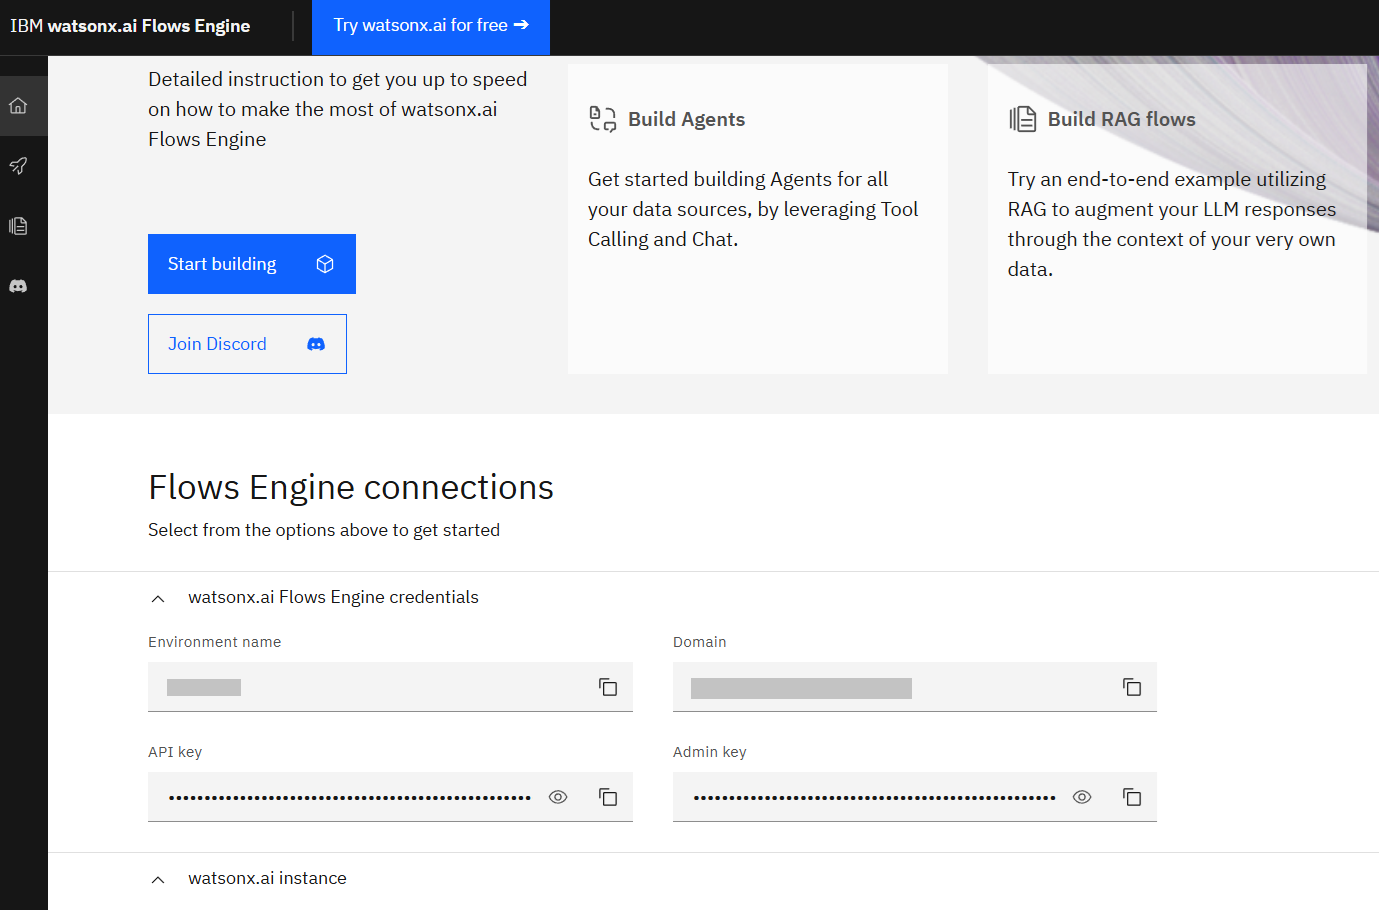
画面には、「watsonx.ai Flows Engine」の認証情報が表示されています。表示されている認証情報をメモしておきましょう。

「Start building」をクリックして始めます。
watsonx.aiの本番利用の場合
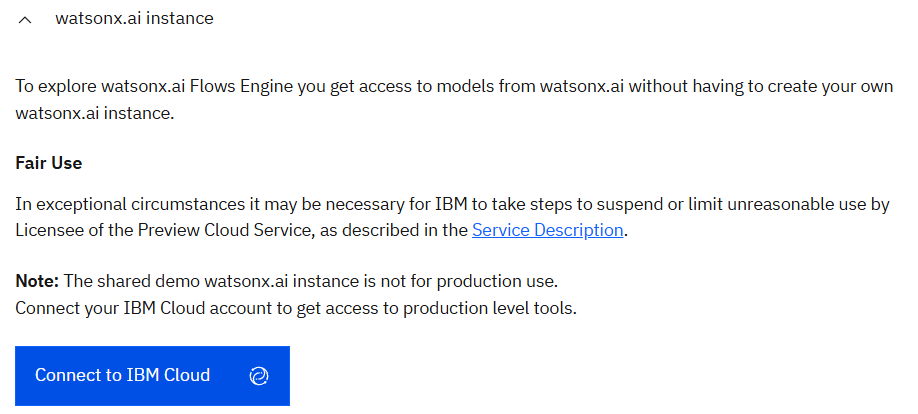
「watsonx.ai instance」の欄には、本番用にIBM Cloud上のwatsonx.aiを接続することが必要だと述べている文章があります。「Connect to IBM Cloud」をクリックすることで、IBM Cloud上の watsonx.ai に接続することができます。

始める前に準備が必要らしい
Getting Startedの表示をみると、「watsonx.ai Flows Engine CLI」と「watsonx.ai Flows Engineの認証(Authenticate)」が必要なようです。

Getting Startedの前に、CLIをインストール
表示された画面で、「installed the CLI」のリンクをクリックします。
https://wxflows.ibm.stepzen.com/docs/installation

CLIのダウンロード
「Download CLI」をクリックし、「wxflows_cli-1.0.0rc172-py3-none-any.whl(2024年11月5日現在)」をダウンロードします。

SSH SCPを使って、「wxflows_cli-1.0.0rc172-py3-none-any.whl」を仮想マシンに転送します。下図では「Tera Term」を使っています。お使いのターミナルエミュレータに置き換えてください。
また、To に指定する転送先のディレクトリも各自の環境に読み替えてください。

もしWSL(WSL2)でUbuntuを使っている場合
ダウンロードしたCLIをUbuntuに転送することにSSH SCPを使いたいので、WSL(WSL2)上のUbuntuにSSH Serverをインストールし、SCP接続できるようにすれば、SCP経由でファイル転送ができます。
sudo apt update
sudo apt install openssh-server
sudo service ssh start
IPアドレスを確認します。
ip addr show eth0 | grep -oP '(?<=inet\s)\d+(\.\d+){3}'
表示されたIPアドレスに対して、WinSCPなどでSCP接続することができるので、ファイル転送が可能になります。
CLIのインストール
次のコマンド実行します。
pip3 install wxflows_cli-1.0.0rc172-py3-none-any.whl --force-reinstall
バージョン確認を行います。
wxflows --version
実行結果
wxflows 1.0.0rc172
もし、command not found が表示された場合は、pipパッケージのバイナリディレクトリにパスが通っていないことが影響していると考えることができるので、パスを通すため、次のコマンドを実行します。
nano .bashrc
末尾に、下記を追記します。
export PATH="$PATH:$HOME/.local/bin"
追記後、保存します。次のコマンドを実行します。
source .bashrc
これでパスが通るので、CLIのインストールを再実行します。その後、バージョン確認を行います。
チュートリアル画面に戻り、「next section」をクリックします。
CLI経由で認証を行う
先ほどメモした認証情報(watsonx.ai Flows Engine credentials)を使います。次のコマンドを実行します。
wxflows login
認証情報の「Environment name」の値を入力します。
No existing credentials found, login is required
Provide your watsonx Flows Engine environment name:
認証情報の「Domain」の値を入力します。
Provide the the domain of your environment (default: us-east-a.ibm.stepzen.net):
認証情報の「Admin key」の値を入力します。Admin keyは入力しても表示されません。これはLinuxではいつものことです。
Provide the admin key for your environment:
認証が完了するので認証情報を確認します。次のコマンドを実行します。
wxflows whoami
実行結果として、入力した情報が表示されます。セキュリティ上、伏字としてxを使っています。自分で確認してください。
Domain: xxxx-xxxxxx-x.ibm.xxxxx.net
Environment: xxxxxxxxxxxxxx
Admin key: sembirit::local.io+1000::cf*****************************************************
Api key: sembirit::local.net+1000::fb******************************************************
チュートリアル画面に戻り、「next section」をクリックします。
やっと、Getting Startedがはじまる
Getting Startedの「Build a RAG application」に取り掛かる準備が終わりましたのではじめましょう。
Build a RAG applicationに記載の手順にしたがって作業を進めます。
Step1. データセットの取得
question-answerディレクトリを作成し、Zip形式のデータセットを取得します。
mkdir question-answer
cd question-answer
データセットを取得します。
curl -O https://watzen.ibm.stepzen.com/downloads/watsonxdocs.zip
ダウンロードした「watsonxdocs.zip」ファイルを解凍するので、次のコマンドを実行します。
sudo apt install unzip
unzip watsonxdocs.zip
確認した範囲では、「watsonxdocs.zip」が、zipファイルとして認識されないことがあります。特に下記のように表示された場合です。
Archive:  watsonxdocs.zip
  End-of-central-directory signature not found.  Either this file is not
  a zipfile, or it constitutes one disk of a multi-part archive.  In the
  latter case the central directory and zipfile comment will be found on
  the last disk(s) of this archive.
unzip:  cannot find zipfile directory in one of watsonxdocs.zip or
        watsonxdocs.zip.zip, and cannot find watsonxdocs.zip.ZIP, period.
これはIBM側の問題なので、IBM側で解決すべきことですが、自分で解決することもできます。
- WindowsもしくはMacで、https://watzen.ibm.stepzen.com/downloads/watsonxdocs.zip にアクセスし、「watsonxdocs.zip」を解凍します。
- 「watsonxdocs」というディレクトリ(フォルダ)ができるので、「watsonxdocs」をzip形式で圧縮します。
- 「watsonxdocs.zip」を、SSH SCP で、Linux環境側に転送します。
- Linux環境側で、「watsonxdocs.zip」を解凍します。
Step2. CLIのインストール
これは完了しているので飛ばします。
Step3. プロジェクトの初期設定を行う
次のコマンドを実行します。
wxflows init --interactive
初期設定のために、いくつかの確認があります。
最初の質問では、yes を選びましょう。
[?] Do you wish to use retrieval-augmented generation (RAG)?:
 > yes
   no
2つ目の質問の回答として、「create from local data」を選びます。
[?] Choose the document collection for context retrieval:
 > create from local data
   use custom
3つ目の質問の回答として、パスとして、./watsonxdocs を指定します。「watsonxdocs.zip」を解凍して出来たディレクトリですね。
[?] Path to the data: ./watsonxdocs
4つ目の質問の回答として、Markdown or HTML(ignore other files) を選びます。
[?] File types to include:
 > Markdown or HTML(ignore other files)
   all supported file types
5つ目の質問の回答として、250 を指定します。
[?] Chunk size (in tokens): 250
6つ目の質問の回答として、25 を指定します。
[?] Chunk overlap (in tokens): 25
7つ目の質問の回答として、そのままで良いでしょう。watsonxdocs です。
[?] Collection name: watsonxdocs
8つ目の質問の回答として、そのままで良いでしょう。エンドポイント名は、wxflows-genai/watsonxdocs です。
[?] Endpoint name: wxflows-genai/watsonxdocs
9つ目の質問は、チュートリアルにはありませんが質問されたので記載します。done を選びます。
[?] Import type:
 > done
   GraphQL
   OpenAPI
   Directory
   Package
ここまでの結果、次のように表示されます。
Processing data...
Processing markdown or HTML in ./watsonxdocs (md)
{
    "description": "Estimates of token counts based upon tiktoken embedding",
    "average": 99.7978513483885,
    "min": 8,
    "max": 266,
    "sum": 455178,
    "count": 4561
}
Processing documents... done
success: created wxflows.toml, watsonxdocs.tsv and .env.sample
Please review and edit these files and then run wxflows deploy to deploy your pattern.
「.env」ファイルを作成します。「.env」ファイルには、STEPZEN_WATSONX_HOST=shared を記述します。
nano .env
保存します。cat コマンドを実行して確認します。
cat .env
実行結果
STEPZEN_WATSONX_HOST=shared
Step4. チャンク化したデータセットをベクターデータベースにアップロード
次のコマンドを実行します。
wxflows collection deploy
ここでは、IBM Cloud上のwatsonx.aiに接続していないので、watsonx.ai Flows Engine評価用の環境にアップロードされます。
Found flow definition in the configuration

Provisioning the watsonx Flows Engine environment
Warning: No flow was present in the input
Published https://sembirit.us-east-a.ibm.stepzen.net/wxflows-genai/watsonxdocs/graphql in 7.515s
Deploying the wxflows-genai/watsonxdocs endpoint... done

Creating or updating the watsonxdocs collection
Using https://sembirit.us-east-a.ibm.stepzen.net/wxflows-genai/watsonxdocs/graphql for search engine type:
gettingStarted
Processing sembirit.us-east-a.ibm.stepzen.net/watsonxdocs 1000 fragments  21.91s elapsed
Processing sembirit.us-east-a.ibm.stepzen.net/watsonxdocs 2000 fragments  39.3s elapsed
Processing sembirit.us-east-a.ibm.stepzen.net/watsonxdocs 3000 fragments  56.8s elapsed
Processing sembirit.us-east-a.ibm.stepzen.net/watsonxdocs 4000 fragments  76.96s elapsed
Processing sembirit.us-east-a.ibm.stepzen.net/watsonxdocs 4561 fragments  87.68s elapsed
Processed sembirit.us-east-a.ibm.stepzen.net/watsonxdocs count 4561 fragments 87.68 elapsed
Uploading... done
Step5. フローを確認する
Step3で生成された「wxflows.toml」に対して、catコマンドを実行して確認します。
cat wxflows.toml
実行結果
[wxflows.deployment]
endpoint_name = "wxflows-genai/watsonxdocs"
# Example flows.
flows="""
    // myPrompt = ragAnswerInput | topNDocs | promptFromTopN | ragInfo
    // myRag = ragAnswerInput | topNDocs | promptFromTopN | completion(parameters:myRag.parameters) | ragInfo
    // myRagWithGuardrails = ragAnswerInput | topNDocs | promptFromTopN | completion(parameters:myRagWithGuardrails.parameters) | ragScoreInfo | hallucinationScore | ragScoreMessage | ragInfo
"""
ai_engine = "WATSONX"

[wxflows.deployment.source.aicore]
# RAG configuration
collection="watsonxdocs"
tsv_files = ["watsonxdocs.tsv"]
embedding_model="ibm/slate-30m-english-rtrvr-v2"
data_type = "md"
data_directory = "./watsonxdocs"
chunk_size = 250
chunk_overlap = 25
documentstore.type="gettingStarted"
次のStep6に向けて、myRag というフローを有効にするので、// を外しコメントアウトし、保存します。
nano wxflows.toml
編集結果を確認するため、catコマンドを実行して確認します。
cat wxflows.toml
実行結果
[wxflows.deployment]
endpoint_name = "wxflows-genai/watsonxdocs"
# Example flows.
flows="""
    // myPrompt = ragAnswerInput | topNDocs | promptFromTopN | ragInfo
    myRag = ragAnswerInput | topNDocs | promptFromTopN | completion(parameters:myRag.parameters) | ragInfo
    // myRagWithGuardrails = ragAnswerInput | topNDocs | promptFromTopN | completion(parameters:myRagWithGuardrails.parameters) | ragScoreInfo | hallucinationScore | ragScoreMessage | ragInfo
"""
ai_engine = "WATSONX"

[wxflows.deployment.source.aicore]
# RAG configuration
collection="watsonxdocs"
tsv_files = ["watsonxdocs.tsv"]
embedding_model="ibm/slate-30m-english-rtrvr-v2"
data_type = "md"
data_directory = "./watsonxdocs"
chunk_size = 250
chunk_overlap = 25
documentstore.type="gettingStarted"
Step6. CLIを使用してフローをデプロイ
フローを示すファイルである「wxflows.toml」がある場所で、次のコマンドを実行します。
wxflows flows deploy
実行結果
Found flow definition in the configuration

Provisioning the watsonx Flows Engine environment
Published flow myRag to https://sembirit.us-east-a.ibm.stepzen.net/wxflows-genai/watsonxdocs/graphql in 6.743s
Use wxflows request to try out your flow:
wxflows request --flow-name myRag [--var-file <FILE>|--var argument_name=VALUE|--json JSON]
Deploying the wxflows-genai/watsonxdocs endpoint... done
Step7. 新しいアプリケーションの設定
アプリケーションの実行に必要な値を取得するために、3つのコマンドを実行します。
1つ目のコマンドを実行します。
echo VITE_WXFLOWS_ENDPOINT=https://$(wxflows whoami --account).$(wxflows whoami --domain)/wxflows-genai/watsonxdocs/graphql
実行結果
VITE_WXFLOWS_ENDPOINT=https://sembirit.us-east-a.ibm.stepzen.net/wxflows-genai/watsonxdocs/graphql
2つ目のコマンドを実行します。
echo VITE_WXFLOWS_APIKEY=$(wxflows whoami --apikey)
実行結果
VITE_WXFLOWS_APIKEY=sembirit::local.net+1000::fb63971xxxxxxxxxxxxxxxxxxxxxxxxxxxxxxxxxxxxxxxxxx
3つ目のコマンドを実行します。
echo VITE_WXFLOWS_COLLECTION="watsonxdocs"
実行結果
VITE_WXFLOWS_COLLECTION=watsonxdocs
チュートリアルの記事内の「Open in StackBlitz」ボタンをクリックします。
https://developer.ibm.com/tutorials/awb-build-rag-application-watsonx-ai-flows-engine/
このボタンです。

画面内で、「FILES」の下に、「.env」ファイルを作成します。下図の青枠の部分をクリックすると作成できます。

作成した「.env」ファイルをクリックして開き、先ほどの3つのコマンドを実行して得た値を記述します。

記述後、Ctrl + sキーを押して保存します。
Step8. 質問をしてみる
「What is WML?」と質問します。「What is your question?」の欄が質問を入力する場所です。
「Submit」をクリックします。
画面下部に結果が表示されます。

チュートリアル記事には記載がない、サンプルアプリのローカル実行
サンプルアプリケーションの取得
watsonx.ai Flows Engineのサンプルを取得するため、次のコマンドを実行します。
git clone https://github.com/IBM/wxflows.git
RAGアプリケーションの「app」ディレクトリまで移動します。
cd wxflows/examples/rag-question-answer/app
サンプルアプリケーションのインストール
インストールを実行するため、次のコマンドを実行します。
npm install
実行結果
added 136 packages, and audited 137 packages in 27s

12 packages are looking for funding
  run `npm fund` for details

found 0 vulnerabilities
.env ファイルの作成と環境変数の設定
チュートリアルの記事内の「Open in StackBlitz」ボタンをクリックして表示されたサンプルのWebアプリケーションの時と同じように、.env ファイルを作成し、3つの値を記述します。

サンプルアプリケーションの起動
次のコマンドを実行して、サンプルアプリケーションを起動します。
npm run dev
実行結果
  VITE v4.5.5  ready in 226 ms

  ➜  Local:   http://localhost:5173/
  ➜  Network: use --host to expose
  ➜  press h to show help
Webブラウザで、http://localhost:5173/ にアクセスします。サンプルアプリケーションを起動することができました。

「What is your question?」の欄が質問を入力する場所です。
「IBMは、AIとクラウドコンピューティングを提供していますか?」と日本で質問してみましょう。
「Submit」をクリックします。

評価用のwatsonx.ai のためか、watsonx 推しですね。
日本語で質問して回答してくれることは確認できたので、動作確認としては良しとします。
まとめ
2024年11月6日までの段階でチュートリアルで遭遇したエラーに対処しながら動かしたので時間がかかりましたが、こうして実際にパブリックプレビュー版を評価してみると、慣れてれば素直にwatsonx.aiによる生成AIアプリケーション開発が出来そうな気がします。

