この記事は ジーズアカデミー Advent Calendar 2018 の2日目の記事です。
はじめに
音声自動文字起こし機能をたった17行のスクリプトコードで実装してみます。
自動文字起こしがあれば、議事録係が不要になったり、無駄な作業が減るので良いですよね。
自作すればアレンジも簡単に出来るようになるのでオススメです。
成果物
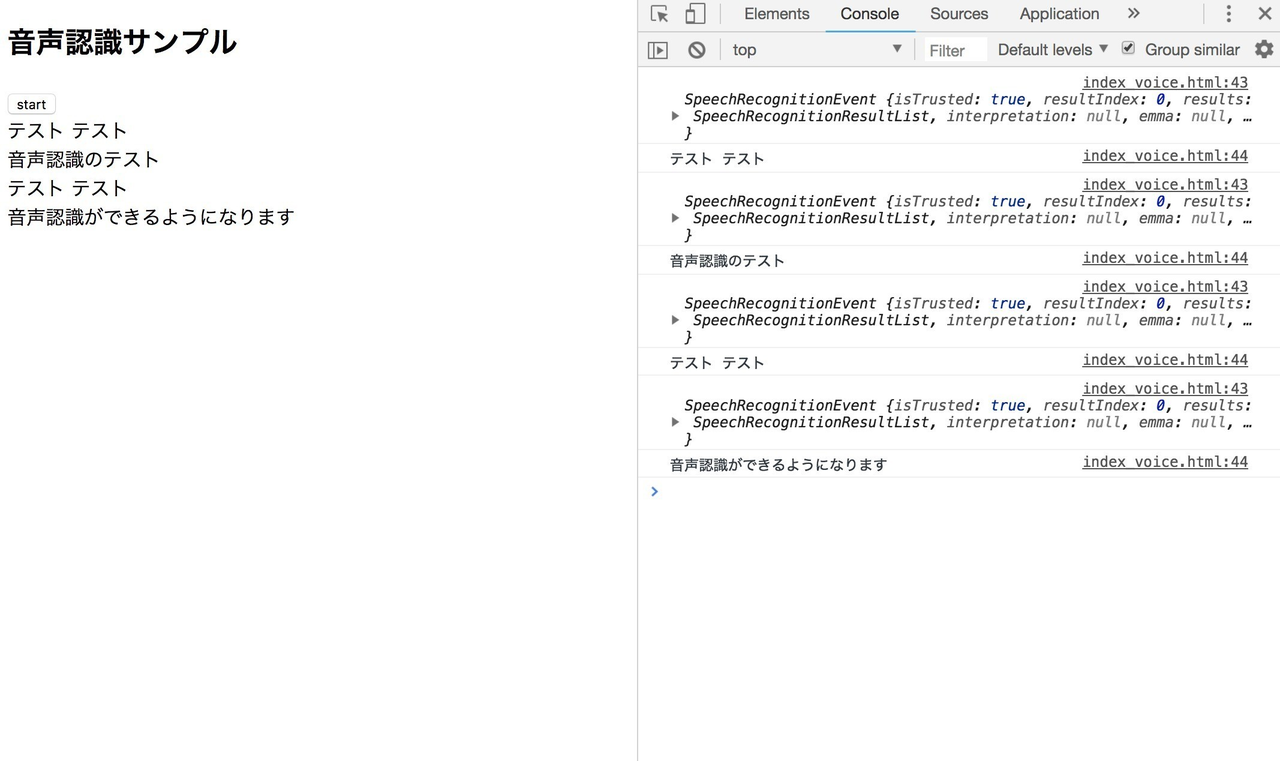
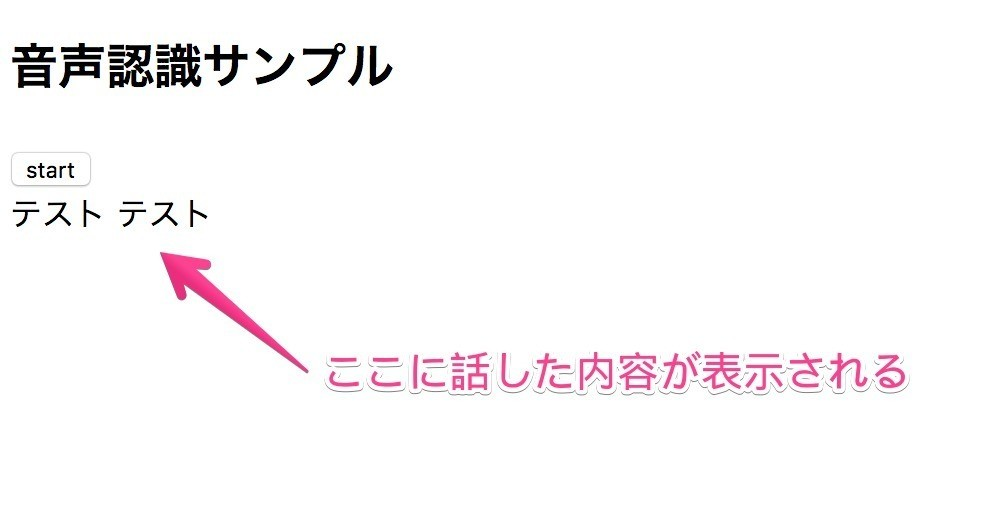
startボタンを押すと、話した内容を自動で文字起こししてくれます。
script内のコードはこちらです。
ぴったり17行です。
<script>
    const speech = new webkitSpeechRecognition();
    speech.lang = 'ja-JP';

    const btn = document.getElementById('btn');
    const content = document.getElementById('content');

    btn.addEventListener('click' , function() {
        speech.start();
    });

    speech.onresult = function(e) {
         speech.stop();
         if(e.results[0].isFinal){
             var autotext =  e.results[0][0].transcript
             content.innerHTML += '<div>'+ autotext +'</div>';
          }
     }

     speech.onend = () => {
        speech.start()
     };

</script>
簡単な音声認識の作成
先ずは簡単な音声認識の作成をして、その次に自動文字起こし機能を追加していく流れで作成していきます。
プログラミング初学者でも実装できるように書いてみたので是非実装してみてください。
web speech APIを使って音声認識を出力
まずは簡単な音声認識を作ってみましょう。
新規フォルダを作成し、その中にindex.htmlを作成し、こちらのコードを用意してください。
<!DOCTYPE html>
<html lang="ja">
<head>
    <meta charset="UTF-8">
    <title>音声認識サンプル</title>
</head>
<body>
    <h2>音声認識サンプル</h2>
    <button id="btn">start</button>
    <div id="content"></div>

<script>
//ここに音声認識の処理を書いていく

</script>
<body>
<html>
音声認識をするための処理をscriptタグ内に書いていきます。
<script>
//ここに音声認識の処理を書いていく
const speech = new webkitSpeechRecognition();
speech.lang = 'ja-JP';
</script>
音声認識を実行する準備はこの2行で完了です。
webkitSpeechRecognition()を定義し、langをja-JPにすることで日本語に対応したWeb Speech APIが使えるようになります。
そしてこれをイベントで実行出来るようにしていきます。
<script>
//ここに音声認識の処理を書いていく
const speech = new webkitSpeechRecognition();
speech.lang = 'ja-JP';

//---------------追記---------------//
const btn = document.getElementById('btn');
const content = document.getElementById('content');

btn.addEventListener('click' , function() {
    // 音声認識をスタート
    speech.start();
});

speech.addEventListener('result' , function(e) {
   // 音声認識で取得した情報を、コンソール画面に表示
   console.log(e);
});
//--------------------------------//

</script>
追加するとこのようなコードになります。
<!DOCTYPE html>
<html lang="ja">
<head>
    <meta charset="UTF-8">
    <title>音声認識サンプル</title>
</head>
<body>
    <h2>音声認識サンプル</h2>
    <button id="btn">start</button>
    <div id="content"></div>

<script>
//音声認識の準備
const speech = new webkitSpeechRecognition();
speech.lang = 'ja-JP';

//使用する変数を用意
const btn = document.getElementById('btn');
const content = document.getElementById('content');


btn.addEventListener('click' , function() {
    // 音声認識をスタート
    speech.start();
});


speech.addEventListener('result' , function(e) {
   // 音声認識で取得した情報を、コンソール画面に表示
   console.log(e);
});

</script>
<body>
<html>
コードが出来たらローカルサーバーを立ち上げましょう。
Macの方はruby、pythonがデフォルトで入っているので下記どれかのコマンドをターミナルで実行してみましょう。
・rubyの場合
$ ruby -run -e httpd . -p 8080
・Python2.xの場合
$ python -m SimpleHTTPServer 8080
・Python3.xの場合
$ python -m http.server 8080
Windowsの方はXAMPPかMAMPをインストールし、Webサーバをローカル環境で利用できるようにしてください。
ブラウザはGoogle Chromeを使用してください。
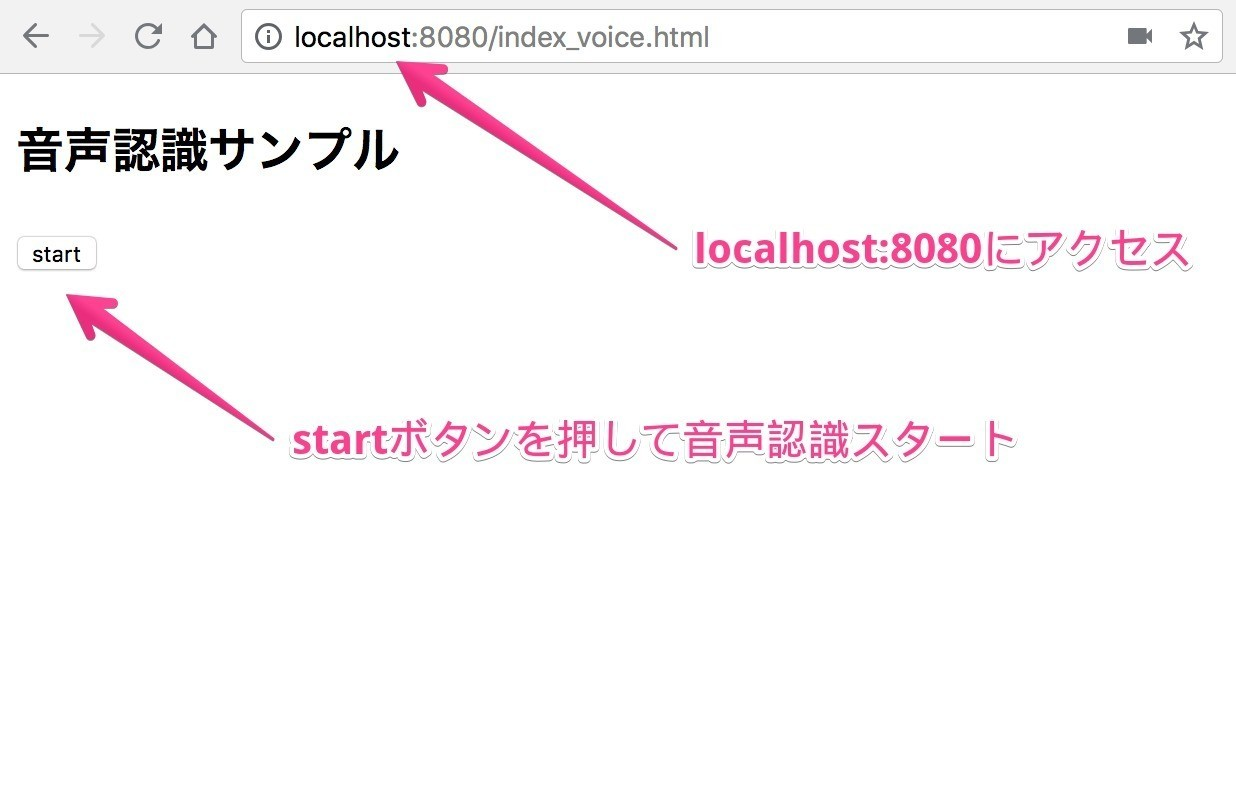
localhost:8080にアクセスします。
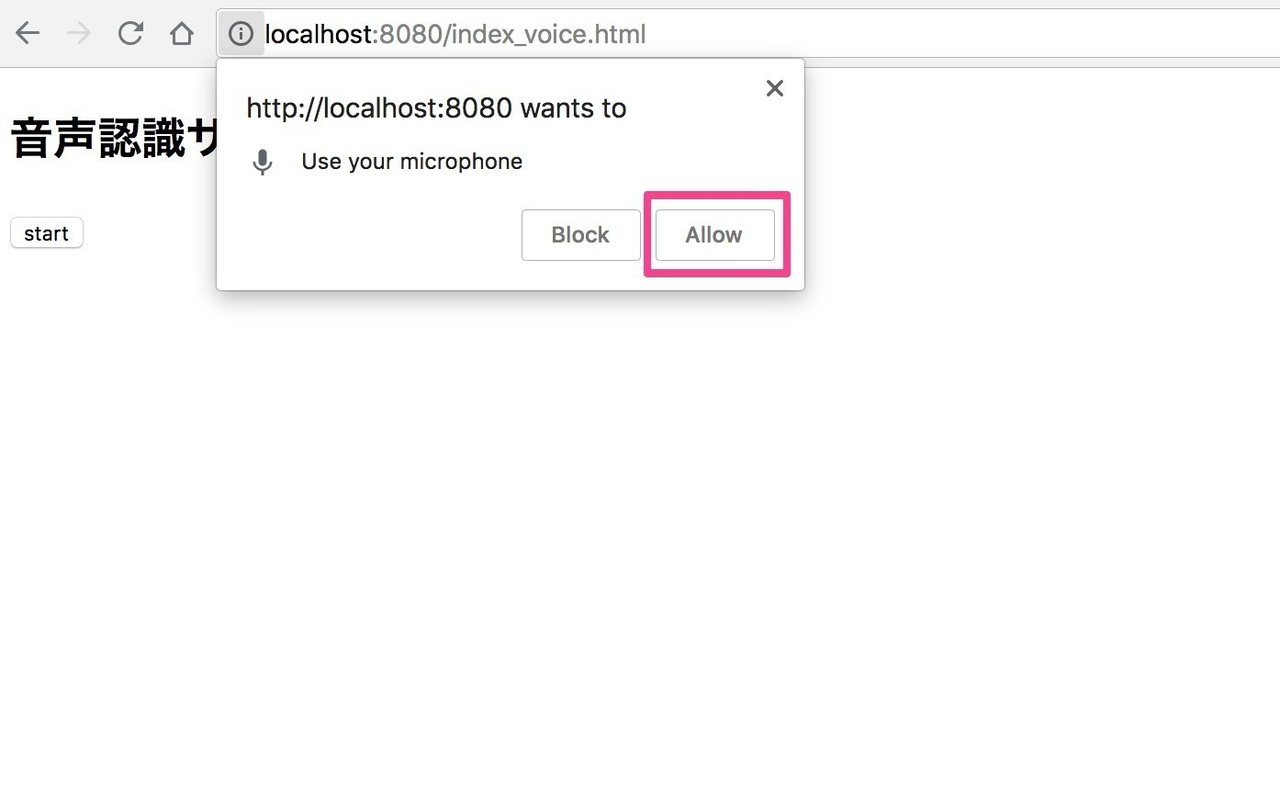
「マイク」の使用許可を求めるポップアップが表示されると思うので、「許可」ボタンをクリックしましょう。
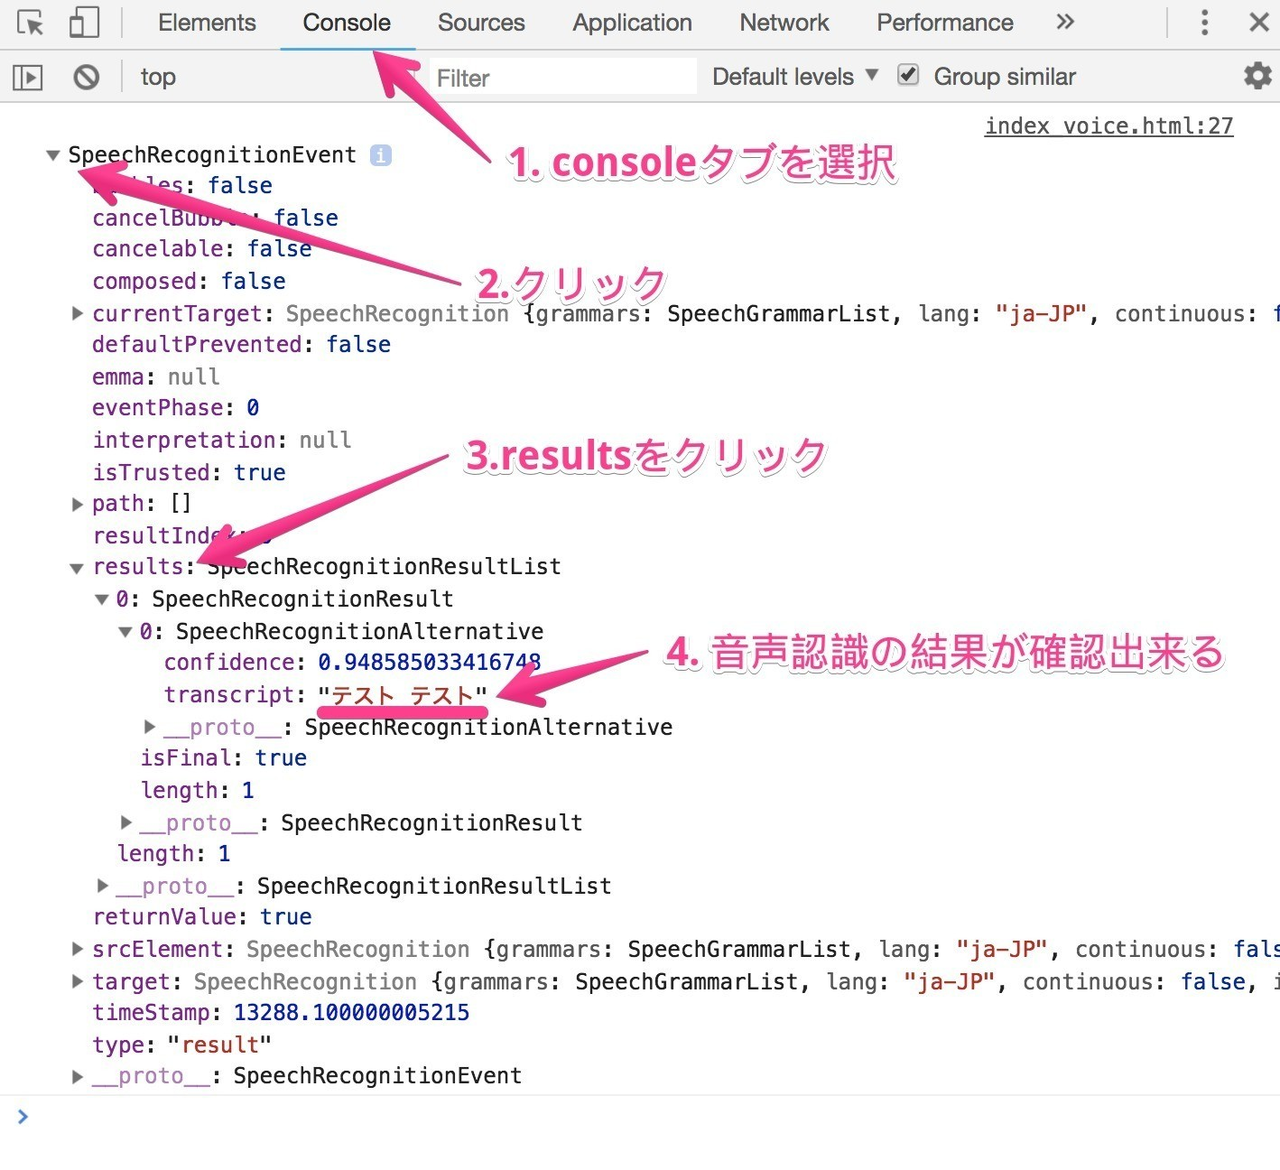
右クリック→ 検証 を開き、Consoleを表示します。
Google Chromeのデベロッパーツールの使い方についてはこちらを参照してみてください。 https://saruwakakun.com/html-css/basic/chrome-dev-tool
準備が出来たらstartボタンを押して「テスト」と話しかけてみましょう。
話しかけた後にConsoleに表示される、resultsのtranscriptに話した文字が入力されれば成功です。
音声認識をHTMLに表示
次にコンソールに表示された内容をHTML上に表示してみましょう下記のコードを追記します。
results内の配列からtranscriptを取得していきます。
<script>
//音声認識の準備
const speech = new webkitSpeechRecognition();
speech.lang = 'ja-JP';

//使用する変数を用意
const btn = document.getElementById('btn');
const content = document.getElementById('content');


btn.addEventListener('click' , function() {
    // 音声認識をスタート
    speech.start();
});

speech.addEventListener('result' , function(e) {
   // 音声認識で取得した情報を、コンソール画面に表示
   console.log(e);

    //---------------追記---------------//
    // 音声認識で取得した情報を、HTMLに表示
    const text = e.results[0][0].transcript;
    content.innerText = text;
    //--------------------------------//

});

</script>
ブラウザを更新し、もう一度startボタンを押し話かけてみてください。
話した内容が表示されればOKです。これで簡単な音声認識が出来ました。
音声自動文字起こし作成
次に毎回startボタンを押さなくても自動で音声を認識する処理を書いていきましょう。先ほどのコードに僅か10行程のコードを追加するだけで音声自動文字起こしが出来るようになります。
先程のスクリプト内のコードのspeech.addEventListenerのfunctionをコメントアウトか削除し、自動音声認識の機能を追記していきます。
コードはこのようになります。
<script>
    const speech = new webkitSpeechRecognition();
    speech.lang = 'ja-JP';

    const btn = document.getElementById('btn');
    const content = document.getElementById('content');

    btn.addEventListener('click' , function() {
    // 音声認識をスタート
    speech.start();
    });

    //---------------追記---------------//
    //音声自動文字起こし機能
    speech.onresult = function(e) {
         speech.stop();
         if(e.results[0].isFinal){
             var autotext =  e.results[0][0].transcript
             console.log(e);
             console.log(autotext);
             content.innerHTML += '<div>'+ autotext +'</div>';
          }
     }

     speech.onend = () => {
        speech.start()
     };
    //--------------------------------//

</script>
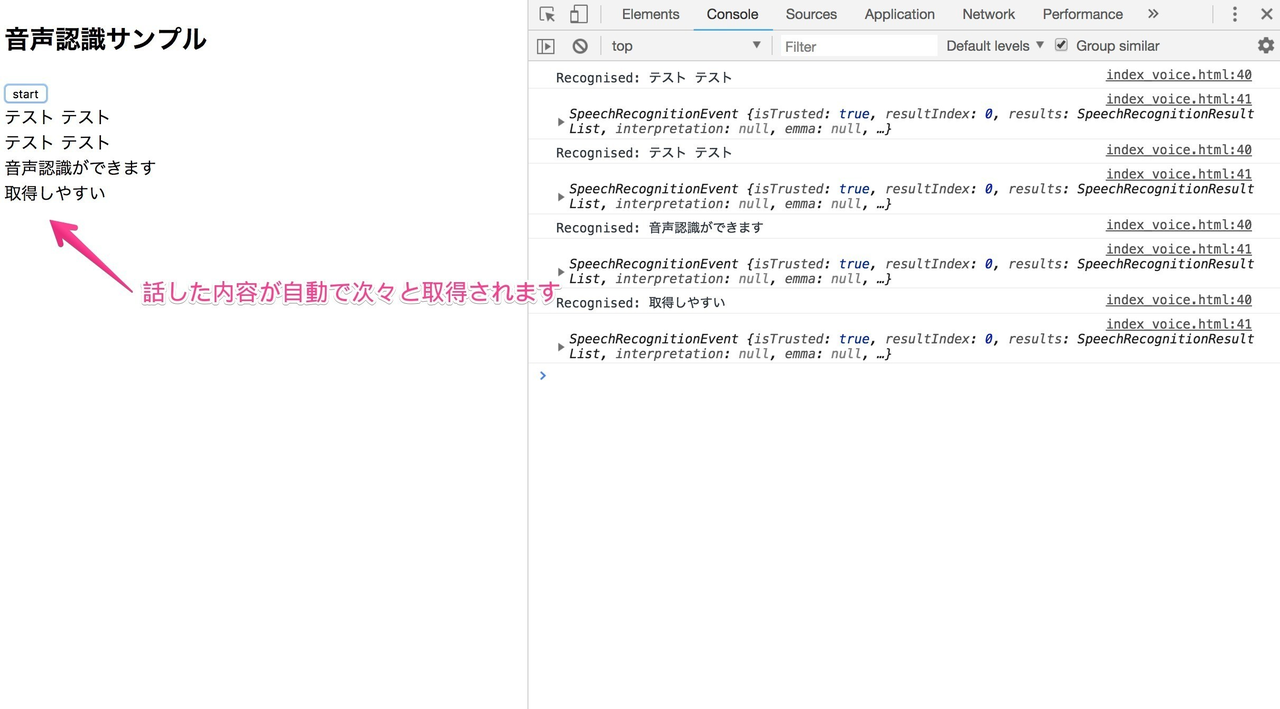
index.htmlを Chromeで開き、話しかけてみてください。
話した内容が次々と記録されていくはずです。
コード解説
SpeechRecognitionのイベントで.onendが認識終了のイベントなので、終了したら、.startをして常に取得する状態にします。
speech.onend = () => {
    speech.start()
};
そしてこの処理でテキストをどんどんHTMLに追加していきます。
content.innerHTML += '<div>'+ autotext +'</div>';
もっと詳しくSpeechRecognitionについて知りたい方はこちらのドキュメントを見てみてください。
https://developer.mozilla.org/en-US/docs/Web/API/SpeechRecognition
はい、これで音声自動文字起こしは完成です。
おわりに
たった17行程のスクリプトコードで実装出来ました。
意外と簡単ではなかったでしょうか?
APIやライブラリを使えば簡単に色々なものが実装できるようになっています。
私自身、プログラミングを学びはじめて6週間でSkypeのようなweb会議システムを作ることが出来ました。
その時のTweetがありがたいことに多くのいいね、リツートを頂きました。
ちょっと前ですが、web会議システム作りました。
— Kohei Tanaka (@kolife01) 2018年7月21日
+ビデオ通話
+音声自動テキスト化
+感情分析
Progateから始めて、当時ほぼプログラミング未経験の自分が6週間でskypeやzoomのようなweb会議システムを作れるようになったのは自分でも驚きでした。この時はJavaScriptたくさん書いたなー pic.twitter.com/6wJzEXKAyY
そしてこのweb会議システムの制作方法も本に書きました。
今回の記事はこちらの本の一部抜粋です。
HTML、CSS、JavaScriptだけでプログラミング初学者でも制作しやすい内容になっています。
もしご興味あれば購読して頂ければと思います。
WebAPIアプリケーション「超」入門 FirebaseとAPIによるWeb会議システム制作

最後まで読んで頂きありがとうございました。
