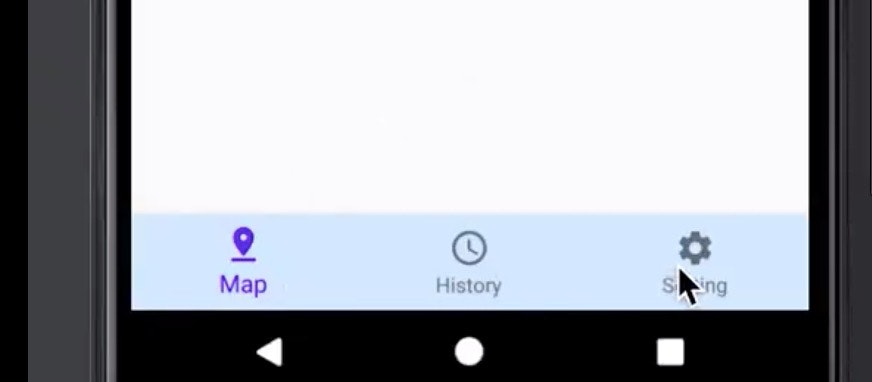
はじめに
完成イメージはこんな感じ
Android kotlin
— げん げんと (@gento34165638) May 31, 2020
fragmentの中にViewPageでスワイプできる画面を作る pic.twitter.com/uayDvUnmIr
「BottomNavigationViewのボタンから遷移した先の、fragmentのページの中で、さらにfragmentで3つのページを作る」みたいな感じです。(Androidネイティブ開発は初心者なので、文章がおかしいかもしれませんが、、、)
前提
すでに画面下の3つのタブがある状態。このタブに作りかたについては、こちらを参考に!(僕もこの動画を見ながら作りました。。)
3つのタブは以下のようなFragmentを表示する。
・fragment_first.xml
・fragment_second.xml
・fragment_third.xml
こちらと全く同じ作りにすると、res/navigation/my_nav.xmlはこんな感じ。(secondFragmentの上部については、この記事でやっていきます![]() )
)
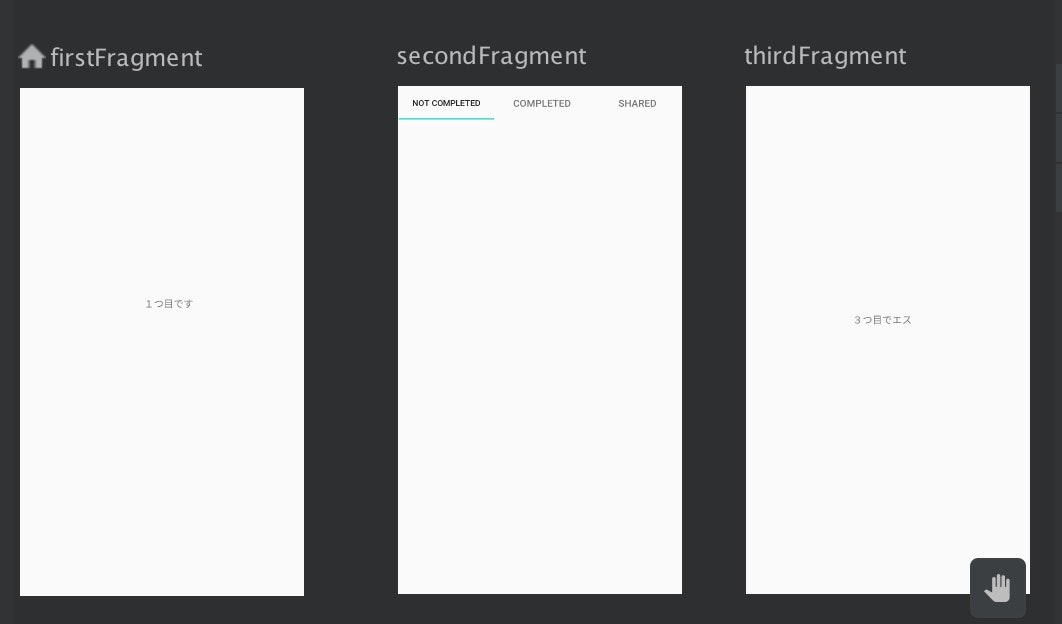
真ん中のsecondFragmentの中に、さらにスワイプ可能な3つのFragmentを作る。
スワイプ可能な3つのFragmentを作る
File>New>Fragment>Fragment(Blank)より、3つ新たにFragmentを作成
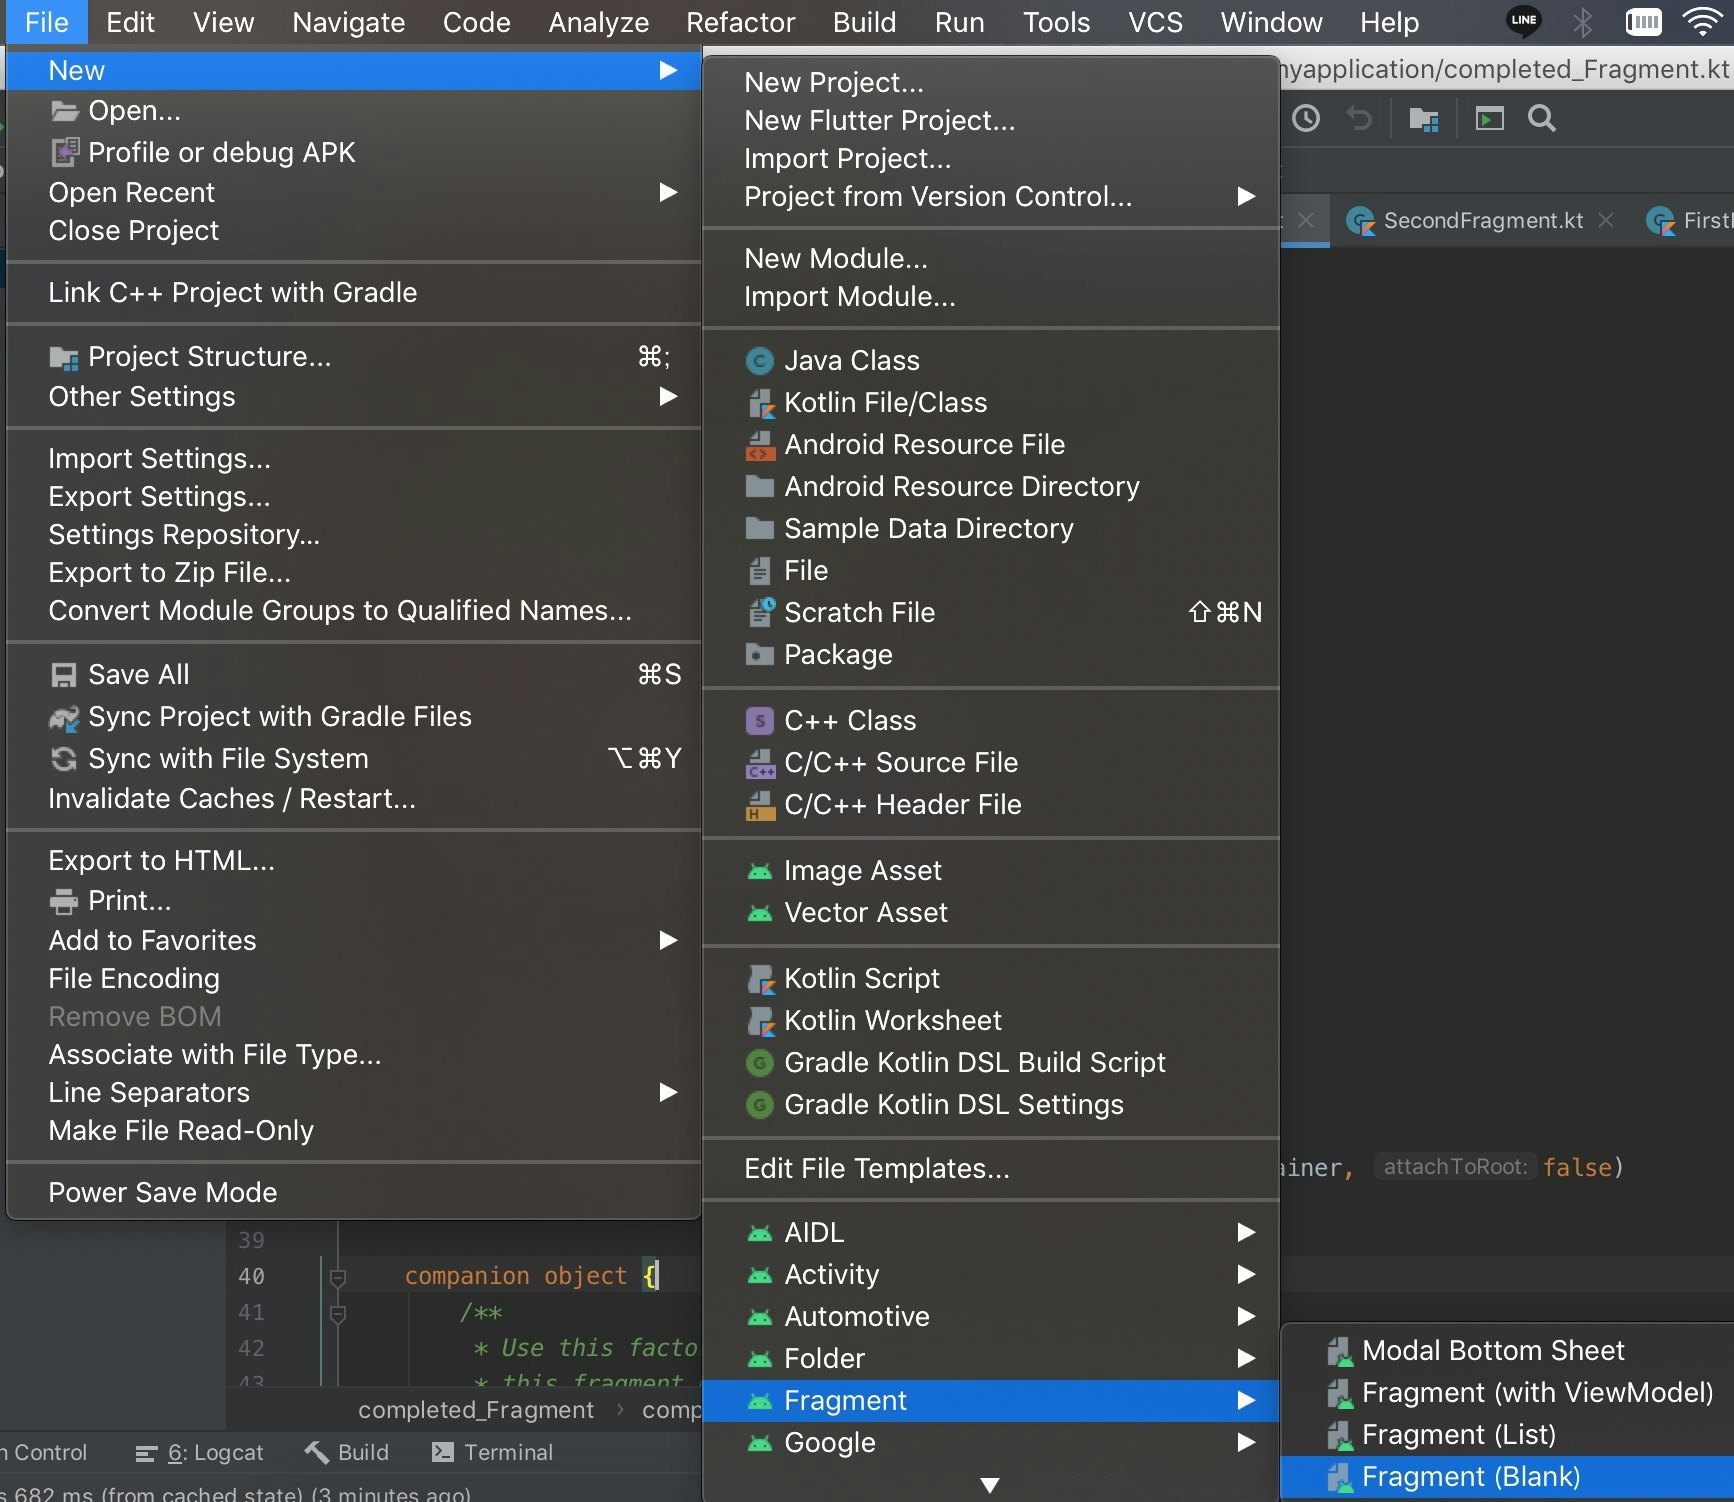
作るFragmentは以下の3つ
・fragment_completed_.xml
・fragment_not_completed_.xml
・fragment_shared_.xml
タブ付きスワイプビューのFragmentを作成するとこんな感じ。![]()
secondFragmentの上部に、TabLayoutとViewPagerを使ったタブ付きスワイプビューを作成する
一応公式ドキュメントはこちら(これを読んで実装できる初心者は、初心者ではない!)

<?xml version="1.0" encoding="utf-8"?>
<androidx.constraintlayout.widget.ConstraintLayout xmlns:android="http://schemas.android.com/apk/res/android"
    xmlns:app="http://schemas.android.com/apk/res-auto"
    xmlns:tools="http://schemas.android.com/tools"
    android:layout_width="match_parent"
    android:layout_height="match_parent"
    tools:context=".SecondFragment">

    <androidx.viewpager.widget.ViewPager
        android:id="@+id/pager"
        android:layout_width="wrap_content"
        android:layout_height="wrap_content"
        app:layout_constraintBottom_toBottomOf="parent"
        app:layout_constraintEnd_toEndOf="parent"
        app:layout_constraintStart_toStartOf="parent"
        app:layout_constraintTop_toBottomOf="@+id/tabLayout"
        app:layout_constraintTop_toTopOf="parent" />

    <com.google.android.material.tabs.TabLayout
        android:id="@+id/tabLayout"
        android:layout_width="match_parent"
        android:layout_height="wrap_content"
        app:layout_constraintEnd_toEndOf="parent"
        app:layout_constraintStart_toStartOf="parent"
        app:layout_constraintTop_toTopOf="parent">

        <com.google.android.material.tabs.TabItem
            android:id="@+id/Not_Completed"
            android:layout_width="wrap_content"
            android:layout_height="wrap_content"
            android:text="Not Completed" />

        <com.google.android.material.tabs.TabItem
            android:id="@+id/Completed"
            android:layout_width="wrap_content"
            android:layout_height="wrap_content"
            android:text="Completed" />

        <com.google.android.material.tabs.TabItem
            android:id="@+id/Shared"
            android:layout_width="wrap_content"
            android:layout_height="wrap_content"
            android:text="Shared" />
    </com.google.android.material.tabs.TabLayout>

</androidx.constraintlayout.widget.ConstraintLayout>
これで一旦見た目はできた。。
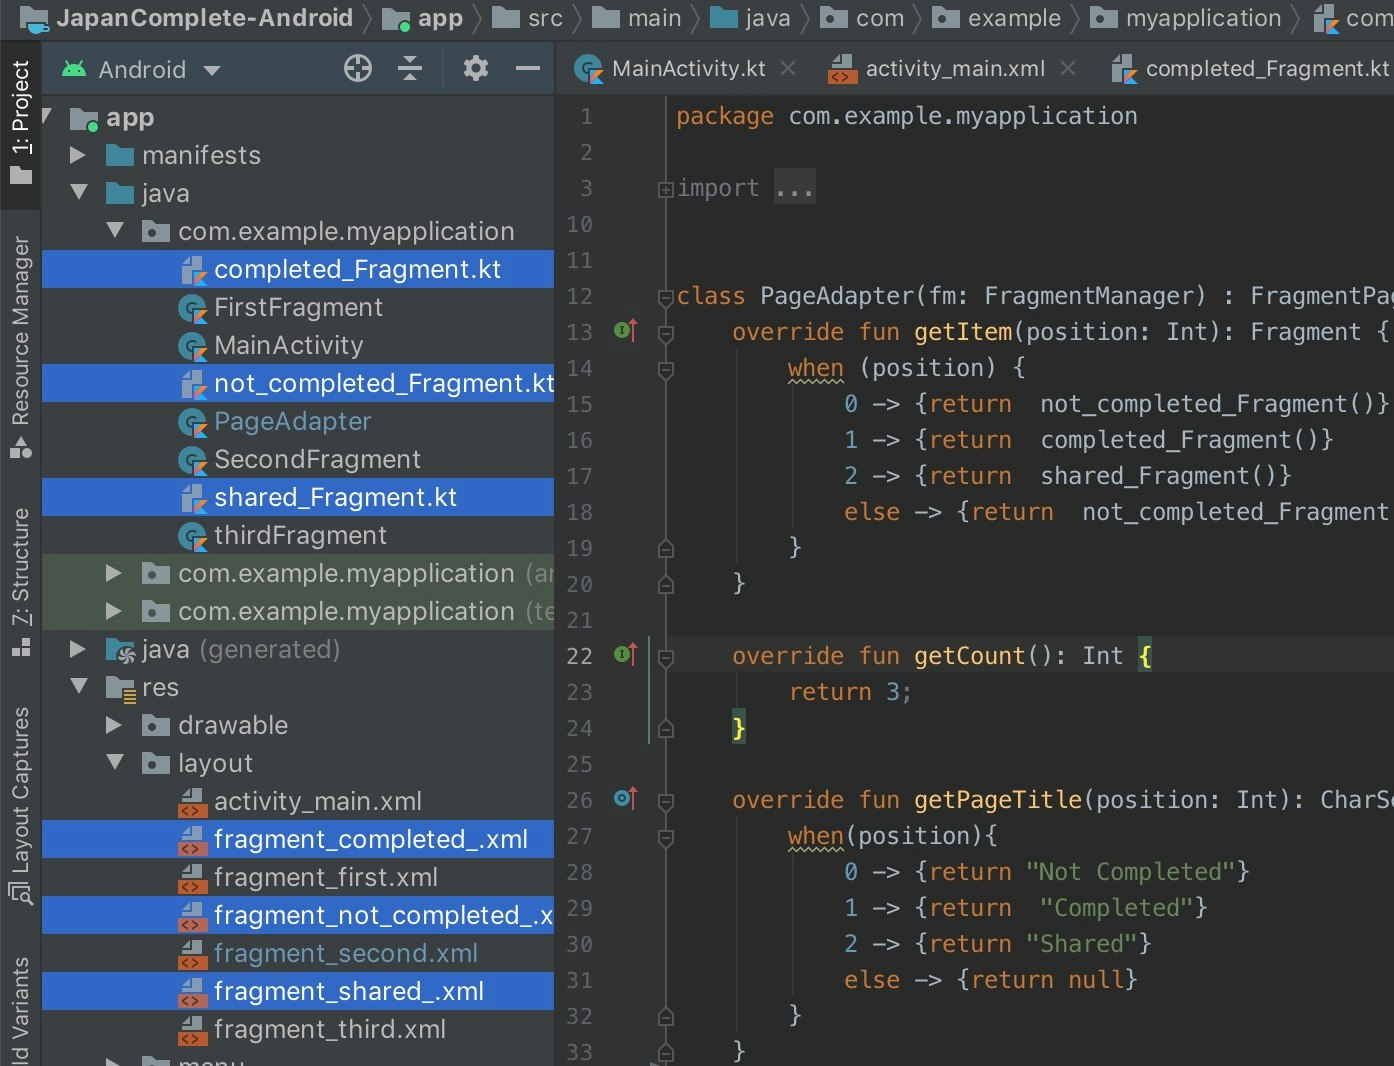
スワイプビューの処理をするクラスを作る
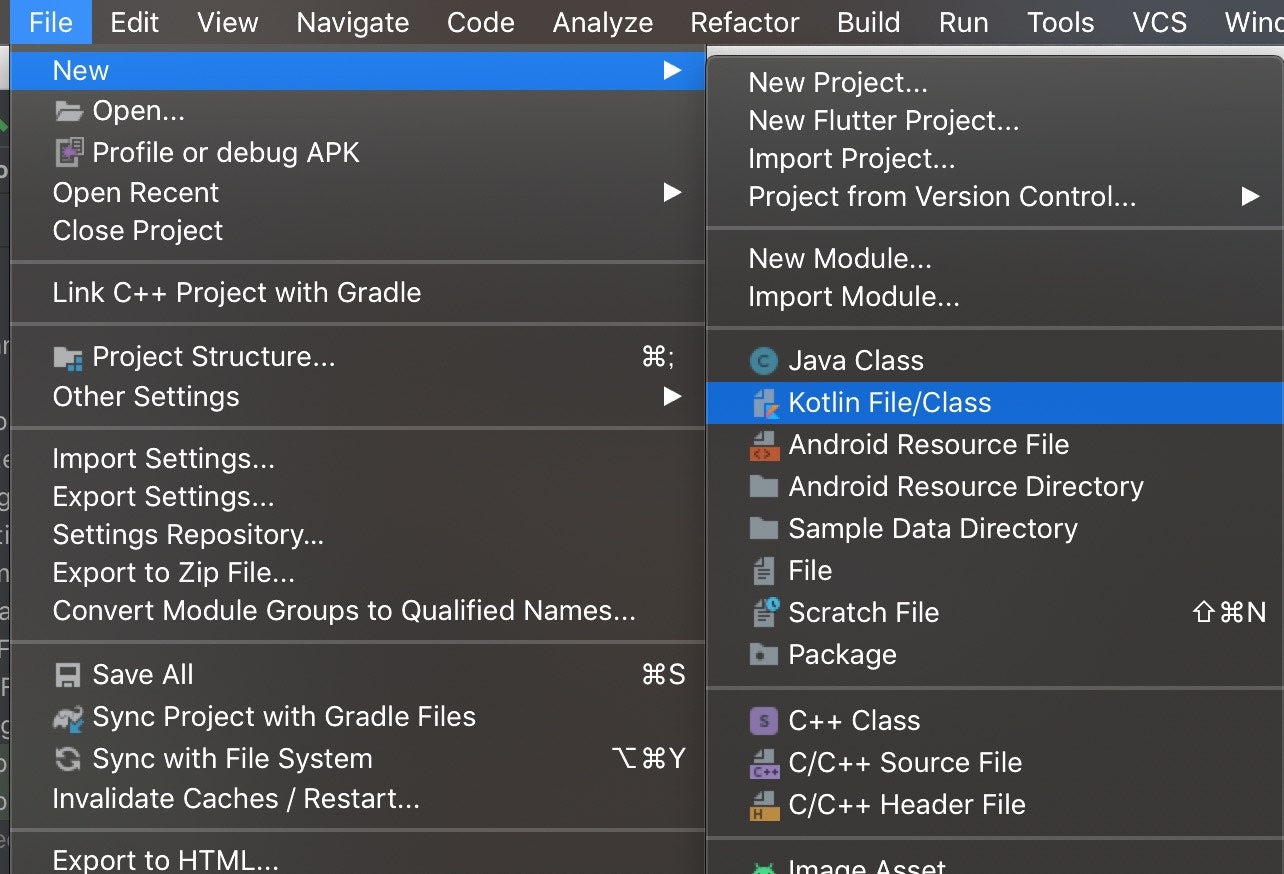
New>Kotlin File/ClassよりFileを作成。(クラスと言いつつFileを作る。。)

package com.example.myapplication

import android.content.Context
import androidx.fragment.app.Fragment
import androidx.fragment.app.FragmentManager
import androidx.fragment.app.FragmentPagerAdapter
import com.example.myapplication.completed_Fragment
import com.example.myapplication.not_completed_Fragment
import com.example.myapplication.shared_Fragment


class PageAdapter(fm: FragmentManager) : FragmentPagerAdapter(fm) {
    override fun getItem(position: Int): Fragment {
        when (position) {
          // どのFragmentを表示するか
            0 -> {return  not_completed_Fragment()}
            1 -> {return  completed_Fragment()}
            2 -> {return  shared_Fragment()}
            else -> {return  not_completed_Fragment()}
        }
    }

// スワイプビューの数が3つだから
    override fun getCount(): Int {
        return 3;
    }

// スワイプビューのタイトルを決める
    override fun getPageTitle(position: Int): CharSequence? {
        when(position){
            0 -> {return "Not Completed"}
            1 -> {return  "Completed"}
            2 -> {return "Shared"}
            else -> {return null}
        }
    }
}
secondFragmentでタブ付きスワイプビューを動作するようにする
package com.example.myapplication

import android.os.Bundle
import androidx.fragment.app.Fragment
import android.view.LayoutInflater
import android.view.View
import android.view.ViewGroup
import androidx.appcompat.app.AppCompatActivity
import androidx.fragment.app.FragmentActivity
import androidx.fragment.app.FragmentManager
import androidx.viewpager.widget.ViewPager
import kotlinx.android.synthetic.main.fragment_second.*


/**
 * A simple [Fragment] subclass.
 */
class SecondFragment : androidx.fragment.app.Fragment() {

    override fun onCreateView(
        inflater: LayoutInflater, container: ViewGroup?,
        savedInstanceState: Bundle?

    ): View? {
        // Inflate the layout for this fragment
        return inflater.inflate(R.layout.fragment_second, container, false)
    }

    override fun onViewCreated(view: View, savedInstanceState: Bundle?) {
        super.onViewCreated(view, savedInstanceState)

        // ActionBarを隠す
        (activity as AppCompatActivity).supportActionBar?.hide()

        val fragmentManager = (activity as FragmentActivity).supportFragmentManager

       //ここの「pager」はfragment_second.xmlのViewPagerのidの事!
        pager.adapter = PageAdapter(fragmentManager)
        tabLayout.setupWithViewPager(pager)
    }
}
この時点で恐らくタブ付きスワイプビューは動作するかと。。。。
fragment_firstとfragment_thirdで、タイトルバーが再表示されるようにする
・fragment_first.xml
・fragment_second.xml
・fragment_third.xml
こちらの3つのFragmentだが、SecondFragment.ktのonViewCreatedの関数で、タイトルバーを隠すようしているので、他のFragmentでは再表示させないといけません。
    override fun onViewCreated(view: View, savedInstanceState: Bundle?) {
        super.onViewCreated(view, savedInstanceState)

        // ActionBarを隠す
        (activity as AppCompatActivity).supportActionBar?.hide()

        val fragmentManager = (activity as FragmentActivity).supportFragmentManager

       //ここの「pager」はfragment_second.xmlのViewPagerのidの事!
        pager.adapter = PageAdapter(fragmentManager)
        tabLayout.setupWithViewPager(pager)
    }
}
なので、FirstFragment.ktとthirdFragment.ktを以下のようにする
package com.example.myapplication

import android.os.Bundle
import androidx.fragment.app.Fragment
import android.view.LayoutInflater
import android.view.View
import android.view.ViewGroup
import androidx.appcompat.app.AppCompatActivity

/**
 * A simple [Fragment] subclass.
 */
class FirstFragment : androidx.fragment.app.Fragment() {

    override fun onCreateView(
        inflater: LayoutInflater, container: ViewGroup?,
        savedInstanceState: Bundle?
    ): View? {
        // Inflate the layout for this fragment
        return inflater.inflate(R.layout.fragment_first, container, false)
    }

    override fun onViewCreated(view: View, savedInstanceState: Bundle?) {
        super.onViewCreated(view, savedInstanceState)
        // ActionBarを出す
        (activity as AppCompatActivity).supportActionBar?.show()
    }
}
最後に
Fragmentの中に、さらにFragmentを作って表示、と言うのがなかなか情報がなく、苦戦しました。。。
onViewCreatedの関数が重要なようです!