今年のFirebaseはCloud Functions for Firebaseが出たり、FirestoreやFirebase Performance MonitoringとかFirebase Predictionsが出たりして盛りだくさんすぎです。
今までWebから触れる物だけを触ってきましたがさすがにネイティブもやらないとなーと思い趣味でですがReact Nativeを触るようになりました。
その中でReact Native Firebaseは便利だったのでFirebase 70%くらいで簡単に紹介したいと思います。
React Nativeとは
React NativeはFacebookが作っているJavaScriptだけでクロスプラットフォームアプリを作れるフレームワークです。
Reactを使ってJSXでネイティブのViewを記述できます。
レイアウトを作るのはJavaScriptですがWebViewではなくSafariと同じJavaScript Coreで動作します。
また開発のときもWeb開発者には馴染み深いDeveloper Toolが使えるしHot reloadにも対応しているのでコードを書き換えたらすぐに反映されます。
もしネイティブの機能が必要になった時はネイティブコードを書くこともできるので、新しい機能のReact Nativeの対応を待つ必要はありません。自分で書きましょう ![]()
React Native Firebaseとは
React Native FirebaseはReact Native用のFirebase SDKのラッパーです。
公式のWeb SDKも一部使えますが、Web SDKでは使えないMessagingやRemote Configにも対応しています。
また、JavaScriptのThreadではなくネイティブのThreadで動くため、UIの処理とは別に動いてくれるのもよいところです。
React Native Firebaseのインストール
React Native Firebaseインストールは基本的なReact Nativeのライブラリのインストールと同じです。
(ただしReact Nativeは絶賛開発中なのでこの情報は来年には古いかもしれないので気をつけてください)
# setup
$ react-native init AwesomeProject
$ cd AwesomeProject

# react-native-firebase install
$ npm install --save react-native-firebase
$ react-native link
Android
まずはAndroidのインストール方法です。
まずはgoogle-services.jsonを用意します。公式のドキュメントを参考にgoogle-services.jsonを用意します。
ダウンロードしたgoogle-services.jsonはandroid/app/google-services.jsonに保存します。
build.gradleの設定
android/build.gradleにclasspath 'com.google.gms:google-services:3.1.1'とmaven { url "https://maven.google.com" }を追加します。
buildscript {
    repositories {
        jcenter()
    }
    dependencies {
        classpath 'com.android.tools.build:gradle:3.0.1'
        classpath 'com.google.gms:google-services:3.1.1' // 追加

        // NOTE: Do not place your application dependencies here; they belong
        // in the individual module build.gradle files
    }
}

allprojects {
    repositories {
        mavenLocal()
        jcenter()
        maven {
            // All of React Native (JS, Obj-C sources, Android binaries) is installed from npm
            url "$rootDir/../node_modules/react-native/android"
        }
        maven { url "https://maven.google.com" } // 追加
    }
}
次にandroid/app/build.gradleにGoogle Play Serviceの設定をします。
...
dependencies {
...
    compile "com.google.android.gms:play-services-base:11.6.2"
    compile "com.google.firebase:firebase-core:11.6.2"
}

apply plugin: 'com.google.gms.google-services' // 一番下に追加する。
iOS
iOSもAndroidと同様に公式ドキュメントを参考にGoogleService-Info.plistを作成します。
ダウンロードしたらios/{Project Name}/GoogleService-Info.plistに保存します。
CocoaPodsの設定
cd iosでiosディレクトリに移動してpod initでPodfileを作成します。
作成できたら次のようにPodfileを編集します。
platform :ios, '9.0'

target 'AwesomeProject' do
  # Uncomment the next line if you're using Swift or would like to use dynamic frameworks
  # use_frameworks!

  pod 'Firebase/Core'

  # あとで必要に応じてコメントアウトを外す
  # pod 'Firebase/AdMob'
  # pod 'Firebase/Auth'
  # pod 'Firebase/Crash'
  # pod 'Firebase/Database'
  # pod 'Firebase/DynamicLinks'
  # pod 'Firebase/Performance'
  # pod 'Firebase/Firestore'
  # pod 'Firebase/Messaging'
  # pod 'Firebase/RemoteConfig'
  # pod 'Firebase/Storage'

end
Podfileを編集したらpod installでライブラリをインストールします。
ついでに.gitignoreにios/Podsを追加もしておきましょう。
AppDelegate.m の設定
pod installが完了すればios/{Project Name}..xcworkspaceができているのでこれをXcodeで開きます。
そしてios/{Project Name}/AppDelegate.m を次のように編集します。
# import <Firebase.h>  // これと


- (BOOL)application:(UIApplication *)application didFinishLaunchingWithOptions:(NSDictionary *)launchOptions
{
  [FIRApp configure]; // これを追加する
...
React Native Firebaseのモジュール
React Native FirebaseをJavaScriptから使うにはimport firebase from 'firebase'の代わりにimport firebase from 'react-native-firebase'を使います。
import firebase from 'react-native-firebase';

firebase.auth().signInAnonymously()
  .then((user) => {
    console.log(user.isAnonymous);
  });
今回ははネイティブのコードで初期化していますが
React Native FirebaseではJavaScriptのコードからも初期化できるので、興味のある方はドキュメントを参照してみてください
次からはモジュールごとの紹介をしていきます。
Firebase Authentication
まずは、Firebase Authenticationです。 様々な認証を見てくれるサービスです。
対応しているのは以下の通りです。
- Email & Password
- GitHub
- Phone Number
- Anonymous
- Custom
Anonymousはメソッドを呼ぶだけでログインが完了します。
Customは対応してないプロバイダの認証を実装することができます。
決められたフォーマットのJWTを生成することでFirebaseでユーザを認識することができます。
React Native Firebaseでは次のようにしてAuthenticationを実装します。
Google ログイン
事前にnpm install --save react-native-google-signinでpackageをインストールしておきます。
import { GoogleSignin } from 'react-native-google-signin';

// Calling this function will open Google for login.
export const googleLogin = () => {
  // Add configuration settings here:
  return GoogleSignin.configure()
  .then(() => {
    GoogleSignin.signIn()
    .then((data) => {
      // create a new firebase credential with the token
      const credential = firebase.auth.GoogleAuthProvider.credential(data.idToken, data.accessToken)

      // login with credential
      return firebase.auth().signInWithCredential(credential)
    })
    .then((currentUser) => {
      console.info(JSON.stringify(currentUser.toJSON()))
    })
    .catch((error) => {
      console.error(`Login fail with error: ${error}`)
    })
  })
}
現在、React Native Firebaseのドキュメントに書かれているソーシャルログインはGoogle,Facebookのみです。
また、ユーザー認証の状態を取るためのonAuthStateChangedはWeb SDKと同じです。
firebase.auth().onAuthStateChanged(function(user) {
  if (user) {
    // User is signed in.
    var displayName = user.displayName;
    var email = user.email;
    var emailVerified = user.emailVerified;
    var photoURL = user.photoURL;
    var isAnonymous = user.isAnonymous;
    var uid = user.uid;
    var providerData = user.providerData;
    // ...
  } else {
    // User is signed out.
    // ...
  }
});
こういうイベントを受け付けるAPIをReactで使う場合はライフサイクルを意識する必要があります。
  componentDidMount() {
    this.unsubscribe = firebase.auth().onAuthStateChanged((user) => {
      if (user) {
        // User is signed in.
      }
    });
  }

  componentWillUnmount() {
    if (this.unsubscribe) {
      this.unsubscribe();
    }
  }
componentDidMountでサブスクライブしたらcomponentWillUnmountでアンサブスクライブするようにしましょう。
Realtime Database
Realtime DatabaseはFirebaseの代名詞とも呼べるデータベースのサービスです。
複数のクライアントでデータを同期することができる他、オフラインでもデータベースに書き込めてオンラインになったタイミングで自動的にデータをサーバと同期してくれます。
Realtime DatabaseのAPIもWeb SDKと大体同じ感じです。
// データの読み込み
firebase.database()
  .ref('posts')
  .on('value', (snapshot) => {
    const value = snapshot.val();
  });
// データの書き込み
firebase.database()
  .ref('posts/1234')
  .set({
    title: 'My awesome post',
    content: 'Some awesome content',
  });
// データの変更を検知する
  componentDidMount() {
    this.ref = firebase.database().ref('posts/1234');
    this.ref.on('value', this.handlePostUpdate);
  }

  // On unmount, ensure we no longer listen for updates
  componentWillUnmount() {
    if (this.ref) {
      this.ref.off('value', this.handlePostUpdate);
    }
  }

  // Bind the method only once to keep the same reference
  handlePostUpdate = (snapshot) => {
    console.log('Post Content', snapshot.val());
  }
Firestore
FirestoreはRealtime Databaseと同じように複数人間でデータを同期したりオフラインの書き込みに対応しています。
またRealtime Databaseでは貧弱なQueryしかなかったのがよりパワーアップしたQueryを記述することができます。
他にもストレージの保存料が安かったりもします。
まだ現在はbetaですが、これから新規にアプリを作るのであれば基本的にはFirestoreを利用することを検討するのがよいでしょう。
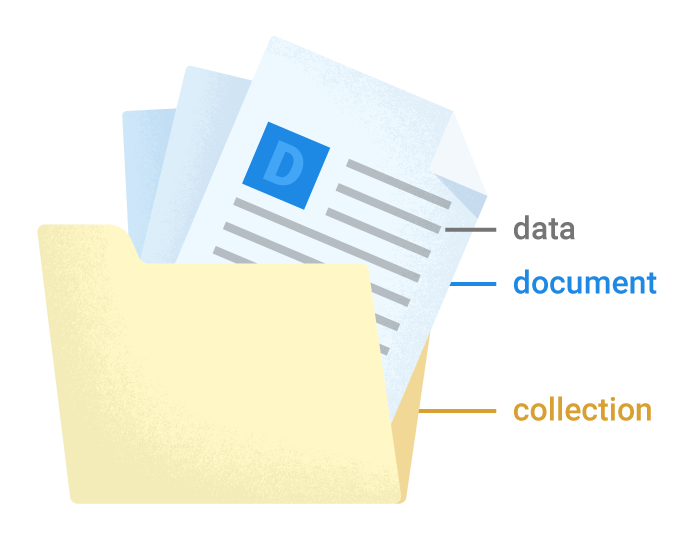
簡単にFirestoreの概念を説明するとRealtime Databaseでは1つの巨大なJSON TreeでしたがFirestoreではドキュメント指向のデータベースです。ドキュメント、コレクション、データという概念でデータを扱います。
React Native FirebaseでもFirestoreに対応していますが、一部トランザクションなど対応しきれていない部分もあります。
基本的にコードはWeb SDKと同じです。
コレクションの取得はgetメソッドで行います。戻り値はPromiseです。
firebase.firestore()
  .collection('posts')
  .get()
  .then(querySnapshot => {
    // Access all the documents in the collection
    const docs = querySnapshot.docs;
    // Access the list of document changes for the collection
    const changes = querySnapshot.docChanges;
    // Loop through the documents
    querySnapshot.forEach((doc) => {
      const value = doc.data();
    })
  })
フィルターと並べ替えはwhereメソッドでQueryを記述します。
citiesRef.where("population", ">", 100000).orderBy("population")
ドキュメントの更新検知はonSnapshotで行います。これもRealtime Database同様にunsubscribeが必要になります。
var unsubscribe = firebase.firestore().collection("cities").doc("SF")
    .onSnapshot(function(doc) {
        console.log("Current data: ", doc && doc.data());
    });

unsubscribe();
特定のフィールドの削除を削除する場合はfirebase.firestore.FieldValue.delete()を次のように使います。
var cityRef = firebase.firestore().collection('cities').doc('BJ');

// Remove the 'capital' field from the document
var removeCapital = cityRef.update({
    capital: firebase.firestore.FieldValue.delete()
});
Cloud Storage for Firebase
Cloud Storage for FirebaseはGCPのCloud StorageにFirebaseのセキュリティ機能がついたようなサービスです。
画像や動画など大きいサイズのファイルを扱うためのサービスです・
たまに勘違いされてますがオフラインでもファイルをアップロードできるという機能はないです。
これは普通にReact Native FirebaseでバインディングされていてWeb SDKと同じAPIで提供されています。
const unsubscribe = firebase.storage()
                        .ref('/files/1234')
                        .putFile('/path/to/file/1234')
                        .on('state_changed', snapshot => {
                            //Current upload state
                        }, err => {
                            //Error
                            unsubscribe();
                        }, uploadedFile => {
                            //Success
                            unsubscribe();
                        });
state_changedでアップロードの進捗状況を確認することができます。
これもReactではライフサイクルにそってunsubscribeしましょう。
Google Analytics for Firebase
ここからはReact Nativeならではのネイティブの機能をJavaScriptから使えるサービスの紹介です。
まずはモバイル版のGoogle AnalyticsのGoogle Analytics for Firebaseです。
無制限にイベントを送ることができ、この機能は全て無料で利用できます。
イベントはlogEventを使って送信します。
firebase.analytics().logEvent('clicked_advert', { id: 1337 });
現在ユーザの見ているスクリーンのイベントを記録するにはsetCurrentScreenを使います。
firebase.analytics().setCurrentScreen('user_profile');
ユーザの情報は次のAPIで設定します。setUserIdでIDを指定してsetUserPropertyで属性を指定できます。
firebase.analytics().setUserId(id);

firebase.analytics().setUserProperty('favoriteFood', 'niku');
Firebase Cloud Messaging
Firebase Cloud MessagingはPush通知のためのサービスです。iOS,Androidを統一したAPIでPush通知を送ることができます。
React NativeではJavaScriptで受け取れるAPIが用意されています。
まずはDevice Tokenの取得方法です。このトークンを使ってPush通知をします。
firebase.messaging().getToken()
  .then((token) => {
    console.log('Device FCM Token: ', token);
  });

firebase.messaging().onTokenRefresh((token) => {
  console.log('Refreshed FCM token: ', token);
});
このAPIを利用するには事前に通知のパーミッションを取得しておく必要があります。
React Native Firebaseに一応パーミッションの許可を求めるダイアログを出すAPIはありますが、他に選択肢がありそうなので別のライブラリを使ったほうが使いやすいかもしれません。
取得したトークンはFirestoreに保存しておくと便利です。
次に、メッセージの受け取りですが
アプリが起動中に受け取る場合はonMessageを利用します。
firebase.messaging().onMessage((message) => {
    console.log('onMessage', message);
});
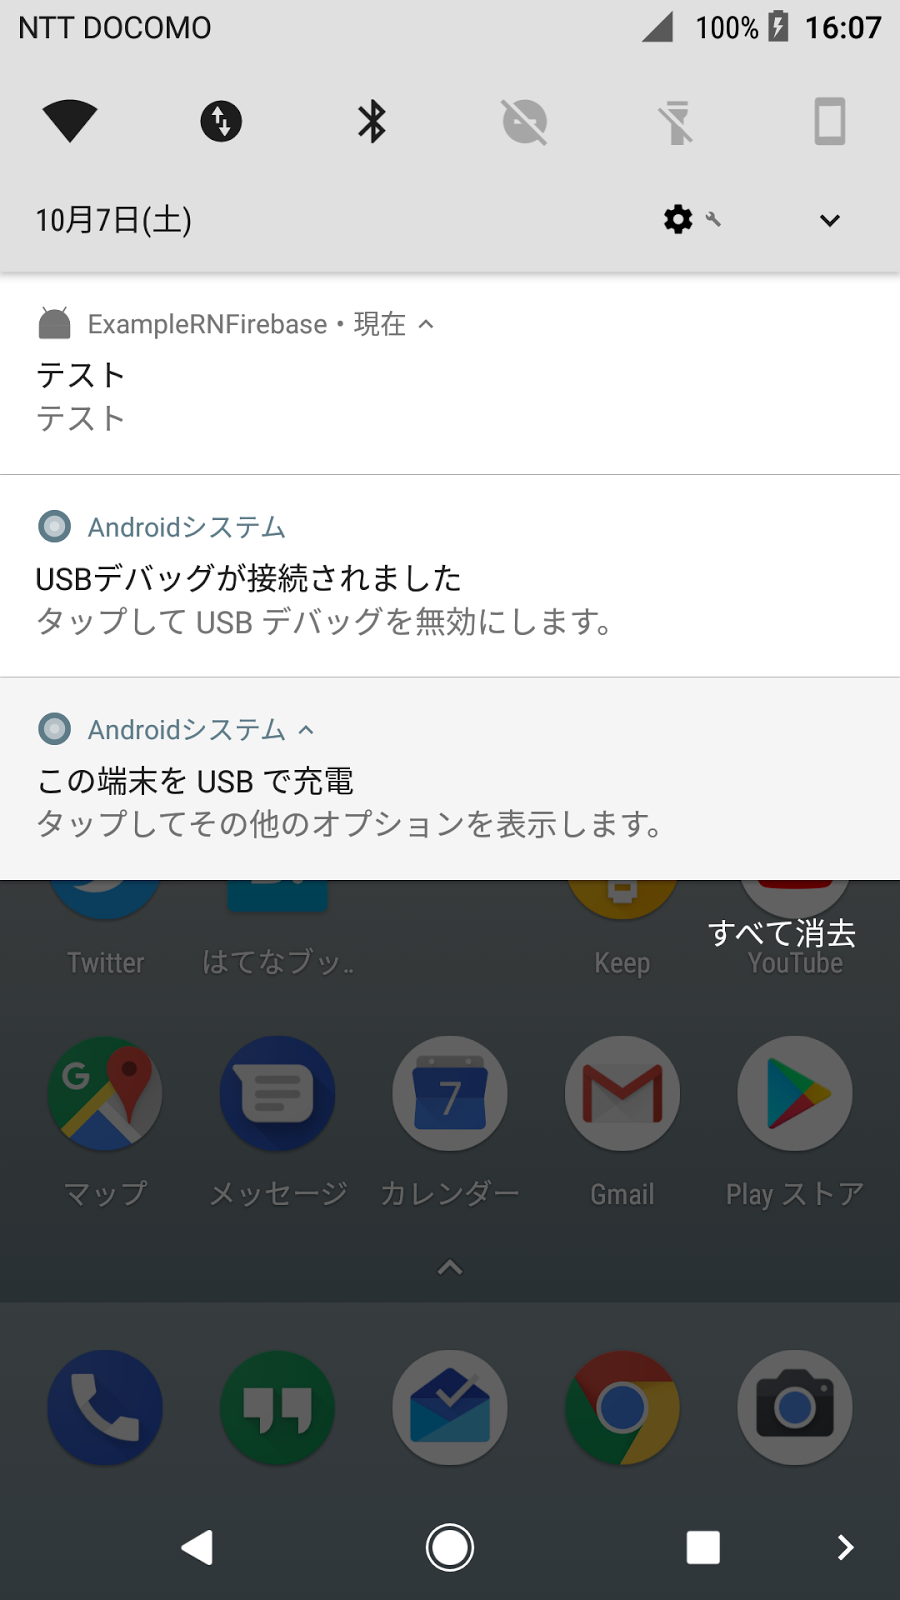
これはアプリが起動中にPush通知を受け取ったらこのコールバック関数が呼ばれます。
次にアプリがバックグラウンド、あるいは起動してない場合はgetInitialNotificationを使う必要があります。
getInitialNotificationは通知領域に表示されたNotificationをクリックしてアプリが起動した時よばれるコールバックです。
firebase.messaging().getInitialNotification()
  .then((notification) => {
    console.log('notification:', notification);
  });
getInitialNotificationとonMessageで受け取るメッセージオブジェクトの形式は違うので注意が必要です。
Firebase Remote Config
Firebase Remote Configはアプリケーションの設定をリモートで更新できるサービスです。
またAnalyticsで集めた情報を元にユーザごとに設定を出し分けるなどの機能もあります。
今年発表された機能でABテストもサポートされていたりします。(すごいけど試せてない!!!!)
JavaScriptでは次のようにして設定を取得します。
firebase.config().fetch()
  .then(() => {
    return firebase.config().activateFetched();
  })
  .then((activated) => {
    if (!activated) console.log('Fetched data not activated');
    return firebase.config().getValue('hasExperimentalFeature');
  })
  .then((snapshot) => {
    const hasExperimentalFeature = snapshot.val();

    if(hasExperimentalFeature) {
      // enableSuperCoolFeature();
    }

    // continue booting app
  })
  .catch(console.error);
まとめ
すごい長々と書いてしまいましたがここでは紹介しきれてないくらいFirebaseには色々な機能があります。
当然ですが1人では色々追いきれないので最近Firebaseのユーザグループ作りました。
来年はこのグループで色々情報交換できたらいいなと思います。