こんにちは。
NMFの練習として、顔のデータセットをやってみました。

Rumaleとは
https://github.com/yoshoku/rumale
Rubyの機械学習用ライブラリです。機械学習のいろいろなアルゴリズムがそろっています。
*
顔画像データセットを準備する
MITのPoggio Labで公開さているFace Datasetを使います。
公式ページは http://poggio-lab.mit.edu/FaceData2.html なのですが、開けません。
StackExchangeの Is the CBCL FACE DATABASE available?
に掲載されているweb.archive.orgのURLからダウンロードしました。1
データセットを読み込む
作業ディレクトリを作成します。
mkdir rumale-nmf-face # 名前は何でもいい
cd rumale-nmf-face
ダウンロードした圧縮ファイルをrumale-nmf-faceディレクトリに配置して適宜解凍していくと、下記のようなディレクトリ構成になります。
tree faces/ -L 3
faces/
├── README
├── face.test
│   └── test
│       ├── face
│       └── non-face
├── face.train
│   └── train
│       ├── face
│       └── non-face
├── faceall
├── rumale-nmf
├── svm.test.normgrey
└── svm.train.normgrey
せっかくなので、trainのfaceデータセット2429個と、testのfaceデータセット472個をまとめます。
mkdir faceall
cp faces/face.train/train/face/*.pgm faceall
cp faces/face.test/test/face/*.pgm faceall
全部でいくつファイルがあるか確認します。
ls -1 faceall | wc -l
# 2901
これらのファイルはpgmファイルです。pgmは頑張って自分で行列に変換してもいいですが、
便利なライブラリを呼ぶだけで済ませたい。世の中はちゃんとそういうときのためのGemを作ってくれる人がいるので使わせてもらいます。PNM
gem install pnm
試しに、一つの画像から行列を取り出してみましょう。
require 'pnm'

f = Dir.glob("faceall/*.pgm").first

img = PNM.read(f)
p img.pixels
Rubyの配列が表示されればうまくいっています。
画像をRubyとGtkで表示してみる
GUI作成の練習もかねてruby-gnomeを使って顔画像を表示するGUIウィンドウを作ってみます。
require 'gtk3'

w = Gtk::Window.new
w.title = "facebook"
w.set_size_request 300, 250
scw = Gtk::ScrolledWindow.new
scw.set_policy(:never, :automatic)
flowbox = Gtk::FlowBox.new

Dir.glob("faceall/*.pgm").each do |file_path|
  pixbuf = GdkPixbuf::Pixbuf.new(file: file_path)
  image = Gtk::Image.new(pixbuf: pixbuf)
  flowbox.add image
end

scw.add flowbox
w.add scw
w.show_all
scw.signal_connect(:destroy){Gtk.main_quit}
Gtk.main
こんな感じでしょうか。自分でウィンドウを作らなくてもファインダーでディレクトリを見ればだいたい同じ感じです。
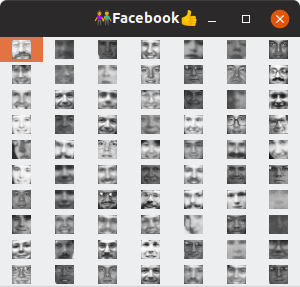
ちょっと怖いです。
RumaleでNMFを実行する
require 'pnm'
require 'rumale'

samples = Dir.glob("faceall/*.pgm").map do |f|
  begin
    image = PNM.read(f)
    pixels =image.pixels
    pixels.flatten
  rescue
    puts "can not read #{f}"
  end
end

samples = Numo::DFloat[*samples]

decomposer = Rumale::Decomposition::NMF.new(n_components: 49, max_iter: 200)
representation = decomposer.fit_transform(samples)       # 今回は使わない
components = decomposer.components
inversed = decomposer.inverse_transform(representation)  # 今回は使わない

File.binwrite("components.dat", Marshal.dump(components))
結果を可視化してみましょう。これも、いろいろなやり方が思いつきますが、今回はcomponentをNMFファイルにして保存して、さっきのウィンドウを少し改造して表示してみましょう。練習を兼ねてRuby/GTKでウィンドウを作っていますが、わざわざGUI作りたくない人は、NMFのComponentsをPGM画像に変換するの段落のところだけ実行してファインダーでpgm画像を見ればいいと思います。
require 'gtk3'
require 'fileutils'
require 'numo/narray'
require 'pnm'
### NMFのComponentsをPGM画像に変換する
FileUtils.mkdir_p 'nmf_face'
components = Marshal.load(File.binread('components.dat'))
49.times do |i|
pixels = components[i, true].reshape(19, 19)
pixels = ((pixels / pixels.max) * 255).cast_to(Numo::UInt8).to_a
image = PNM.create(pixels)
image.write("nmf_face/component#{i}.pgm")
end
### GUI ###
w = Gtk::Window.new
w.title = '👫Facebook👍'
w.set_size_request 400, 400
notebook = Gtk::Notebook.new
def create_page(path)
scw = Gtk::ScrolledWindow.new
scw.set_policy(:never, :automatic)
flowbox = Gtk::FlowBox.new
Dir.glob(path).each do |file_path|
pixbuf = GdkPixbuf::Pixbuf.new(file: file_path)
# やや画像のサイズが小さいので200%に拡大する
pixbuf_2x = pixbuf.scale_simple(pixbuf.width * 2, pixbuf.height * 2, :bilinear)
image = Gtk::Image.new(pixbuf: pixbuf_2x)
flowbox.add image
end
scw.add flowbox
scw
end
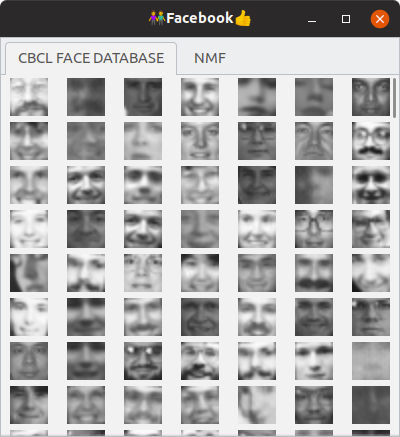
notebook.append_page(create_page('faceall/*.pgm'), Gtk::Label.new('CBCL FACE DATABASE'))
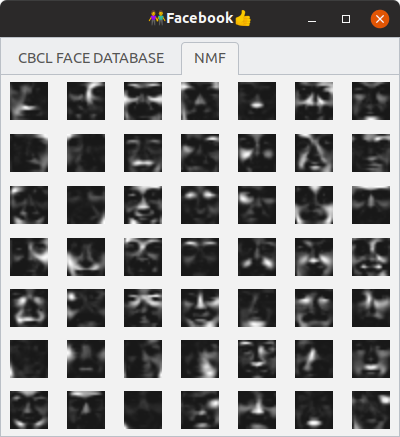
notebook.append_page(create_page('nmf_face/*.pgm'), Gtk::Label.new('NMF'))
w.add notebook
w.show_all
w.signal_connect(:destroy) { Gtk.main_quit }
Gtk.main
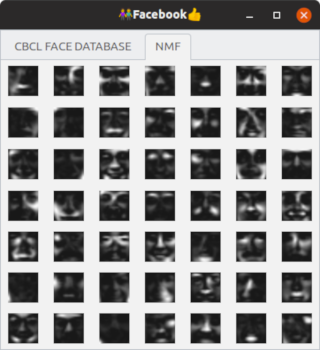
こんな感じになりました。まあまあいい感じかな?
数学的に詳しいことはさっぱりですが、ネットの情報によると、NMFで求まるのは大域最適解ではなくもっぱら局所解であるそうです。この顔のサンプルではないけれど、実行してみると初期値によって得られる結果がかなり変わる実感があります。その点には注意が必要だと感じました。
この記事は以上です。
-
ai.mit.edu のリンクは運悪く途中で止まりました。google colab (米国からアクセス)だと最後までダウンロードできるようです。5月末の時点では両者のリンク先のファイルに差異がないことはdiffで確認しました。 ↩