はじめに
ROS2でよく使われているNavigation2パッケージについて記事を上げていこうと思います。
まずこの記事では、ROS2のNavigation2のインストールから、costmapのpluginの制御を例に、pluginの設定方法まで紹介します。
環境
以下の環境で動作を確認しています。
| 項目 | バージョン |
|---|---|
| Ubuntu | 22.04 |
| ROS2 | Humble |
| Gazebo (Gazebo Classic) | Gazebo 11 |
Navigation2のインストール
aptでインストールするか、ソースコードからビルドするかになります。
本記事含め、以降の記事ではソースコードからビルドした前提で設定ファイル等の説明をすることが多くなります。
aptでインストール
sudo apt install ros-$ROS_DISTRO-navigation2
sudo apt install ros-$ROS_DISTRO-nav2-bringup
ソースコードからビルド
source /opt/ros/$ROS_DISTRO/setup.bash
mkdir -p ~/nav2_ws/src && cd ~/nav2_ws
git clone https://github.com/ros-planning/navigation2.git --branch $ROS_DISTRO ./src/navigation2
rosdep install -y \
  --from-paths ./src \
  --ignore-src
colcon build \
  --symlink-install
Turtlebot gazeboのインストール
Navigation2の動作確認で使用するのでインストールします。
sudo apt install ros-$ROS_DISTRO-turtlebot3-gazebo
Navigation2の起動
環境変数の設定
source /opt/ros/$ROS_DISTRO/setup.bash
export TURTLEBOT3_MODEL=waffle
export GAZEBO_MODEL_PATH=$GAZEBO_MODEL_PATH:/opt/ros/$ROS_DISTRO/share/turtlebot3_gazebo/models
起動
ros2 launch nav2_bringup tb3_simulation_launch.py headless:=False
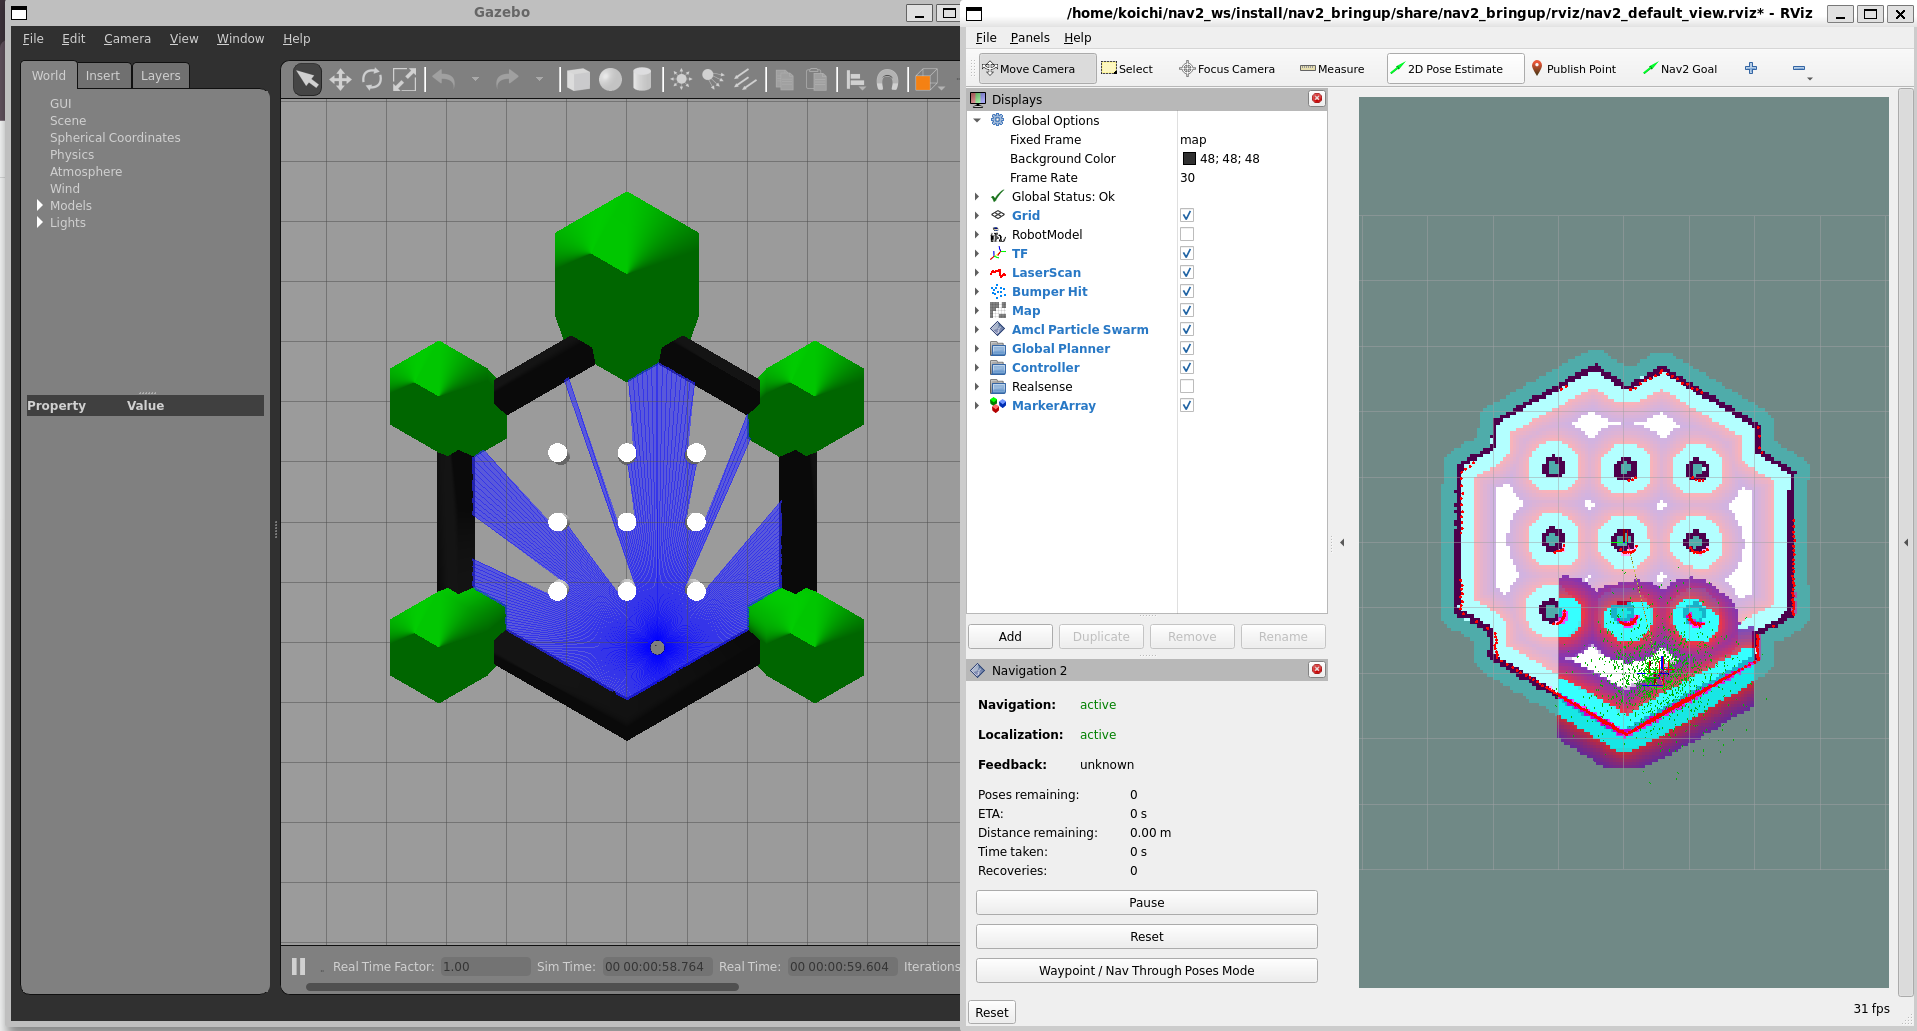
起動直後の画面
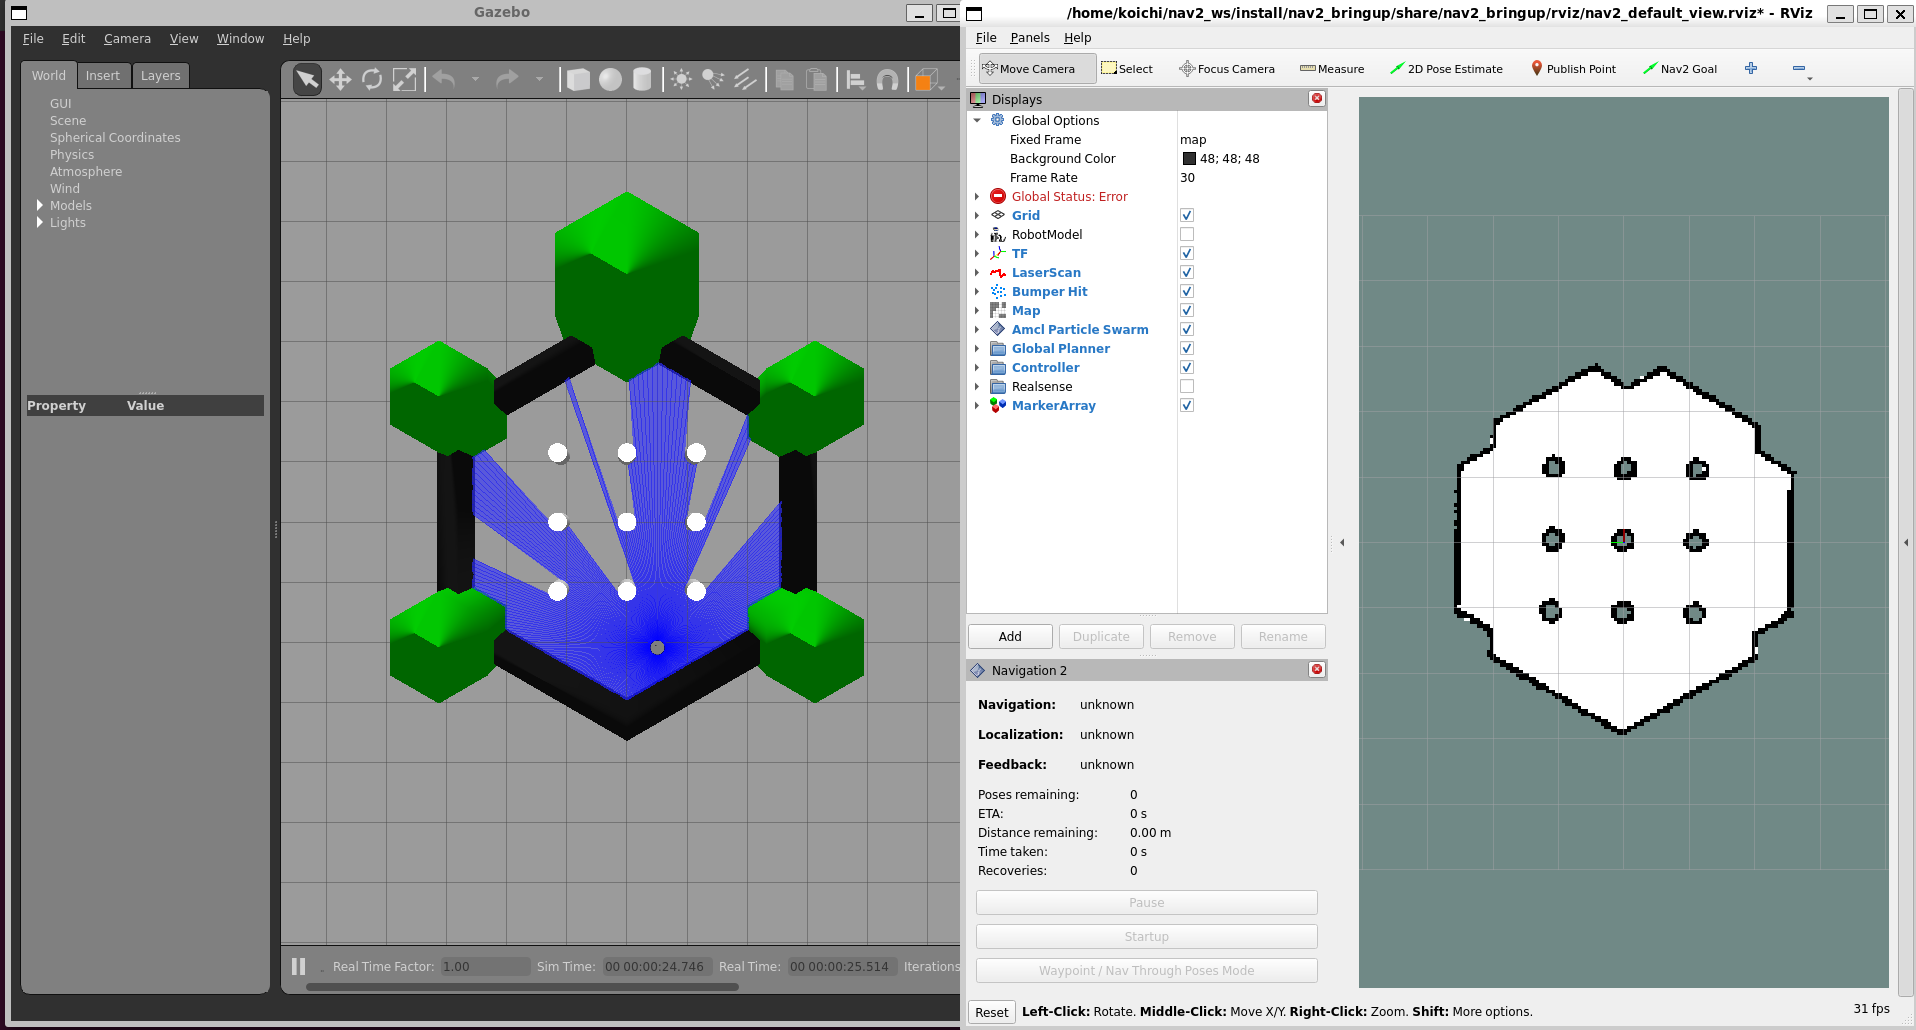
ロボットの初期位置を設定した後、costmapの表示を確認することができます。
pluginについて
ここからが本題です。
Navigation2では、コストマップの生成や経路計画の手法をpluginとして切り替えることができます。
pluginの一覧
以下がデフォルトで用意されているpluginの一覧です。
また、自分でpluginを実装して追加することもできます。
上記ページに記載があるcostmap layerのplugin一覧を載せます。
costmap layerはlocal costmap, layer costmap関係なくplguinとして実装されていて、起動時にどのpluginがglobal costmap / local costmapの計算で使われるかを定義します。
| Plugin Name | Creator | Description |
|---|---|---|
| Voxel Layer | Eitan Marder-Eppstein | Maintains persistant 3D voxel layer using depth and laser sensor readings and raycasting to clear free space |
| Range Layer | David Lu | Uses a probabalistic model to put data from sensors that publish range msgs on the costmap |
| Static Layer | Eitan Marder-Eppstein | Gets static map and loads occupancy information into costmap |
| Inflation Layer | Eitan Marder-Eppstein | Inflates lethal obstacles in costmap with exponential decay |
| Obstacle Layer | Eitan Marder-Eppstein | Maintains persistent 2D costmap from 2D laser scans with raycasting to clear free space |
| Spatio-Temporal Voxel Layer | Steve Macenski | Maintains temporal 3D sparse volumetric voxel grid with decay through sensor models |
| Non-Persistent Voxel Layer | Steve Macenski | Maintains 3D occupancy grid consisting only of the most sets of measurements |
| Denoise Layer | Andrey Ryzhikov | Filters noise-induced standalone obstacles or small obstacles groups |
pluginの切り替え方
使用するpluginなどのコンフィグレーションは、Navigation2内のbringup_launch.pyが読み込むnavigation2/nav2_bringup/params/nav2_params.yamlファイル内に定義されています。
local_costmap:
  local_costmap:
    ros__parameters:
      update_frequency: 5.0
      publish_frequency: 2.0
      global_frame: odom
      robot_base_frame: base_link
      use_sim_time: True
      rolling_window: true
      width: 3
      height: 3
      resolution: 0.05
      robot_radius: 0.22
      plugins: ["voxel_layer", "inflation_layer"]
      inflation_layer:
        plugin: "nav2_costmap_2d::InflationLayer"
        cost_scaling_factor: 3.0
        inflation_radius: 0.55
      voxel_layer:
        plugin: "nav2_costmap_2d::VoxelLayer"
        enabled: True
        publish_voxel_map: True
        origin_z: 0.0
        z_resolution: 0.05
        z_voxels: 16
        max_obstacle_height: 2.0
        mark_threshold: 0
        observation_sources: scan
        scan:
          topic: /scan
          max_obstacle_height: 2.0
          clearing: True
          marking: True
          data_type: "LaserScan"
          raytrace_max_range: 3.0
          raytrace_min_range: 0.0
          obstacle_max_range: 2.5
          obstacle_min_range: 0.0
      static_layer:
        plugin: "nav2_costmap_2d::StaticLayer"
        map_subscribe_transient_local: True
      always_send_full_costmap: True

global_costmap:
  global_costmap:
    ros__parameters:
      update_frequency: 1.0
      publish_frequency: 1.0
      global_frame: map
      robot_base_frame: base_link
      use_sim_time: True
      robot_radius: 0.22
      resolution: 0.05
      track_unknown_space: true
      plugins: ["static_layer", "obstacle_layer", "inflation_layer"]
      obstacle_layer:
        plugin: "nav2_costmap_2d::ObstacleLayer"
        enabled: True
        observation_sources: scan
        scan:
          topic: /scan
          max_obstacle_height: 2.0
          clearing: True
          marking: True
          data_type: "LaserScan"
          raytrace_max_range: 3.0
          raytrace_min_range: 0.0
          obstacle_max_range: 2.5
          obstacle_min_range: 0.0
      static_layer:
        plugin: "nav2_costmap_2d::StaticLayer"
        map_subscribe_transient_local: True
      inflation_layer:
        plugin: "nav2_costmap_2d::InflationLayer"
        cost_scaling_factor: 3.0
        inflation_radius: 0.55
      always_send_full_costmap: True
変化がわかりやすいように、global_costmapをstatic_layerのみ、local_costmapをvoxel_layerのみにしてみましょう。
local_costmap:
  local_costmap:
    ros__parameters:
      # === 省略 ===
      plugins: ["voxel_layer", "inflation_layer"] # 変更前
      plugins: ["voxel_layer"] # 変更後
      # === 省略 ===

global_costmap:
  global_costmap:
    ros__parameters:
        # === 省略 ===
        plugins: ["static_layer", "obstacle_layer", "inflation_layer"] # 変更前
        plugins: ["static_layer"] # 変更後
        # === 省略 ===
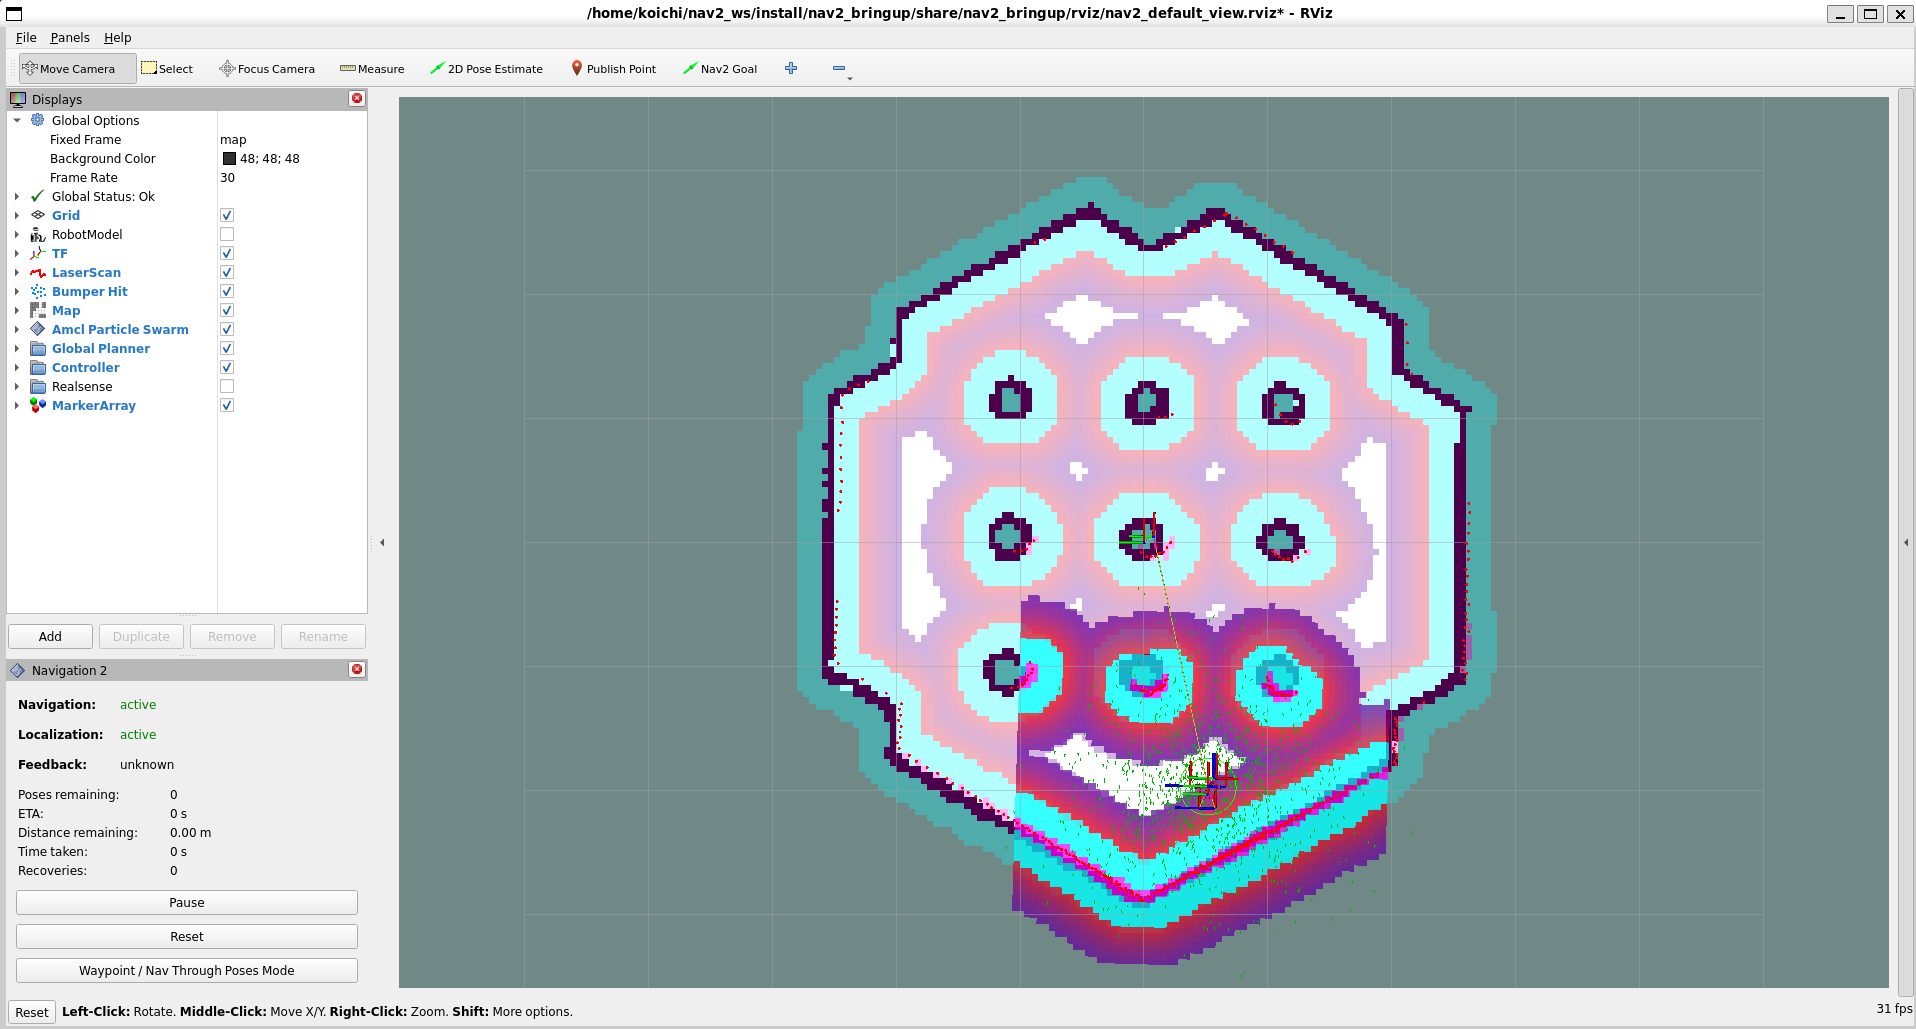
変更前
変更後
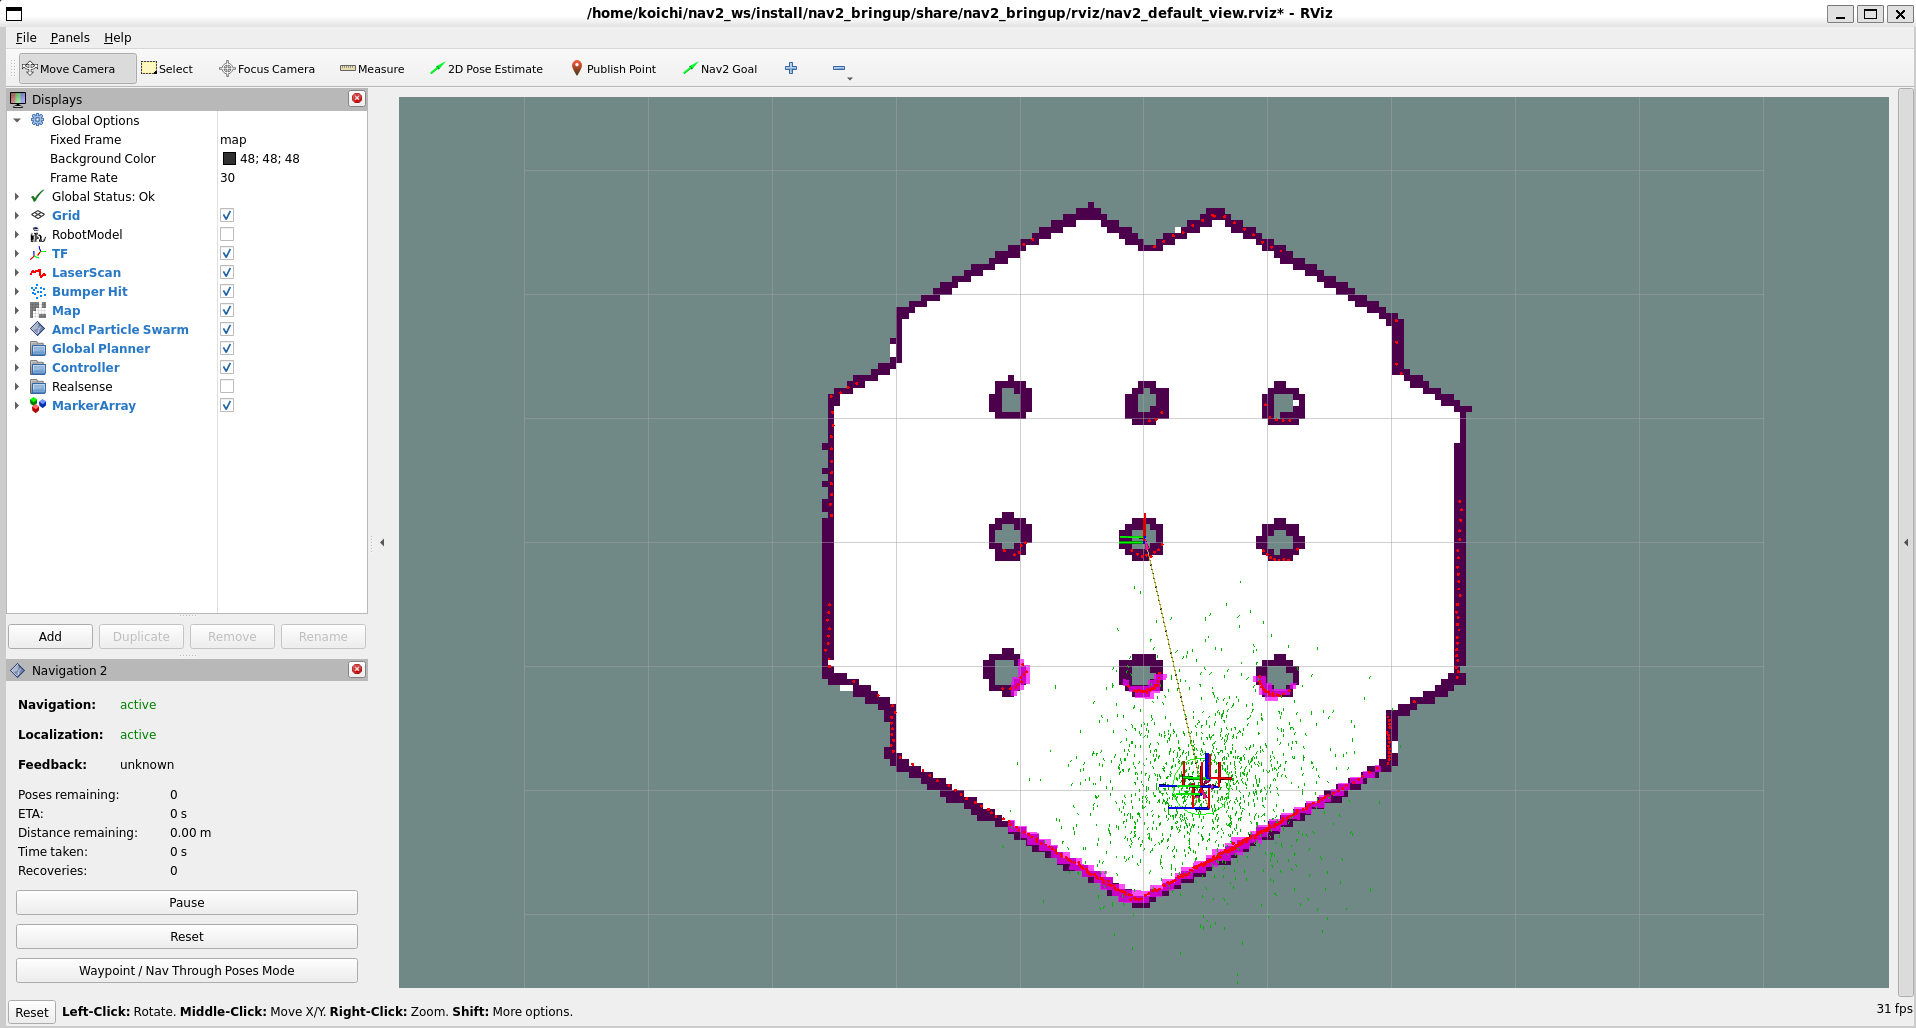
変更後は主に壁の周りにcostmapが設定されていないことがわかります。
除外したpluginのinflation_layerはロボットの大きさ等を考慮して、障害物に対してcostmapを膨張させる働きがあります。
また、このままNav2 Goalでゴールの姿勢を指定してロボットを走行させるとcostmapの設定が最低限なため、ロボットが障害物に当たってしまうことがあります。
inflation layerのロジックなど、詳細は以下の画像と参考ページを確認いただければと思います。
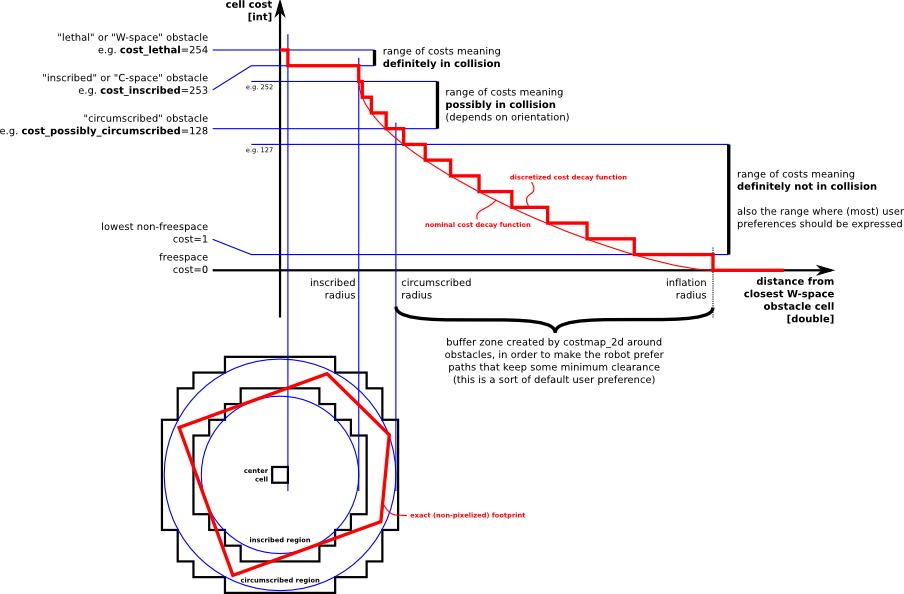
出展:http://wiki.ros.org/costmap_2d
日本語の解説は以下のページが参考になります。
https://robo-marc.github.io/navigation_documents/costmap_2d.html
上記の資料の注意点として、上記の資料はROS1のNavigation stackの説明資料です。Navigation2の公式ドキュメントは以下ですが、細かいロジックなどについての記載はあまり見つけることができませんでした。
おわりに
今回はNavigation2のインストールからpluginの設定方法を紹介しました。
今後、自作のpluginの作成や導入なども紹介していこうと思います。