概要
Android アプリに Google Play 課金システムの 定期購入 を実装するときのポイントを簡単にまとめておきます。
設定
Google Cloud Platform - Pub/Sub
リアルタイム デベロッパー通知を構成する
基本的にはこちらの内容です。
定期購入されたときの通知を受け取るトピックを作成していきます。
トピック作成
- GCP の Pub/Sub から「トピックを作成」

- トピック ID を入力して「トピックを作成」

サブスクリプション作成
- 作成したトピックに「サブスクリプションを作成」

- サブスクリプション ID を入力して CREATE

トピックに権限付与
- 作成したトピックを選択して「メンバーを追加」
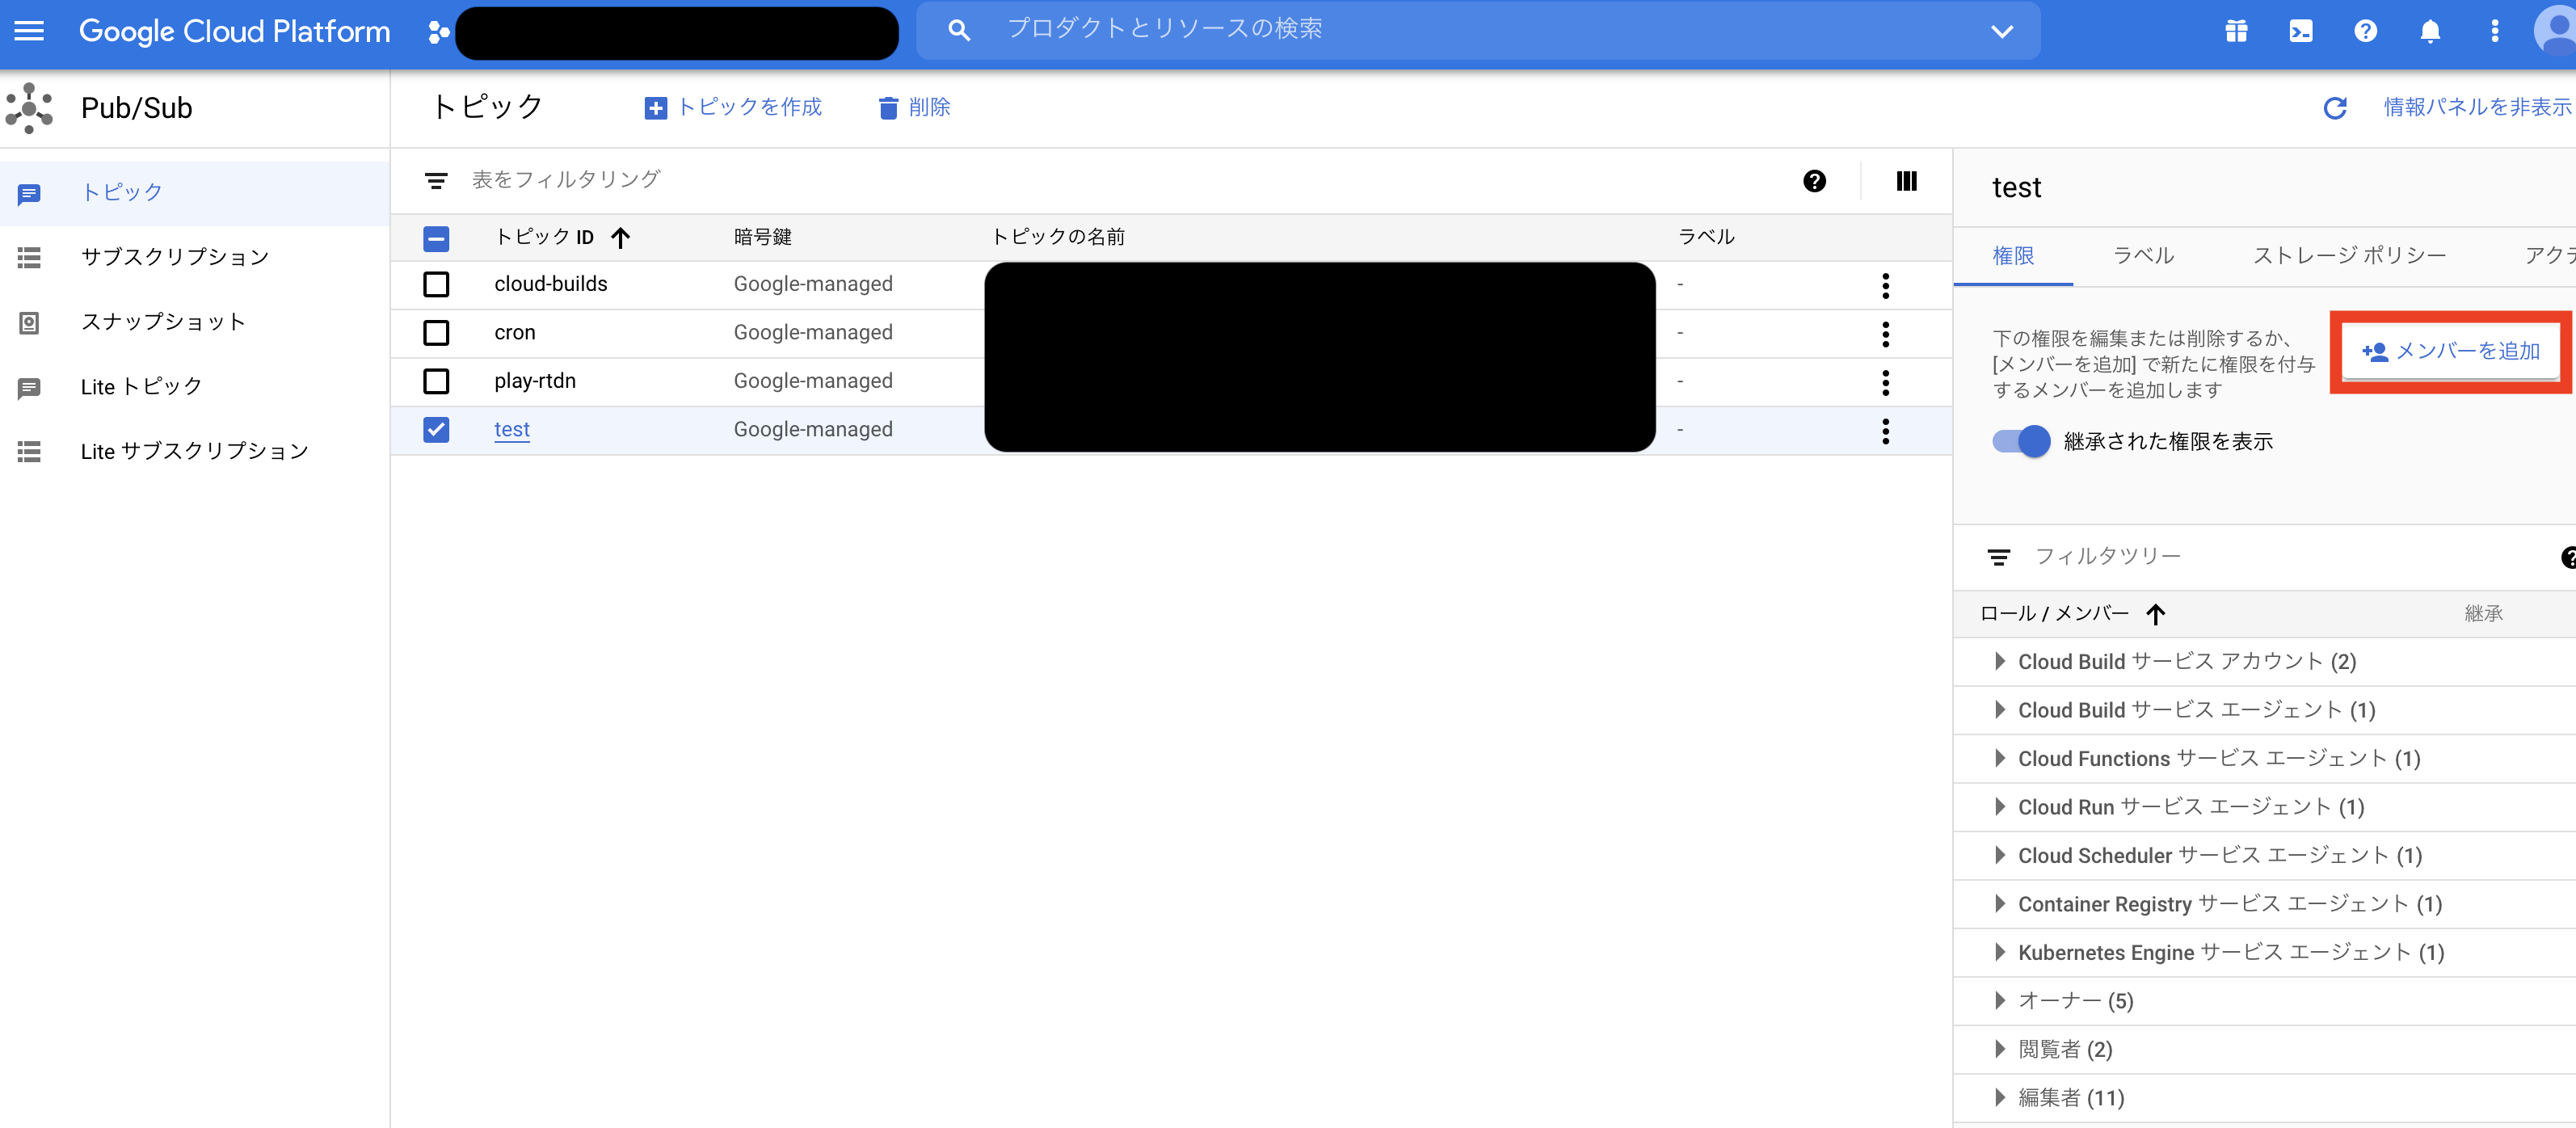
- メンバー追加して保存
新しいメンバーに google-play-developer-notifications@system.gserviceaccount.com を入力、
ロールに Pub/Sub パブリッシャー を選択

以上で Google Cloud Platform - Pub/Sub の設定は終了です。
Google Play Console
基本的に アプリでリアルタイム デベロッパー通知を有効にする と アイテムを作成して構成する の内容になります。
収益化のセットアップ
- 先ほど作成したトピックのトピック名を入力

入力したら 「テスト通知を送信」 してエラーが表示されないことを確認してください。
もしエラーが表示されたらトピック名が間違えてるか権限付与されていない可能性があります。
定期購入を作成
- アイテム ID などを入力して「保存」(各入力項目は Play Console ヘルプ - 定期購入の作成 参照)

以上で Google Play Console の設定は終了です。
実装
ここからは具体的な実装方法になります。
- アプリから定期購入処理を呼び出す処理
と定期購入処理が完了したあとに Google から通知される
- リアルタイムデベロッパー通知を受け取る処理
の 2 つを実装する必要があります。
アプリから定期購入処理を呼び出す処理
主に Google Play Billing Library をアプリに統合する の内容になります。
BillingClient の初期化など
private lateinit var billingClient: BillingClient
private var autosubscriptionSkuDetails: SkuDetails? = null

private fun billingSetup() {
    // 購入処理のコールバック
    val purchaseUpdateListener = PurchasesUpdatedListener { billingResult, purchases ->
        Log.d("BILLING_TEST_TAG", "billingResult.responseCode: ${billingResult.responseCode}")
    }

    // BillingClient の初期化
    billingClient = BillingClient.newBuilder(this)
        .setListener(purchaseUpdateListener)
        .enablePendingPurchases()
        .build()

    // セットアップ処理のコールバック
    val billingClientStateListener: BillingClientStateListener = object : BillingClientStateListener {
        override fun onBillingSetupFinished(billingResult: BillingResult) {
            if (billingResult.responseCode == BillingClient.BillingResponseCode.OK) {
                // 商品情報取得
                val skuList = listOf(
                    // 「定期購入を作成」で入力した定期購入のアイテム ID
                    "subscription.product.id"
                )
                val params = SkuDetailsParams.newBuilder().setSkusList(skuList).setType(BillingClient.SkuType.SUBS).build()

                billingClient.querySkuDetailsAsync(params) { querySkuBillingResult, skuDetailsResult ->
                    if (querySkuBillingResult.responseCode == BillingClient.BillingResponseCode.OK) {
                        skuDetailsResult ?: return@querySkuDetailsAsync
                        for (skuDetails: SkuDetails in skuDetailsResult) {
                            if (skuDetails.sku == "subscription.product.id") {
                                autosubscriptionSkuDetails = skuDetails
                                return@querySkuDetailsAsync
                            }
                        }
                    } else {
                        Log.d(
                            BILLING_TEST_TAG,
                            "querySkuDetailsAsync error. responseCode:${querySkuBillingResult.responseCode}"
                        )
                    }
                }
            } else {
                Log.d(BILLING_TEST_TAG, "Setup error. responseCode:${billingResult.responseCode}")
            }
        }

        override fun onBillingServiceDisconnected() {
            Log.d(
                "BILLING_TEST_TAG",
                "Try to restart the connection on the next request to Google Play by calling the startConnection() method."
            )
        }
    }

    // 接続開始
    billingClient.startConnection(billingClientStateListener)
}
購入処理の呼び出し
val skuDetails: SkuDetails? = autosubscriptionSkuDetails
if (skuDetails != null) {
    val billingFlowParams = BillingFlowParams.newBuilder()
        .setSkuDetails(skuDetails)
        .build()

    // 購入フローを開始
    billingClient.launchBillingFlow(this, billingFlowParams)
}
ここまで実装すれば以下のような購入画面が表示できると思います。

ちなみにテスト購入できるようにするためにいくつか設定が必要なので Google Play Billing Library 統合をテストする を参照してください。
以上でアプリから定期購入処理を呼び出す処理は終了です。
リアルタイムデベロッパー通知を受け取る処理
定期購入を販売する
こちらに記載されているライフサイクルを処理します。
定期購入されると 「収益化のセットアップ」 で設定したトピックに対してメッセージが送信されてくるので
それをトリガーに GoogleCloudPlatform の Cloud Functions で処理します。
import { Message } from 'firebase-functions/lib/providers/pubsub';
import { EventContext } from 'firebase-functions';

import * as JsonPrune from 'json-prune';
import * as Functions from 'firebase-functions';

class GooglePlayRtdnEndpoint {
    public static topicName = 'test';

    public async run(resolve: any, reject: any, message: Message, context?: EventContext) {
        const data = message.json;
        if (!data.subscriptionNotification && !data.oneTimeProductNotification && !data.testNotification) {
            return reject({ data, error: new Error(`PubSub message was invalid JSON: ${JsonPrune(data)}`) });
        }

        console.log(JsonPrune(data));
        return resolve();
    }
}

const googlePlayRtdnEndpoint = new GooglePlayRtdnEndpoint();

export const googlePlayRtdn = Functions.region('asia-northeast1')
    .pubsub.topic(GooglePlayRtdnEndpoint.topicName)
    .onPublish((message: Message, context?: EventContext) => {
        return new Promise((resolve, reject) => googlePlayRtdnEndpoint.run(resolve, reject, message, context)).catch(error => {
            console.error(error);
        });
    });
こちらのソースコードを GoogleCloudPlatform にデプロイします。
GoogleCloudPlatform の Cloud Functions に googlePlayRtdn という関数が追加されていることを確認してください。
以上でリアルタイムデベロッパー通知を受け取る処理は終了です。
動作確認
アプリからテスト購入を実行します。
GoogleCloudPlatform の Cloud Functions googlePlayRtdn の「ログ」に
{
    "version": "1.0",
    "packageName": "******",
    "eventTimeMillis": "1610083333446",
    "subscriptionNotification": {
        "version": "1.0",
        "notificationType": 4,
        "purchaseToken": "************************************",
        "subscriptionId": "subscription.product.id"
    }
}
こんな感じの json が出力されれば成功です。
あとは notificationType によってどういう処理を実行させるかを判断します。
notificationType の種類などは リアルタイム デベロッパー通知のリファレンス ガイド を参照してください。
有料会員かどうか、は Firebase の Custom Claims を使用するのが良いと思います。