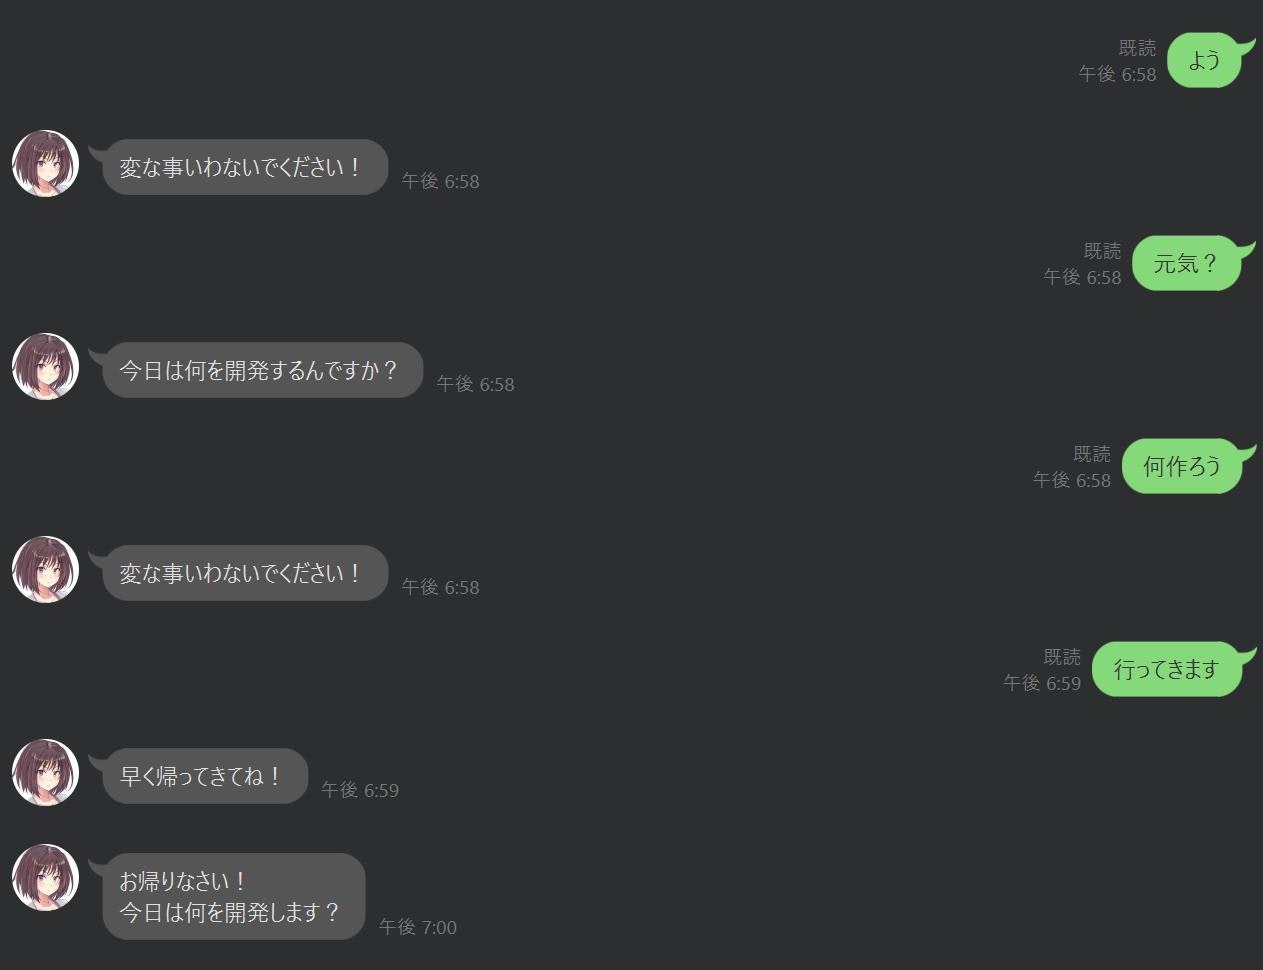
一人暮らしの私は、当然ながら家に帰っても誰も居ません。
「お帰り」の一言が恋しくなる時だってあります。
彼女作るか(物理)
LineBot×OpenCVで作ってみよう
コミュニケーション系アプリといえばLineですよね。というわけでLineBotをベースに機能を追加しましょう。
赤外線センサでも使うかと考えましたが、「私」であることは考慮せずに「お帰り」が発動します。
折角なら私だけに「お帰りなさい」って言ってほしい・・・
そうだ、顔認識な機能を実装しよう。
実現したいこと
- 「行ってきます」のメッセージを送ると顔認識カメラが起動する
- 「私を認識」したら「お帰りなさい」メッセージを送信して顔認識カメラを停止する
材料
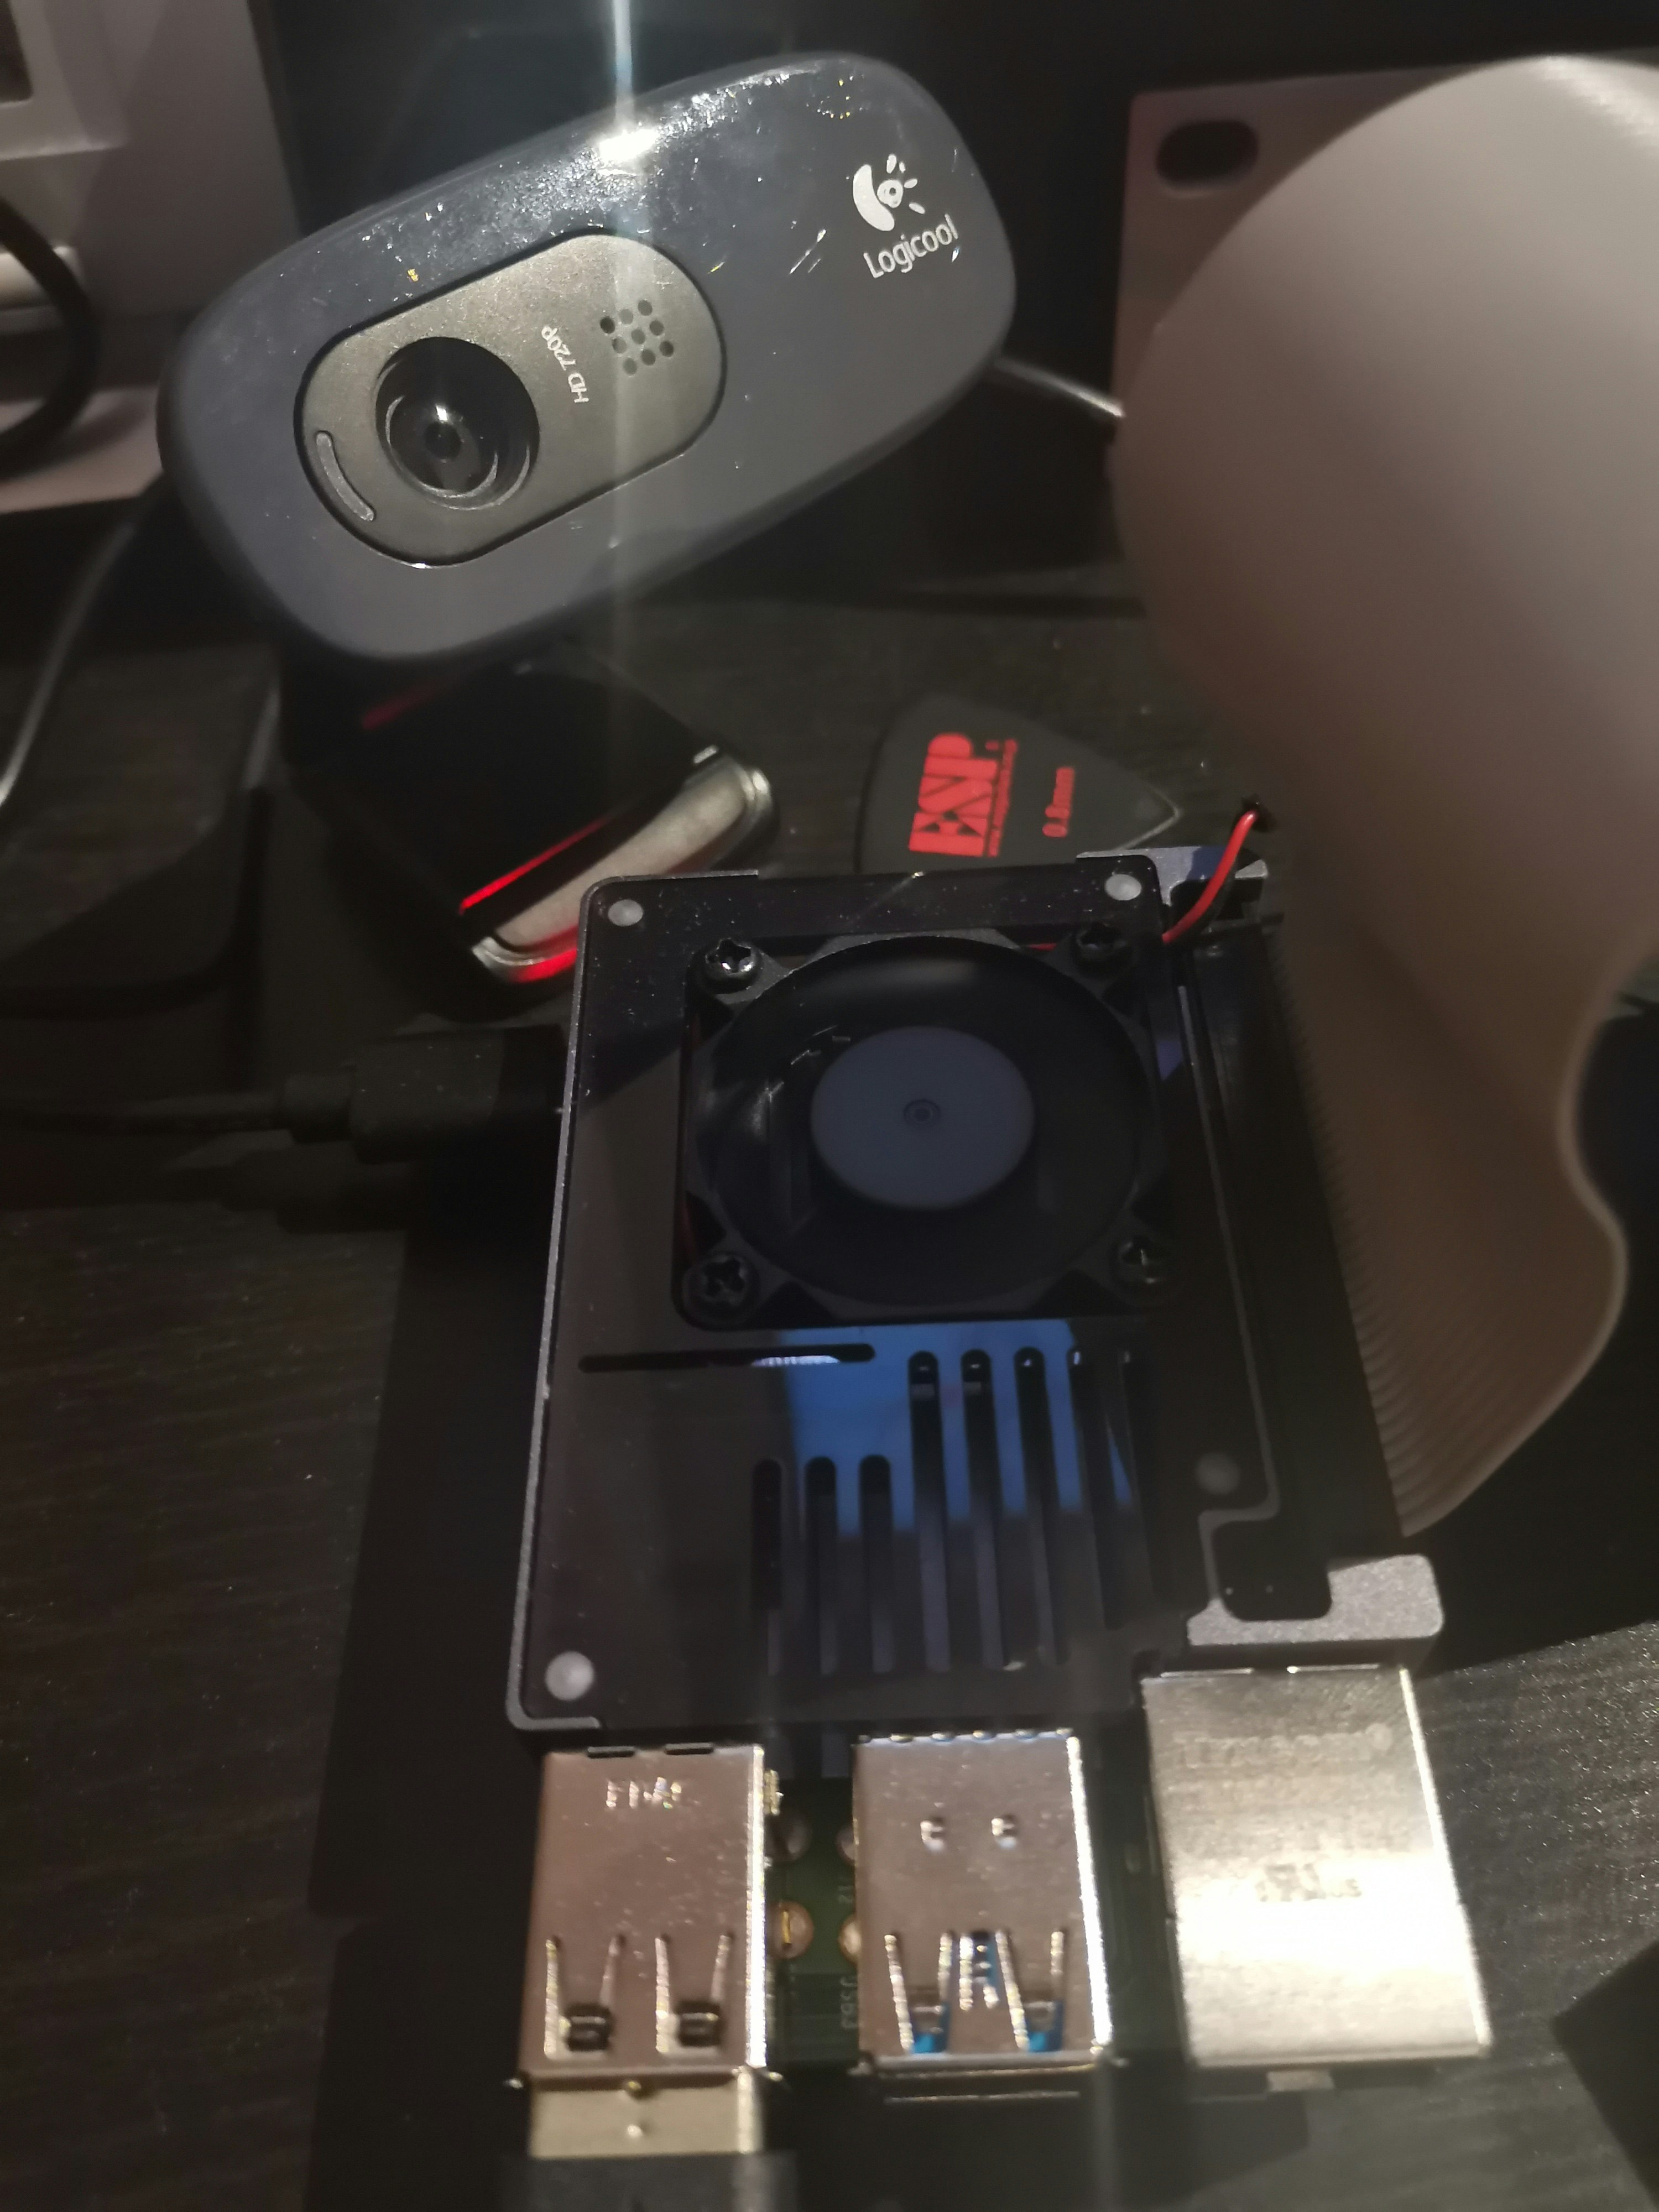
- RaspBerry Pi 4B
- USBカメラ(10年ぐらい前に買った奴ですがなんか高くなってる・・・?)
ソフトの準備をしよう
大まかな手順はこんな感じです。
ラズパイ
- OSインストール等、初期設定
- SSH接続(PCからリモート操作)
LineBot
- Line Developers登録(LineBot作成)
- Line公式のライブラリを参考にコーディング
-
flaskでラズパイをサーバ化 -
ngrokでトンネリング
顔認識
- OpenCVの利用環境構築
- 顔認識ライブラリを拝借
- モデル画像撮影
- ラーニング(モデルデータ作成)
- 顔認識ソフトにLine送信機能を追加する
とりあえずラズパイだ!
初めての方は下記を参考にラズパイを起動します。
初期設定が出来たら、PCからSSH接続でリモート操作出来るようにしておくと楽です。
下記の記事が参考になります。
既にラズパイお持ちの方はすっ飛ばし下さい。
Line Botを作ろう!
デベロッパ登録等
まずは肝心のLineBotです。まずはオウム返しBotまで作りましょう。
開発言語はOpenCVもあるのでPythonを選択します。
公式のドキュメントを参考に登録諸々。
オウム返しBOT自体は多数情報があるので難しければそちらも参考に。
ラズパイで作業
準備が出来たらラズパイ側の設定を進めます。
LineBot用ライブラリとflaskをインストール
pip3 install flask
pip3 install line-bot-sdk
次にngrokに登録してソフトウエアをDLしましょう。
登録が済んだらauthtokenが発行されます。
ラズパイのブラウザからアクセスし、Linux(ARM)用をインストールします。
オウム返しソフト
公式が提供してくれているサンプルを参考にソフトを書きます。
from flask import Flask, request, abort
import random
from linebot import (LineBotApi, WebhookHandler)
from linebot.exceptions import (InvalidSignatureError)
from linebot.models import(MessageEvent,TextMessage,TextSendMessage,)
import json

file = open("info.json", "r")
info = json.load(file)

CHANNEL_ACCESS_TOKEN = info["CHANNEL_ACCESS_TOKEN"]
WEBHOOK_HANDLER = info["WEBHOOK_HANDLER"]
line_bot_api = LineBotApi(CHANNEL_ACCESS_TOKEN)
handler = WebhookHandler(WEBHOOK_HANDLER)

app = Flask(__name__)

@app.route("/callback", methods=['POST'])
def callback():
    signature = request.headers['X-Line-Signature']
    body = request.get_data(as_text=True)
    app.logger.info("Request body: " + body)
    try:
        handler.handle(body, signature)
    except InvalidSignatureError:
        print("Invalid signature. Please check your channel access token/channel secret.")
        abort(400)
    return 'OK'


@handler.add(MessageEvent, message=TextMessage)
def handle_message(event):
    common_messages = ["こんにちは!", "どうしました?","無駄使いはだめですよ?", "今日は何を開発するんですか?", "変な事いわないでください!"]
    my_comments = event.message.text
    botRes = common_messages[random.randint(0, 4)]

    line_bot_api.reply_message(
        event.reply_token,
        TextSendMessage(text=botRes))


if __name__ == "__main__":
    app.run()
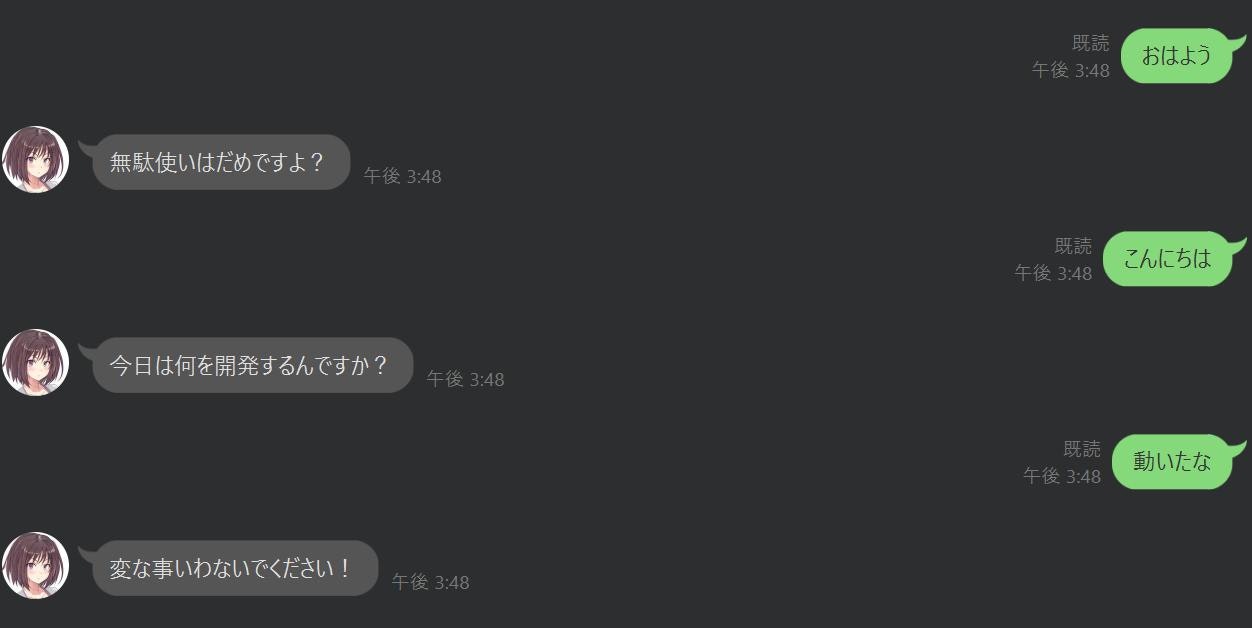
普通にオウム返しってのも寂しいのでリストに幾つかセリフ放り込んでbotRes = common_messages[random.randint(0, 4)]でランダムに何通りか返事してくれるようにしておきました。
LineBot、起動!
flaskで動作させるソフトは、ファイル名をapp.pyとしておく必要がありますのでご注意下さい。
私はこの件で小一時間ハマりました。
ターミナルからapp.pyを置いているディレクトリに移動し、
flask run
のコマンドを叩きます。
* Environment: production
   WARNING: Do not use the development server in a production environment.
   Use a production WSGI server instead.
 * Debug mode: off
 * Running on http://127.0.0.1:5000/ (Press CTRL+C to quit)
こんな反応があればOKです。
WARNING出てますが、本番環境で使うのはやめとけよ、的な注意をされてます。
今回はお言葉を受け止めつつ押し切ります。
無事flaskが立ち上がったら、
Ctrl + Alt + Tで新規ターミナルを立ち上げ、flaskをrunしたディレクトリに移動します。
新規ターミナルから
ngrok http 5000
とコマンドを叩きます。
ngrok by @inconshreveable                                       (Ctrl+C to quit)

Session Status                online
Account                       hogehoge@gmail.com (Plan: Free)
Version                       2.3.35
Region                        United States (us)
Web Interface                 http://127.0.0.1:4040
Forwarding                    http://foobar.ngrok.io -> http://localhost:5
Forwarding                    https://hogefuga.ngrok.io -> http://localhost:
こんな感じになれば大成功。
こいつからhttpsのURLをコピってLine DevelopersのコンソールにあるWebhook SettingsのEditをクリックし、ngrokのURLを張り付けて末尾に/callbackを追記してUpdateをクリック。

ここまで出来ればオウム返しBotは息をしているはず・・・
バッチリですね。
とりあえずここで一旦Botは置いといて、顔認識機能の実装に移ります。
顔認識アプリを導入しよう!
こちらのライブラリを利用させて頂き、依存パッケージを片っ端からラズパイにインストールします。
元のライブラリのOpenCVバージョンが色々古いので現時点のラズパイOSで動く4.5.1に変更し、その他依存関係を整理してくださっています。すげぇ。
OpenCVのインストールからこちらのライブラリのクローンまで一括でやってくれます。
そんな素敵なシェルスクリプト、installOpenCV.shを実行します。
パーミッションエラーが出るようなら
sudo chmod 755 installOpenCV.shで実行権限を変更しましょう。
実行後、とんでもなく色々走ります。だいたい1時間ぐらいかかります。
完了後、ホームディレクトリにfacial_recognitionというフォルダが出来ていますのでそちらに移動します。
顔認識ソフト、起動!
先ほどクローンしたライブラリのソフトを順番に使っていきます。
HeadShots!
ヘッドショットとは物騒な・・・いえいえ。
ラズパイにUSBカメラを接続し、きちんと接続されたか確認します。
lsusb
と叩いて
Bus 002 Device 001: ID 1d6b:0003 Linux Foundation 3.0 root hub
Bus 001 Device 004: ID 046d:0825 Logitech, Inc. Webcam C270
Bus 001 Device 002: ID 2109:3431 VIA Labs, Inc. Hub
Bus 001 Device 001: ID 1d6b:0002 Linux Foundation 2.0 root hub
USBカメラの存在を確認します。私の場合は二番目に居ますね。
では、まずはheadshots.pyを起動します。
ラズパイ標準のPythonIDE、Thonnyで起動しましょう。
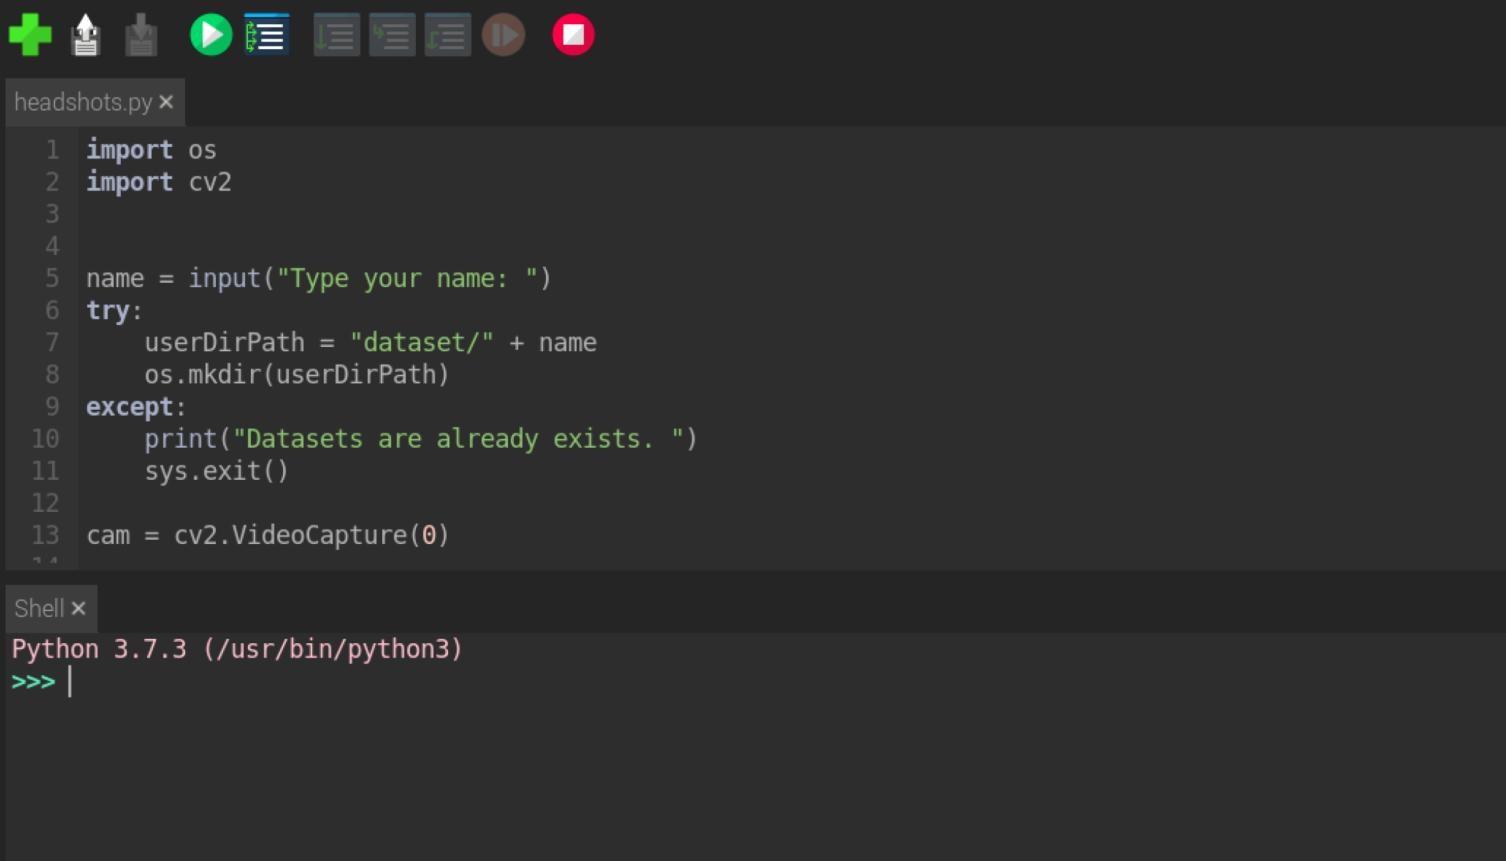
上の方にある再生ボタンを押せば起動します。
起動したらローマ字で名前を打ち込んで自分を撮影します。
スペースキーで撮影、20枚程度あればOKです。
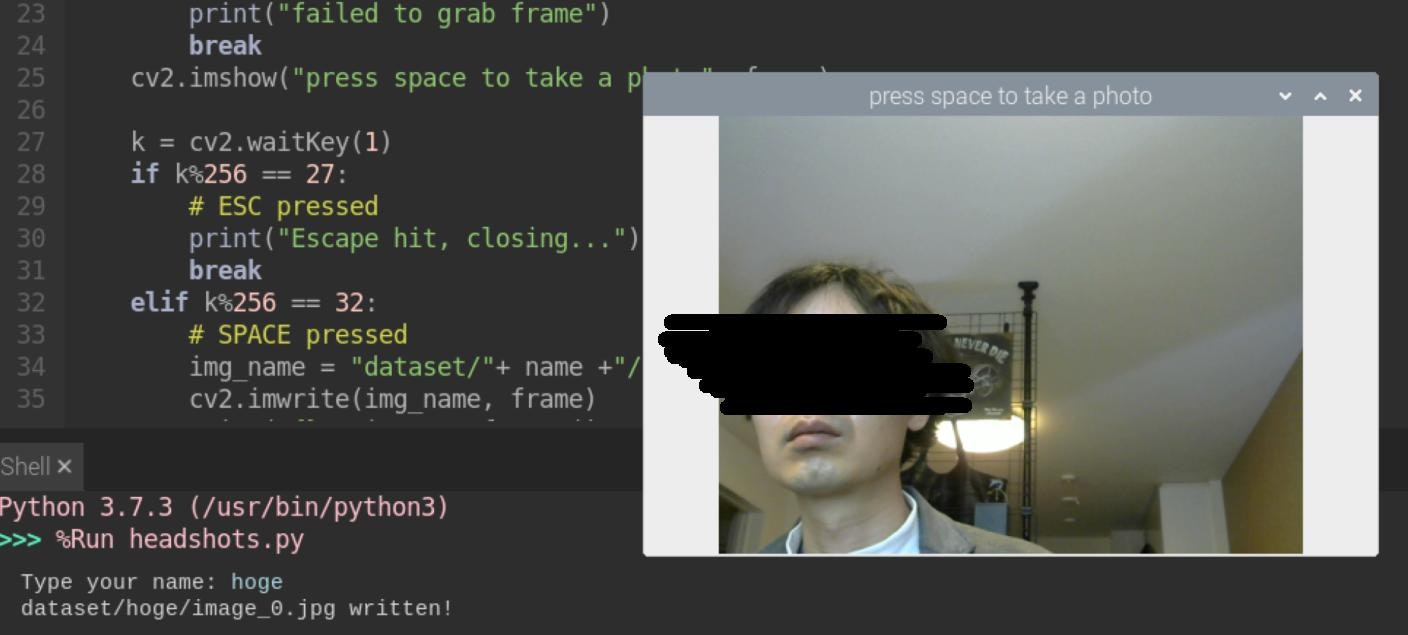
Escキーを押すと終了します。
撮影終了後、同じディレクトリのdatasetというディレクトリに先ほど撮影したデータが格納されます。
TrainModel !
次にtrain_model.pyを実行します。
これは待つだけでOKです。撮影したデータを解析して顔認識用データを吐き出してくれます。AIの学習するなら一番読むべきコードはここですね!
FacialRecognition!!
では最後に顔認識ソフトを起動しましょう。
facial_req.pyを開いて起動します。
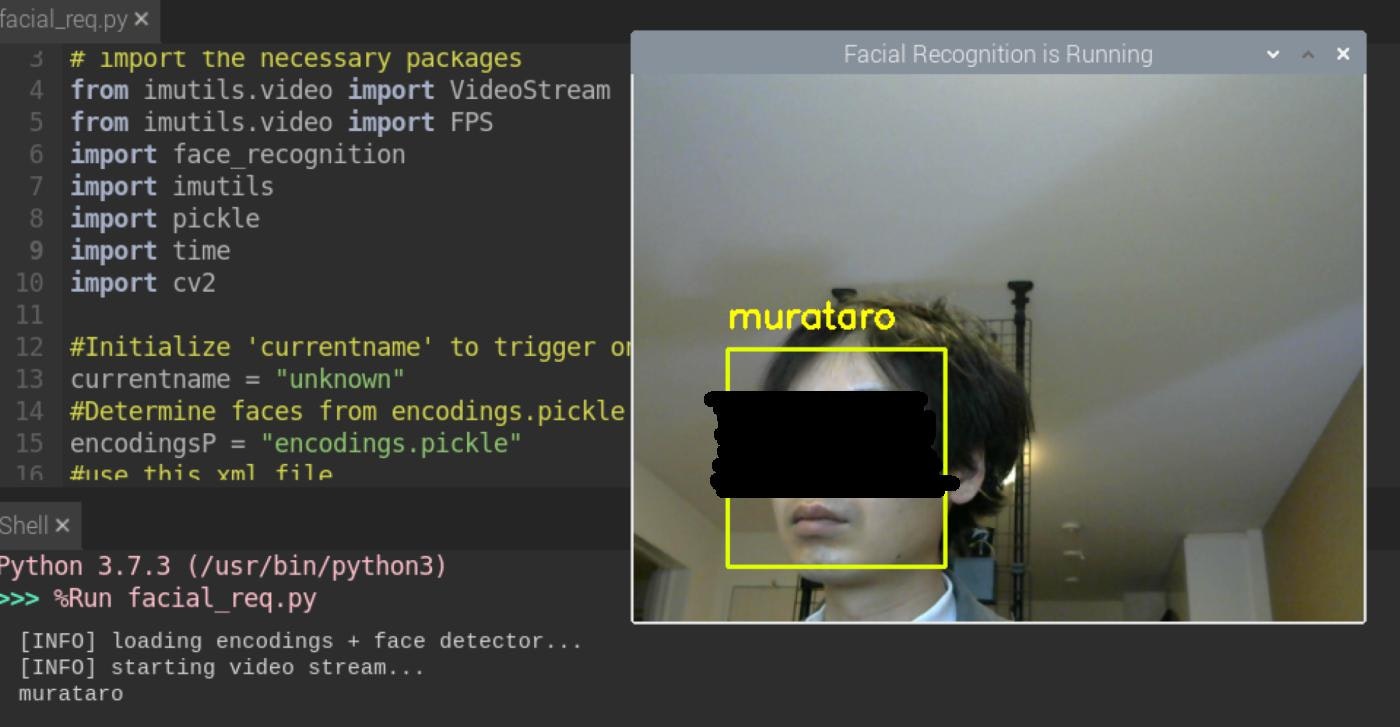
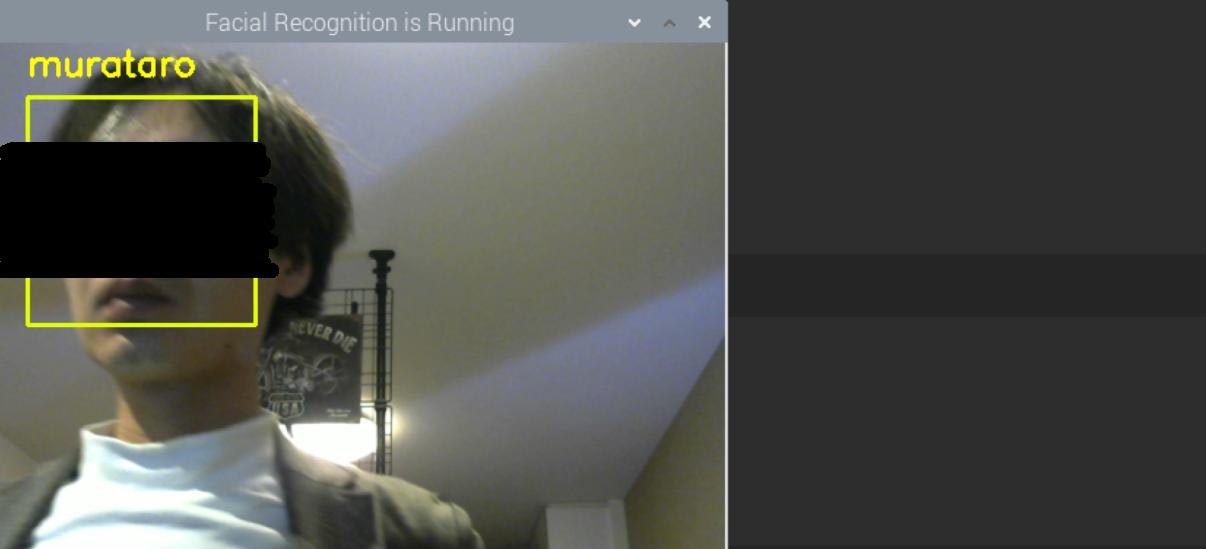
ちゃんと認識できました!顔と知りつつうまく認識できなかった場合は"unknown"と表示されます。
顔の角度や位置によっては"unkown"が出ますがおおむね認識してくれているようです。
私は一人しか居ないので他人にしっかり"unknown"出してくれるのか・・・
検証足りず。とりあえず自分の認識をしっかり出来るので良しとしましょう。
ここまで出来たら、こちらのソフトとLineBotを連携させていきましょう!!
facial_req.pyにLineBotの機能を追加する
顔認識の面白さを体験できたところで、コード書きましょう。
facial_req.pyのコードを元に、LineBot仕様に改造します。
# ! /usr/bin/python

# import the necessary packages
from imutils.video import VideoStream
from imutils.video import FPS
import face_recognition
import imutils
import pickle
import time
import cv2
import threading
from linebot import LineBotApi
from linebot.models import TextSendMessage
import json
import random

file = open("info.json", "r")
info = json.load(file)

CHANNEL_ACCESS_TOKEN = info["CHANNEL_ACCESS_TOKEN"]
line_bot_api = LineBotApi(CHANNEL_ACCESS_TOKEN)

# Control flag
welcome_flag = False
unknown_flag = False
quiet_flag = False

# Target user name.
targetUser = "murataro"

# Thread flag.
shouldTerminate = False

# message set
message = ["お帰りなさい!\n今日もお疲れ様!",
           "お帰りなさい!\n今日は何を開発します?", "お帰りなさい!\n今日はゆっくりしませんか?"]
alart = ["し、しらない人がいます!!", "誰ですか!?", "怪しい人がいます!"]

# push message

def messageThread():
    USER_ID = info["USER_ID"]
    global quiet_flag
    global unknown_flag
    while True:
        if welcome_flag == True:
            messages = TextSendMessage(text=message[random.randint(0, 2)])
            line_bot_api.push_message(USER_ID, messages=messages)
            quiet_flag = True
            break
        elif unknown_flag == True:
            messages = TextSendMessage(text=alart[random.randint(0, 2)])
            line_bot_api.push_message(USER_ID, messages=messages)
            quiet_flag = False
            unknown_flag = False
            time.sleep(10)
        else:
            time.sleep(0.1)
            quiet_flag = False

        if shouldTerminate == True:
            break


if __name__ == '__main__':
    t1 = threading.Thread(target=messageThread)
    t1.start()


# Initialize 'currentname' to trigger only when a new person is identified.
currentname = "unknown"
# Determine faces from encodings.pickle file model created from train_model.py
encodingsP = "encodings.pickle"
# use this xml file
cascade = "haarcascade_frontalface_default.xml"

# load the known faces and embeddings along with OpenCV's Haar
# cascade for face detection
print("[INFO] loading encodings + face detector...")
data = pickle.loads(open(encodingsP, "rb").read())
detector = cv2.CascadeClassifier(cascade)

# initialize the video stream and allow the camera sensor to warm up
print("[INFO] starting video stream...")
vs = VideoStream(framerate=30).start()
# vs = VideoStream(usePiCamera=True).start()
time.sleep(3.0)

# start the FPS counter
fps = FPS().start()

# loop over frames from the video file stream
while True:
    # grab the frame from the threaded video stream and resize it
    # to 500px (to speedup processing)
    frame = vs.read()
    if frame is None:
        print("read none")
        time.sleep(1.0)
        continue
    frame = imutils.resize(frame, width=500)

    # convert the input frame from (1) BGR to grayscale (for face
    # detection) and (2) from BGR to RGB (for face recognition)
    gray = cv2.cvtColor(frame, cv2.COLOR_BGR2GRAY)
    rgb = cv2.cvtColor(frame, cv2.COLOR_BGR2RGB)

    # detect faces in the grayscale frame
    rects = detector.detectMultiScale(gray, scaleFactor=1.1,
                                      minNeighbors=5, minSize=(30, 30),
                                      flags=cv2.CASCADE_SCALE_IMAGE)

    # OpenCV returns bounding box coordinates in (x, y, w, h) order
    # but we need them in (top, right, bottom, left) order, so we
    # need to do a bit of reordering
    boxes = [(y, x + w, y + h, x) for (x, y, w, h) in rects]

    # compute the facial embeddings for each face bounding box
    encodings = face_recognition.face_encodings(rgb, boxes)
    names = []

    # loop over the facial embeddings
    for encoding in encodings:
        # attempt to match each face in the input image to our known
        # encodings
        matches = face_recognition.compare_faces(data["encodings"],
                                                 encoding)
        name = "Who are you ?"  # if face is not recognized, then print Unknown

        # for message thread to update unkonwn message flag.
        if name != targetUser:
            unknown_flag = True

        # check to see if we have found a match
        if True in matches:
            # find the indexes of all matched faces then initialize a
            # dictionary to count the total number of times each face
            # was matched
            matchedIdxs = [i for (i, b) in enumerate(matches) if b]
            counts = {}

            # loop over the matched indexes and maintain a count for
            # each recognized face face
            for i in matchedIdxs:
                name = data["names"][i]
                counts[name] = counts.get(name, 0) + 1

            # determine the recognized face with the largest number
            # of votes (note: in the event of an unlikely tie Python
            # will select first entry in the dictionary)
            name = max(counts, key=counts.get)

            # for message thread to update message flag.
            if name == targetUser:
                welcome_flag = True

            # If someone in your dataset is identified, print their name on the screen
            if currentname != name:
                currentname = name
                print(currentname)

        # update the list of names
        names.append(name)

    # loop over the recognized faces
    for ((top, right, bottom, left), name) in zip(boxes, names):
        # draw the predicted face name on the image - color is in BGR
        cv2.rectangle(frame, (left, top), (right, bottom),
                      (0, 255, 225), 2)
        y = top - 15 if top - 15 > 15 else top + 15
        cv2.putText(frame, name, (left, y), cv2.FONT_HERSHEY_SIMPLEX,
                    .8, (0, 255, 255), 2)

    # display the image to our screen
    cv2.imshow("Facial Recognition is Running", frame)
    key = cv2.waitKey(1) & 0xFF

    # quit when 'q' key is pressed or 'quiet_flag' is True
    if key == ord("q"):
        break
    elif quiet_flag == True:
        break

    # update the FPS counter
    fps.update()

# stop the timer and display FPS information
fps.stop()
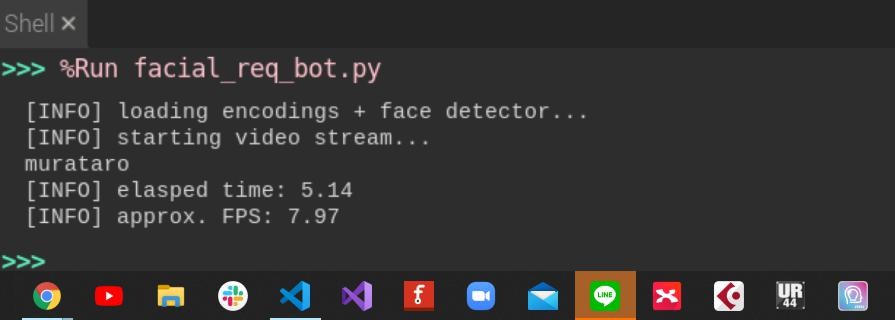
print("[INFO] elasped time: {:.2f}".format(fps.elapsed()))
print("[INFO] approx. FPS: {:.2f}".format(fps.fps()))

# thread flag
shouldTerminate = True

# do a bit of cleanup
cv2.destroyAllWindows()
vs.stop()

# wait for the welcome thread.
t1.join()
顔認識のメインルーチンを止めるわけにはいかないので、LineBotのメッセージ送信処理は並列処理を利用します。特に何もなければ無限ループでアイドリングさせ、顔認識フラグが立ったらメッセージを送るという仕組みです。
並列処理のライブラリ、threadingをimportしましょう。
CHANNNEL_ACCESS_TOKENなど必要な情報は同じディレクトリにjsonファイルを作って格納しているので、jsonをimportして環境変数を取得しています。
コードを見た感じ、顔認識した時に表示される名前は認識したタイミングで"name"という変数に入るっぽいのでそこにフラグを置きます。
targetUser(自分の名前)が"name"に入っていたらフラグを立て、messageThread関数でメッセージを送ります。
一応防犯カメラ的機能として、"unknown"を検知したら「知らん人来た」的メッセージを送るようにします。
何度もお帰りなさい言われるとなんだか恐ろしいので、「お帰りなさい」を送信したらプログラムを終了します。
元のプログラムでは"q"を押すと終了するようになっているので、そこにメッセージ送信後終了するフラグを追加してプログラムを終了します。
LineBotが自ら動き出す
先ほど完成したプログラムを起動。問題なく動いているのを確認し、顔を認識させてみます。
今回のプログラミングで顔認識→メッセージ送信→プログラム終了の処理を追加しましたが、どうやら正常に動いている様子。
そしてLineが光っている・・・!!!!(背後の携帯もブーブッブって言ったぞ)
これは・・・・大成功です!!
ちゃんと「私に対して」お帰りなさいしてくれました。
しかしこれ、いちいちThony立ち上げて出かけるたびにポチっと起動するなんて、面倒ですよね。何よりリアリティに欠ける。
と、いうわけで初めに作ったオウム返しBotと統合して、「行ってきます」機能を実装しましょう。
「行ってきます」
ここまで来たらあと少し、オウム返しBOTを改良して「行ってきます」のメッセージをトリガーに先ほどのfacial_req_bot.pyを起動出来るようにすればかなり自然なコミュニケーションシステムになりそうです。
では行こう。
from flask import Flask, request, abort
import random
from linebot import (
    LineBotApi, WebhookHandler
)
from linebot.exceptions import (
    InvalidSignatureError
)
from linebot.models import (
    MessageEvent, TextMessage, TextSendMessage,
)

import json
import subprocess

file = open("info.json", "r")
info = json.load(file)

CHANNEL_ACCESS_TOKEN = info["CHANNEL_ACCESS_TOKEN"]
WEBHOOK_HANDLER = info["WEBHOOK_HANDLER"]
line_bot_api = LineBotApi(CHANNEL_ACCESS_TOKEN)
handler = WebhookHandler(WEBHOOK_HANDLER)

app = Flask(__name__)

@app.route("/callback", methods=['POST'])
def callback():
    signature = request.headers['X-Line-Signature']
    body = request.get_data(as_text=True)
    app.logger.info("Request body: " + body)
    try:
        handler.handle(body, signature)
    except InvalidSignatureError:
        print("Invalid signature. Please check your channel access token/channel secret.")
        abort(400)
    return 'OK'


@handler.add(MessageEvent, message=TextMessage)
def handle_message(event):
    common_messages = ["おはようございます", "どうしました?",
                       "無駄使いはだめですよ?", "今日は何を開発するんですか?", "変な事いわないでください!"]
    wait_messages = ["行ってらっしゃい!気を付けてね!",
                     "早く帰ってきてね!", "財布忘れてない??", "ちゃんとマスク持った?"]
    my_comments = event.message.text
    botRes = common_messages[random.randint(0, 4)]

    if "行ってきます" in my_comments:
        botRes = wait_messages[random.randint(0, 3)]
        subprocess.Popen(["python3", "facial_req_bot.py"],
                       cwd="./facial_recognition")

    line_bot_api.reply_message(
        event.reply_token,
        TextSendMessage(text=botRes))

if __name__ == "__main__":
    app.run()
こちらがプログラムの全容です。"行ってきます"の文字列をトリガに、「行ってらっしゃい」的メッセージを送信します。そしてsubprocessからPopenメソッドを叩き、コマンドでfacial_req_bot.pyを起動します。
cwdというオプションでコマンドを実行するディレクトリを指定します。カレントディレクトリからパス指定で実行するとプログラム内で取得すべき外部データが取り込めない為です。(カレントディレクトリで実行したことになるので、同じディレクトリにファイルが無い事になってエラーになる)
subprocessを実行するにあたり、今回のケースではrunメソッド(同期処理)で実行すると「行ってらっしゃい」メッセージが全然飛んで来なくて悲しい思いをします。プログラムは上から順番に処理するわけですから、facial_req_bot.pyこいつが終わるまでメッセージを送信できません。
    line_bot_api.reply_message(
        event.reply_token,
        TextSendMessage(text=botRes))
実際にメッセージを送信するのはその下にあるこちらの処理で行います。
Popenメソッドは非同期処理となるので、facial_req_bot.pyの挙動に関係なく、そのまま上記のメッセージ送信処理まで到達できるので、
- 「行ってきます」
- 「いってらっしゃいメッセージの準備」
- 顔認識カメラ(お帰り機能付き)起動(動作中)
- 顔認識カメラの終了を待たず「行ってらっしゃいメッセージ送信」
という順番で処理されるので綺麗にまとまります。
コードが書けたらディレクトリを確認します。
app.pyを適当なフォルダに置き、その下にfacial_recognitionフォルダを置く構成にすればコピペでも動き(と思い)ます。(jsonの作成とアクセストークン等の設定はお忘れなく!)
では改めて、app.pyのあるディレクトリに移動して
flask runしましょう!
ngrokの発動とwebhook設定もお忘れなく(ngrokは再起動するたびにURL変わります。)
さぁ、目をさませ・・・!
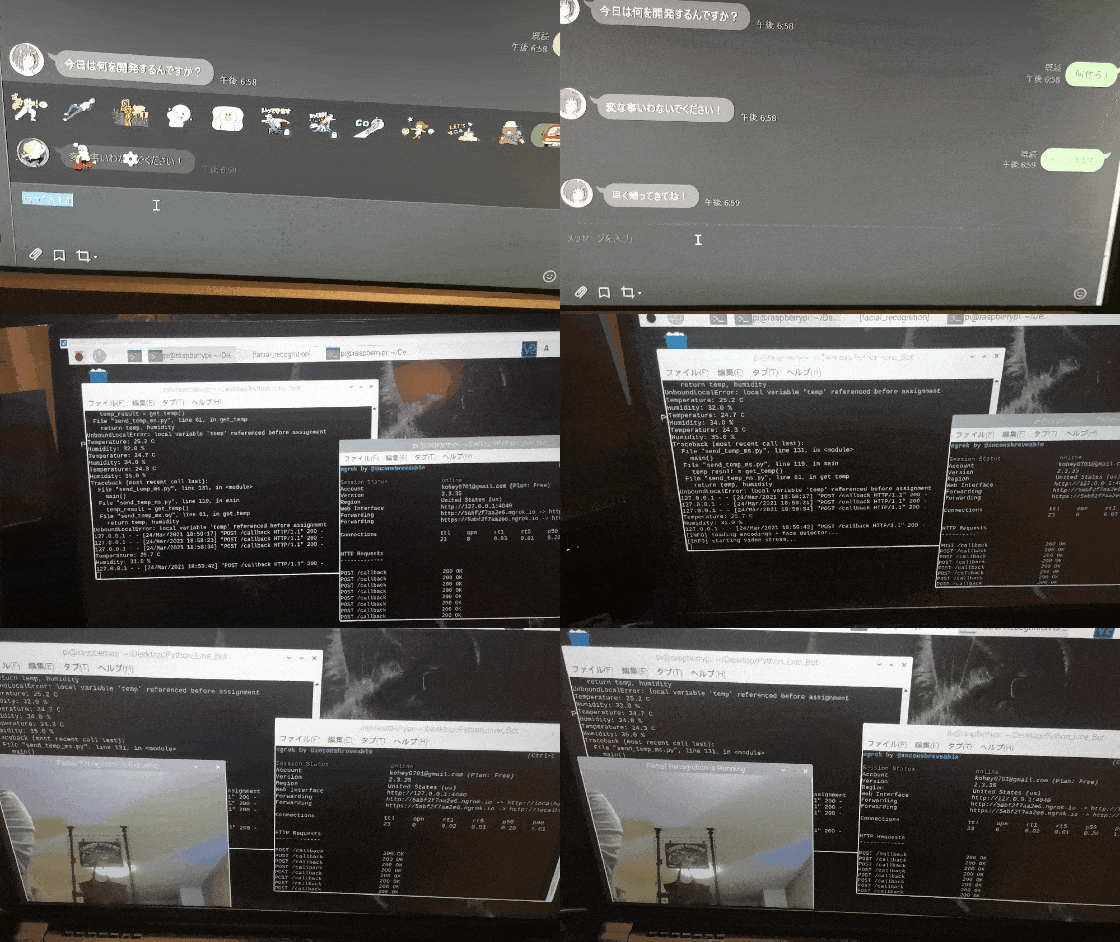
ちゃんとすぐに返事をしてくれて、facial_req_bot.pyが起動しました!!
で、顔を認識したら「お帰りなさい」と言ってくれます。
これで一人暮らしでも「お帰りなさい」してもらえるようになりました!不審者がいたら知らせてくれますね!(逆に知らせられたら怖すぎる)
おわりに
今回の工作を通じてPythonのプログラミングやWebAPIのデータの流れを見たり、OpenCVによる画像解析のコードに触れたりとラズパイでLinuxコマンドやシェルスクリプトに慣れたりと、幅広い技術に触れて勉強できました。
ラズパイは電子工作的アプローチが出来るので、PCで作るLineBotとはまた違った楽しみ方ができますね。
今回の工作は拡張が効くので今後も追加機能を開発しては実装してみたいと思います。
今回作ったLINEBOTをベースに、温湿度、気圧センサを使って機能拡張してみました!
ご興味のある方は宜しければ下記の記事も是非ご覧ください!
おまけ
2次元彼女風アイコンはこちらのサービスで作成して頂きました。
何がすごいって、既存のイラストがポンポン出てくるんじゃなくて、AIがリアルタイムでキャラクタを生成しているんです!
今回はAIの面白さを体験する趣旨の記事でもあるので、ついでにご紹介でした。
ちなみに今回出来た彼女(物理)の正体はこちら。
