Tryciclerとは
Trycyclerは、複数のロングリードのアセンブリを用いてゲノムアセンブリを行い、コンセンサスリードを生成するツール。
ゲノムデータからサブサンプリングを行い、複数のサブセットを抽出したり、複数の異なるロングリード用のアセンブラを用いることで、ロングリードのゲノムアセンブリにおけるエラーを解消している。
ゲノムアセンブリでおなじみのUnicyclerで「ロングリードのみアセンブリする場合は、Trycyclerのほうがアセンブリに優れているので、Trycyclerを推奨する」との表記がある。
インストールについて
Trycycler自体は、pipでインストールできる。
git clone https://github.com/rrwick/Trycycler.git
pip3 install ./Trycycler

 _______                               _
|__   __|                             | |
   | | _ __  _   _   ___  _   _   ___ | |  ___  _ __
   | || '__|| | | | / __|| | | | / __|| | / _ \| '__|
   | || |   | |_| || (__ | |_| || (__ | ||  __/| |
   |_||_|    \__, | \___| \__, | \___||_| \___||_|
              __/ |        __/ |
             |___/        |___/

Trycycler: a consensus long-read assembly tool

trycycler --version
Trycycler v0.3.3
実行手順について
How to run Trycyclerにて詳細に実行手順がまとめられている。本記事は、こちらを参考に書いている。
以下の順序で実行していく。
- ゲノムアセンブリの生成
- コンティグのクラスタリング
- コンティグの確認と調整
- 配列のマルチプルアライメント
- リードの分割
- コンセンサスリードの生成
- ショートリードを用いたPilon-polishing
1. ゲノムアセンブリの生成
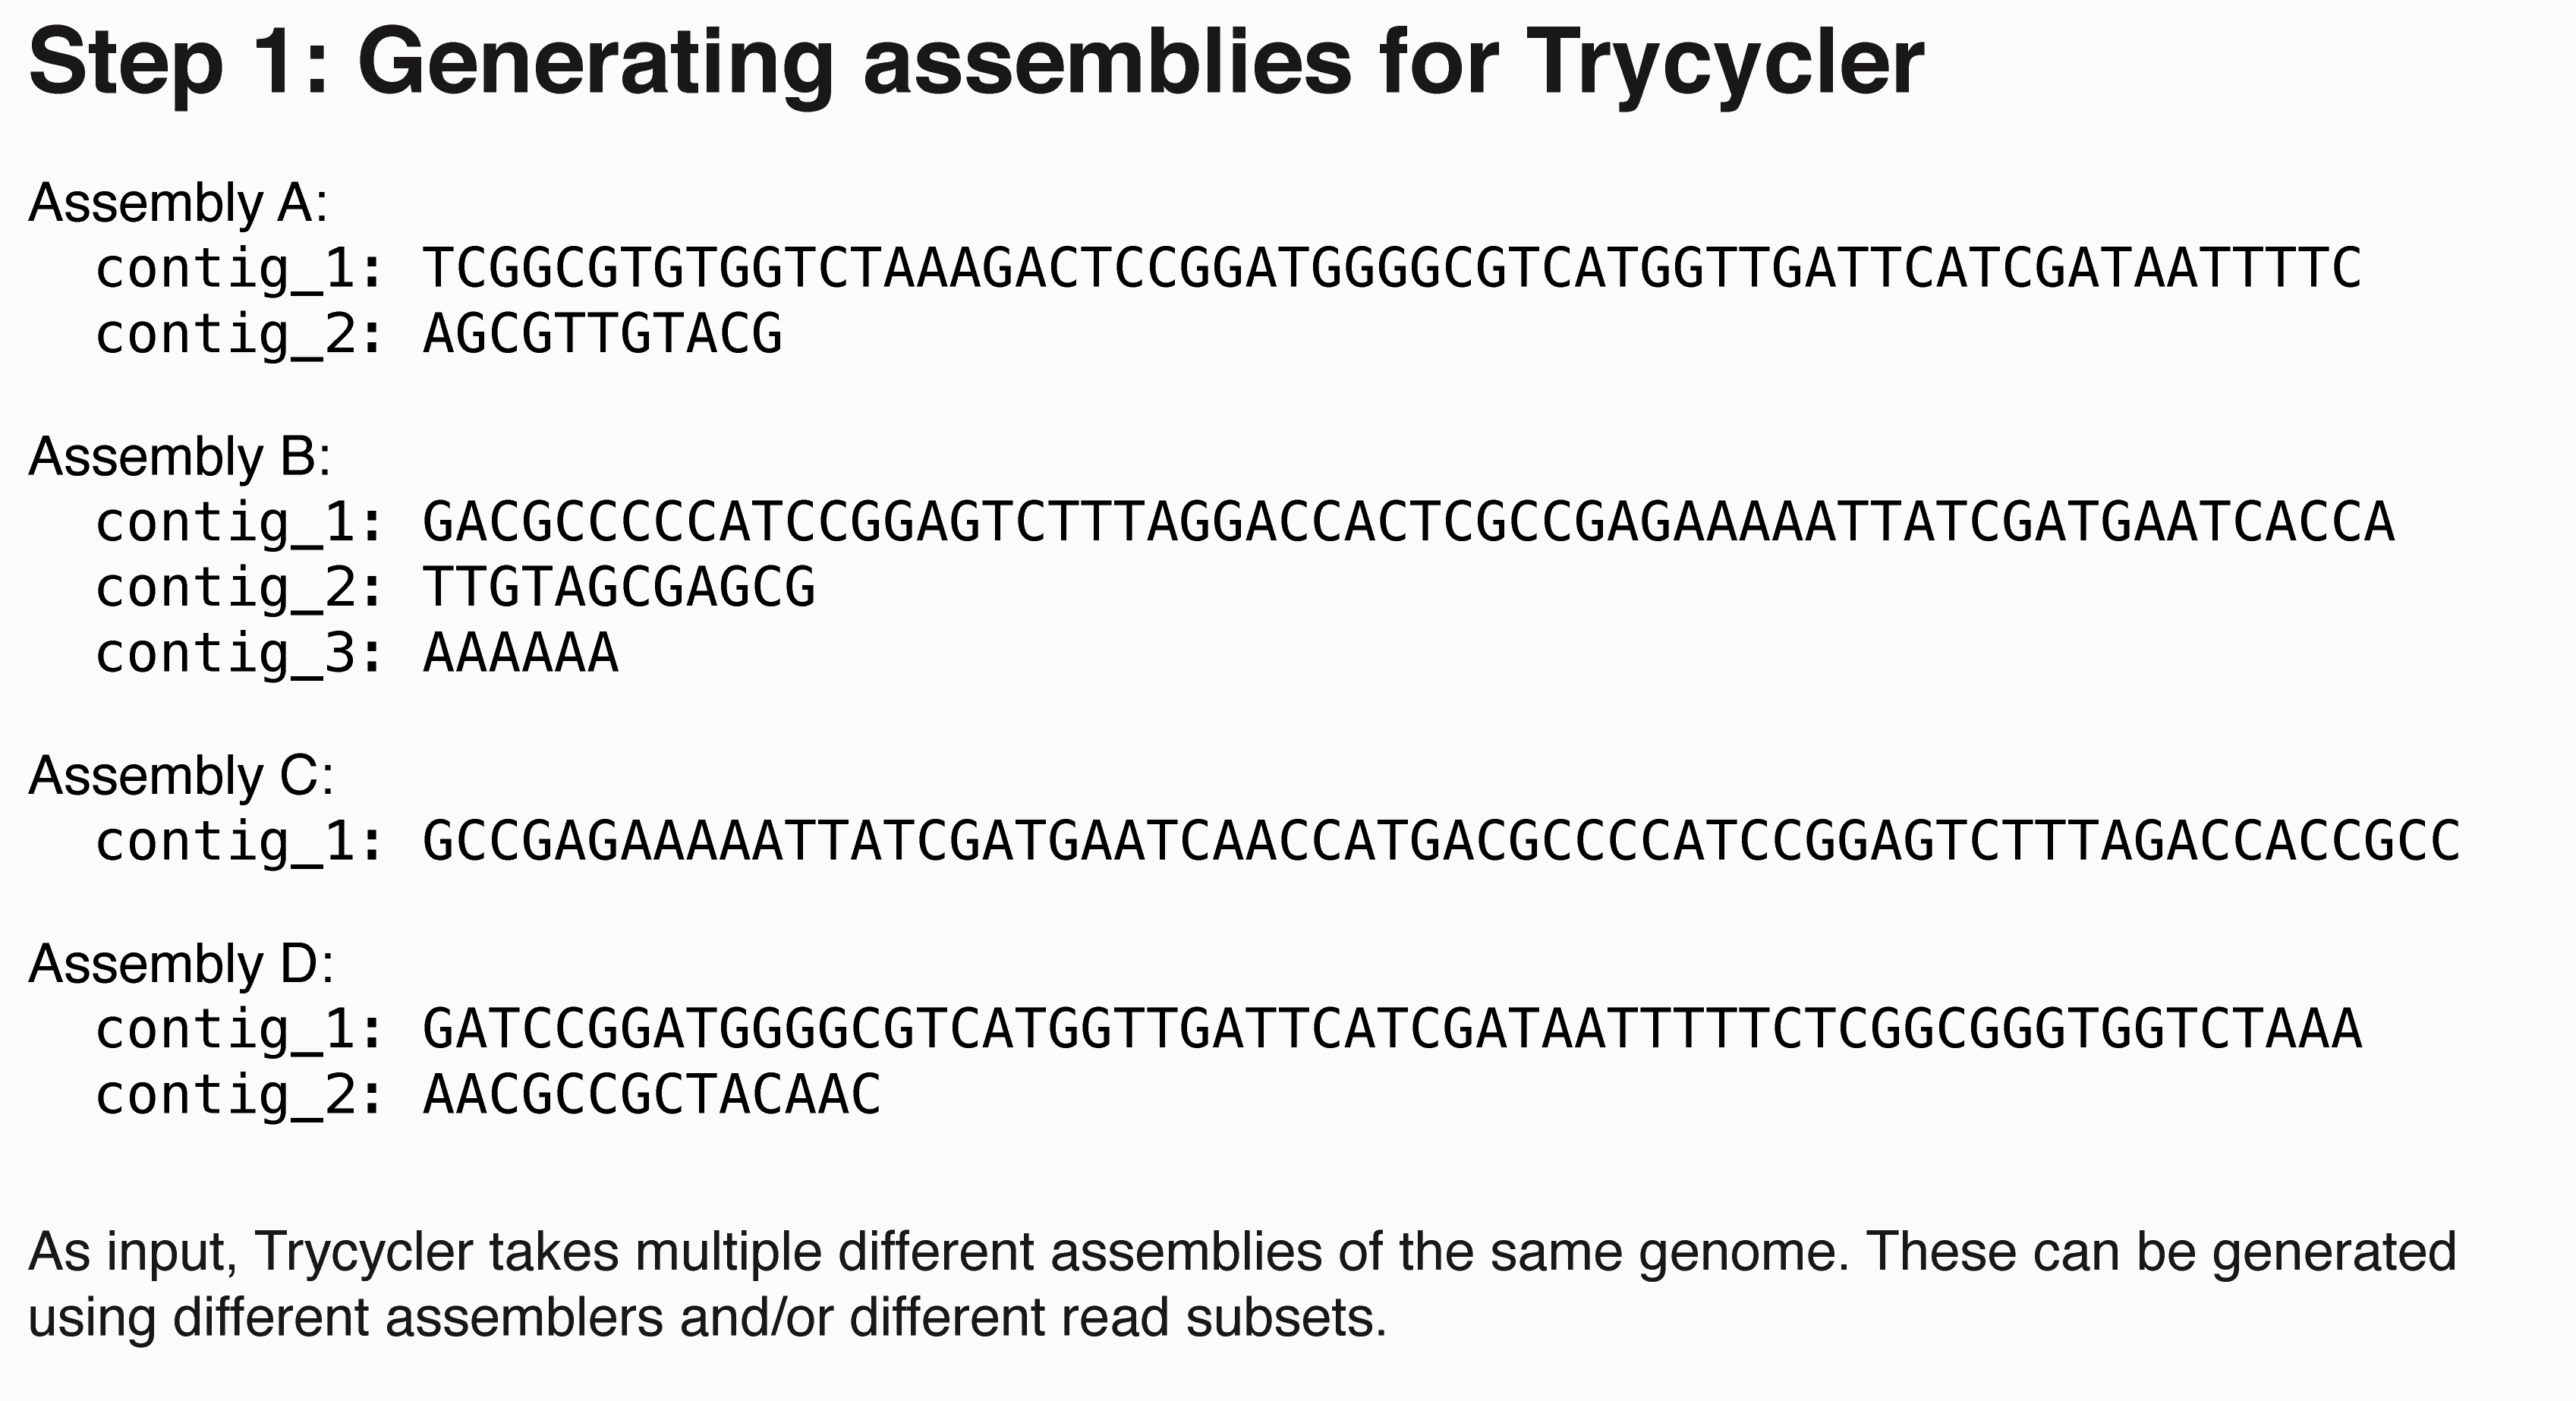
ここでは、Trycyclerに入力するためのゲノムアセンブリを作っていく。サブサンプリングしたリードのサブセットを、複数のアセンブラを用いて、アセンブリしていく。上の図のように、複数のサブセットからゲノムアセンブリのコンティグが生成される。
10個以下のアセンブリがあると良いと書いてある。
The goal is to have multiple assemblies (~10 is nice) which are reasonably independent of each other.
今回は、input_reads.fastq.gzというファイルを解析に用いると仮定する。
1.1. fastqファイルのQC
ここで、明らかに品質の悪い配列だけ除去する。1kbp以下の短い配列と、全配列中で下位5%に該当する品質が悪い配列を除去する。
read depthが深ければ、もっとQCを厳しくすることもできるが、配列が短いプラスミドが除去される可能性がある。そのため、リード長より、リードの品質に基づいてQCするのがよいそう。
filtlong --min_length 1000 --keep_percent 95 input_reads.fastq.gz > read.fastq
1.2. サブサンプリング
ここでは、QCしたread.fastqからサブサンプリングを実行し、複数のfastqを生成する。
この手順は、Trycyclerのコマンドで実行する。
trycycler subsample --reads reads.fastq --out_dir read_subsets
オプション
--count:サブサンプリングして出力するfastqファイルの数。
--genome_size:推定ゲノムサイズ。正確な値でなくても大丈夫らしい。
--min_read_depth:許容する最小のread depth。
--threads:使用するスレッド数。
サブサンプリングが終わると、read_subsets/sample_*.fastqに複数のfastqファイルが生成される。
1.3. 複数のロングリードアセンブラを用いたゲノムアセンブリ
ここで、サブサンプリングした12個のfastqファイルを3つのアセンブラに入力し、ゲノムアセンブリしていく。
チュートリアルどおり、今回はFlye、Minipolish、Ravenを用いた。
これらのアセンブラは、自分でインストールして利用できる形にしておく。(ツールのインストールが多く面倒だった、、、)
# 任意のスレッド数
threads=8
mkdir assemblies

flye --nano-raw read_subsets/sample_01.fastq --threads "$threads" --plasmids --out-dir assembly_01 && cp assembly_01/assembly.fasta assemblies/assembly_01.fasta && rm -r assembly_01
miniasm_and_minipolish.sh read_subsets/sample_02.fastq "$threads" > assembly_02.gfa && any2fasta assembly_02.gfa > assemblies/assembly_02.fasta && rm assembly_02.gfa
raven --threads "$threads" read_subsets/sample_03.fastq > assemblies/assembly_03.fasta && rm raven.cereal

flye --nano-raw read_subsets/sample_04.fastq --threads "$threads" --plasmids --out-dir assembly_04 && cp assembly_04/assembly.fasta assemblies/assembly_04.fasta && rm -r assembly_04
miniasm_and_minipolish.sh read_subsets/sample_05.fastq "$threads" > assembly_05.gfa && any2fasta assembly_05.gfa > assemblies/assembly_05.fasta && rm assembly_05.gfa
raven --threads "$threads" read_subsets/sample_06.fastq > assemblies/assembly_06.fasta && rm raven.cereal

flye --nano-raw read_subsets/sample_07.fastq --threads "$threads" --plasmids --out-dir assembly_07 && cp assembly_07/assembly.fasta assemblies/assembly_07.fasta && rm -r assembly_07
miniasm_and_minipolish.sh read_subsets/sample_08.fastq "$threads" > assembly_08.gfa && any2fasta assembly_08.gfa > assemblies/assembly_08.fasta && rm assembly_08.gfa
raven --threads "$threads" read_subsets/sample_09.fastq > assemblies/assembly_09.fasta && rm raven.cereal

flye --nano-raw read_subsets/sample_10.fastq --threads "$threads" --plasmids --out-dir assembly_10 && cp assembly_10/assembly.fasta assemblies/assembly_10.fasta && rm -r assembly_10
miniasm_and_minipolish.sh read_subsets/sample_11.fastq "$threads" > assembly_11.gfa && any2fasta assembly_11.gfa > assemblies/assembly_11.fasta && rm assembly_11.gfa
raven --threads "$threads" read_subsets/sample_12.fastq > assemblies/assembly_12.fasta && rm raven.cereal
実行が終了すると、assembly_00.fastaからassembly_11.fastaまでの12ファイルがそれぞれassembliesに出力される。
このタイミングで、Bandageを使って、12個のゲノムアセンブリが使えるものかを手動で判別した。データセットによっては、アセンブリが上手く行われず、Trycyclerの結果に影響を及ぼす可能性があるので、ここで確認して削除しておく。
12個のゲノムアセンブリがあるので、1-2個くらいは断片化していて品質が悪い場合は削除してしまっても問題なさそう。
2. コンティグのクラスタリング
ここで、さきほど元データをQCして生成したread.fastqを用いる。
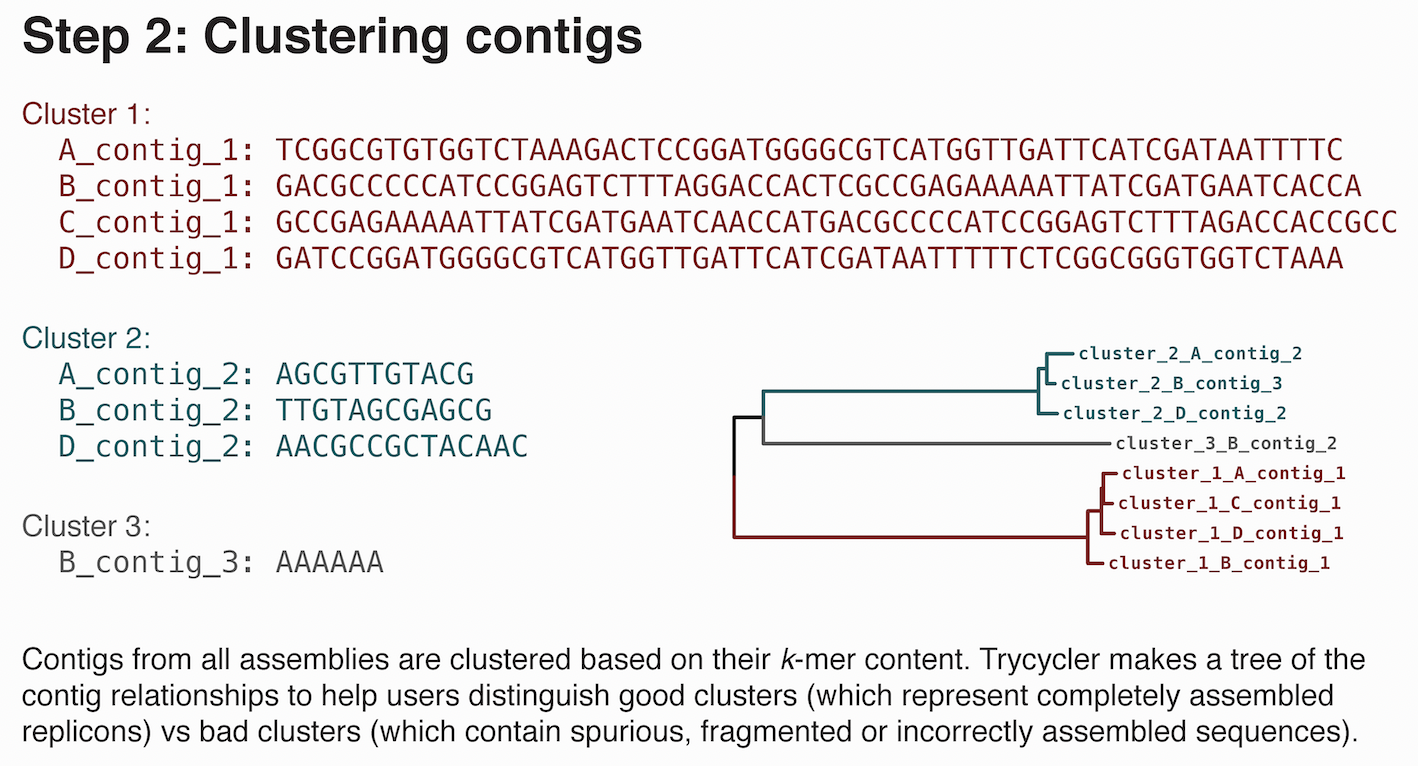
生成したゲノムアセンブリ内のコンティグを同一コピーごとのグループにクラスタリングする。ここで、誤ってアセンブリされたコンティグを認識して除去することもできる。
trycycler cluster --assemblies assemblies/*.fasta --reads reads.fastq --out_dir trycycler
オプション
--min_contig_len:任意の配列長以下のコンティグの削除。デフォルトは1,000。
--min_contig_depth:任意のread depth以下のコンティグを削除。
--distance:Mash distanceのしきい値。
--threads:スレッド数。
実行が終了すると、Mash distanceの行列データcontigs.phylipと距離行列から生成された系統樹contigs.newick、クラスターごとのディレクトリが生成される。
cluster_001やcluster_002など、クラスタリングされたコンティグがそれぞれ格納される。
3. コンティグの確認と調整
ここでは、クラスタリングされたコンティグが十分な類似性を持っているか(配列長が近いか、Mash distanceが小さいか)を確認する。
加えて、細菌のゲノムは環状なのでTrycyclerは他の各ゲノムアセンブリを参照して、配列を追加したり削除することで各コンティグ配列を環状化させる。環状化の修復の仕組みはHow circularisation repair worksに書いてある。
今回は、染色体ゲノム1本、プラスミドゲノム2本の計3本のコンティグがクラスタリングされたと想定する(cluster_001, cluster_002, cluster_003)。
以下のように、各クラスターのコンティグに対してコマンドを実行。
trycycler reconcile --reads reads.fastq --cluster_dir trycycler/cluster_001
trycycler reconcile --reads reads.fastq --cluster_dir trycycler/cluster_002
trycycler reconcile --reads reads.fastq --cluster_dir trycycler/cluster_003
オプション
- 一般設定
--linear:入力するコンティグが環状ではない場合。
--threads:スレッド数。
- 初期チェック
--max_mash_dist:Pairwise Mash distanceのしきい値。これを超えたら初期チェックに失敗する。
--max_length_diff:配列のいずれかがこれを超えるペアワイズ相対長係数を持っている場合、コンティグは初期チェックに失敗する。
- 環状化
--max_add_seq と --max_add_seq_percent:Trycyclerがコンティグを環状化させるために追加できる配列数と割合。
--max_trim_seq と --max_trim_seq_percent:Trycyclerがコンティグを環状化させるために削除できる配列数と割合。
- 最終チェック
--min_identity:ペアワイズの同一性のしきい値。
--max_indel_size:ペアワイズアライメントのインデルサイズのしきい値。
私が実行した際には、「hogehoge配列が開始端のギャップが大きすぎるため環状化できません」というエラーがいくつかのコンティグに対して発生した。
Error: failed to circularise sequence hogehoge because it contained too large of a start-end gap. You can either increase the value of the --max_add_seq/--max_add_seq_percent parameters or exclude the sequence altogether and try again.
加えて、配列の同一性が98%以下なので許容値を下回っているとのエラーも発生した。
Error: some pairwise identities are below the minimum allowed value of 98.0%. Please remove offending sequences or lower the --min_identity threshold and try again.
そのため、いくつかの品質が悪いコンティグファイルを移動させた。各クラスター内のコンティグが複数あるため、環状化できないコンティグは2-3個であれば削除してしまっても問題がないと考えている。
mkdir bad_contigs

mv hogehoge1.fasta ./bad_contigs
mv hogehoge2.fasta ./bad_contigs
mv hogehoge3.fasta ./bad_contigs
コンティグの理想的な個数
Ideal number of contigsによると、Trycycler reconcileを実施したあとに、4-8個のコンティグがクラスターごとに残っているのが理想。それ以下だと、コンセンサス配列に影響を与え、逆にコンティグが多すぎてもメリットはほぼ無い。
4. 配列のマルチプルアライメント
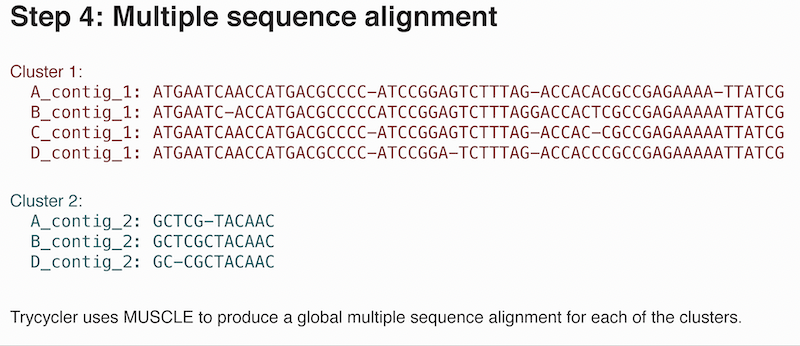
クラスターごとに配列のマルチプルアライメントを行う。
trycycler msa --cluster_dir trycycler/cluster_001
trycycler msa --cluster_dir trycycler/cluster_002
trycycler msa --cluster_dir trycycler/cluster_003
オプション
--kmer:パーティションを分割するためのk-merサイズ。
--step:パーティションを分割するためのステップサイズ。
--threads:スレッド数。MUSCLEで使用。
settingより、パラメータの変更は必要なさそう。
You likely won't need to adjust the partitioning parameters (--kmer, --step and --lookahead)
5. リードの分割
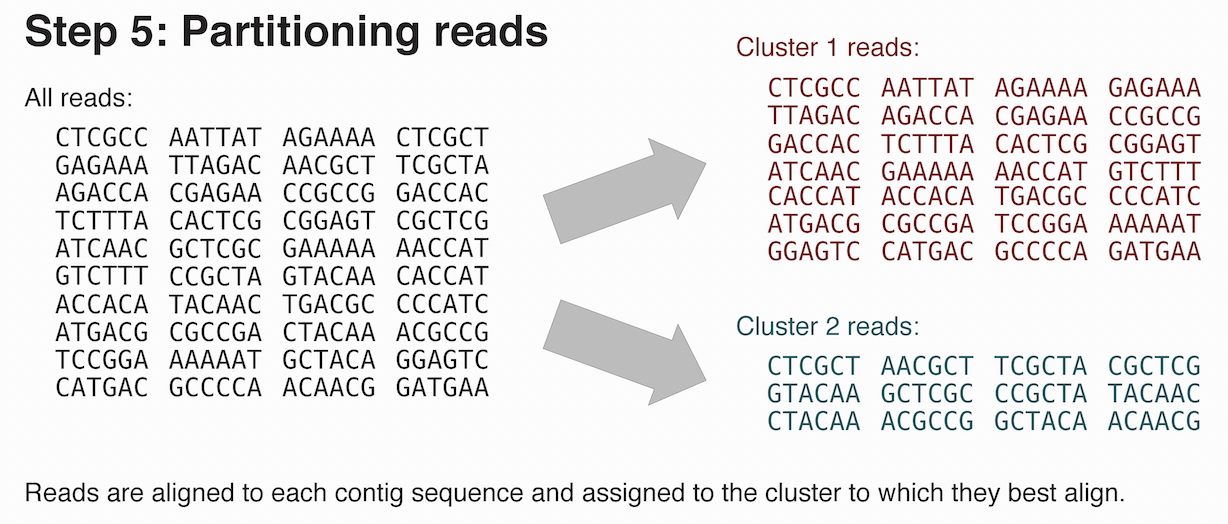
「3. コンティグの確認と調整」にて、各クラスターのコンティグ配列を調整したので、ここでは、クラスター間でのリード分割を実施する。それぞれのリードは、最も整列しているクラスタに割り当てられ、そのクラスターのディレクトリに保存される。
このコマンドは、クラスターごとに実行するのではなく、ゲノム全体に一回実行する。
trycycler partition --reads reads.fastq --cluster_dirs trycycler/cluster_*
オプション
--min_aligned_len:これより少ない塩基数のリードは無視される。
--min_read_cov:これより少ないカバレッジのリードは無視される。
--threads:スレッド数。
6. コンセンサスリードの生成
最後に、各クラスターのコンセンサスコンティグ配列を生成する。
trycycler consensus --cluster_dir trycycler/cluster_001
trycycler consensus --cluster_dir trycycler/cluster_002
trycycler consensus --cluster_dir trycycler/cluster_003
オプション
--linear:入力するコンティグが環状ではない場合。
--min_aligned_len:これより少ない塩基数のリードは無視される。
--min_read_cov:これより少ないカバレッジのリードは無視される。
--threads:スレッド数。
出力ファイル
各クラスターのディレクトリに7_final_consensus.fastaが出力されるため、コンセンサス配列を一つにまとめる。
cat trycycler/cluster_*/7_final_consensus.fasta > trycycler/consensus.fasta
consensus.fastaが出力される。
ここで、Trycyclerのパイプライン工程は終了!!
以下は、任意で実行。
7. ショートリードを用いたPilon-polishing
Illuminaなどのペアエンドのショートリード配列も持っている場合は、Pilonによるpolishingも実行できる。
私は、TrimGalore!でQCしたペアエンドのショートリードfastqファイルを用いた。
QC後のfastqファイルを1.fastq.gzと2.fastq.gzとする。
7.1. アライメントをinsert sizeの推定
ペアエンドの挿入サイズ(フラグメント長)はリードセット間で異なるため、Bowtie2にて最初にアライメントを行うことで、insert sizeの推定値を得る。
bowtie2-build consensus.fasta consensus.fasta
bowtie2 -1 1.fastq.gz -2 2.fastq.gz -x consensus.fasta --fast --threads 16 -I 0 -X 1000 -S insert_size_test.sam
以下のPythonコードで、私のデータセットの場合は1stパーセンタイル (1%)と99thパーセンタイル (99%)のインサートサイズ(アダプター配列の間のゲノム配列長)がそれぞれ242、646だと判明した。
import math

def get_percentile(sorted_list, percentile):
    rank = int(math.ceil(percentile / 100.0 * len(sorted_list)))
    if rank == 0:
        return sorted_list[0]
    return sorted_list[rank - 1]

insert_sizes = []
with open('insert_size_test.sam', 'rt') as sam:
    for sam_line in sam:
        try:
            sam_parts = sam_line.split('\t')
            sam_flags = int(sam_parts[1])
            if sam_flags & 2:  # read mapped in proper pair
                insert_size = int(sam_parts[8])
                if insert_size > 0:
                    insert_sizes.append(insert_size)
        except (ValueError, IndexError):
            pass

insert_sizes = sorted(insert_sizes)
insert_size_1st = get_percentile(insert_sizes, 1.0)
insert_size_99th = get_percentile(insert_sizes, 99.0)
print(insert_size_1st, insert_size_99th)
7.2. Pilon polishingの最初のラウンド
shell変数の定義。
before=consensus
after=round_1
threads=16      # set to the number of alignment threads you want to use
insert_min=242  # set to the insert size 1st percentile
insert_max=646  # set to the insert size 99th percentile
リードのアライメントを実行する。
bowtie2-build "$before".fasta "$before".fasta

# ペアのあるリード
bowtie2 -1 1.fastq.gz -2 2.fastq.gz -x "$before".fasta --threads "$threads" -I "$insert_min" -X "$insert_max" --local --very-sensitive-local | samtools sort > illumina_alignments.bam

# ペアのないリード
bowtie2 -U u.fastq.gz -x "$before".fasta --threads "$threads" --local --very-sensitive-local | samtools sort > illumina_alignments_u.bam

samtools index illumina_alignments.bam
samtools index illumina_alignments_u.bam
Pilonの実行。
pilon --genome "$before".fasta --frags illumina_alignments.bam --unpaired illumina_alignments_u.bam --output "$after" --changes

rm *.bam *.bam.bai *.bt2

# fastaファイルのヘッダーから"_pilon"を削除
sed -i 's/_pilon//' "$after".fasta
7.3. Pilon polishingの2回目以降のラウンド
$beforeと$afterの変数を定義し直して、再度実行。
before = round_1
after = round_2
まとめ
ロングリードのゲノムアセンブラはここ数年で増加してきて、とても精度も高くなってきた。しかし、配列の環状化に失敗したり、大きなミスアセンブリも起きることがある。
サブセットを作成し、複数のアセンブラから得られた複数のゲノムアセンブリからコンセンサス配列を得るTrycyclerは信頼度の高いアセンブリを生成することができる。
ただ、Trycyclerは複数の手順を踏む必要があり、途中で手動でのチェックが入ったりなど、完全に自動化されているわけではない。
私は、今回NanoporeとDNBseqでシーケンスされた新規の細菌ゲノム配列を使ってTrycyclerを試したが、もともとのリードのクオリティが高かったため、ロングリードだけでのアセンブリと、ショートリードでpolishingを行ったときでゲノムアセンブリに差が殆どなかった。
また、同時にUnicyclerでハイブリッドアセンブリを行ったデータとも比較したが、ほとんど同様のアセンブリになった。
Trycyclerが公開しているDemo datasetsには、クオリティが低いデータセットもあるので、この場合はTrycyclerでの解析がとても効果的なのだと思う。
