はじめに
XCodeでプロジェクトを作成すると必ず存在するMain.storyboard。
今回はMain.storyboardにViewControllerをいくつも置いて開発をしている初学者向けにこの記事を書きました。
なぜMain.storyboardを消すのか
デフォルトで入っているものだし、画面遷移の流れを追いやすいのになぜ消す必要があるのか、と私も最初は思っていました。
一般的にチームで開発を行う場合、何人もの人が同時にプロジェクトを編集します。
その際全員が別のViewControllerをいじっていたとしても、そのViewControllerが全てMain.storyboard上にあったらマージする時にコンフリクトが起きてしまう可能性が高いのです。
その対策としてViewControllerとstoryboardを一対一で作成している企業が多いようです。
これなら複数人でブランチを切って開発を進めていっても該当するstoryboard内でしかコンフリクトは起きませんよね。
では実際にやってみましょう。
環境
・macOS Big Sur バージョン11.2.3
・XCode 12.4
・Swift5.3.2
① Main.storyboardを削除
Move to trashしちゃってください。
元からあるViewControllerも不要なのでMove to trash
② 新しくstoryboardとViewControllerを作成
File → New Fileからstoryboardを作成し、ViewControllerを配置します。
Is initial ViewControllerにチェックを入れるのを忘れずに!
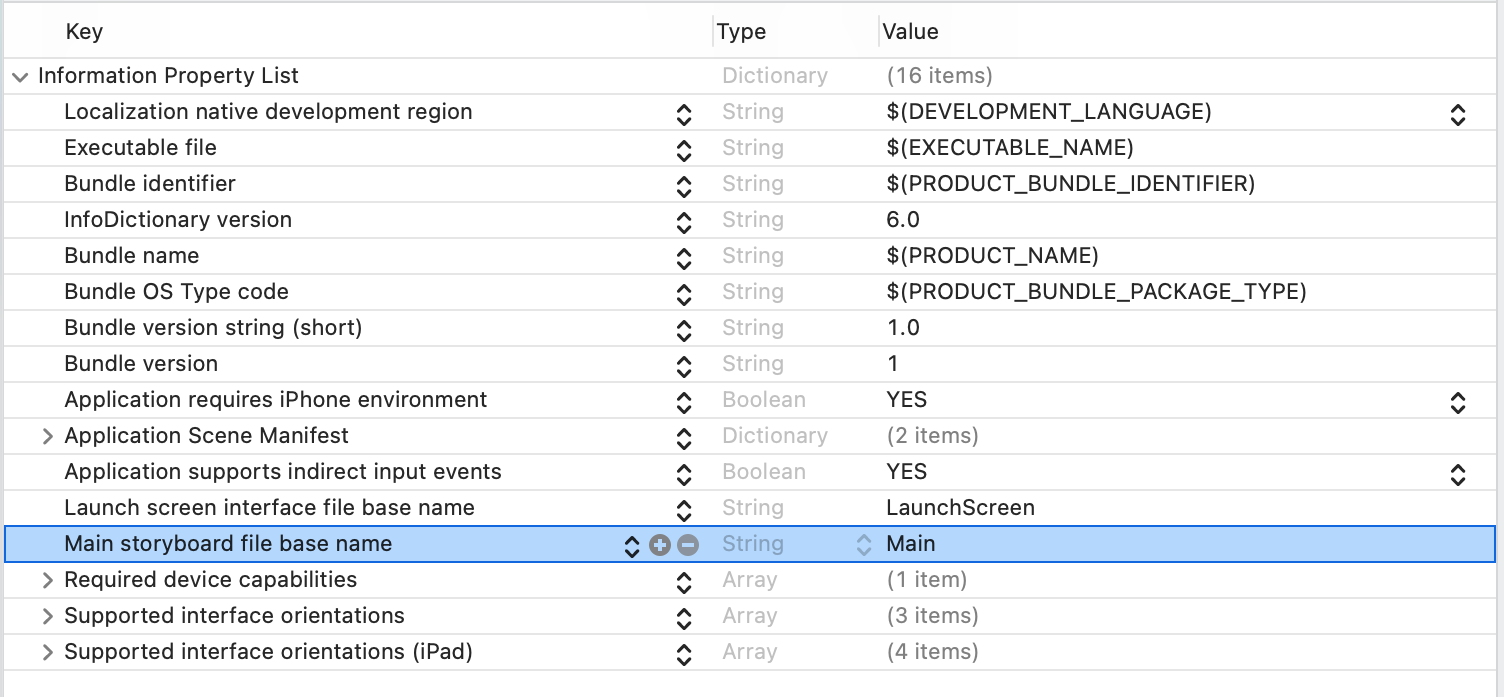
③ Info.plistからMainを削除
今のままでは起動経路がMain.storyboardになっているので、その記述を削除します。
Info.plist内のMainと書いてあるものを−ボタンを選択して消してください。

④ SceneDelegateで起動経路を設定
アプリ起動時の初期画面を条件に応じて切り替えたり、初回起動時に何かしたい場合に対応するため、SceneDelegateで起動経路を設定します。
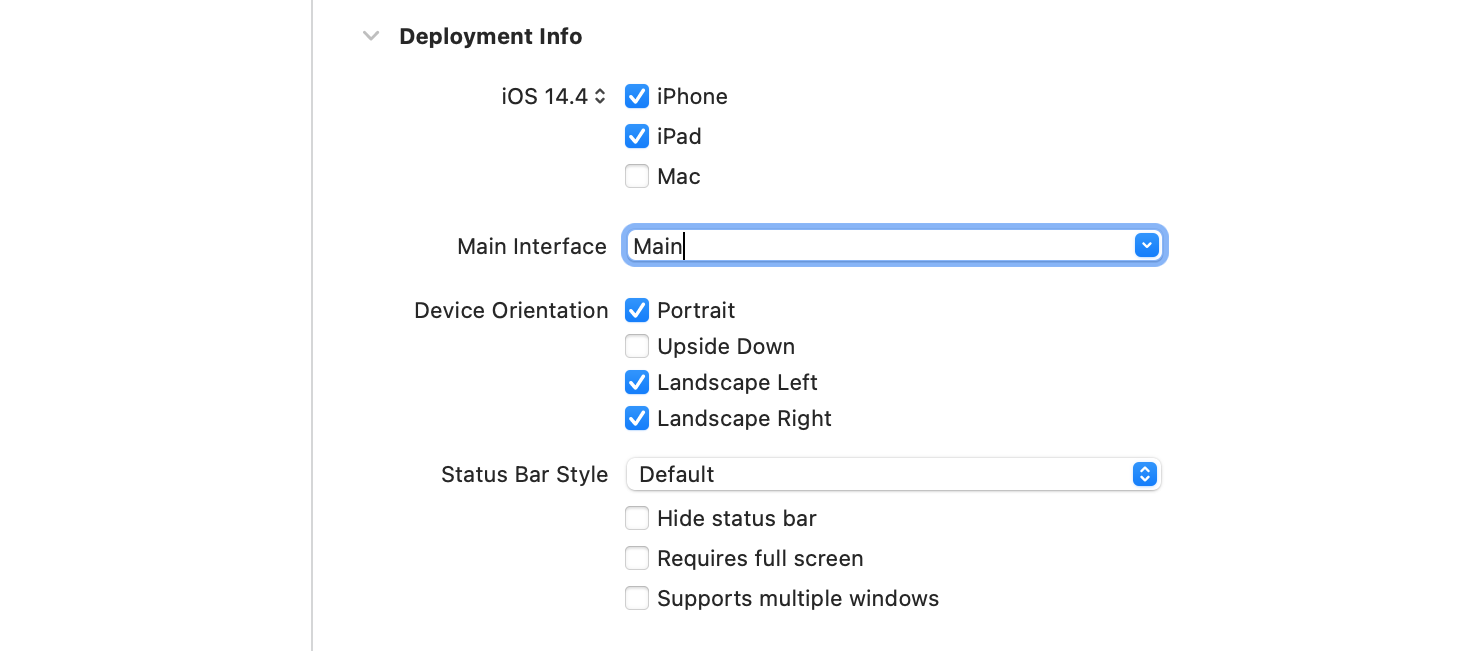
Project→GeneralのMain InterfaceのMainと書かれている箇所を新しく作成したViewControllerにすることでも起動経路を設定できますが、SceneDelegateで設定する場合はこちらは使用しないので削除して空欄にしてください。

次に、SceneDelegateに以下のようにコードを書きます。
import UIKit

class SceneDelegate: UIResponder, UIWindowSceneDelegate {

    var window: UIWindow?

    func scene(_ scene: UIScene, willConnectTo session: UISceneSession, options connectionOptions: UIScene.ConnectionOptions) {
        guard let windowScene = (scene as? UIWindowScene) else { return }

        //Windowをインスタンス化
        window = UIWindow(windowScene: windowScene)

        //rootViewControllerに指定したいControllerを指定
        //StoryboardからViewControllerを生成
        window?.rootViewController = UIStoryboard(name: "FirstView", bundle: nil).instantiateInitialViewController()
        window?.makeKeyAndVisible()
    }
以上で完了です。実行すると指定したViewControllerが表示されるはずです。
他の画面もStoryboardとViewControllerを一対一で作成し、コードで画面遷移を行うと便利です!
segueを使って画面遷移をしたい場合はStoryboardReferenceを使用すると良いです。
参考記事
【Swift】プロジェクト作成時に生成されるMain.storyboardを削除する
[Xcode 11でStoryboardを使わずに開発する]
(https://medium.com/@shiba1014/xcode-11%E3%81%A7storyboard%E3%82%92%E4%BD%BF%E3%82%8F%E3%81%9A%E3%81%AB%E9%96%8B%E7%99%BA%E3%81%99%E3%82%8B-d43bd95b13e5)