検証環境
Amazon EC2 上に2014年11月構築
centos version 6.5 64bit
postfix-2.6.6
PHP 5.5.19
Apache/2.2.15 (CentOS)
mysql Ver 14.14 Distrib 5.1.73
Postfix, mysqlはインストール済みです。
またSelinuxをOFFにし、iptablesも無効化しています。
Vimbadminのインストール
VimbadminはPHPのバージョンが5.4以降推奨となっています。
現在のCentOS6.5でyumパッケージで取得できるPHPはversion 5.3です。
yumレポジトリの設定
そこでこちらに記載のの手順を参考にし、
remiのレポジトリを設定、version 5.5のパッケージを取得できるようにします。
CentOSにPHP5.5をインストール
http://qiita.com/pakiln/items/bcddcdd96e94dab96873
PHPのインストール
基本的にはこちらの本家のインストール手順に従ってセットアップできます。
https://github.com/opensolutions/ViMbAdmin/wiki/Installation
ただこちらはUbuntu向けですので、一部CentOS向けに変更して記載します。
yumパッケージのインストールは以下になります。
yum -y install --enablerepo=remi --enablerepo=remi-php55 php php-mbstring php-cgi php-mcrypt php-memcache php-json php-mysql php-gettext
インストール先のパスを指定します。
export INSTALL_PATH=/srv/vimbadmin
PHP Composerをインストールします。
curl -sS https://getcomposer.org/installer | php
mv composer.phar /usr/local/bin/composer
chmod 755 /usr/local/bin/composer
gitでVimbadminをとってきてインストールします。
yum -y install git
git clone https://github.com/opensolutions/ViMbAdmin.git $INSTALL_PATH
cd $INSTALL_PATH
composer install --dev

chmod -R 777 $INSTALL_PATH/var
データベースを作成します。
CREATE DATABASE `vimbadmin`;
grant all privileges on vimbadmin .* to vimbadmin@localhost identified by 'password';
FLUSH PRIVILEGES;
設定ファイルのデータベース部分を書き換えます。
resources.doctrine2.connection.options.driver   = 'pdo_mysql'
resources.doctrine2.connection.options.dbname   = 'vimbadmin'
resources.doctrine2.connection.options.user     = 'vimbadmin'
resources.doctrine2.connection.options.password = 'password'
resources.doctrine2.connection.options.host     = 'localhost'
テーブルを作成します。
cd $INSTALL_PATH
./bin/doctrine2-cli.php orm:schema-tool:create
apacheの設定ファイルを修正します。
<Directory "/var/www/html">

#
# Possible values for the Options directive are "None", "All",
# or any combination of:
#   Indexes Includes FollowSymLinks SymLinksifOwnerMatch ExecCGI MultiViews
#
# Note that "MultiViews" must be named *explicitly* --- "Options All"
# doesn't give it to you.
#
# The Options directive is both complicated and important.  Please see
# http://httpd.apache.org/docs/2.2/mod/core.html#options
# for more information.
#
#    Options Indexes FollowSymLinks
    Options Indexes FollowSymLinks ExecCGI

#
# AllowOverride controls what directives may be placed in .htaccess files.
# It can be "All", "None", or any combination of the keywords:
#   Options FileInfo AuthConfig Limit
#
#    AllowOverride None
    AllowOverride All
apacheの設定ファイルを作成します。
Alias /vimbadmin /srv/vimbadmin/public

<Directory /srv/vimbadmin/public>
    Options FollowSymLinks
    AllowOverride None

    # For Apache <= 2.3:
    Order allow,deny
    allow from all

    # For Apache >= 2.4
    # Require all granted

    SetEnv APPLICATION_ENV production

    RewriteEngine On
    RewriteCond %{REQUEST_FILENAME} -s [OR]
    RewriteCond %{REQUEST_FILENAME} -l [OR]
    RewriteCond %{REQUEST_FILENAME} -d
    RewriteRule ^.*$ - [NC,L]
    RewriteRule ^.*$ /vimbadmin/index.php [NC,L]
    # RewriteRule ^.*$ /smtpconf/index.php [NC,L]
</Directory>
httpdを再起動します。
これでインストールはおしまいです。さっそくhttp://localhost/vimbadmin にアクセスしてみます。
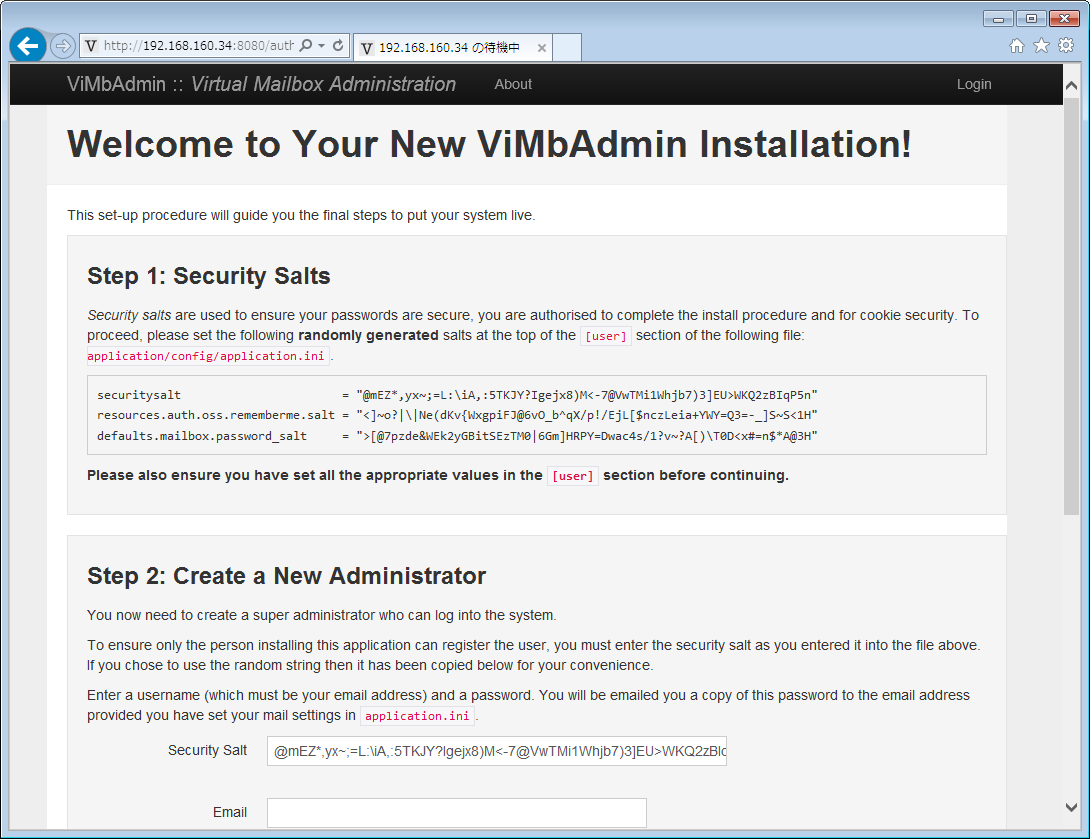
セキュリティソルトを表示されているものに修正します。
[user]


;;;;;;;;;;;;;;;;;;;;;;;;;;;;;;;;;;;;;;;;;;;;;;;;;;;;;;;;;;;;;;;;;;;;;;;;;;;
; Installation Keys and Salts

;securitysalt                       = ""
;resources.auth.oss.rememberme.salt = ""
;defaults.mailbox.password_salt     = ""
securitysalt                       = "@mEZ*,yx~;=L:\iA,:5TKJY?Igejx8)M<-7@VwTMi1Whjb7)3]EU>WKQ2zBIqP5n"
resources.auth.oss.rememberme.salt = "<]~o?|\|Ne(dKv{WxgpiFJ@6vO_b^qX/p!/EjL[$nczLeia+YWY=Q3=-_]S~S<1H"
defaults.mailbox.password_salt     = ">[@7pzde&WEk2yGBitSEzTM0|6Gm]HRPY=Dwac4s/1?v~?A[)\T0D<x#=n$*A@3H"
設定したセキュリティソルトを使い、管理者用のアカウントを作成します。
security salt :
e-mail : postmaster@example.com
passowrd : test!123
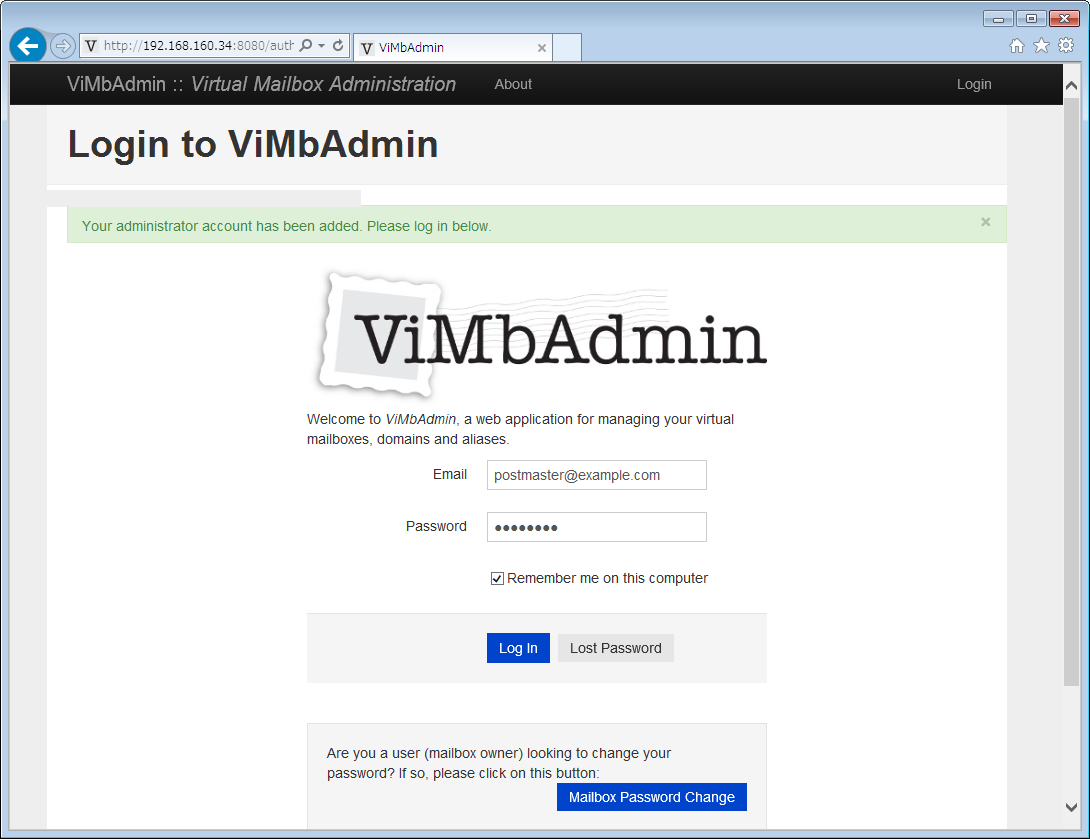
ログインします。
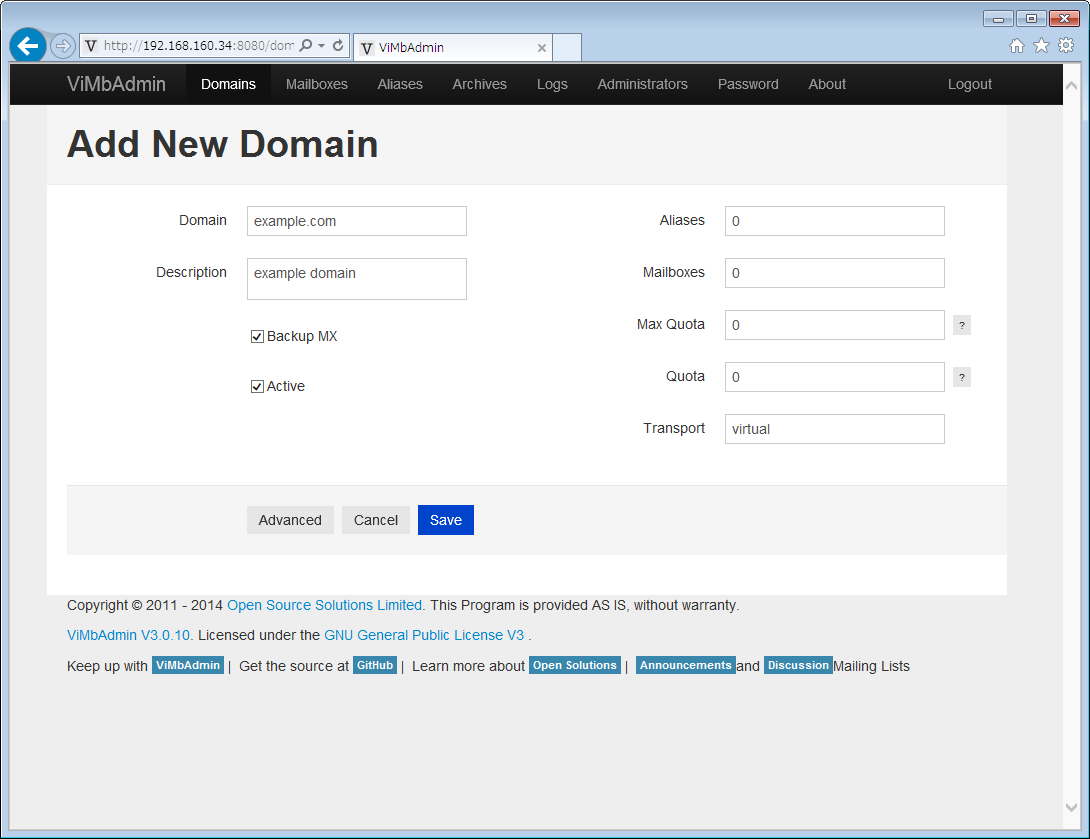
ドメインの作成。
ドメインタブを選択し、右上の+ボタンを押します。

ドメイン作成画面です。
終わりに
GUIが今風でかっこいいです。
以下の機能も使えるようです。
1.ユーザーでログインしてパスワード変更
2.メールアカウントの削除
削除時に同時にアカウントのメールボックスを削除することも、残すこともできます。