背景
お試しでreactを触ってみたところ、入力フォームで、各フォーム毎に State を管理すると大変だと思うことがありました。
ここら辺スッキリ書けるといいなと思って調べてみて、いくつか方法あったので学習がてらメモで残します。
簡単なデモ
シンプルなタスク管理アプリを想定します。
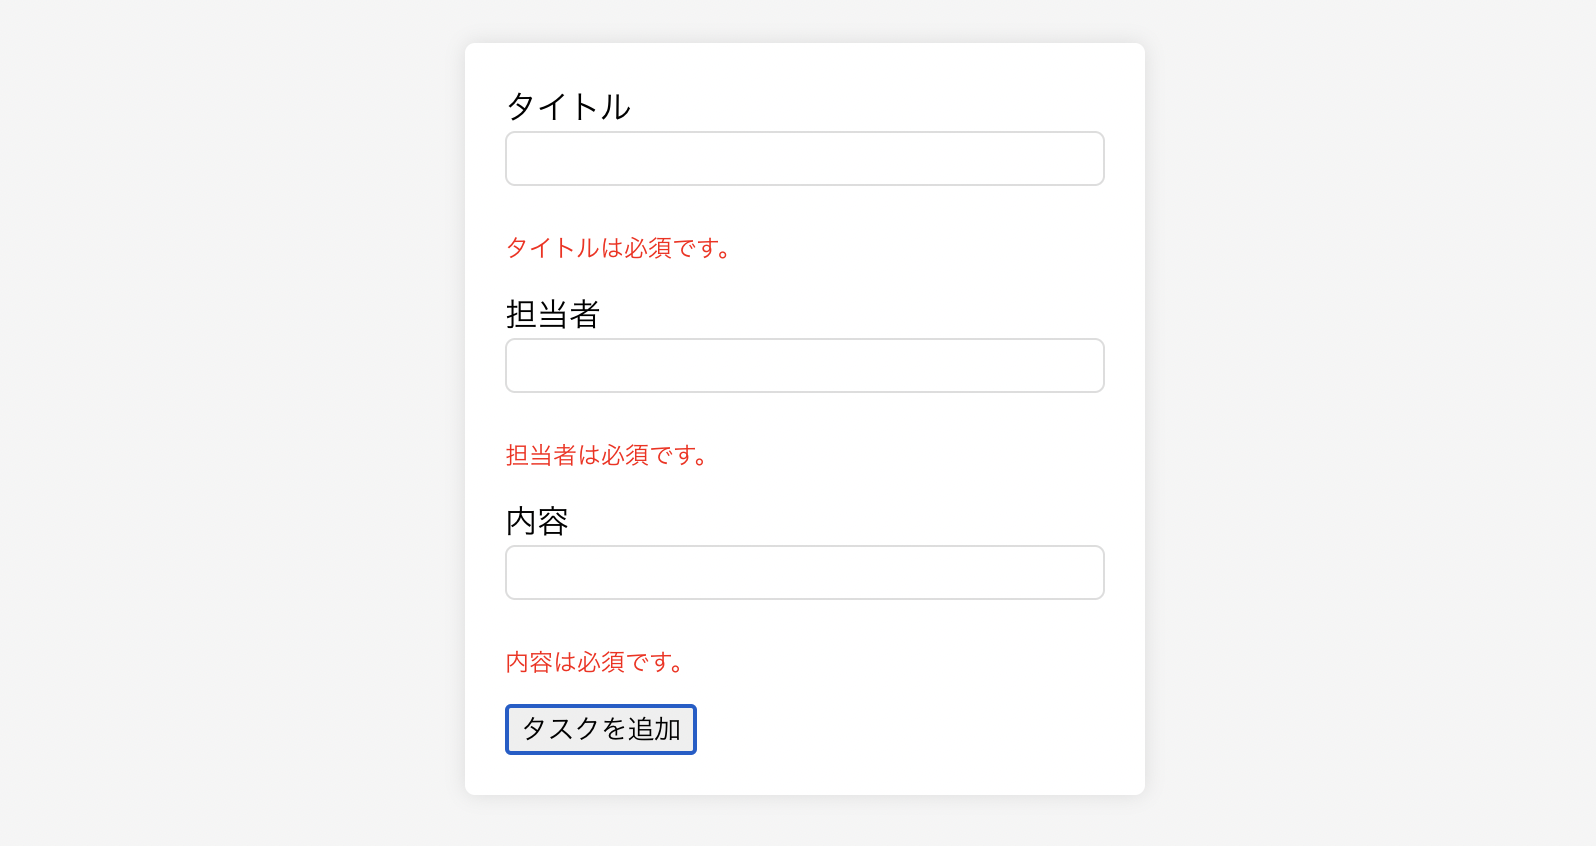
タスクのタイトル、担当者、内容を入力して、list化するだけの簡単なアプリです。
画像荒くてごめんなさい
useState地獄
この簡単なタスクの仕様でも、タイトル、担当者、内容についてステートを管理しないといけないのが目に見えています。
useState で管理したコードが以下になります。
上流のコンポーネントから受け取ったaddTodoを使用してタスクを追加します。
import React, { useState } from "react";
import { Todo } from "../type";

interface TodoFormProps {
  addTodo: (todo: Todo) => void;
}

const TodoForm = ({ addTodo }: TodoFormProps) => {

  const [title, setTitle] = useState("");
  const [personInCharge, setPersonInCharge] = useState("");
  const [content, setContent] = useState("");

  const handleSubmit = (e: React.FormEvent<HTMLFormElement>) => {
    e.preventDefault();

    addTodo({
      title: title,
      personInCharge: personInCharge,
      content: content,
      isCompleted: false,
    });
    setTitle("");
    setPersonInCharge("");
    setContent("");
  };

  return (
    <form onSubmit={handleSubmit}>
      <label>タイトル</label>
      <input
        type="text"
        className="input"
        value={title}
        onChange={(e) => setTitle(e.target.value)}
      />

      <label>担当者</label>
      <input
        type="text"
        className="input"
        value={personInCharge}
        onChange={(e) => setPersonInCharge(e.target.value)}
      />

      <label>内容</label>
      <input
        type="text"
        className="input"
        value={content}
        onChange={(e) => setContent(e.target.value)}
      />
      <button type="submit">タスクを追加</button>
    </form>
  );
};

export default TodoForm;
今は3つしかタスクのプロパティがないのでそこまで煩雑ではないですが、
実際のフォームではもっとプロパティがあるでしょうし、
バリデーションロジックやらその他の関数で溢れかえるはずです。
そして増えたプロパティを1個ずつuseState で管理するのは冗長な気がする...
set関数を呼び出したり、送信処理、リセット処理など、処理がDRYではないですね
だったら、プロパティをまとめたオブジェクトとして管理した方が見やすくない?
一つのオブジェクトとして管理する
で、Todo を以下のような感じの1つのオブジェクトにしてみる。
デフォルト値も予め決めておくことで、フォームをリセットしたりする時に便利。
   const defaultTodo = {
    title: "",
    personInCharge: "",
    content: "",
    isCompleted: false,
  };

  const [todo, setTodo] = useState<Todo>(defaultTodo);
State の更新処理も共通なので以下のようなメソッドも作成できる。
  const handleChange = (e: React.ChangeEvent<HTMLInputElement>) => {
    const { name, value } = e.target;

    setTodo((prevTodo) => ({
      ...prevTodo,
      [name]: value,
    }));
  };
以下の部分では、元のTodoオブジェクトをスプレッド演算子でコピーしたあと、変化のあったプロパティのみを更新しています。
{
  ...prevTodo,
  [name]: value,
}
すると、コード全体は以下のようになります。
import React, { useState } from "react";
import { Todo } from "../type";

interface TodoFormProps {
  addTodo: (todo: Todo) => void;
}

const TodoForm = ({ addTodo }: TodoFormProps) => {
  const defaultTodo: Todo = {
    title: "",
    personInCharge: "",
    content: "",
    isCompleted: false,
  };

  const [todo, setTodo] = useState<Todo>(defaultTodo);
  const reset = () => setTodo(defaultTodo);

  const handleChange = (e: React.ChangeEvent<HTMLInputElement>) => {
    const { name, value } = e.target;

    setTodo((prevTodo) => ({
      ...prevTodo,
      [name]: value,
    }));
  };

  const handleSubmit = (e: React.FormEvent<HTMLFormElement>) => {
    e.preventDefault();
    addTodo({ ...todo });
    reset();
  };

  return (
    <form onSubmit={handleSubmit}>
      <label>タイトル</label>
      <input
        type="text"
        name="title"
        className="input"
        value={todo.title}
        onChange={handleChange}
      />

      <label>担当者</label>
      <input
        type="text"
        name="personInCharge"
        className="input"
        value={todo.personInCharge}
        onChange={handleChange}
      />

      <label>内容</label>
      <input
        type="text"
        name="content"
        className="input"
        value={todo.content}
        onChange={handleChange}
      />
      <button type="submit">タスクを追加</button>
    </form>
  );
};

export default TodoForm;
見ての通り、単純な入力フォームエリアのみで構成されていれば冗長なコードを減らすことができます。
また、こうしておくと、新しいプロパティが増えても、入力エリアとデフォ値しか触ることがないでしょう。
バリデーションを頑張ってみるとどうなるか?
オブジェクトにまとまったので、エラーオブジェクトも一つで管理してみよう。
以下のようなエラーオブジェクトを作ることを想定してみる
    const [errors, setErrors] = useState<Record<string, string>>({});

    const errors = {
        'title': 'タイトルは必須です',
        'personInCharge': '担当者は必須です',
        'content': '内容は必須です',
    }
実装は以下のようになる。
valid関数で、エラーの有無を検査できるようにしました。
エラーオブジェクトを生成し、オブジェクトの中身があるなら、バリデーションエラーとみなす仕組みにしました。
  const valid = (): boolean => {
    const newErrors: Record<string, string> = {};
    if (!todo.title.trim()) {
      newErrors.title = "タイトルは必須です。";
    }
    if (!todo.personInCharge.trim()) {
      newErrors.personInCharge = "担当者は必須です。";
    }
    if (!todo.content.trim()) {
      newErrors.content = "内容は必須です。";
    }
    setErrors(newErrors);
    return Object.keys(newErrors).length === 0;
  };

  // 追加処理
  const handleSubmit = (e: React.FormEvent<HTMLFormElement>) => {
    e.preventDefault();
    if (valid()) {
      addTodo({ ...todo });
      reset();
    }
  };
今回はシンプルに存在確認しかバリデーションしていませんが、文字数制限やフォーマット制約などのバリデーションを追加すると、かなり複雑なロジックになりそうな予感がします。
特に、フォームに日付入力が入ると圧倒的にめんどくさくなる。
そうなるとバリデーションロジックを別のファイルに切り出すことも考えられます。
ライブラリ react-hook-form を活用する
react-hook-form
やっぱり、フォームの値を楽に扱えるライブラリあるんですね。
みんな考えることは同じです。調べるとすぐに出てきました。😄
基本的な使い方
必要な機能は
- フォームとして扱うプロパティを登録できる
- submitできる
- フォームのデフォルト値を設定できる
なので以下の機能を使用する。
register関数でフォームとして扱うプロパティを登録する
handleSubmit関数で、submit時に発火する関数を定義できる
defaultValues オプションでデフォ値を設定できる
  const {
    register,
    handleSubmit,
  } = useForm<Todo>({
    defaultValues: {
      title: "",
      personInCharge: "",
      content: "",
      isCompleted: false,
    }
  });

  // 略 //
      <form onSubmit={handleSubmit(onSubmit)}>
      <label>タイトル</label>
      <input
        type="text"
        className="input"
        {...register("title")}  // この時点でname属性も登録されている
      />
また、設定したデフォ値に戻したいときは reset関数 も用意されているので以下の記述でデフォ値に戻る。
    // ただ呼び出すとdefaultValuesの値がセットされる
    reset()

    // 指定もできるが全部指定しないとundefineで入るので注意
    reset({
      title: "",
      personInCharge: "",
      content: "",
      isCompleted: true,
    });
そうすると全体のコードは以下のようになる。
import React, { useState } from "react";
import { Todo } from "../type";
import { useForm } from "react-hook-form";

interface TodoFormProps {
  addTodo: (todo: Todo) => void;
}

const TodoForm = ({ addTodo }: TodoFormProps) => {
  const { register, handleSubmit, reset } = useForm<Todo>({
    defaultValues: {
      title: "",
      personInCharge: "",
      content: "",
      isCompleted: false,
    },
  });

  const onSubmit = (todo: Todo) => {
    addTodo({ ...todo });
    reset();
  };

  return (
    <form onSubmit={handleSubmit(onSubmit)}>
      <label>タイトル</label>
      <input type="text" className="input" {...register("title")} />

      <label>担当者</label>
      <input type="text" className="input" {...register("personInCharge")} />

      <label>内容</label>
      <input type="text" className="input" {...register("content")} />
      <button type="submit">タスクを追加</button>
    </form>
  );
};

export default TodoForm;
なんということだ...!
フォームのステート管理がすべてライブラリに吸収されたので、元あったロジックが全てなくなった!
もちろんバリデーションも豊富にある
ついでにバリデーション機能について軽く触れておこう。
FormState のerrorsを使用する
  const {
    register,
    handleSubmit,
    reset,
    formState: { errors }, // 新しく追加
  } = useForm<Todo>({
    defaultValues: {
      title: "",
      personInCharge: "",
      content: "",
      isCompleted: false,
    },
  });
そして、register 関数の第二引数にバリデーションのオプションを追加する
register関数 にある通り豊富なパターンがあるので困らなそう。
      <input
        type="text"
        className="input"
        {...register("title", {
          required: "タイトルは入力必須です",
          maxLength: {
            value: 20,
            message: "最大20文字です",
          },
        })}
      />
こう記述することでsubmit時にバリデーションエラーになると、
FormStateオブジェクト に errorsオブジェクト が生成される。
viewでは以下のように表示できる。
{errors.title && <p>{errors.title.message}</p>}
FormStateオブジェクト は FormState にある通り、errors 以外にも
- isValid: errorsオブジェクトがあるかどうか
- isLoading: formが非同期処理中かどうか
など便利な機能を用意してくれている。マジで有能。
バリデーションライブラリとも併用できる
バリデーションライブラリ(Zod とか)を使用することで、バリデーションのスキーマを定義することもできる。
以下のようなノリで、スキーマを定義してそれをresolverに食わせればいいらしい。
import { z } from "zod";

export const TodoSchema = z.object({
  title: z.string().min(1, { message: "タイトルは必須です" }).max(20, {message: "20文字以内で入力してください"}),
  personInCharge: z.string().min(1, { message: "担当者は必須です" }),
  content: z.string().min(1, { message: "内容は必須です" }),
});

export type BasicFormSchemaType = z.infer<typeof TodoSchema>;
バリデーションライブラリは react-hook-form だけに限らないため、両者をつなぎ合わせるためのライブラリ(resolver)が別途必要になるみたい。
UIライブラリとの噛み合わせ
流石と言うべきか、他のUIライブラリとも統合できるような仕組みもあるみたいです。
React Hook Form has made it easy to integrate with external UI component libraries. If the component doesn't expose input's ref, then you should use the Controller component, which will take care of the registration process.
MaterialUIを使いながら、react-hook-formも導入できそうです。
まとめ
ここまで見ていただきありがとうございます!
- useStateで頑張る
- オブジェクト化して頑張る
- ライブラリで頑張る
3パターン使ってみましたが、やっぱりライブラリが有能すぎる。
使っていきたい気持ちもあるが、他のライブラリとの噛み合わせなどもあって、気軽に採用する勇気がないですね...
react実務経験者はライブラリの導入についてどう判断しているんでしょうか...
自作アプリならガシガシ入れるんですけどねー...( ˘ω˘ )

