JavaScriptでできること
さまざまです。。。
- ブラウザ上でHTMLとCSSを操作してWebサイトの見た目を別のものにする。
- アニメーションさせる。
- 最近ではブラウザ以外でも、Node.jsなどサーバサイドでJavaScriptが使われている。
その他にも、
- ReactNativeやCordovaといったJavaScriptでスマートフォンアプリが作れる。
- Electronでデスクトップアプリが開発できる。
など、JavaScriptを学ぶことで 様々なことができる!
早速書いてみた
<!DOCTYPE html>
<html lang="ja">
<head>
<meta charset="UTF-8">
<title>タイトル</title>
</head>
<body>
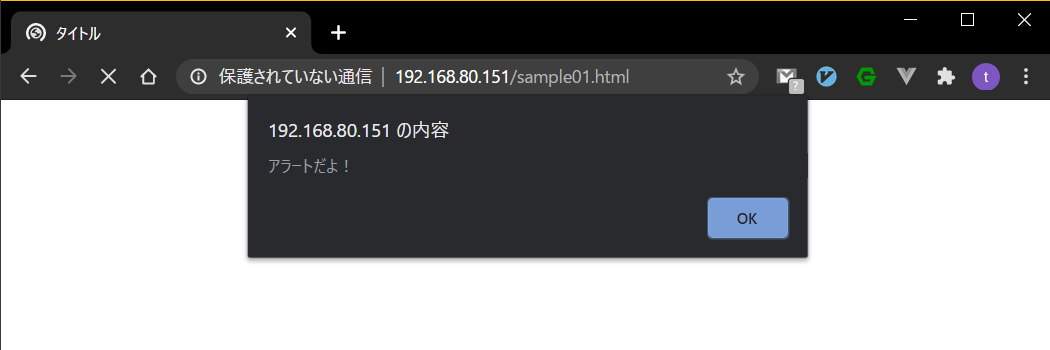
<script>
alert("アラートだよ!");
</script>
</body>
</html>
JavaScriptは、HTML内に記述したscript要素の内側に記述した。
ブラウザでアクセスしてみると命令どおりアラートが表示される
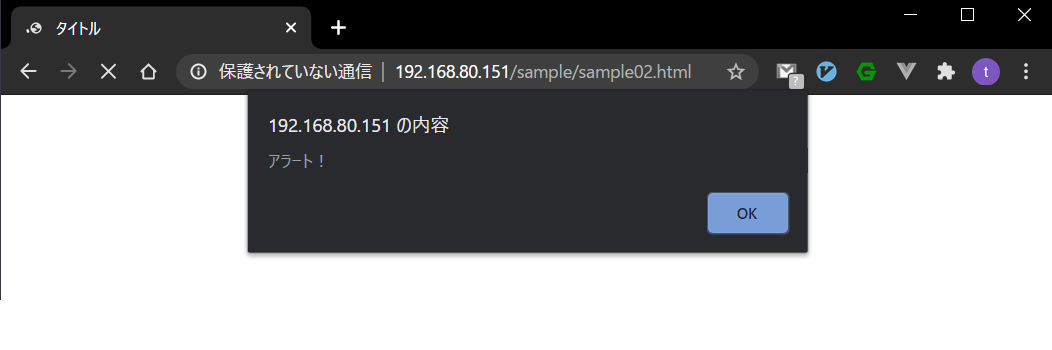
JavaScriptのファイルを独立させてみた
alert("アラート!");
<!DOCTYPE html>
<html lang="ja">
  <head>
    <meta charset="UTF-8">
    <title>タイトル</title>
  </head>
  <body>
  <script src="sample02.js"></script>
  </body>
</html>
同じようにアラートが表示される。
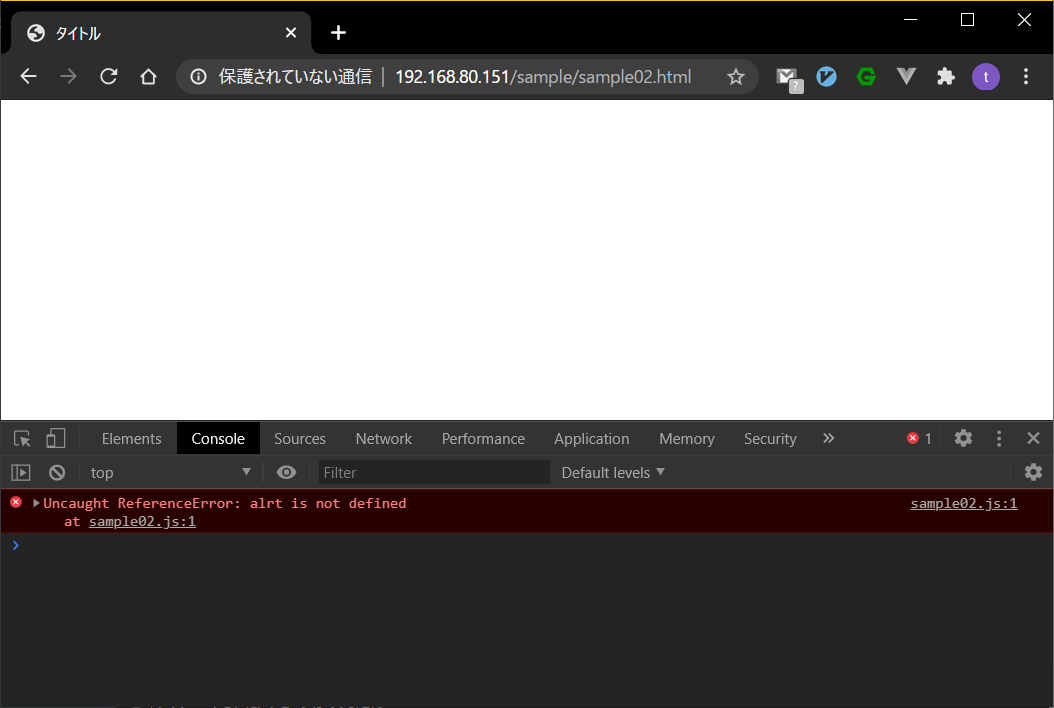
デバッグ
- chromeのブラウザの場合
F12を押すとデベロッパーツールが表示される。
わざと間違ったソースを作成し表示を確認。
alrt("アラート!");
Consoleタブにalrtなんてないよって感じでエラー表示。
変数
letとconst
- let ・・・再代入可能
- const ・・・再代入不可
letのほうが再代入できて便利な気がするが、再代入で値が変化するのでソースコードが複雑に見えてしまう可能性がある。
再代入が必要な場合のみletにして、不要なときはできるだけconstを利用するようにする。
変数をブラウザに表示
<!DOCTYPE html>
<html lang="ja">
  <head>
    <meta charset="UTF-8">
    <title>タイトル</title>
  </head>
  <body>
    <div id="title"></div>
    <script src="sample03.js"></script>
  </body>
</html>
id属性[title]のdiv要素を追加
const title = "Hello World";
document.querySelector("#title").textContent = title;
document.querySelectorという命令でHTML要素を取得。
カッコの中には取得したいHTMLを表すCSSセレクタを文字列で指定。
取得したHTMLのtextContentにtitleを代入。
真偽値
const myString === "雨";
const myBoolean = myString === "晴れ";
2行目は、変数myStringの中身が"晴れ"かどうかを確認し、その結果をmyBoolean変数に格納している。
boolean型なので結果は、falseとなる。
配列
forで配列を取得
const myAnimals = ["ねこ","いぬ","ぞう"];

for (let i=0; i < myAnimals.length; i++){
  console.log(myAnimals[i]);
};
forEachで配列を取得
const myAnimals = ["ねこ","いぬ","ぞう"];

myAnimals.forEach(function(animal,i){
  console.log(animal);
});
配列の追加
先頭に追加(unshift)
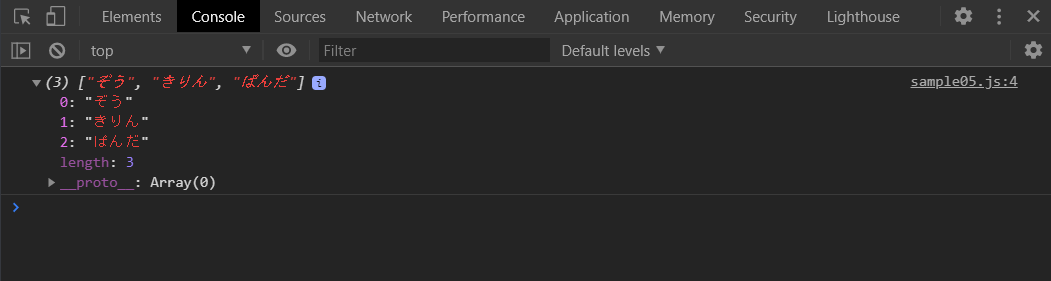
const myAnimals = ["ねこ","いぬ","ぞう"];

myAnimals.unshift("きりん");
console.log(myAnimals);
最後尾に追加(push)
const myAnimals = ["ねこ","いぬ","ぞう"];

myAnimals.push("きりん");
console.log(myAnimals);
こういった命令をJavaScriptでは、メソッドという。
配列の後ろに.(ドット)を書きメソッド名を記述。
配列の削除
先頭を削除(shift)
const myAnimals = ["ねこ","いぬ","ぞう"];

myAnimals.shift();
console.log(myAnimals);
最後尾を削除(pop)
const myAnimals = ["ねこ","いぬ","ぞう"];

myAnimals.pop();
console.log(myAnimals);
配列の削除、追加(splice)
任意の位置で削除、追加
削除
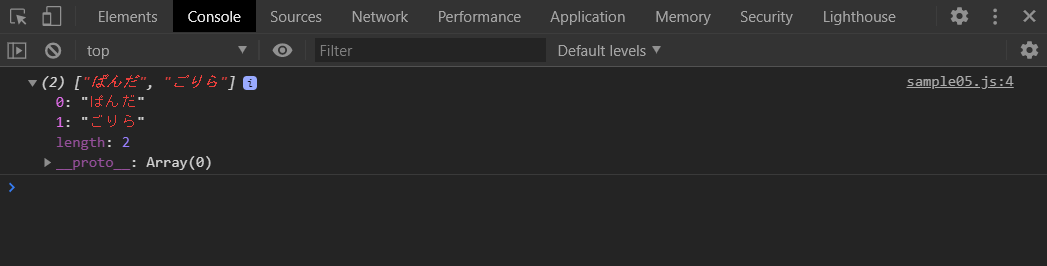
const myAnimals = ["ねこ","いぬ","ぞう"];

myAnimals.splice(1,1);
console.log(myAnimals);

- 第1引数・・・削除したい配列の番号
- 第2引数・・・削除する項目数
配列1から1つ削除となる
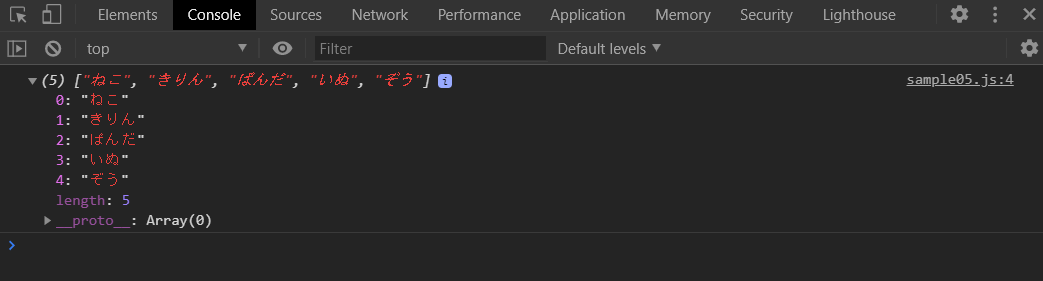
追加
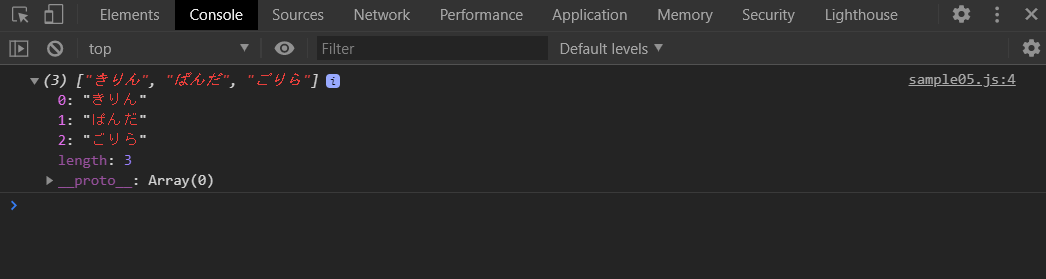
const myAnimals = ["ねこ","いぬ","ぞう"];

myAnimals.splice(1,0,"きりん","ぱんだ");
console.log(myAnimals);
配列順序の逆転(reverse)
const myAnimals = ["ねこ","いぬ","ぞう","きりん","ぱんだ"];

myAnimals.reverse();
console.log(myAnimals);
並び順が逆転します。
50音順に変更(sort)
const myAnimals = ["ねこ","いぬ","ぞう","きりん","ぱんだ"];

myAnimals.sort();
console.log(myAnimals);
正確には、Unicodeコードポイントと呼ばれる文字に割り当てられている番号順。
Unicodeコードポイントで並べる際は、ひらがな・カタカナ・漢字で読み順とならない場合があるので要注意。
配列の切り取り(slice)
const myAnimals = ["ねこ","いぬ","ぞう","きりん","ぱんだ","ごりら"];

const newAnimals = myAnimals.slice(3);
console.log(newAnimals);
第1引数は、切り取り位置を指定する。
第1引数にマイナスを指定すると
const myAnimals = ["ねこ","いぬ","ぞう","きりん","ぱんだ","ごりら"];

const newAnimals = myAnimals.slice(-2);
console.log(newAnimals);
後ろからの切り取り開始位置となる
中間
const myAnimals = ["ねこ","いぬ","ぞう","きりん","ぱんだ","ごりら"];

const newAnimals = myAnimals.slice(2,5);
console.log(newAnimals);
配列2番目から5番の手前まで。
配列のフィルタリング(filter)
const myAnimals = ["ねこ","いぬ","ぞう","きりん","ぱんだ","ごりら"];

const newAnimals = myAnimals.filter(function(animal){
  return animal !== "きりん";
});
console.log(newAnimals)
きりん以外が出力される。
配列の中身を変換(map)
const myAnimals = ["cat","dog","elephant","giraffe","pand","gorilla"];

const newAnimals = myAnimals.map(function(animal){
  return animal.toUpperCase();
});
console.log(newAnimals);
toUpperCaseメソッドで配列の中身が小文字から大文字になる。
配列の結合(concat)
const myAnimals = ["ねこ","いぬ","ぞう"];
const yourAnimals = ["きりん","ぱんだ","ごりら"];

const newAnimals = myAnimals.concat(yourAnimals);
console.log(newAnimals);
配列「myAnimals 」と「yourAnimals」が結合される。
配列の位置を取得
const myAnimals = ["ねこ","ごりら","ぞう","きりん","ぱんだ","ごりら"];

const index = myAnimals.indexOf("ごりら");
console.log(index);
indexOfメソッドは、最初に一致した位置が返却される。
→1
const myAnimals = ["ねこ","ごりら","ぞう","きりん","ぱんだ","ごりら"];

const index = myAnimals.lastIndexOf("ごりら");
console.log(index);
lastIndexOfメソッドは、最後に一致した位置を返却。
→5
特定の条件にマッチするか調べる(some,every)
some
const myAnimals = ["ねこ","ごりら","ぞう","きりん","ぱんだ","ごりら"];

const isExist = myAnimals.some(function(animal){
  return animal === ("ごりら");
});
console.log(isExist);
引数に関数を指定し、条件判定の結果をreturnで返却して、コンソールに出力している。
every
const myAnimals = ["ねこ","ごりら","ぞう","きりん","ぱんだ","ごりら"];

const isExistAll = myAnimals.every(function(animal){
  return animal.length === 3;
});
console.log(isExistAll);
everyは、配列の各項目がすべて条件にマッチするか確認するメソッド。
結果は、3文字以外もあるのでfalseとなる。
配列の中身を検索(find)
const myAnimals = ["ねこ","ごりら","ぞう","きりん","ぱんだ","ごりら"];

const threeLengthAnimal = myAnimals.find(function(animal){
  return animal.length === 3;
});
console.log(threeLengthAnimal);
配列内で3文字の項目を探してきて最初の項目を出力する。
→「ごりら」が出力される。
関数
いきなり雑いけどこんな感じ。
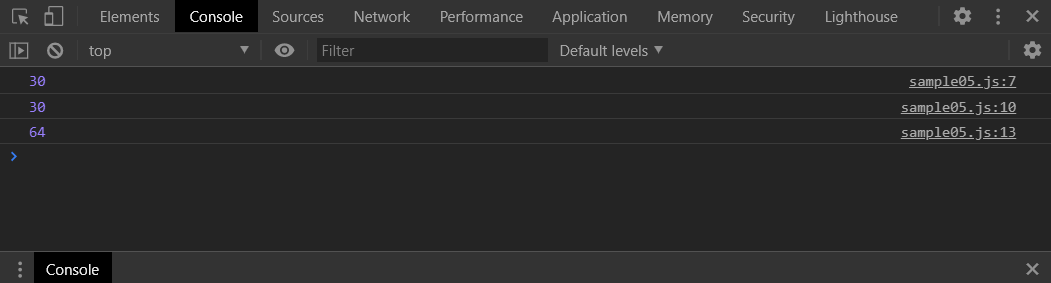
function getAddNum(num1,num2){
  const answer = num1 + num2;
  return answer;
}

const answer1 = getAddNum(1,29);
console.log(answer1);

const answer2 = getAddNum(18,12);
console.log(answer2);

const answer3 = getAddNum(23,41);
console.log(answer3);
変数のスコープ
const baseNum = 10;
function getAddNum(num){
  const answer1 = baseNum + num;
  return answer1;
}

const answer2 = getAddNum(12);
console.log(answer2);
関数外で定義したbaseNumは関数内で利用できる。
逆に、関数内で定義したanswer1は関数外では利用できない。
関数以外の変数スコープ
const myWeather = "雪";

if(myWeather === "雪"){
  const text = "傘いるね";
} else {
  const text = "傘いらないね";
}
console.log(text)
```sample_func04.js
関数以外にもスコープは存在し、letやconstは、波カッコ{...}の間でしか有効ではない。
そのため、これはエラーとなる。
[Uncaught ReferenceError: text is not defined]
→波カッコ{...}の外で宣言すればletやconstを利用することは可能です。
var
const myWeather = "雪";

if(myWeather === "雪"){
  var text = "傘いるね";
} else {
  var text = "傘いらないね";
}
console.log(text)
これは波カッコ以外からも参照できるが、スコープが大きくなり、予期せぬ場所で目的の変数を上書きするバグの原因になるので、特段の理由がなければ利用しない方が良い。
関数宣言と関数式
関数宣言
function 関数名(){
 //処理
}
関数式
const 関数名 = function(){
 //処理
}
例
const getAddNum = function(num1,num2){
  const answer = num1 + num2;
  return answer;
};

const answer1 = getAddNum(1,20);
console.log(answer1);
- 関数宣言と関数式の定義場所の違い
定義方法以外で1点だけ違うのは、関数宣言はスコープ内のどこで定義しても参照できるのに対し、関数式は定義後にしか利用できない。
無名関数(関数リテラル)
関数名がなく他の場所から呼び出す必要のない時に使われる。
引数に関数を指定する必要があり、その場以外では使わない処理について無名関数として書くのが一般的。
const newAnimals = myAnimals.filter(function(animal){
  return animal !== "ごり";
})
→fileterメソッドは引数に関数を指定しなければならない。
アロー関数
ES2015(ES6)から利用可能になった新しいJavaScriptの構文の一つで、関数リテラルをシンプルに記述する方法。
function( test ){
  a;
}
をアロー関数で書くと、
(test) => a;
testが1つの時は()を省略することも可能。
長くなってきたので一旦区切ろう。
続きは別の記事で!