はじめに
この記事では、Next.jsとTypeScriptを使用してフロントエンドアプリを作成する方法を学びます。具体的には、物件の詳細情報を入力すると説明文を生成するシンプルなアプリケーションを構築します。
開発環境
- OS: Windows 11
- 言語: TypeScript
- フレームワーク: Next.js (React)
- Node.js: v18.19.0
実装手順
1. プロジェクトの作成
まず、npxコマンドを使用してNext.jsプロジェクトを作成します:
npx create-next-app@latest my-property-app
プロジェクト作成時に表示される質問に答えます。TypeScriptを使用し、appディレクトリを使用するオプションを選択してください。
プロジェクトディレクトリに移動します:
cd my-property-app
2. 依存関係のインストール
必要なパッケージがインストールされていることを確認します:
nvm install 18.19.0
nvm use 18.19.0
npm install
3. アプリケーションの実装
app/page.tsxを以下のコードで置き換えます:
'use client'

import React, { useState } from 'react';

export default function Home() {
  const [propertyDetails, setPropertyDetails] = useState({
    layout: '',
    facilities: '',
    location: '',
    other: '',
  });
  const [generatedDescription, setGeneratedDescription] = useState('');

  const handleInputChange = (e: React.ChangeEvent<HTMLInputElement | HTMLTextAreaElement>) => {
    const { name, value } = e.target;
    setPropertyDetails(prev => ({ ...prev, [name]: value }));
  };

  const generateDescription = () => {
    const description = `魅力的な${propertyDetails.layout}の物件です。${propertyDetails.facilities}が備わっており、${propertyDetails.location}に位置しています。${propertyDetails.other}`;
    setGeneratedDescription(description);
  };

  return (
    <div className="min-h-screen bg-gray-100 py-12 px-4 sm:px-6 lg:px-8">
      <div className="max-w-md mx-auto bg-white rounded-xl shadow-md overflow-hidden md:max-w-2xl">
        <div className="md:flex">
          <div className="p-8 w-full">
            <div className="uppercase tracking-wide text-sm text-indigo-500 font-semibold mb-1">物件説明文生成</div>
            <h1 className="block mt-1 text-lg leading-tight font-medium text-black">詳細情報を入力してください</h1>
            <p className="mt-2 text-gray-500">各項目を入力し、ボタンをクリックして魅力的な説明文を生成します。</p>
            <div className="mt-4 space-y-4">
              <input
                type="text"
                name="layout"
                placeholder="間取り"
                value={propertyDetails.layout}
                onChange={handleInputChange}
                className="w-full px-3 py-2 placeholder-gray-300 border border-gray-300 rounded-md focus:outline-none focus:ring focus:ring-indigo-100 focus:border-indigo-300"
              />
              <input
                type="text"
                name="facilities"
                placeholder="設備"
                value={propertyDetails.facilities}
                onChange={handleInputChange}
                className="w-full px-3 py-2 placeholder-gray-300 border border-gray-300 rounded-md focus:outline-none focus:ring focus:ring-indigo-100 focus:border-indigo-300"
              />
              <input
                type="text"
                name="location"
                placeholder="立地"
                value={propertyDetails.location}
                onChange={handleInputChange}
                className="w-full px-3 py-2 placeholder-gray-300 border border-gray-300 rounded-md focus:outline-none focus:ring focus:ring-indigo-100 focus:border-indigo-300"
              />
              <textarea
                name="other"
                placeholder="その他の特徴"
                value={propertyDetails.other}
                onChange={handleInputChange}
                rows={3}
                className="w-full px-3 py-2 placeholder-gray-300 border border-gray-300 rounded-md focus:outline-none focus:ring focus:ring-indigo-100 focus:border-indigo-300"
              ></textarea>
              <button
                onClick={generateDescription}
                className="w-full px-3 py-4 text-white bg-indigo-500 rounded-md focus:bg-indigo-600 focus:outline-none"
              >
                説明文を生成
              </button>
            </div>
            {generatedDescription && (
              <div className="mt-6 p-4 bg-green-50 rounded-md border border-green-200">
                <h2 className="text-lg font-semibold text-green-800 mb-2">生成された説明文:</h2>
                <p className="text-green-700">{generatedDescription}</p>
              </div>
            )}
          </div>
        </div>
      </div>
    </div>
  );
}
4. アプリケーションの起動
Next.jsアプリケーションを起動します:
npm run dev
ブラウザで http://localhost:3000 にアクセスして、アプリケーションが正常に動作していることを確認します。
結果
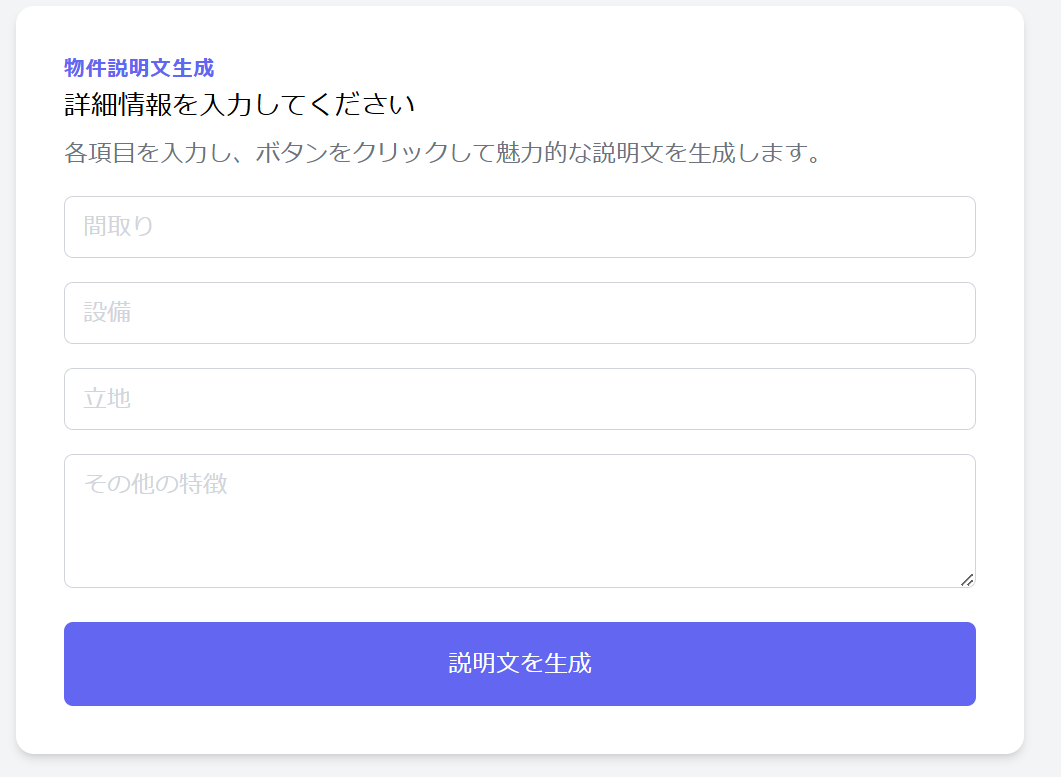
アプリケーションの実行結果は以下のようになります:
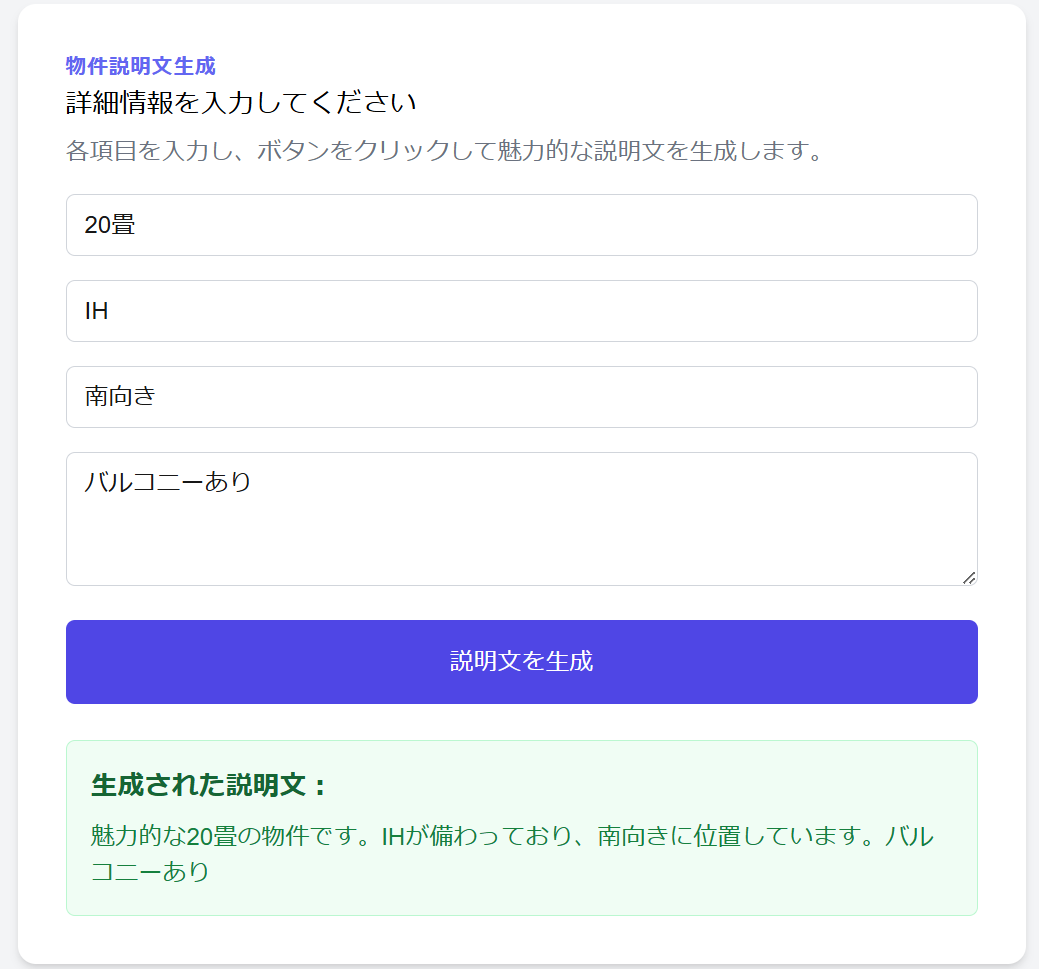
実際に情報を入力して説明文を生成すると、以下のような結果が得られます:
まとめ
このチュートリアルでは、npx create-next-appコマンドを使用してNext.jsプロジェクトを作成し、TypeScriptを活用して物件説明文生成アプリケーションを構築しました。Next.jsのappディレクトリ構造を活用し、TailwindCSSでUIを整え、基本的なフォーム処理とステート管理の実装方法を学びました。
このプロジェクトを通じて、Next.js開発の基礎と、TypeScriptを使用したコンポーネント設計の実践的なアプローチを体験できました。Next.jsの特徴である高速なページロードやサーバーサイドレンダリングの利点も、このようなシンプルなアプリケーションでも活かすことができます。
最後まで読んでいただき、ありがとうございました!

