Dropwizardについて3回に渡って説明したいと思います。
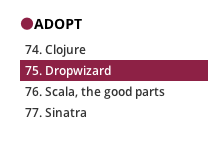
今年に入ってリファクタリングなどで有名なマーティン・ファウラーらが所属するthoughtworks社のTechnology RadarのLanguages & frameworksでADOPT(つまりプロジェクトで採用すべきプロダクト)に入りました。
他に入っているものが、Clojure,Scala,Sinatraなので、それらと同じくらい注目すべきプロダクトということになります。

他のプロダクトに比べると日本語の記事が少なく、また、バージョンも上がり変わった部分もあるので記述しました。
なお、Dropwizardは日々進化しているので、この記事の内容もすぐに古くなるかもしれません。
概要
DropWizardは、YammerのWebサービス部分で利用するために作られたフレームワークでした。
自分が思う一番の特徴は、
**「1つのjarだけでの起動」**です。
(依存するjarを一つにまとめる=fat-jar化する必要はあります)
つまり、次の特徴に繋がります。
- APサーバーいらず(組み込みwebサーバーのjettyを同梱)
- webアプリをプロセスとして起動(アプリ内ではthreadで動作。別アプリを同じ筐体に配置するときは別ポートでリッスンしておき、リバプロで振り分ける)
- CTRL-C (SIGINT)によるgraceful shutdown
この特徴により、Herokuの中の人が提唱するThe Twelve-Factor Appの設計方針の一部がアプリケーションレベルで実現できるわけです。
また、フルスタックフレームワークとして、実績のある以下のライブラリを同梱しています。
1.JAX-RS実装のJerseyによるREST
2.JacksonによるJSON変換
3.Metrics Java libraryによるJVM、アプリケーションレベルのmetricsの収集
4.Guava(Google製のjava core library。Java8では使わないかも)
5.Logback and slf4j による効率的で柔軟なログ
6.Hibernate Validatorでのモデルのannotationによる検証
7.Apache HttpClient
8.JDBIでRDBへのSQLでの簡単アクセスライブラリ
9.LiquibaseでのDBのマイグレーション
10.Freemarker、Mustacheによるテンプレートエンジン
11.Joda Timeで日時ライブラリ提供(Java8では使わないかも)
公式サイト
https://dropwizard.github.io/dropwizard/
github
https://github.com/dropwizard/dropwizard
環境
以下の環境で試しました。
- macOSX
- java7
- maven3.2.1
- DropWizard0.7.0
この記事で書くこと
Dropwizardのついて以下のこと
- mavenでのbuild
- HelloWorldアプリ作成を通して、基本クラスの説明
- healthcheck機能
maven設定
まずは、Dropwizard本体の依存を定義します
  <properties>
    <dropwizard.version>0.7.0</dropwizard.version>
  </properties>

  <dependencies>
    <dependency>
      <groupId>io.dropwizard</groupId>
      <artifactId>dropwizard-core</artifactId>
      <version>${dropwizard.version}</version>
    </dependency>
  </dependencies>
maven-shade-pluginでfat-jarを作ります。
このPluginで
- 依存するjarを一つにまとめます
- 署名付きjarから署名部分を取り除きます(filters excludes)
- jarに含まれる
META-INF/servicesをまとめます(ServicesResourceTransformer) - 実行可能なjarにします(ManifestResourceTransformer)
署名が必要なjarがある場合は、以下を参照
http://maven.apache.org/plugins/maven-shade-plugin/examples/includes-excludes.html
  <build>
    <plugins>
      <plugin>
        <groupId>org.apache.maven.plugins</groupId>
        <artifactId>maven-shade-plugin</artifactId>
        <version>2.2</version>
        <configuration>
          <createDependencyReducedPom>true</createDependencyReducedPom>
          <filters>
            <filter>
              <artifact>*:*</artifact>
              <excludes>
                <exclude>META-INF/*.SF</exclude>
                <exclude>META-INF/*.DSA</exclude>
                <exclude>META-INF/*.RSA</exclude>
              </excludes>
            </filter>
          </filters>
        </configuration>
        <executions>
          <execution>
            <phase>package</phase>
            <goals>
              <goal>shade</goal>
            </goals>
            <configuration>
              <transformers>
                <transformer implementation="org.apache.maven.plugins.shade.resource.ServicesResourceTransformer" />
                <transformer implementation="org.apache.maven.plugins.shade.resource.ManifestResourceTransformer">
                  <mainClass>com.github.ko2ic.HelloWorldApplication</mainClass>
                </transformer>
              </transformers>
            </configuration>
          </execution>
        </executions>
      </plugin>
以下の設定は、特に必要ではないが便利なので記述しておきます。
- maven-jar-pluginでは、依存jarのバージョンを
mvn package時に表示します。 - maven-eclipse-pluginで依存jarのsourceを添付する
- maven-compiler-pluginでjavaのバージョン指定
      <plugin>
        <groupId>org.apache.maven.plugins</groupId>
        <artifactId>maven-jar-plugin</artifactId>
        <version>2.4</version>
        <configuration>
          <archive>
            <manifest>
              <addDefaultImplementationEntries>true</addDefaultImplementationEntries>
            </manifest>
          </archive>
        </configuration>
      </plugin>
      <plugin>
        <groupId>org.apache.maven.plugins</groupId>
        <artifactId>maven-eclipse-plugin</artifactId>
        <version>2.9</version>
        <configuration>
          <downloadSources>true</downloadSources>
          <downloadJavadocs>true</downloadJavadocs>
        </configuration>
      </plugin>
      <plugin>
        <groupId>org.apache.maven.plugins</groupId>
        <artifactId>maven-compiler-plugin</artifactId>
        <version>3.1</version>
        <configuration>
          <source>1.7</source>
          <target>1.7</target>
          <encoding>UTF-8</encoding>
        </configuration>
      </plugin>
    </plugins>
  </build>
Configurationクラス
Dropwizardは、環境固有の値はYAML形式のファイルに記述します。(拡張子が.ymlまたは .yamlではないときは、jsonとしてパースします。)
Configuration Classは、そのYAMLをオブジェクトに変換したクラスになります。
変換はJacksonによって行われているため、jacksonのすべてのobject-mapping annotationが利用できることになります。
また、Hibernate Validatorによって検証を入れることができ、検証違反の場合にアプリケーションを起動させないようにします。このような検証ができることで、設定不足によるバグを事前(起動前)に回避することができます。
なお、このYAMLファイルは通常アプリケーション外に置き、アプリケーション起動時に引数でこのファイルパスを渡します。
(The Twelve FactorsのConfigの指針で考えると環境ごとに異なるものを記述するファイルのはずなので、このサンプルような使い方は正しくないかもしれません)
public class HelloWorldConfiguration extends Configuration {
	@NotEmpty
	private String template;

	@NotEmpty
	private String defaultName = "Stranger";

	@JsonProperty
	public String getTemplate() {
		return template;
	}

	@JsonProperty
	public void setTemplate(String template) {
		this.template = template;
	}

	@JsonProperty
	public String getDefaultName() {
		return defaultName;
	}

	@JsonProperty
	public void setDefaultName(String defaultName) {
		this.defaultName = defaultName;
	}
      // Templateは、自作のドメインクラスです
	public Template buildTemplate() {
		return new Template(template, defaultName);
	}
}
template、defaultNameは、HelloWorldConfigurationで利用している値。
その他の設定は本家のマニュアルを参照
template: Hello, %s!
defaultName: Stranger

# use the simple server factory if you only want to run on a single port

server:
  applicationConnectors:
    - type: http
      port: 8080
  adminConnectors:
    - type: http
      port: 8081

# Logging settings.
logging:

  # The default level of all loggers. Can be OFF, ERROR, WARN, INFO, DEBUG, TRACE, or ALL.
  level: INFO

  # Logger-specific levels.
  loggers:

    # Sets the level for 'com.github.ko2ic' to DEBUG.
    com.github.ko2ic: DEBUG

  appenders:
    - type: console
      timeZone: JST
これらの値は通常のシステムプロパティと同様にjava起動時のオプションによって上書きできます。
例えば以下ように
java -Ddw.logging.level=DEBUG server my-config.json
また、環境設定はグループ化することを推奨しています。それは、管理可能な設定ファイルとConfigurationクラスを維持するためです。たとえば、Dropwizard組み込みのDataSourceFactoryクラスは、DB環境のConfigurationクラスになります。
Applicationクラス
Application クラスは、Dropwizardのエントリポイントとなり、通常はJavaのmainメソッドをこのクラスに書きます。
実際はApplicationクラスのサブクラスを実装していくことになります。
このクラスの役割は、アプリを利用する前に必要な設定を行うことです。
例えば、以下の登録を行います。
- コマンド引数を扱うCommandクラス
- アプリケーションにアプリで利用する環境を教えるBundlerクラス
- RESTのURLとマッピングするResourceクラス
public class HelloWorldApplication extends Application<HelloWorldConfiguration> {
	public static void main(String[] args) throws Exception {
        //  この中で、このクラスのinitialize(bootstrap)が呼ばれます。
		new HelloWorldApplication().run(args);
	}

	@Override
	public String getName() {
		return "hello-world";
	}

	@Override
	public void initialize(Bootstrap<HelloWorldConfiguration> bootstrap) {
       // 開発者はこのメソッド内でCommandやBundlerを追加します。
       // ServerCommandとCheckCommandはこのメソッドの前に設定されています
       // ServerCommand = YAMLのserver部分を扱いjettyサーバーを起動・停止させるクラス
       // CheckCommand = YAMLの構文チェックをするクラス。こんな感じでチェックします。java -jar foo.jar check config.yaml
	}

	@Override
	public void run(HelloWorldConfiguration configuration,
			Environment environment) throws ClassNotFoundException {
             // このメソッドでResourceを登録します
		final Template template = configuration.buildTemplate();
		environment.jersey().register(new HelloWorldResource(template));
	}
Resourceクラス
URIにマッピングされたクラスがResourceクラスになります。
Resourceクラスはthread-safeではないので、stateless/immutableで作ることを推奨しています。
@Path("/hello-world")
@Produces(MediaType.APPLICATION_JSON)
public class HelloWorldResource {
	private static final Logger LOGGER = LoggerFactory
			.getLogger(HelloWorldResource.class);

	private final Template template;
	private final AtomicLong counter;

	public HelloWorldResource(Template template) {
		this.template = template;
		this.counter = new AtomicLong();
	}

	@GET
	@Timed(name = "get-requests")
	@CacheControl(maxAge = 1, maxAgeUnit = TimeUnit.DAYS)
    // Sayingは後述するRepresentationクラス(POJO)になります
    // 戻り値のオブジェクトをjson形式に変換します
	public Saying sayHello(@QueryParam("name") Optional<String> name) {
		return new Saying(counter.incrementAndGet(), template.render(name));
	}

	@POST
	public void receiveHello(@Valid Saying saying) {
		LOGGER.info("Received a saying: {}", saying);
	}
}
例えば、後述するRepresentationを作って動作させると
http://localhost:8080/hello-world にアクセスした場合
{"id":1,"content":"Hello, Stranger!"}
http://localhost:8080/hello-world?name=hoge
{"id":2,"content":"Hello, hoge!"}
が表示されます。
Representationクラス
ユーザに表現するためのモデルクラスになります。
json形式でもhtml形式でも、表示するための情報になるクラスです。
このサンプルのSayingクラスの場合は、jacksonのアノテーションでjson形式に変換されます。また、デフォルトコンストラクタはjacksonのために記述しておきます。
ここでもHibernate Validatorでモデルの検証ができます。
public class Saying {
    private long id;

    @Length(max = 3)
    private String content;

    public Saying() {
        // Jackson deserialization
    }

    public Saying(long id, String content) {
        this.id = id;
        this.content = content;
    }

    @JsonProperty
    public long getId() {
        return id;
    }

    @JsonProperty
    public String getContent() {
        return content;
    }
}
public class Template {
    private final String content;
    private final String defaultName;

    public Template(String content, String defaultName) {
        this.content = content;
        this.defaultName = defaultName;
    }

    public String render(Optional<String> name) {
        return format(content, name.or(defaultName));
    }
}
動作確認
jarを作成して、起動します。引数には、serverと設定ファイルのパスを指定します。(eclipseの場合はrun configurationでargsを指定してください)
起動すると、利用できるリソースパスが表示されてます。
また、NO HEALTHCHECKSとの警告が出ています。ので次はhealthcheckを作成します。
$ mvn package
$ java -jar target/spike-dropwizard-1.0-SNAPSHOT.jar server example.yml
・・・
INFO  [2014-04-19 16:28:53,850] io.dropwizard.jersey.DropwizardResourceConfig: The following paths were found for the configured resources:

    GET     /hello-world (com.github.ko2ic.resources.HelloWorldResource)
    POST    /hello-world (com.github.ko2ic.resources.HelloWorldResource)

INFO  [2014-04-19 16:28:54,131] org.eclipse.jetty.server.handler.ContextHandler: Started i.d.j.MutableServletContextHandler@5ebd56e9{/,null,AVAILABLE}
INFO  [2014-04-19 16:28:54,132] io.dropwizard.setup.AdminEnvironment: tasks =

    POST    /tasks/gc (io.dropwizard.servlets.tasks.GarbageCollectionTask)
WARN  [2014-04-19 16:28:54,133] io.dropwizard.setup.AdminEnvironment:
!!!!!!!!!!!!!!!!!!!!!!!!!!!!!!!!!!!!!!!!!!!!!!!!!!!!!!!!!!!!!!!!!!!!!!!!!!!!!!!!
!!!!!!!!!!!!!!!!!!!!!!!!!!!!!!!!!!!!!!!!!!!!!!!!!!!!!!!!!!!!!!!!!!!!!!!!!!!!!!!!
!    THIS APPLICATION HAS NO HEALTHCHECKS. THIS MEANS YOU WILL NEVER KNOW      !
!     IF IT DIES IN PRODUCTION, WHICH MEANS YOU WILL NEVER KNOW IF YOU'RE      !
!    LETTING YOUR USERS DOWN. YOU SHOULD ADD A HEALTHCHECK FOR EACH OF YOUR    !
!         APPLICATION'S DEPENDENCIES WHICH FULLY (BUT LIGHTLY) TESTS IT.       !
!!!!!!!!!!!!!!!!!!!!!!!!!!!!!!!!!!!!!!!!!!!!!!!!!!!!!!!!!!!!!!!!!!!!!!!!!!!!!!!!
!!!!!!!!!!!!!!!!!!!!!!!!!!!!!!!!!!!!!!!!!!!!!!!!!!!!!!!!!!!!!!!!!!!!!!!!!!!!!!!!
表示されているリソースパスを叩くとjson形式でレスポンスがあるのが確認できます。
$ curl http://localhost:8080/hello-world
{"id":1,"content":"Hello, Stranger!"}
Health Checkの実装
HealthCheckのサブクラスをApplicationクラスで登録します。
複数のヘルスチェクが登録できます。
すべてのヘルスチェックがtrueの場合だけ、HTTPステータスコードは200 OK、それ以外は500 Internal Server Errorを返却します。
public class TemplateHealthCheck extends HealthCheck {
	private final Template template;

	public TemplateHealthCheck(Template template) {
		this.template = template;
	}

	@Override
	protected Result check() throws Exception {
		return Result.healthy();
	}
	@Override
	public void run(HelloWorldConfiguration configuration,
			Environment environment) throws ClassNotFoundException {
・・・
		environment.healthChecks().register("template",
				new TemplateHealthCheck(template));
	}
・・・
jarを再作成して、起動すると先ほどのNO HEALTHCHECKSは表示されなくなります。
$ curl http://localhost:8081/healthcheck
{"deadlocks":{"healthy":true},"template":{"healthy":true}}
デフォルトでdeadlocksのヘルスチェクが入っています。
これは、threadでデッドロックが発生しているかどうかを検出します。
templateは、HelloWorldApplicationクラスで登録したときの名前に対応するHealthCheckクラスのヘルスチェックです。
HealthCheck#check()の戻り値=[healthy or unhealthy] で判断します。
エラーの場合のメッセージは、unhealty(Strng)で設定した文字が表示されます。例えば、以下のような戻り値の場合、
	@Override
	protected Result check() throws Exception {
		return Result.unhealthy(String.format("error=%s",
				template.render(Optional.of("error"))));
	}
このようになります。
$ curl http://localhost:8081/healthcheck
{"deadlocks":{"healthy":true},"template":{"healthy":false,"message":"error=Hello, error!"}}
Taskクラス
起動時に表示されている
POST /tasks/gc (io.dropwizard.servlets.tasks.GarbageCollectionTask)
は何かというとadminのポートで実行するadmin用のURIで、GarbageCollectionTaskはその名の通りgcを実行します。
タスクはabstractなTaskクラスを継承して作ります。
URLは/tasks/名前で、名前はコンスタクタで渡した値になります。
これは、HttpServletを継承したTaskServletで管理されています。
自作のTaskは以下のように登録します
environment.admin().addTask(task);
おまけ
src/main/resources/banner.txt を置くとそのファイルの中身がアプリ起動時に表示されます。
                           web-scale hello world dP for the web
                                                 88
  .d8888b. dP.  .dP .d8888b. 88d8b.d8b. 88d888b. 88 .d8888b.
  88ooood8  `8bd8'  88'  `88 88'`88'`88 88'  `88 88 88ooood8
  88.  ...  .d88b.  88.  .88 88  88  88 88.  .88 88 88.  ...
  `88888P' dP'  `dP `88888P8 dP  dP  dP 88Y888P' dP `88888P'
                                        88
                                        dP